Engine Oil Cooler Hose/Pipe Replacement 8.1L Engine
Removal Procedure
Important: Flush the oil cooler and replace the filter if the following conditions exist:
| • | Foreign material is present in the oil cooler. |
| • | The engine is damaged internally. |
| | This action will prevent premature engine wear. |
- Use a small pick-like tool in order to remove the cooler lines quick connector clip.
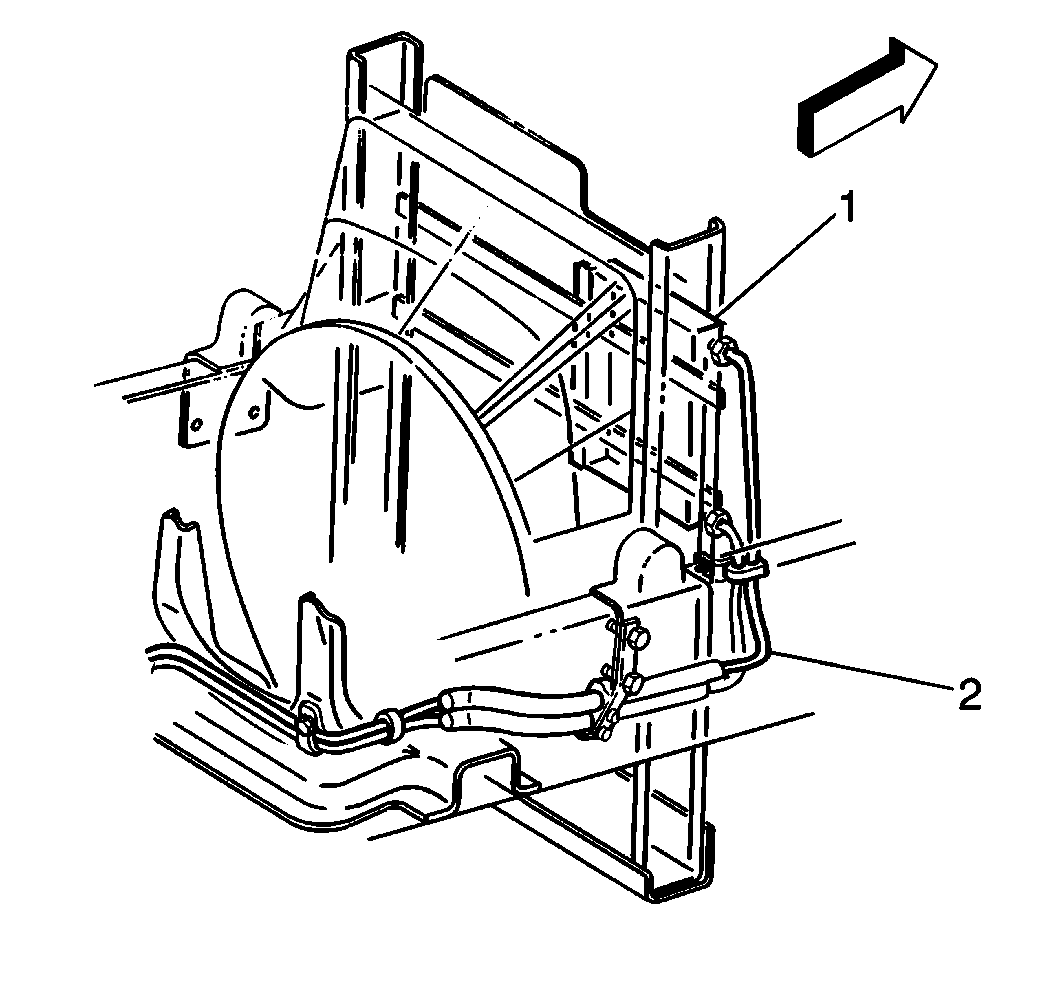
- Remove the cooler lines (2) from the engine oil cooler (1).
- Place a drain pan under the engine oil cooler line connectors.
- Use a small pick-like tool in order to remove the cooler line quick-connector clip.
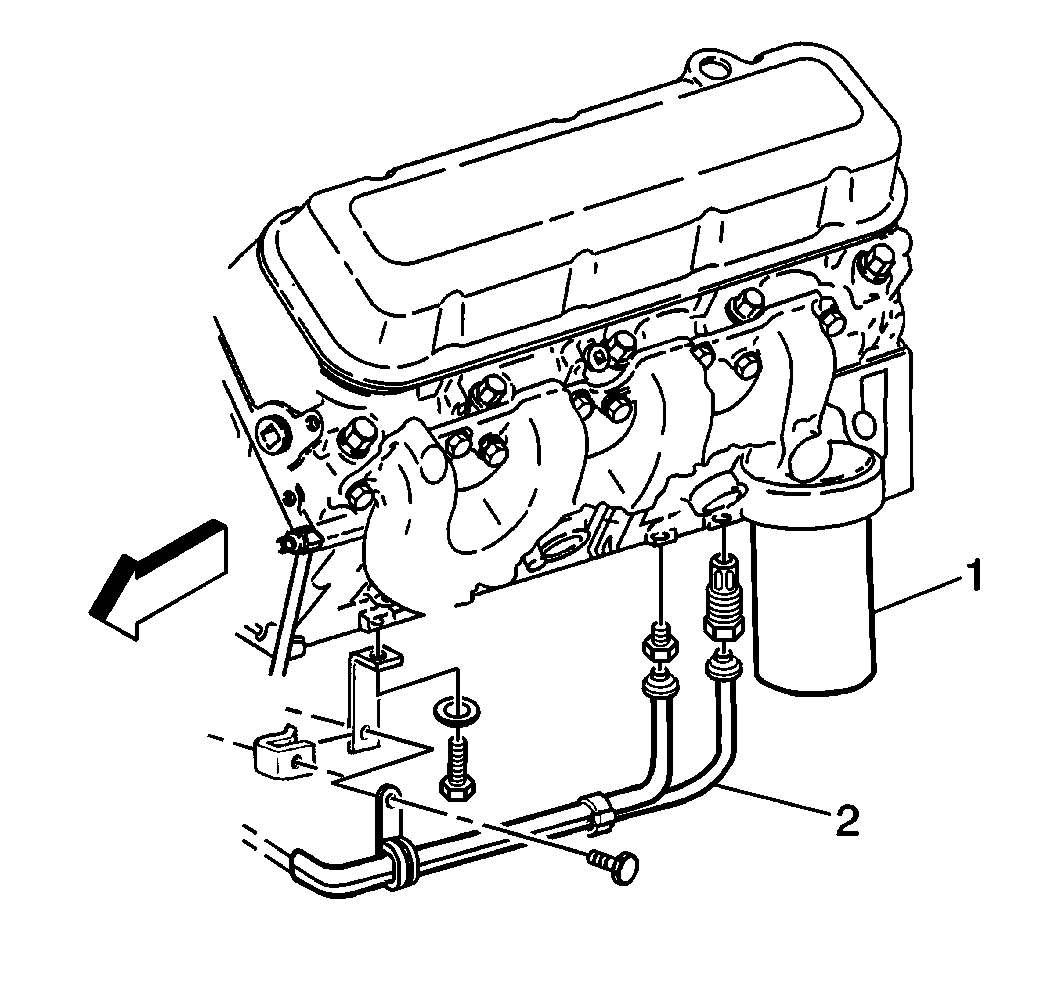
- Remove the cooler line from the connector at the engine block.
- Remove the cooler line mounting clamps.
- Remove the engine oil cooler lines (2).
Installation Procedure
- Install the engine oil cooler lines (2) to the original routing.
Notice: Make sure the connector clip engages all three slots in the connector.
Failure to properly install the connector clip could cause the oil cooler
line to come loose and cause damage to the engine.
- Use the following procedure in order to install the cooler line quick connector clip:
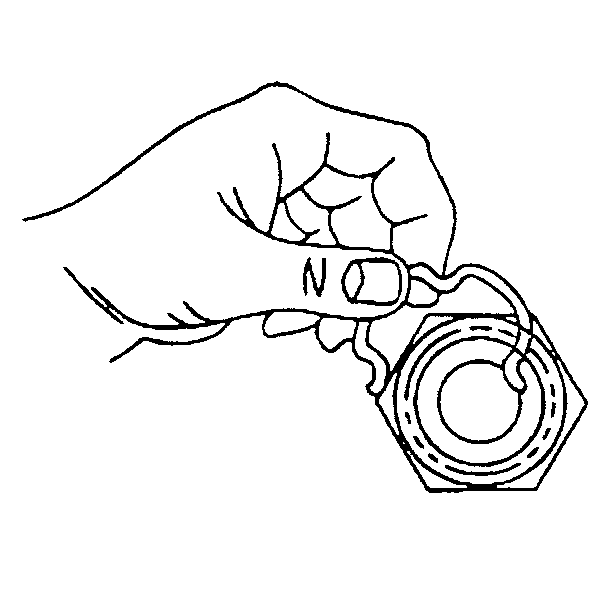
| 2.1. | Use your thumb and your forefinger in order to insert the connector clip into one of the three recesses in the connector. |
| 2.2. | When one end of the clip is engaged in the connector slot, use your thumb to rotate the clip around the connector until the clip snaps into place. |
- Use the following procedure in order to install the cooler line (2) to the quick connector at the engine block:
| 3.1. | Fully insert the oil cooler line into the quick connector. You will hear a distinct snap when you assemble the oil cooler line to the quick connector. |
| 3.2. | Pull the fitting forcefully in order to ensure full installation. |
Notice: Use the correct fastener in the correct location. Replacement fasteners
must be the correct part number for that application. Fasteners requiring
replacement or fasteners requiring the use of thread locking compound or sealant
are identified in the service procedure. Do not use paints, lubricants, or
corrosion inhibitors on fasteners or fastener joint surfaces unless specified.
These coatings affect fastener torque and joint clamping force and may damage
the fastener. Use the correct tightening sequence and specifications when
installing fasteners in order to avoid damage to parts and systems.
- Install the cooler line mounting clamps.
Tighten
Tighten the cooler line mounting bolts to 3 N·m (27 lb in).
- Install the engine oil cooler mounting bracket at the engine block.
- Install the engine oil cooler mounting bolts.
Tighten
Tighten the engine oil cooler mounting bolts to 15 N·m (11 lb ft).
Notice: Make sure the connector clip engages all three slots in the connector.
Failure to properly install the connector clip could cause the oil cooler
line to come loose and cause damage to the engine.
- Use the following procedure in order to install the cooler line quick connector clip to the oil cooler:
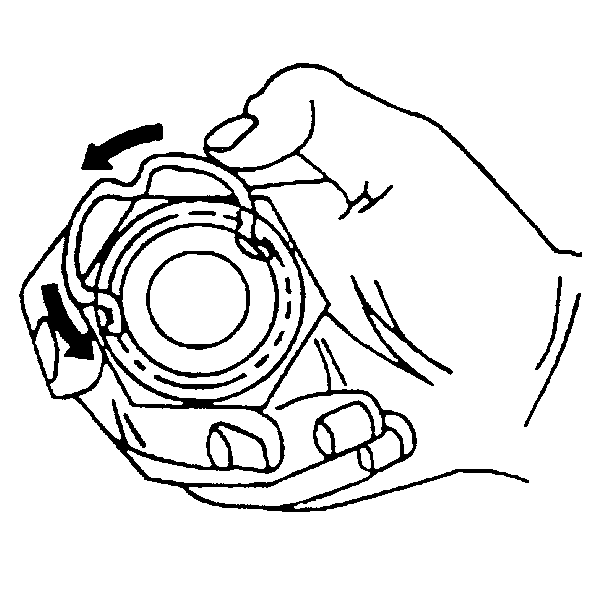
| 7.1. | Use your thumb and your forefinger in order to insert the connector clip into one of the three recesses in the connector. |
| 7.2. | When one end of the clip is engaged in the connector slot, use your thumb in order to rotate the clip around the connector until the clip snaps into place. |
- Use the following procedure in order to install the cooler line to the quick connector:
| 8.1. | Fully insert the oil cooler line into the quick connector. |
You will hear a distinct snap when you assemble the oil cooler line to the quick connector.
| 8.2. | Pull the fitting forcefully in order to ensure full installation. |
- Install the engine oil cooler line mounting bracket to radiator support.
- Refill the engine to the correct level.
- Start the engine.
- Inspect the system for leaks.
