For 1990-2009 cars only
Air Brake Automatic Slack Adjuster Replacement Arvin-Meritor
Removal Procedure
- Block the wheels.
- Cage the rear air brake chambers. Refer to Caging the Rear Air Brake Chamber .
- Drain all air reservoirs. Refer to Air Brake Reservoir Draining .
- Raise and support the vehicle with safety stands. Refer to Lifting and Jacking the Vehicle .
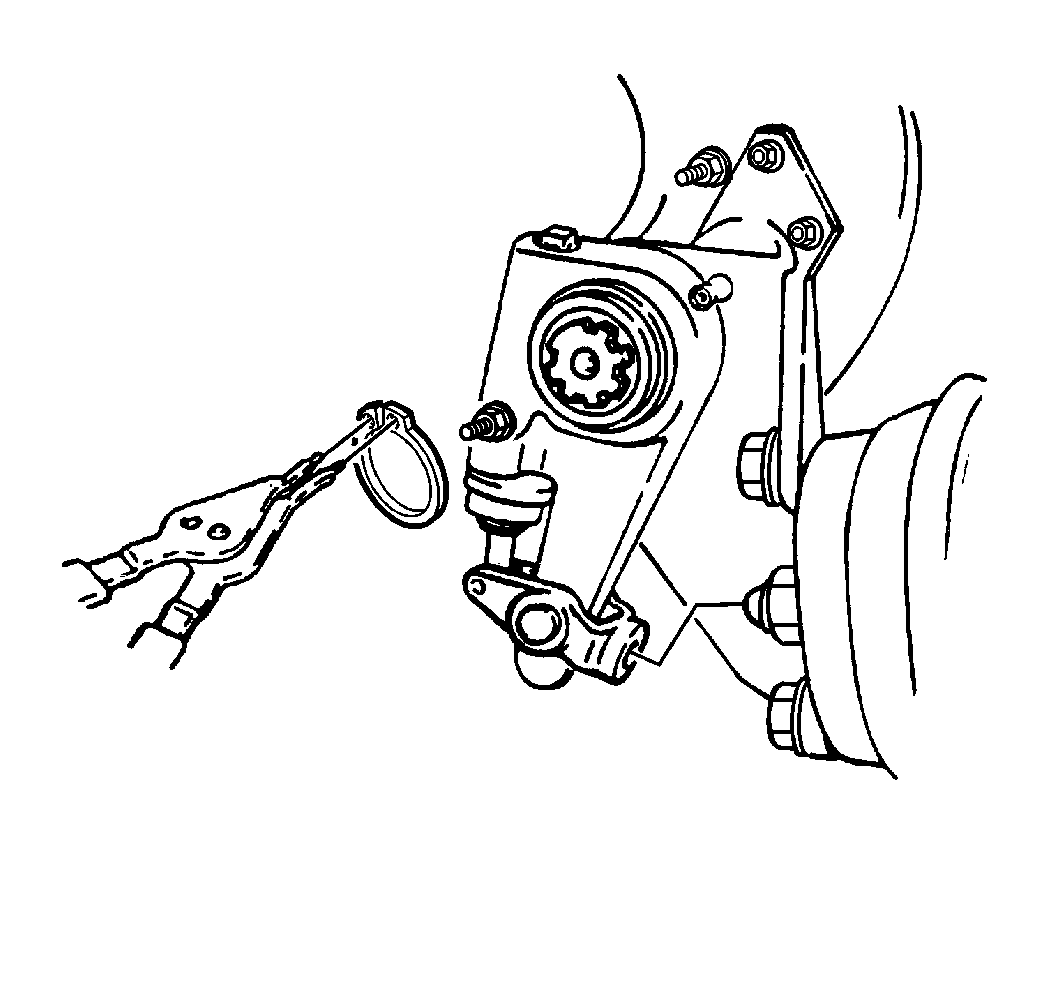
- Mark the position of the air brake automatic slack adjuster to the camshaft by drawing a straight line on both parts.
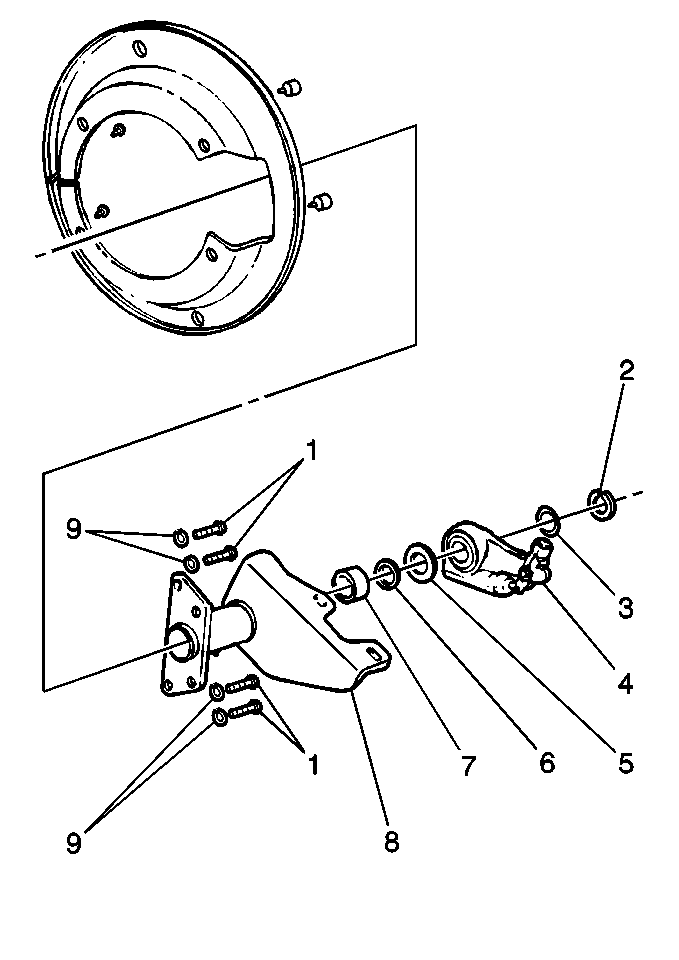
- Remove the retainers.
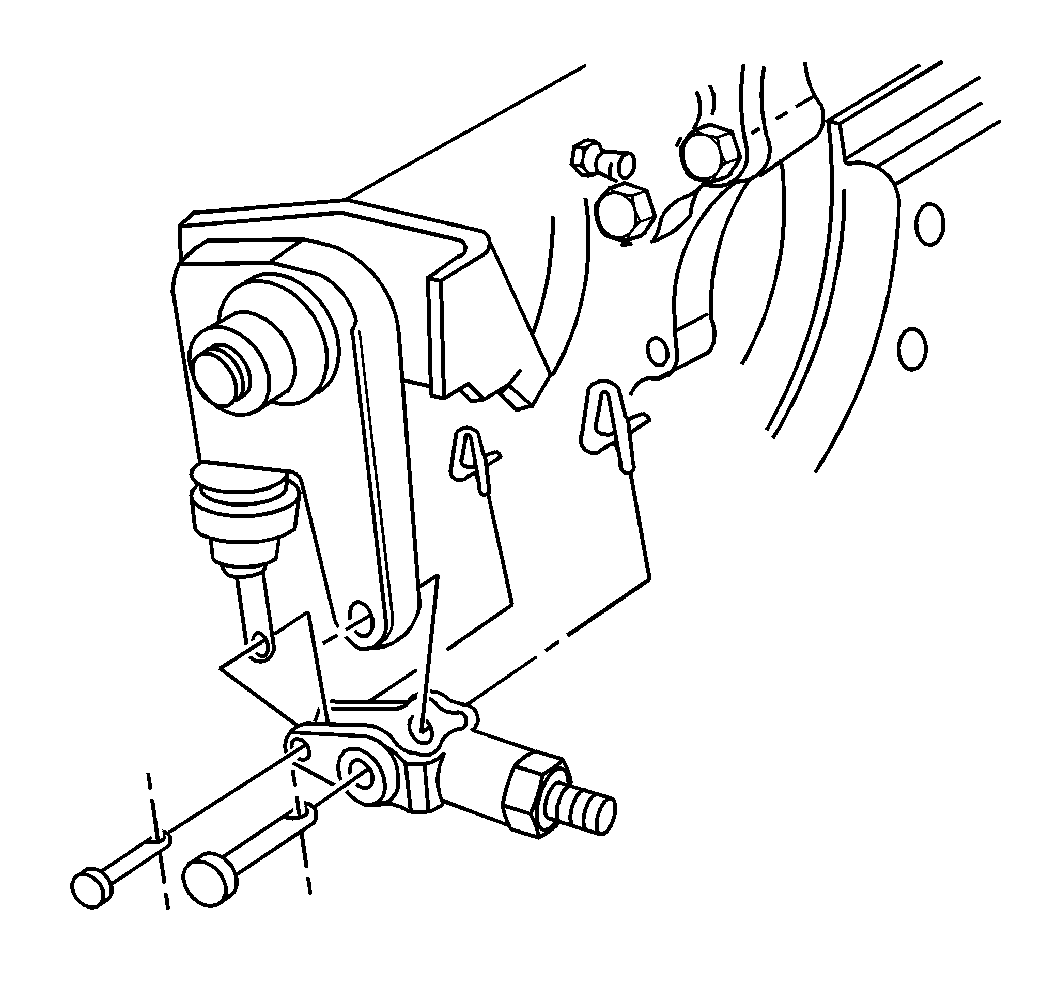
- Remove the air brake chamber clevis pins.
- Fully release the air brake automatic slack adjuster using the following steps:
- Remove the camshaft snap ring.
- Remove the camshaft washer(s) (9).
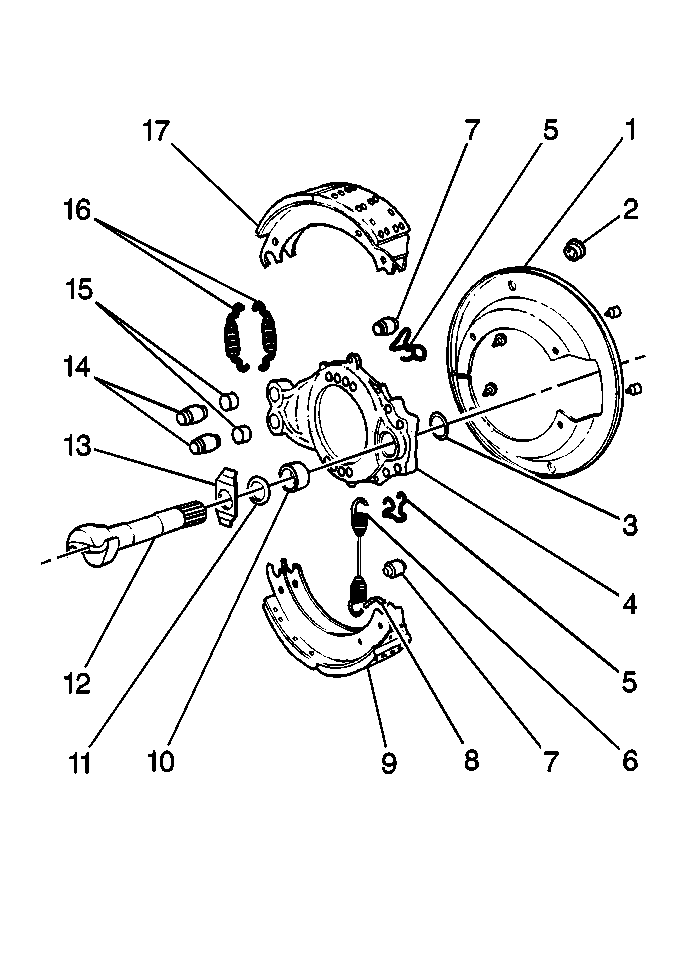
- Remove the air brake automatic slack adjuster (4).
- Check the air brake automatic slack adjuster adjusting nut torque using the following steps:
- Inspect the air brake chamber clevis pins for wear or damage.
- Measure the bushing in the arm of the air brake automatic slack adjuster (4).
Important: For unit repair information on the Arvin-Meritor® air brake automatic slack adjuster contact the Field Support Center at 1-800-535-5560.
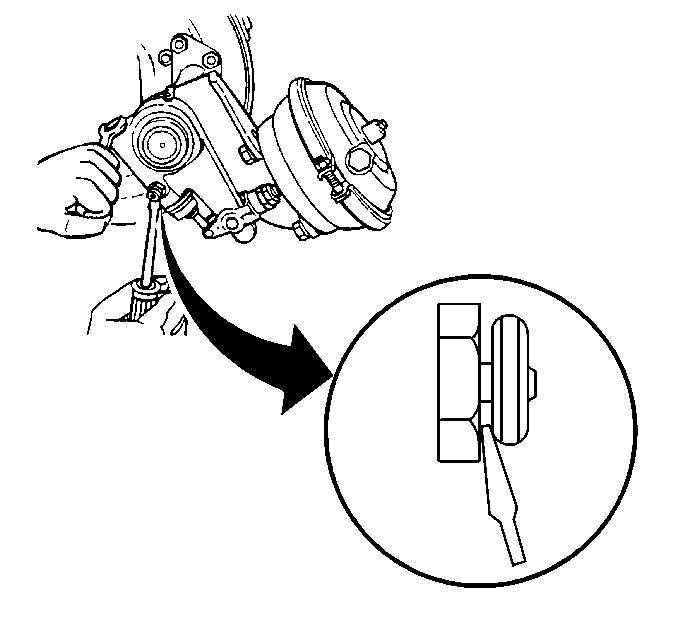
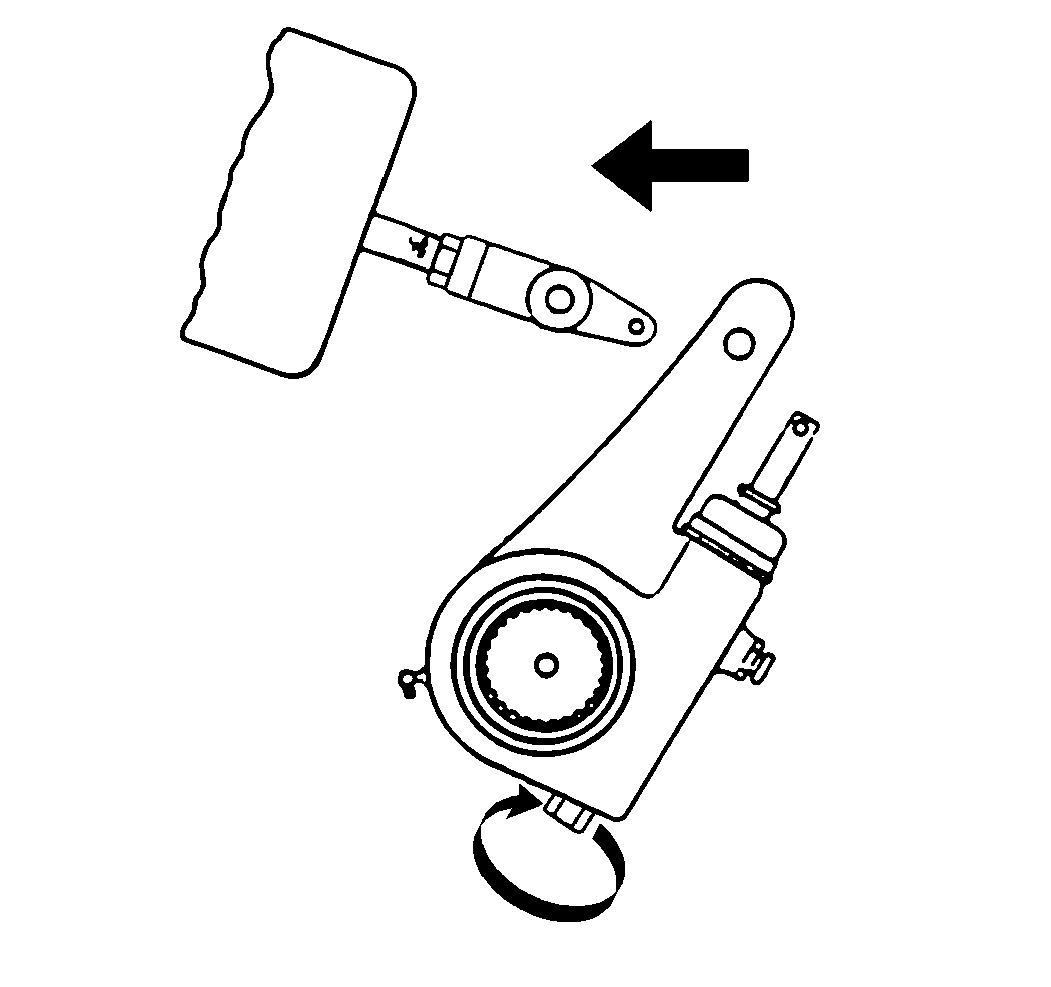
| 8.1. | Disengage the pawl with a screwdriver. |
| 8.2. | Turn the air brake automatic slack adjuster adjusting nut until the air brake automatic slack adjuster is free from the air brake chamber clevis. |
| 8.3. | Release the pawl so that the pawl snaps into engagement. |
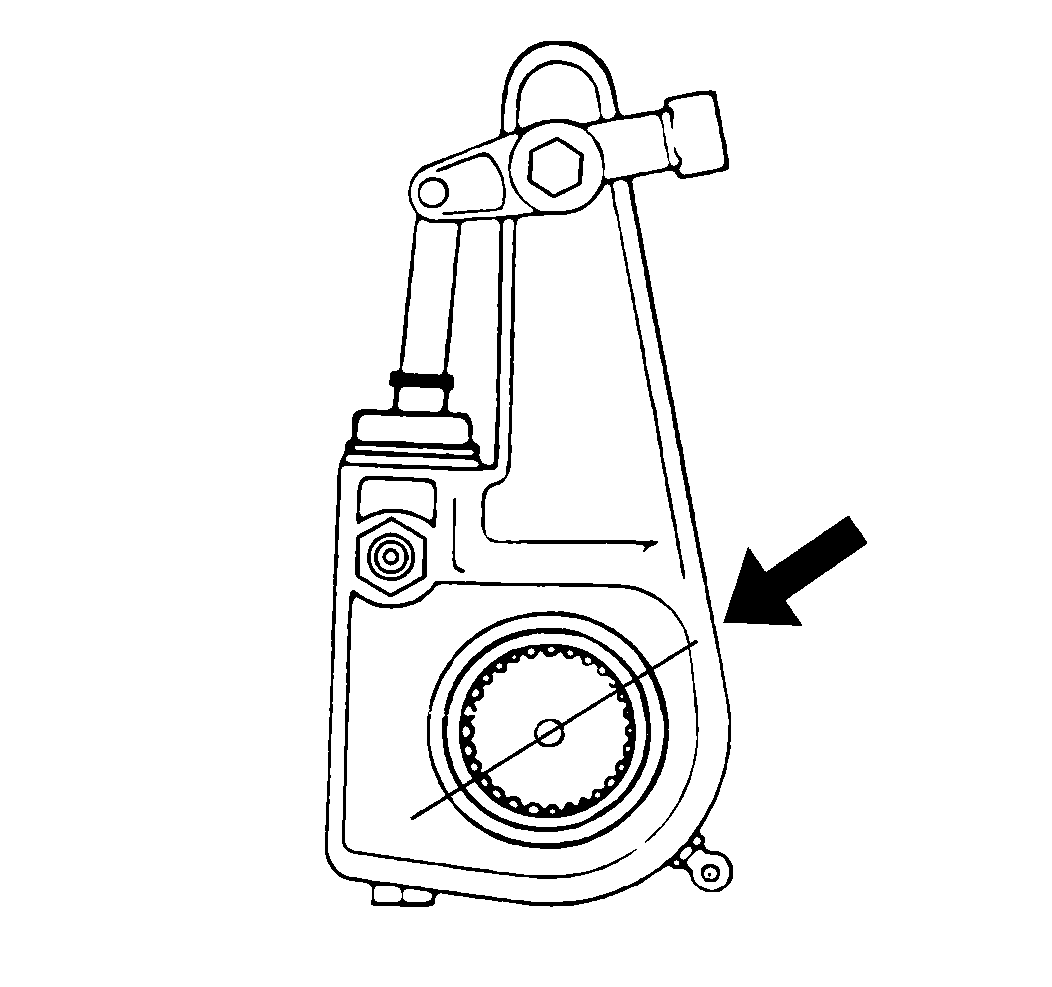
| 12.1. | Use a pound/inch torque wrench in order to rotate the air brake automatic slack adjuster adjusting nut counterclockwise. |
| 12.2. | Turn the air brake automatic slack adjuster gear 360 degrees, 22 rotations of the air brake automatic slack adjuster adjusting nut. The torque must remain less than 4.5 N·m (40 lb in). Replace the air brake automatic slack adjuster if the torque specification is exceeded. |
Replace the air brake chamber clevis pins if necessary.
Replace the bushings if the diameter exceeds 13.5 mm (0.531 in).
Installation Procedure
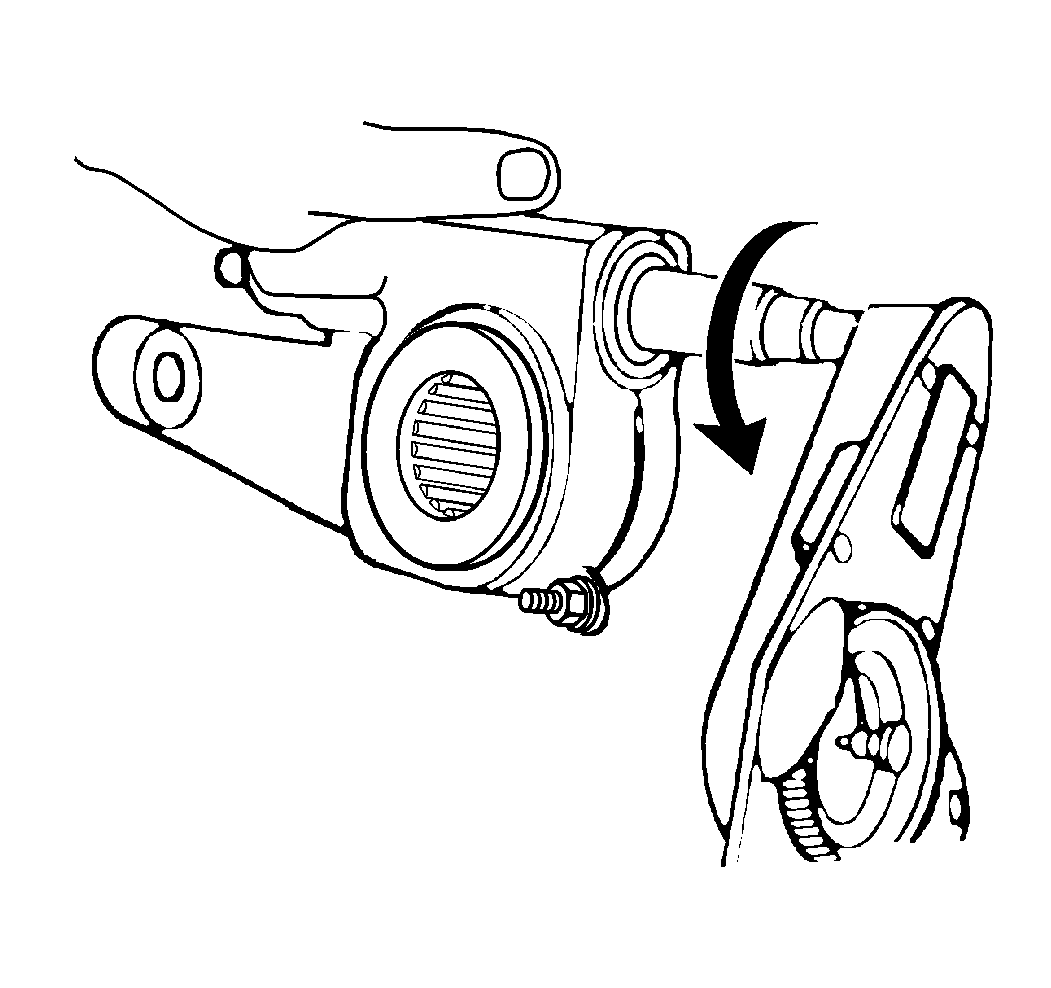
- Install the air brake automatic slack adjuster to the camshaft (12).
- Install the camshaft washers (13).
- Install the camshaft snap ring.
- Disengage the pawl assembly with a screwdriver.
- Turn the slack adjuster adjusting nut until the slack adjuster arm is properly aligned with the holes in the clevis.
- Release the pawl so that the pawl snaps into engagement.
- Align the marks made on the air brake automatic slack adjuster and the camshaft.
- Fully release the air brake automatic slack adjuster.
- Install the air brake chamber clevis pins.
- Install the NEW retainers.
- Adjust the brakes. Refer to Air Drum Brake Adjustment .
- Remove the safety stands and lower the vehicle. Refer to Lifting and Jacking the Vehicle .
- Uncage the rear air brake chambers. Refer to Caging the Rear Air Brake Chamber .
- Check for proper brake operation.
- Apply the parking brake.
- Remove the wheel blocks.