For 1990-2009 cars only
Removal Procedure
- Remove the air cleaner. Refer to Air Cleaner Assembly Replacement.
- Remove the positive crankcase ventilation (PCV) pipe. Refer to Positive Crankcase Ventilation Hose/Pipe/Tube Replacement.
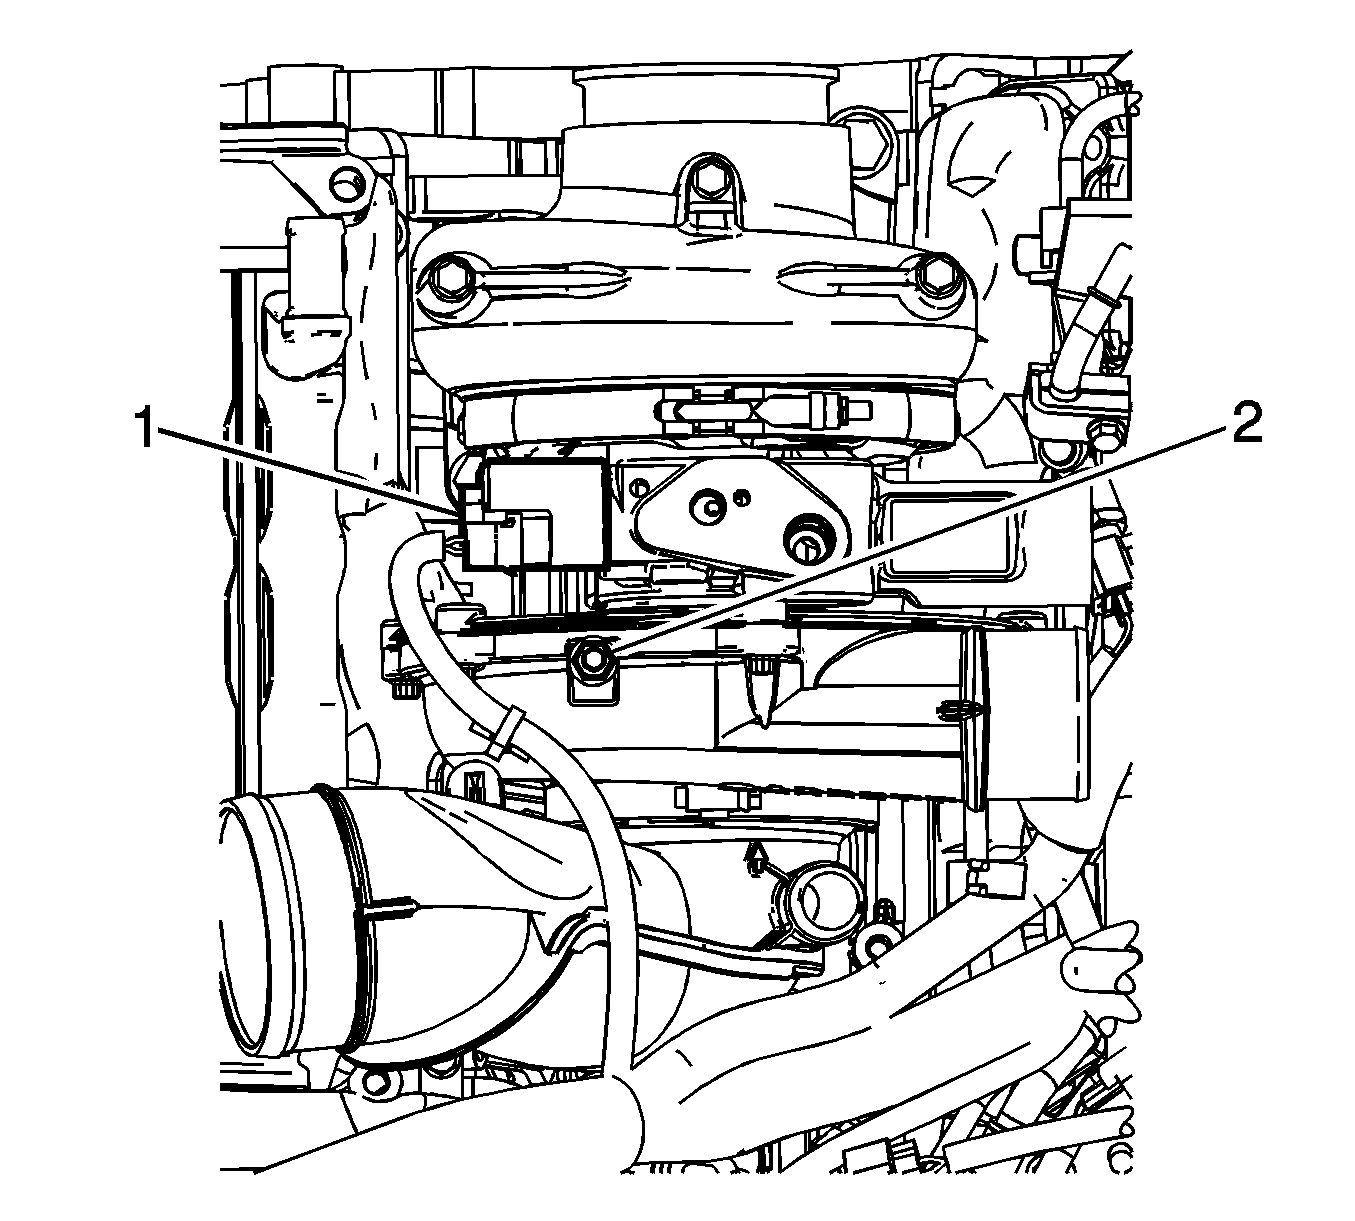
- Disconnect the engine wiring harness electrical connector (1) from the turbocharger control solenoid valve.
- Remove the engine wiring harness bracket nut (2) from the turbocharger.
- Remove the engine wiring harness clip from the bracket, and reposition the engine wiring harness out of the way.
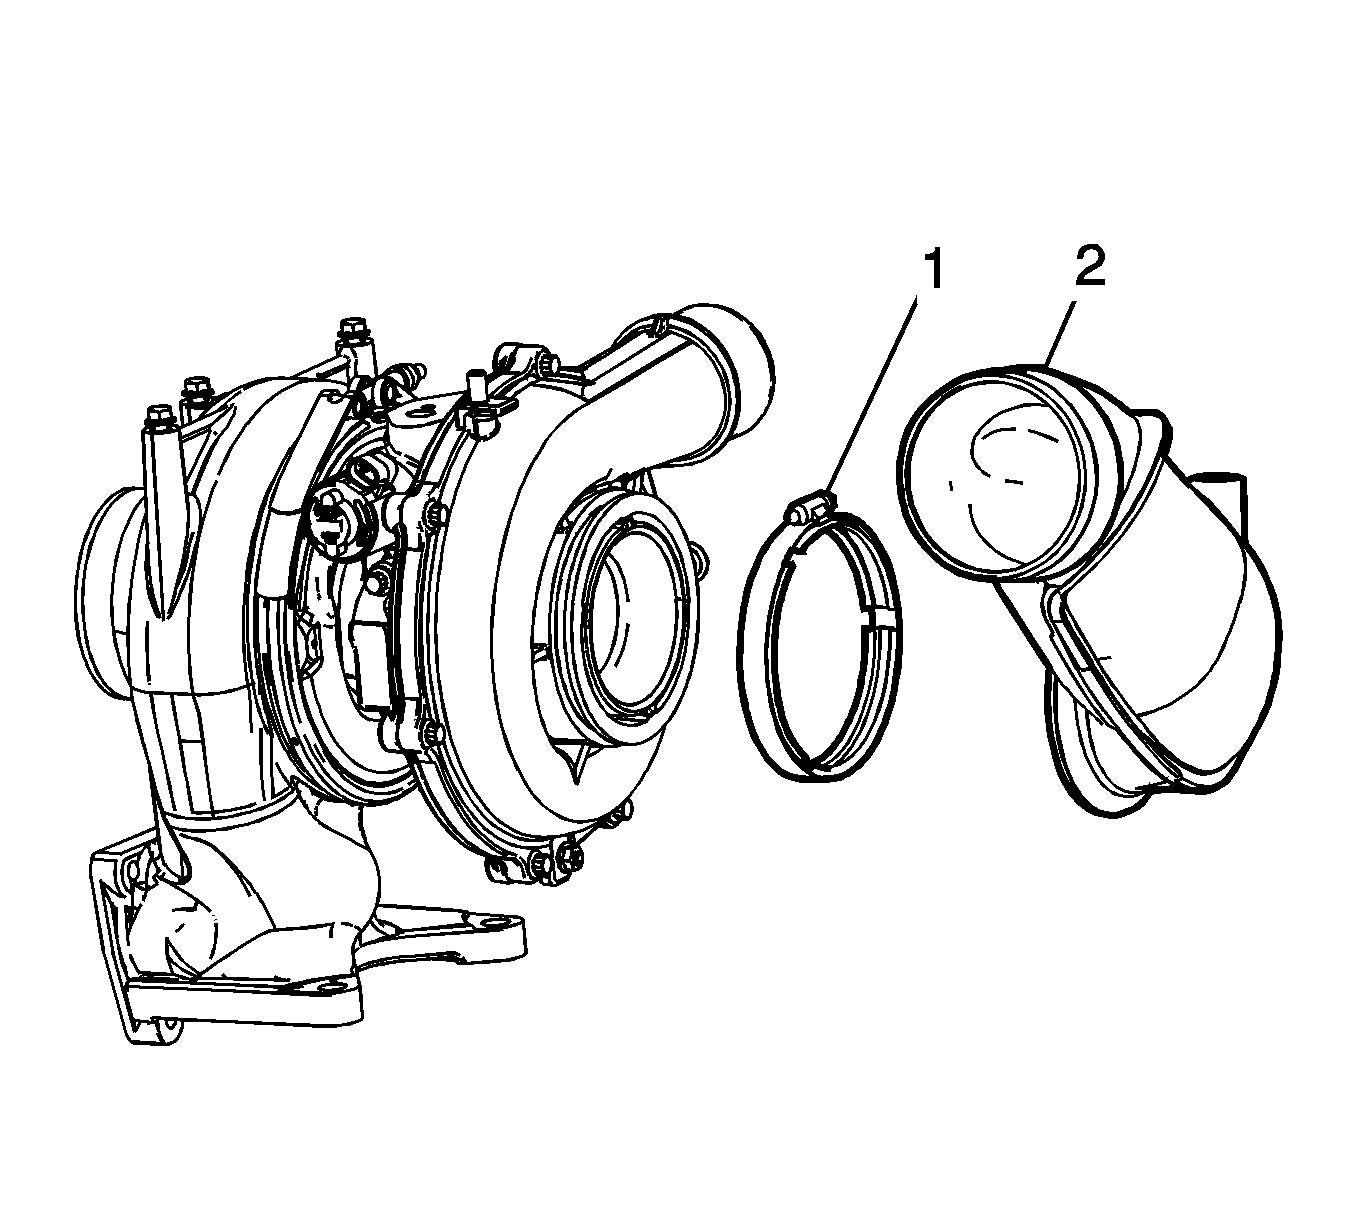
- Loosen the air intake pipe to turbocharger clamp (1).
- Remove the air intake pipe (2) from the turbocharger. (turbocharger shown removed for clarity).


Installation Procedure
- Clean the mating surfaces on the air intake pipe and the turbocharger.
- Position the clamp onto the turbocharger.
- Install and align the air inlet pipe arrow (2) to the turbocharger arrow (1).
- Tighten the clamp.
- Position the engine wiring harness and install the engine wiring harness clip to the stud.
- Install the engine wiring harness bracket nut (2) to the turbocharger.
- Connect the engine wiring harness electrical connector (1) to the turbocharger control solenoid valve.
- Install the PCV pipe. Refer to Positive Crankcase Ventilation Hose/Pipe/Tube Replacement.
- Install the air cleaner. Refer to Air Cleaner Assembly Replacement.

Caution: Refer to Fastener Caution in the Preface section.
Tighten
Tighten the clamp to 4.6 N·m (41 lb in).

Tighten
Tighten the nut to 10 N·m (89 lb in).
