Steering Arm Replacement C4500/C5500
Removal Procedure
- The steering arm is bolted to the steering knuckle with 2 bolts. The steering arm is non-repairable. Replace the steering arm if damaged or worn.
- Remove the steering arm-to-knuckle bolts (1) and washers.
- Remove the steering arm (2).
- Inspect the steering arm for damage or wear.
Remove the relay rod from the steering arm (2). Refer to Relay Rod Replacement .
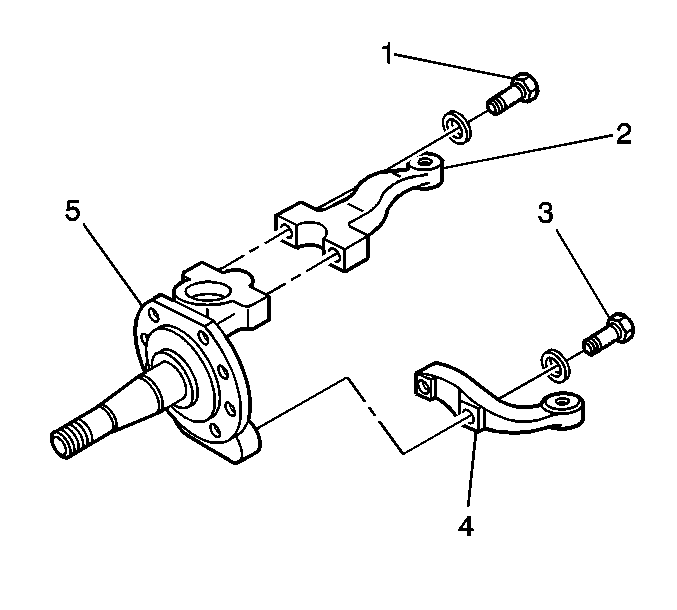
Important: The steering arm is non-repairable. Replace the steering arm if damaged or worn.
Installation Procedure
- Install the steering arm (2) to the knuckle (5).
- Install the steering arm-to-knuckle bolts (1) and washers.
- Install the relay rod to the steering arm. Refer to Relay Rod Replacement .
- Adjust the toe-in. Refer to Front Toe Adjustment .
Notice: Use the correct fastener in the correct location. Replacement fasteners must be the correct part number for that application. Fasteners requiring replacement or fasteners requiring the use of thread locking compound or sealant are identified in the service procedure. Do not use paints, lubricants, or corrosion inhibitors on fasteners or fastener joint surfaces unless specified. These coatings affect fastener torque and joint clamping force and may damage the fastener. Use the correct tightening sequence and specifications when installing fasteners in order to avoid damage to parts and systems.
Tighten
Tighten the steering arm-to-knuckle bolts to 563 N·m (415 lb ft).
Steering Arm Replacement C6500/C7500/C8500
Removal Procedure
- Disconnect the relay rod from the steering arm. Refer to Relay Rod Replacement .
- Remove the cotter pin (10).
- Remove the nut (9).
- Drive the arm (1) from knuckle (6) with a suitable brass drift and hammer.
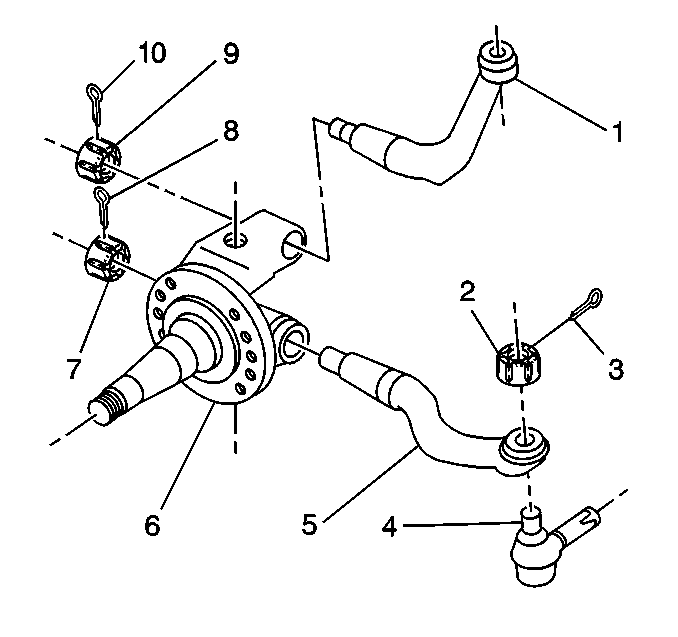
Important: Do not use heat on components in order to remove the arms.
Installation Procedure
- Install new steering arm (1) with key supplied.
- Install the nut (9).
- Install the cotter pin (10) .
- Install the relay rod to the steering arm. Refer to Relay Rod Replacement .
Notice: Use the correct fastener in the correct location. Replacement fasteners must be the correct part number for that application. Fasteners requiring replacement or fasteners requiring the use of thread locking compound or sealant are identified in the service procedure. Do not use paints, lubricants, or corrosion inhibitors on fasteners or fastener joint surfaces unless specified. These coatings affect fastener torque and joint clamping force and may damage the fastener. Use the correct tightening sequence and specifications when installing fasteners in order to avoid damage to parts and systems.
Tighten
Tighten the nut to 1508 N·m (1112 lb ft).
Steering Arm Replacement 4WD
Removal Procedure
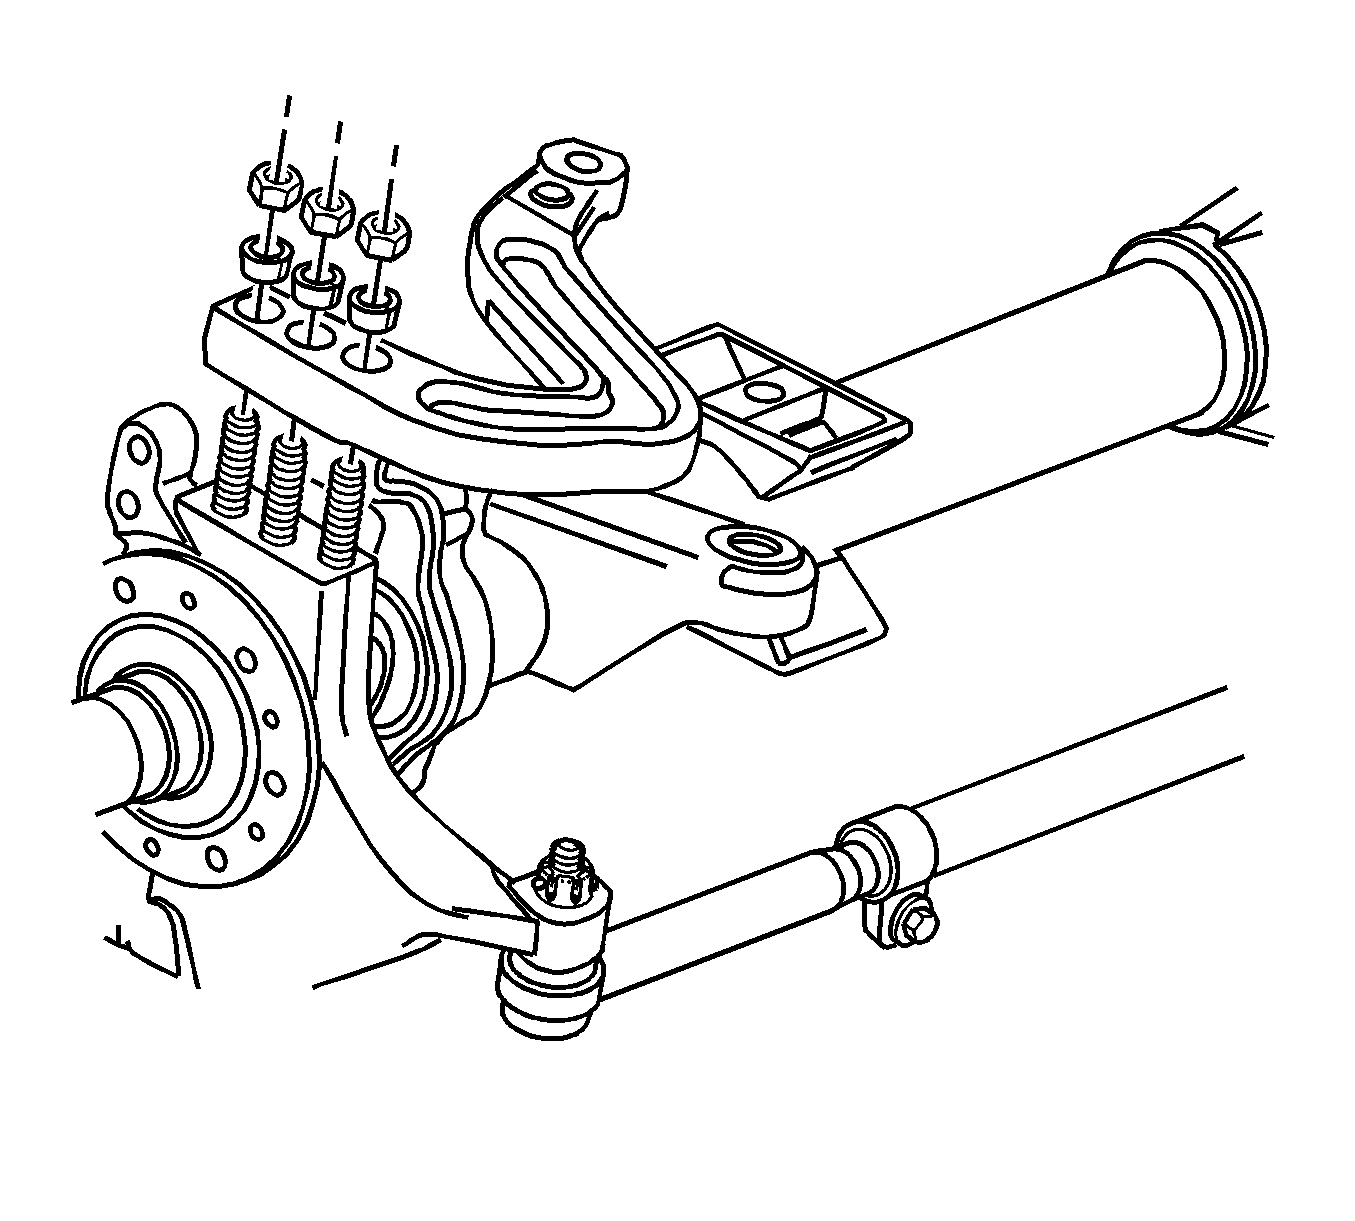
- Remove the relay rod from the steering arm. Refer to Relay Rod Replacement .
- Remove the steering arm to steering knuckle nut and washers.
- Remove the steering arm.
Installation Procedure
- Install the steering arm to the steering knuckle.
- Install the steering arm to steering knuckle washers and nuts.
- Install the relay rod to the steering arm. Refer to Relay Rod Replacement .
- Adjust the toe-in. Refer to Front Toe Adjustment .
Notice: Refer to Fastener Notice in the Preface section.
Tighten
Tighten the nuts to 339 N·m (250 lb ft).
