Removal Procedure
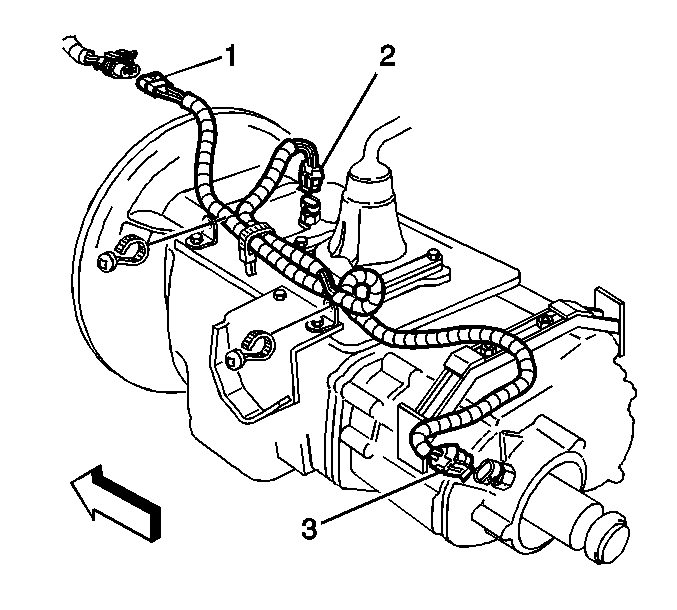
- Raise and suitably support the vehicle. Refer to
Lifting and Jacking the Vehicle
.
- If equipped with the Eaton® Fuller® RT6609 9 speed transmission, disconnect the backup lamp switch electrical connector (2).
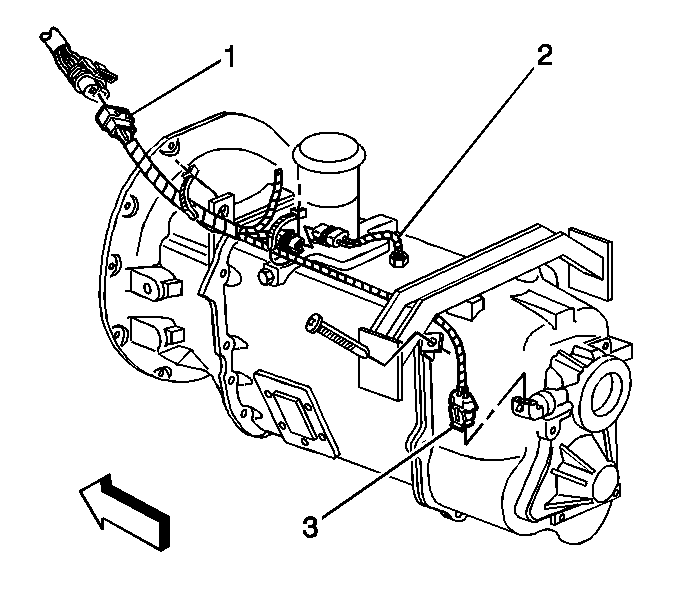
- If equipped with the Spicer® ES52-7B or ES066-7B 7 speed transmissions, disconnect the backup
lamp switch electrical connector (2).
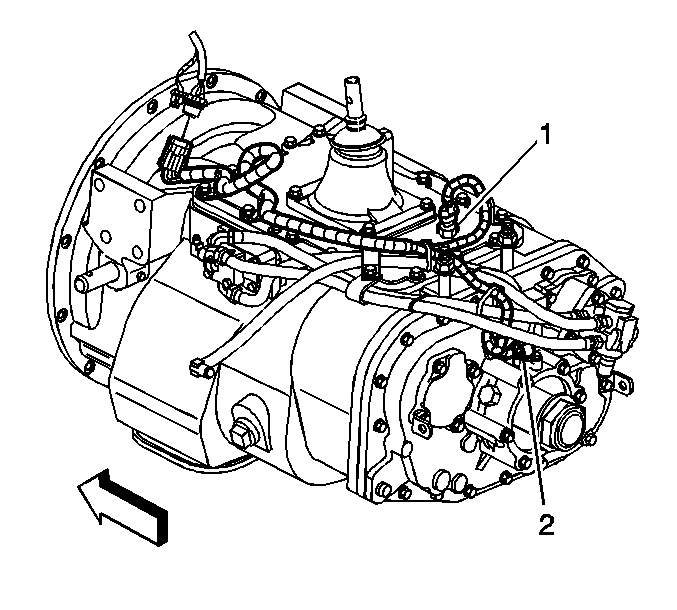
- If equipped with the Eaton® Fuller® RT8709 9 speed, or RT8908LL 10 speed transmissions,
disconnect the backup lamp switch electrical connector (1).
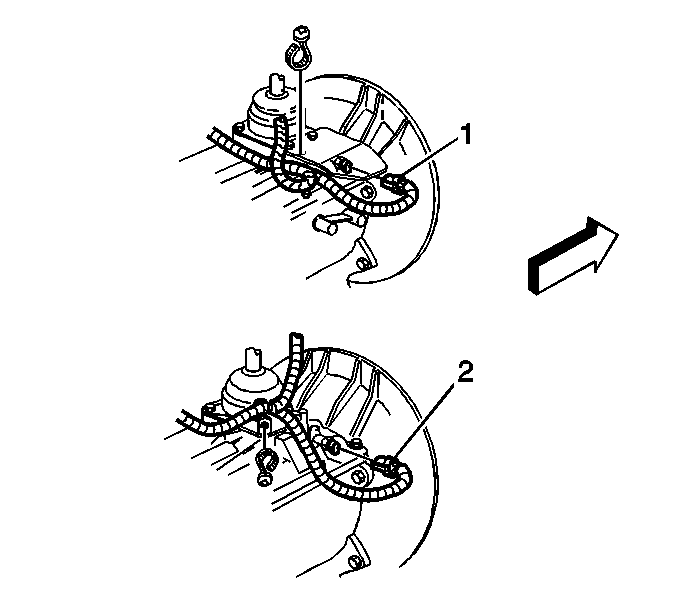
- If equipped with one of the following Eaton® Fuller® transmissions, disconnect the backup lamp switch
electrical connector (1, 2).
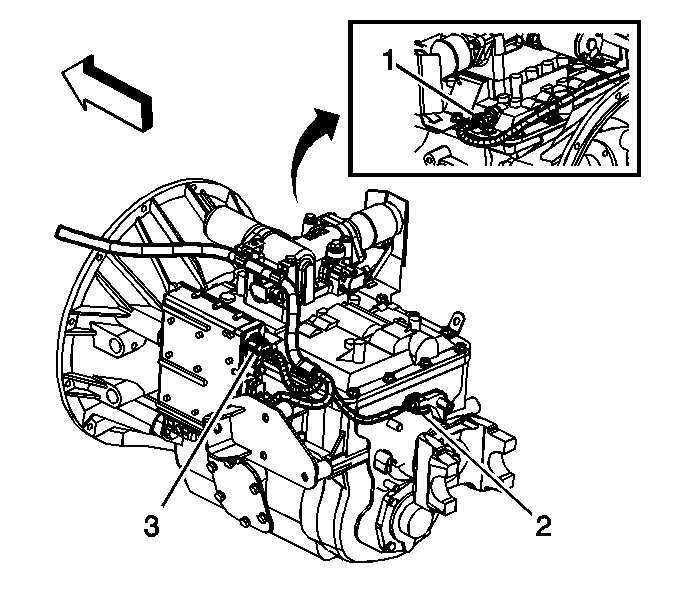
- If equipped with the Eaton® Fuller® FO 8406A-ASX transmission, disconnect the backup lamp switch
electrical connector (1).
- Remove the backup lamp switch.
Installation Procedure

Important: A NEW backup lamp switch has pre-applied thread sealant on the threads.
- If installing the old backup lamp switch, apply thread sealant GM P/N 12346004 or equivalent to the threads.
Notice: Refer to Fastener Notice in the Preface section.
- Install the backup lamp switch.
Tighten
Tighten the backup lamp switch to 48 N·m (35 lb ft).
- If equipped with the Eaton® Fuller® FO 8406A-ASX transmission, connect the backup lamp switch electrical connector (1).

- If equipped with one of the following Eaton® Fuller® transmissions, connect the backup lamp switch
electrical connector (1, 2).

- If equipped with the Eaton® Fuller® RT8709 9 speed, or RT8908LL 10 speed transmissions,
connect the backup lamp switch electrical connector (1).

- If equipped with the Spicer® ES52-7B or ES066-7B 7 speed transmissions, connect the backup lamp
switch electrical connector (2).

- If equipped with the Eaton® Fuller® RT6609 9 speed transmission, connect the backup lamp switch electrical connector (2).
- Lower the vehicle.


