Brake Fluid
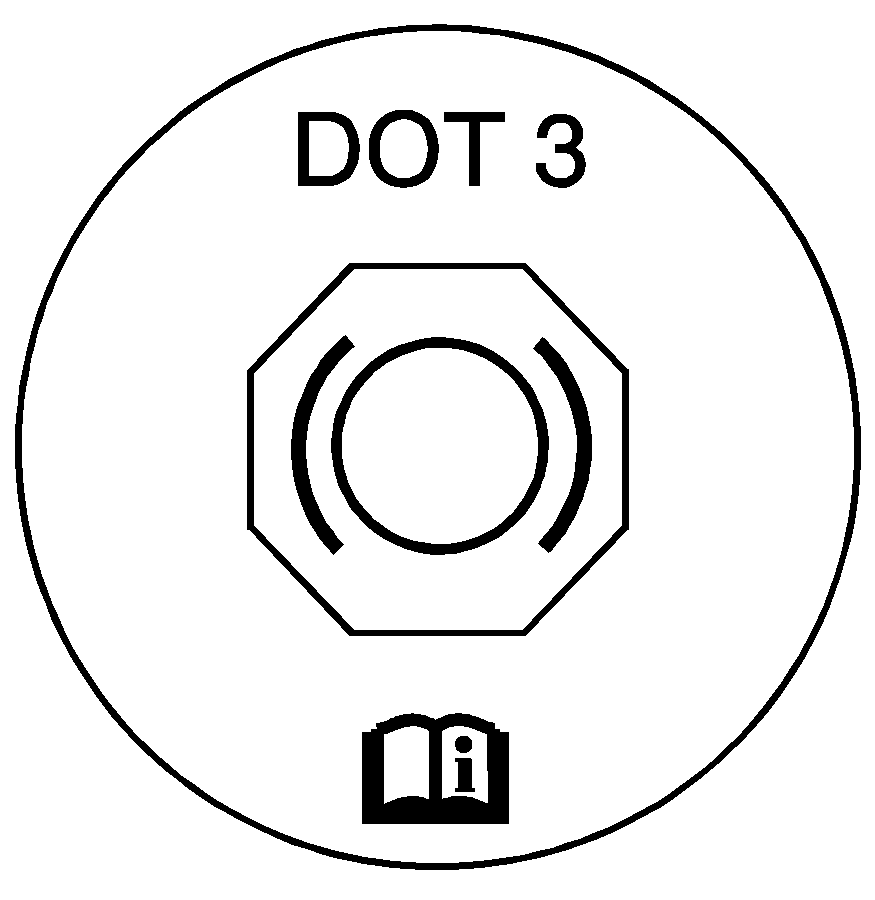
If your vehicle has hydraulic brakes, there is a brake master cylinder in the engine compartment on the driver side of the vehicle.
Refer to the Maintenance Schedule to determine when to check the brake fluid.
Caution: Do not add brake fluid before checking the level or there could be too much brake fluid. Brake fluid could spill on the hot engine and it can catch fire. You could be burned and the vehicle could be damaged. See "Checking Brake Fluid" in this section.
Checking Brake Fluid
Apply the brake pedal several times with the ignition off. The brake fluid reservoir is in the engine compartment on the driver side of the vehicle. Clean one of the reservoir caps and the area around the cap, and remove it.
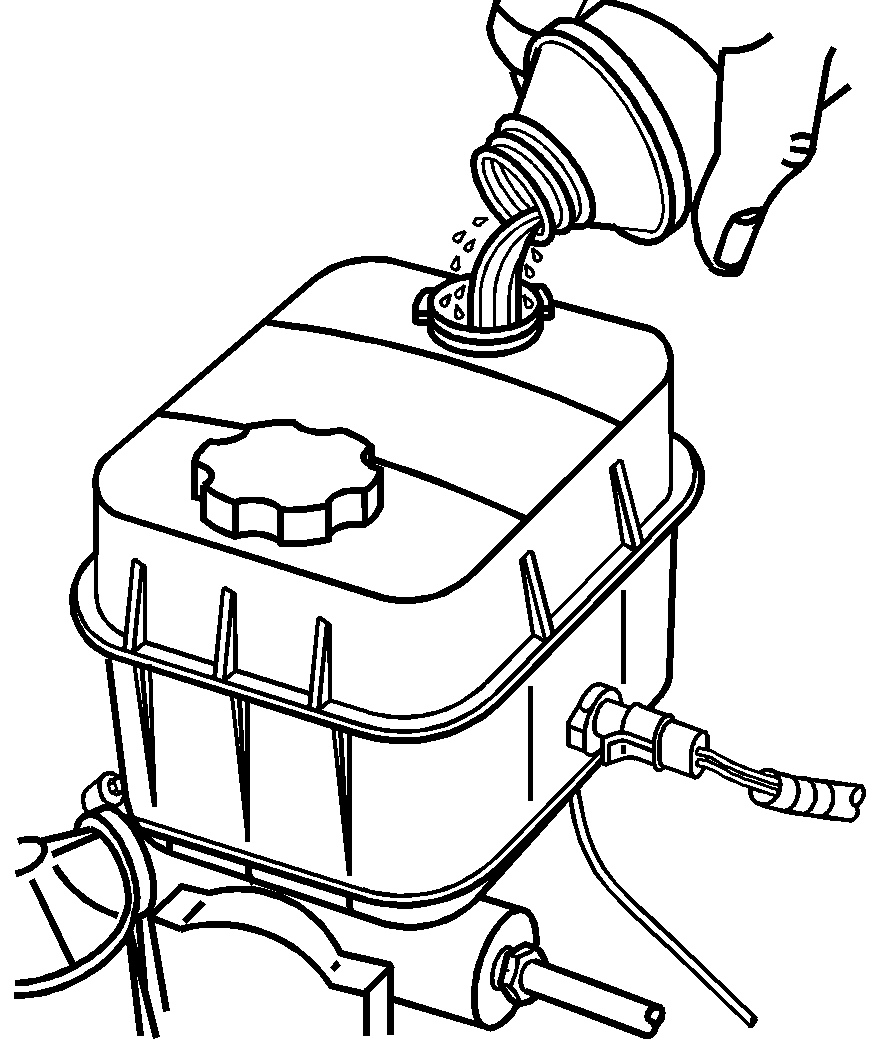
The fluid level should be even with the bottom ring of the filler opening. If it is low, add enough fluid to fill the reservoir to the proper level.
What to Add
Use the proper fluid listed in the Maintenance Schedule. Use new brake fluid from a sealed container only.
Always clean the brake fluid reservoir cap/cover and the area around the cap/cover before removing it. This helps keep dirt from entering the reservoir.
Caution: With the wrong kind of fluid in the brake hydraulic system, the brakes might not work well. This could cause a crash. Always use the proper brake fluid.
Notice:
• Using the wrong fluid can badly damage brake hydraulic system parts.
For example, just a few drops of mineral-based oil, such as engine oil, in the brake
hydraulic system can damage brake hydraulic system parts so badly that they will have
to be replaced. Do not let someone put in the wrong kind of fluid, and do not use
DOT-5 silicone brake fluid. • If brake fluid is spilled on the vehicle's painted surfaces, the paint
finish can be damaged. Be careful not to spill brake fluid on the vehicle. If you
do, wash it off immediately. See
Washing Your Vehicle
.
Four-Wheel Disc Brakes (Hydraulic Only)
Your vehicle has four-wheel disc brakes.
Some driving conditions or climates can cause a brake squeal when the brakes are first applied or lightly applied. This does not mean something is wrong with the brakes.
Brake linings should always be replaced as complete axle sets.
Four-Wheel and Six-Wheel Drum Brakes (Air Only)
The brake drums should be removed and inspected each time the tires are removed for rotation or changing. When you have the front brakes replaced, have the rear brakes inspected, too.
Brake linings should always be replaced as complete axle sets.
Brake Pedal Travel
See your dealer/retailer if the brake pedal does not return to normal height, or if there is a rapid increase in pedal travel. This could be a sign that brake service might be required.
Brake Adjustment
Every time you make a brake stop, the brakes adjust for wear.
Brake Adjustment on Air Braked Vehicles
Your vehicle has automatic slack adjusters. Every time you make a brake stop, the brakes automatically adjust for wear. Slack adjusters should never be manually adjusted to correct excessive brake chamber pushrod stroke. Excessive brake chamber pushrod stroke means that the brake system needs to be serviced by a qualified service technician.
Notice: Do not manually adjust automatic slack adjusters. Manual adjustment of the automatic slack adjusters can result in a degradation of the slack adjuster performance over time. If the brake chamber pushrod stroke is out of adjustment, the brake system needs to be serviced by a qualified service technician.
Replacing Brake System Parts
The braking system on a vehicle is complex. Its many parts have to be of top quality and work well together if the vehicle is to have really good braking. Your vehicle was designed and tested with top-quality brake parts. When you replace parts of the braking system -- for example, when the brake linings wear down and you need new ones put in -- be sure you get new approved replacement parts. If you do not, the brakes might not work properly. For example, if someone puts in brake linings that are wrong for your vehicle, the balance between the front and rear brakes can change -- for the worse. The braking performance you have come to expect can change in many other ways if someone puts in the wrong replacement brake parts.
Air Brake Systems
If your vehicle has air brakes, it is important to get rid of moisture in the system. Moisture will damage the system if it is not removed daily.
There are two ways to do this. One is automatic through the air brake vehicle's air dryer with intregal automatic moisture ejector that purges air from the system through a self-contained reservoir. The other way to drain moisture from the air brake system is to manually activate drain valves at each reservoir. Drain the air reservoirs occasionally to be sure the air dryer is working properly.
Drain the air brakes at full system pressure. To be sure you are at full pressure, check the air pressure gage. It should read at least 100 psi (692 kPa).
Air Dryer
If your vehicle has air brakes, it has an air dryer mounted on the passenger side frame rail. This collects and removes dirt, moisture, or other foreign matter from the air prior to entering the brake system. The dryer also acts as a moisture ejector. It automatically ejects the moisture when the compressor cycles. The purge tank has a manual drain valve that must be drained every day. See "Air Brake Systems" for the manual drain procedure.
The dryer has a filter that you need to change at intervals. See Scheduled Maintenance for more about servicing this filter.
Electric Air Compressor
Your vehicle may have an electric air compressor. This compressor is used to run options that require pressurized air, such as an air horn, air seat, 7.8L engine exhaust restrictor, or 7.8L engine exhaust brake.
The air compressor is used when vehicles do not have an air brake system.
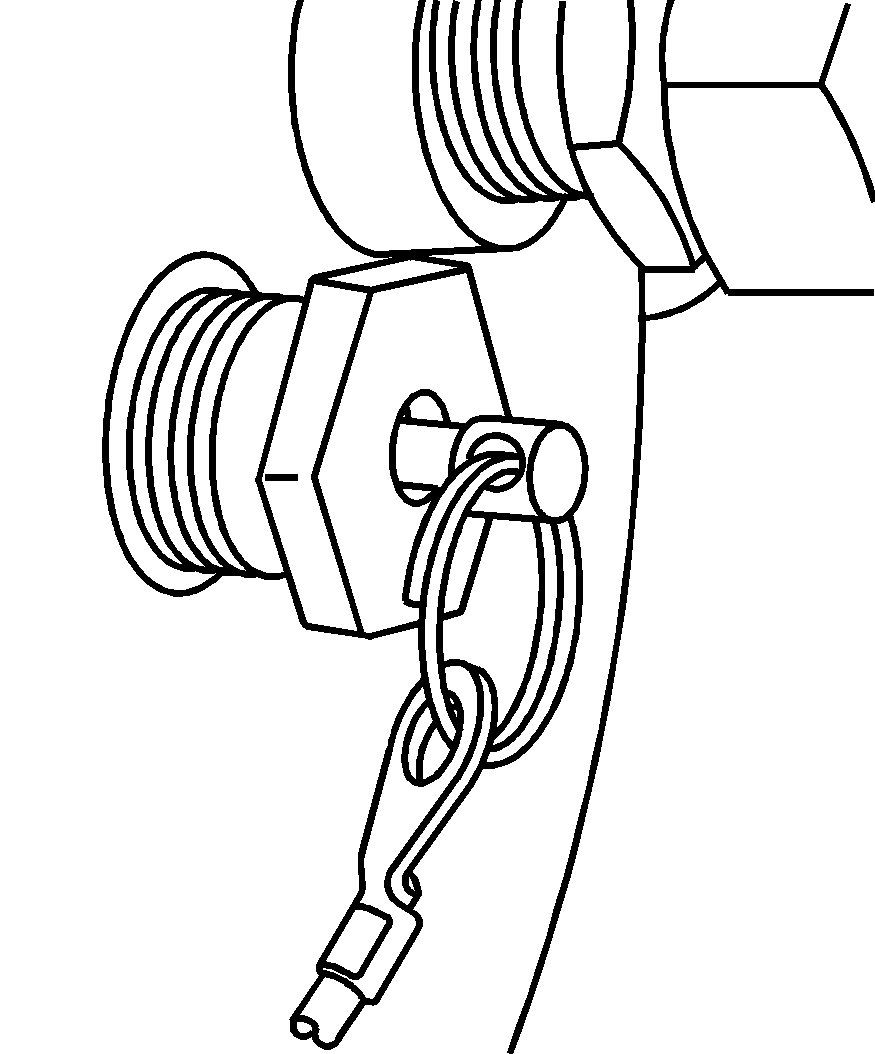
The air supply for this system must be maintained by releasing the drain valve to eject any moisture that could have built up in the system.
It is recommended that this system be drained on a weekly basis.
Clutch Pedal Free Travel
If you have a V8 engine and a manual transmission, the clutch will need adjustment when pedal free travel gets down to about 1/4 inch (6 mm), as measured at the clutch pedal pad. You should have 1 1/2 to 2 inches (38 to 51 mm) of clutch pedal free travel.
If the clutch ever needs service, be sure to use only approved clutch replacement parts.
Chassis Lubrication
Your Maintenance Schedule provides all of the required chassis lubrication intervals and identifies proper lubricants to use. Be sure to see the Maintenance Schedule before performing any chassis lubrication service. To determine location of chassis lubrication items, use the following charts.
Single Axle Models
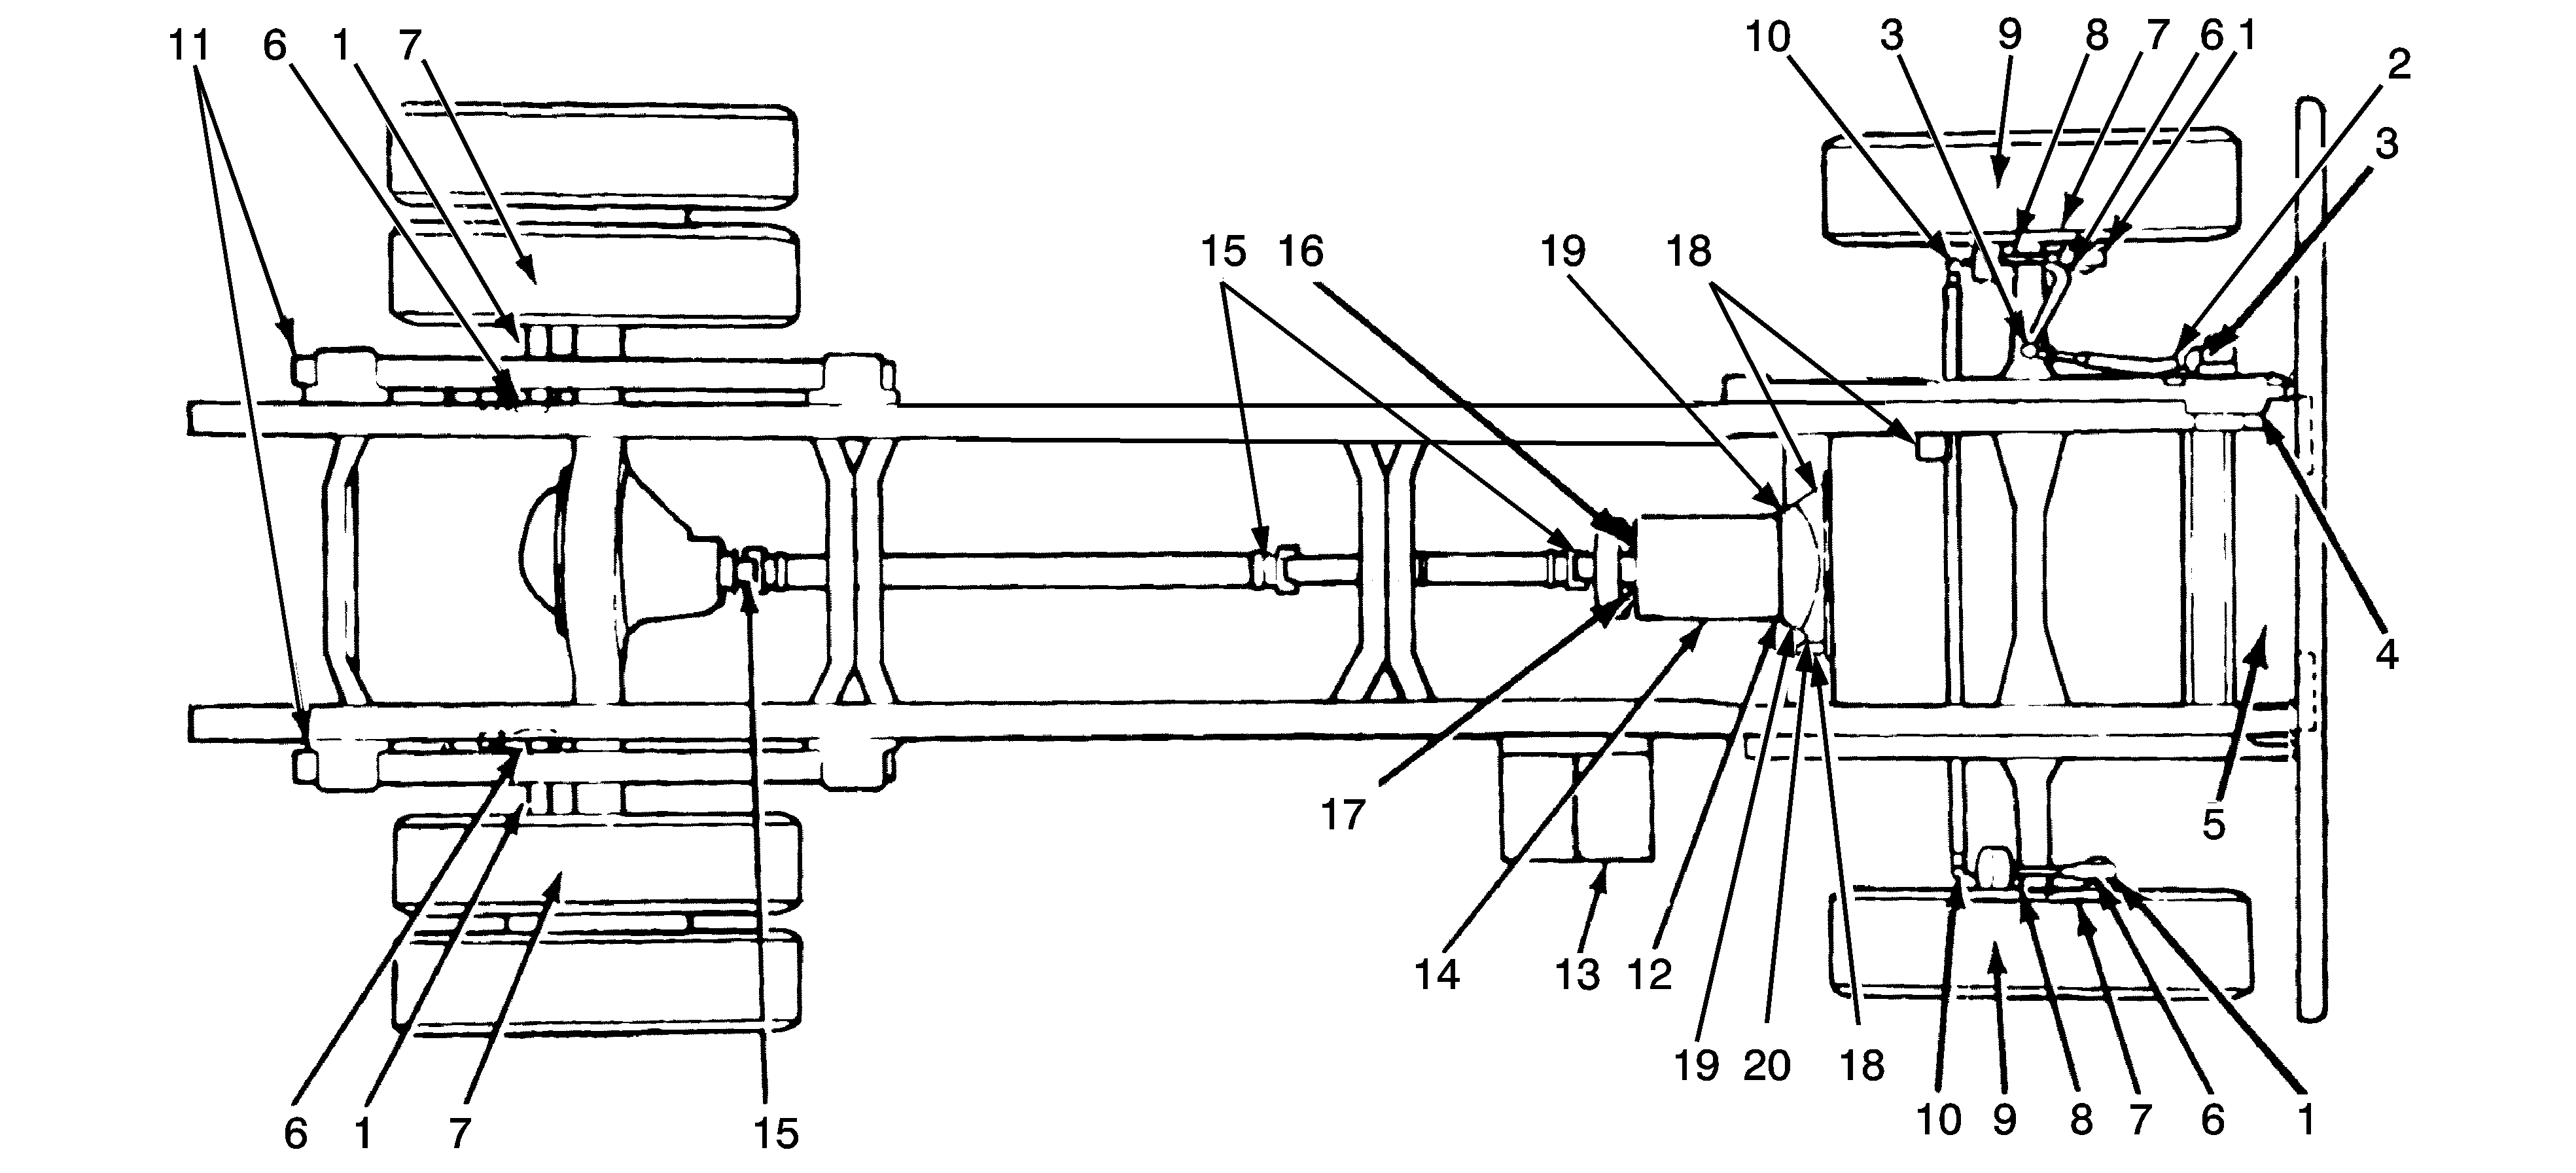
Item Number | Item | Remarks |
|---|---|---|
1 | Brake Camshaft** | One fitting each (apply sparingly). |
2 | Steering Column Slip Joint* | One fitting. |
3 | Steering Drag Link Ends | One fitting each end. |
4 | Pivot Points and Hinges | Apply chassis lubricant. |
5 | Pivot Points and Hinges | Apply chassis lubricant. |
6 | Slack Adjuster** | One fitting. |
7 | Brake Cam Roller Pins at interface of pin and shoe** | Apply engine oil. |
8 | Front Steering Knuckles | One fitting each side, lower bushing. (Hand-operated grease gun only.) Hand-pack upper bearing. |
9 | Front Wheel Bearings | Hand-pack or lubricate. |
10 | Steering Tie Rod Ends | One fitting each end. |
11 | Spring Slip Pads* (Multi-Leaf Only) | Apply chassis lubricant. |
12 | Clutch Release Bearing* | Cup or fitting. |
13 | Battery Terminal (except "ST" type) | Keep coated with petroleum jelly. |
14 | Transmission | Fill to level of filler plug. |
15 | Propshaft U-Joints | Lubricate with GM Part No. 1051344 Wheel Bearing Lubricant. |
16 | Parking Brake Clevis Pin$ | Apply chassis lubricant. |
17 | Parking Brake Lever Pivot*, $ | Apply chassis lubricant. |
18 | Clutch Release Cross Shaft, Master Cylinder$ | Apply chassis lubricant, fill to 1/4 inch (6 mm) below opening. |
19 | Release Bearing, Clutch Cross Shaft | Two fittings, apply chassis lubricant. |
20 | Clutch Release Fork | Two fittings. |
* Applies to some vehicles. ** Applies to air brakes only. $ Applies to hydraulic brakes only. | ||
Tandem Axle Models
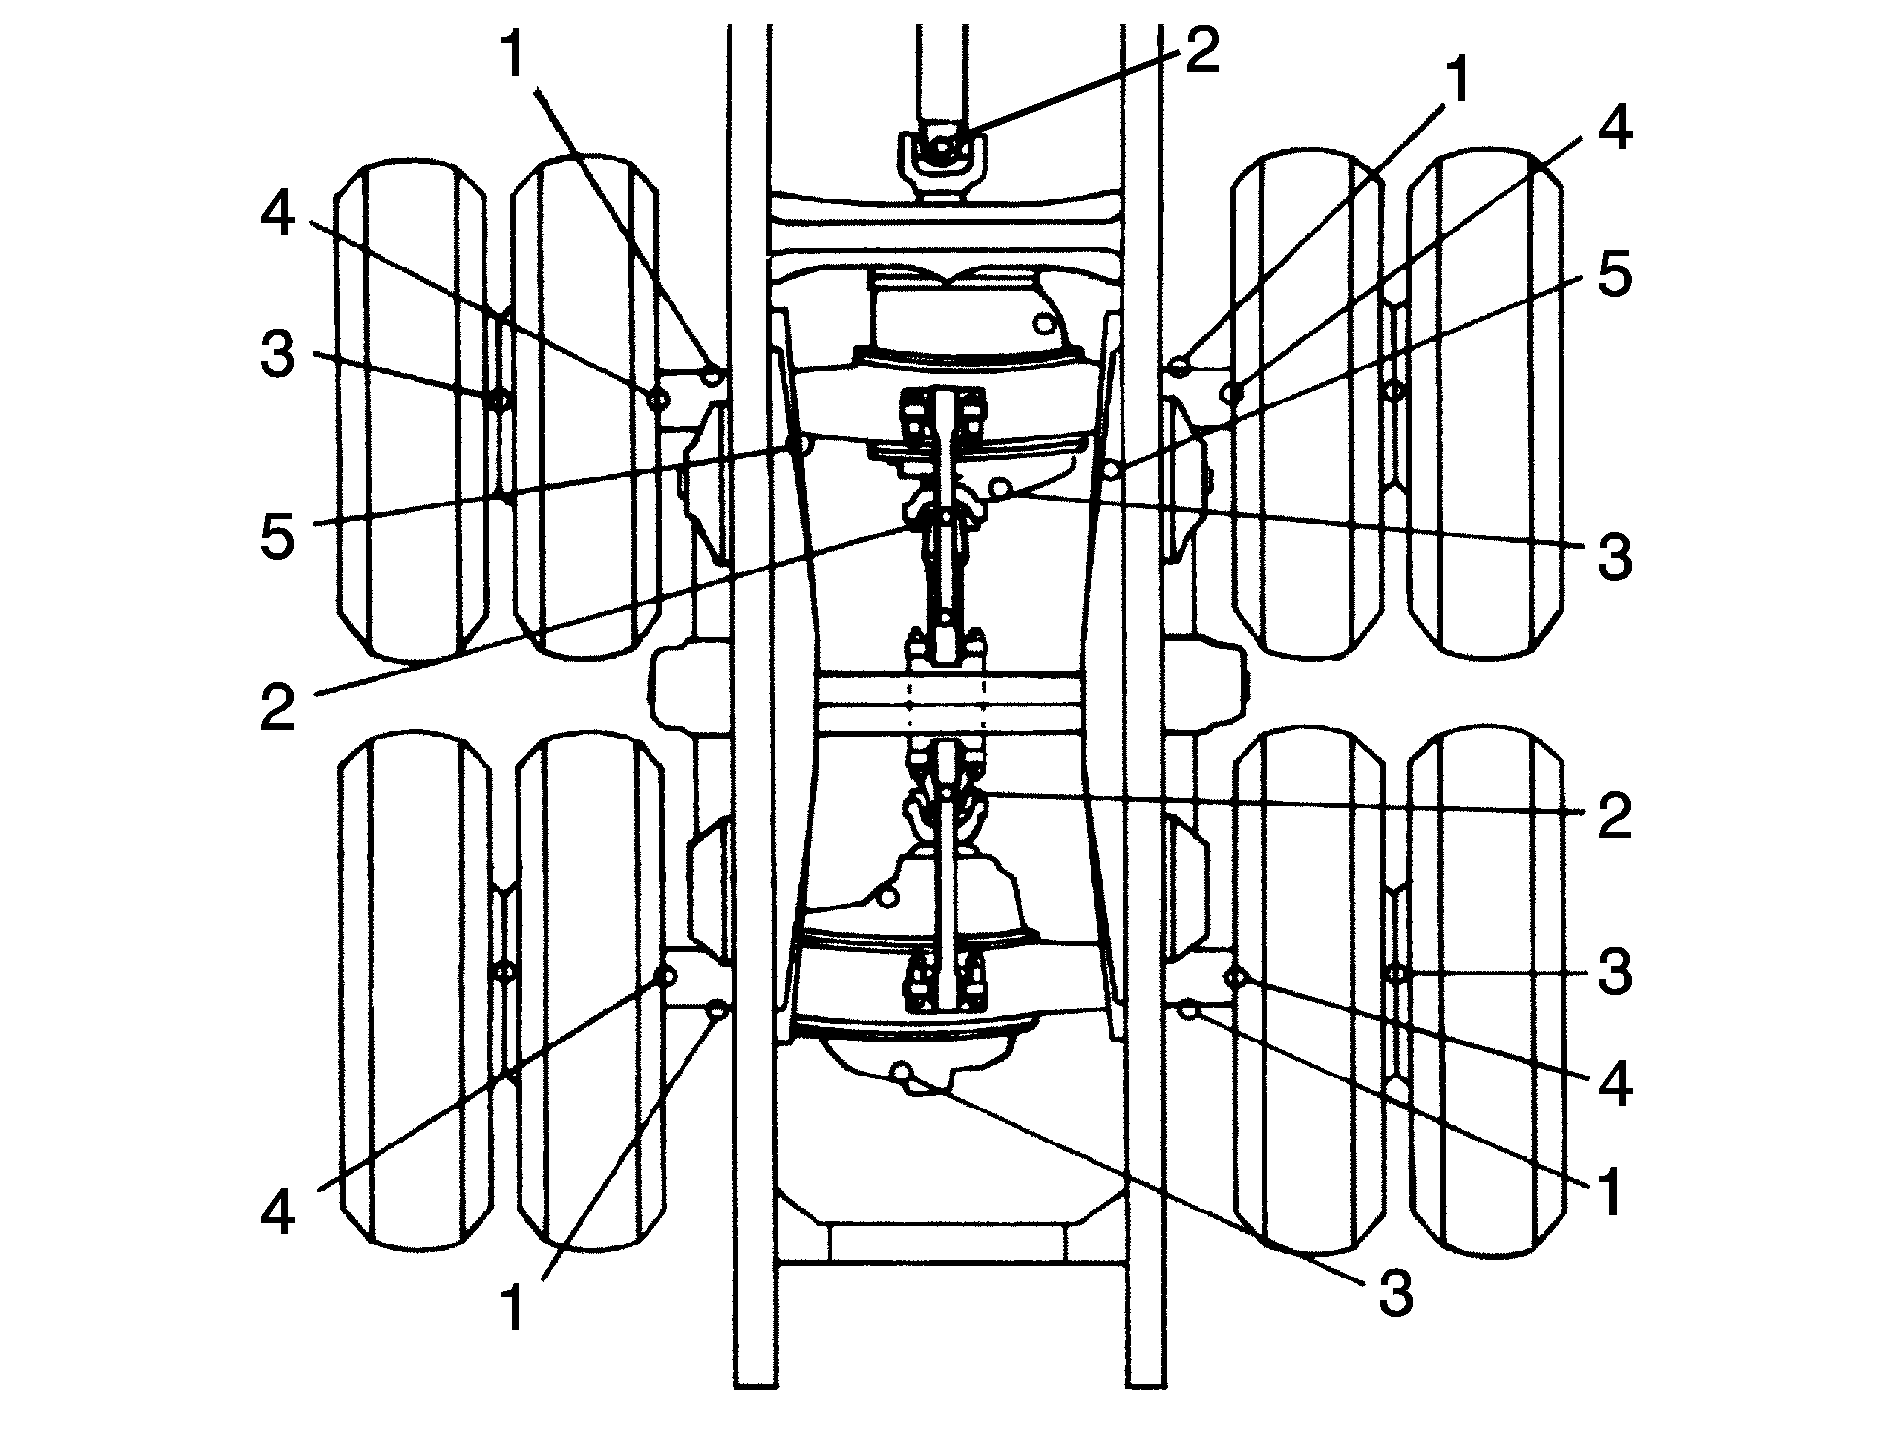
Item Number | Item | Remarks |
|---|---|---|
1 | Brake Camshafts | One fitting each. |
2 | Propshaft U-Joint | One fitting each joint. Lubricate with GM Part No. 1051344, Wheel Bearing Lubricant |
3 | Rear Axles | Fill to level of filler plug. |
4 | Brake Shoe Roller Pins | Apply engine oil at pin to shoe joint only. |
5 | Rear Spring Pin | One fitting each side. |
