You will need a solvent tank large enough to hold the larger engine parts,
along with various bristle brushes and a gasket scraper. A source of compressed
air will be helpful in the cleaning operations.
Precision measuring tools will be required for the inspection procedure. These
include: micrometers, cylinder bore gage, feeler gage, dial indicators sets, etc.
It is very important that the inspection work be performed with the proper methods
and tools. The rebuilt engine cannot be expected to perform properly, if any of
the parts are worn beyond their serviceable limits.
The cylinder block needs to be inspected thoroughly to determine if it is reusable.
Before the cylinder block inspection can be performed, it should be stripped of
all coolant plugs and oil gallery plugs. To prevent dirt from being stuck into the
oil bypass valves, they must be removed before the cylinder block can be cleaned.
- Remove the oil pipe.
- Remove the oil filter assembly.
- Remove the cup plugs and the block heater (if equipped).
- Remove the oil gallery plugs (if equipped).
Cylinder Block Cleaning
- Place the block into the approved cleaning solvent.
Important: Use only the proper cleaning solvent when
removing old gasket material.
- Clean the old gasket material from the sealing surfaces.
- Using compressed air, blow through all oil passages. Wear protective
safety glasses and gloves.
- Clean scale deposits from the coolant passages.
- Clean the crankshaft.
Cylinder Block Inspection
- Inspect the cylinder block for cracks and wear.
- Inspect the coolant jackets.
- Inspect the crankshaft bearing webs.
- Inspect the engine mounting bosses.
- Inspect the thrust washer mating surfaces on the cylinder block and lower
crankcase.

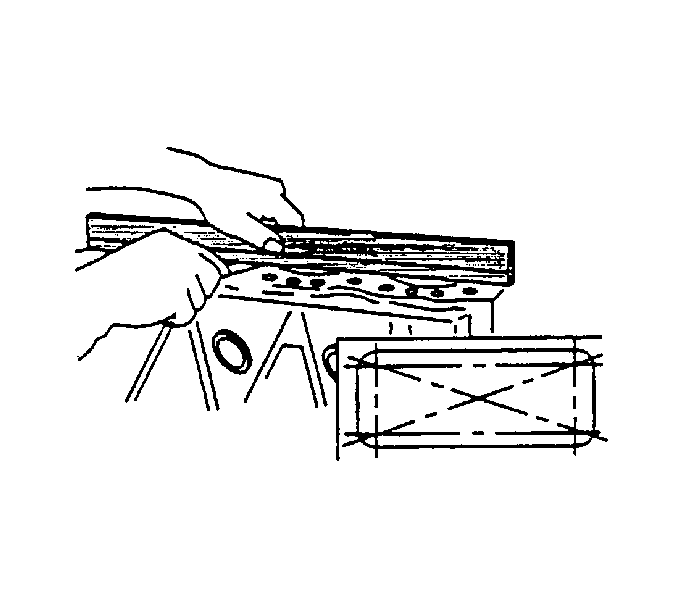
- Measure the cylinder block for warpage. Use a straight edge and a feeler gage
to measure the four sides and the two diagonals of the cylinder block. If the measured
values exceed the 0.2 mm (0.008 in), the cylinder block must be replaced.
- Measure the crankshaft bearing bores (cylinder block and lower crankcase).
- Use an inside micrometer and measure the crankshaft bearing inside diameter.
Subtract the crankshaft main bearing journal diameter from the crankshaft
main bearing inside diameter to obtain the proper clearances
| • | No. 4 crankshaft main bearing journal |
| - | Production: 0.093-0.124 mm (0.0037-0.0049 in) |
| - | Service Limit: 0.14 mm (0.0055 in) |
| • | All other crankshaft main bearing journals: |
| - | Production: 0.063-0.094 mm (0.0025-0.0037 in) |
| - | Service Limit: 0.14 mm (0.0055 in) |

