Starter Replacement L18
Removal Procedure
- Disconnect the negative battery cable. Refer to Battery Negative Cable Disconnection and Connection.
- Raise and suitably support the vehicle with safety stands. Refer to Lifting and Jacking the Vehicle.
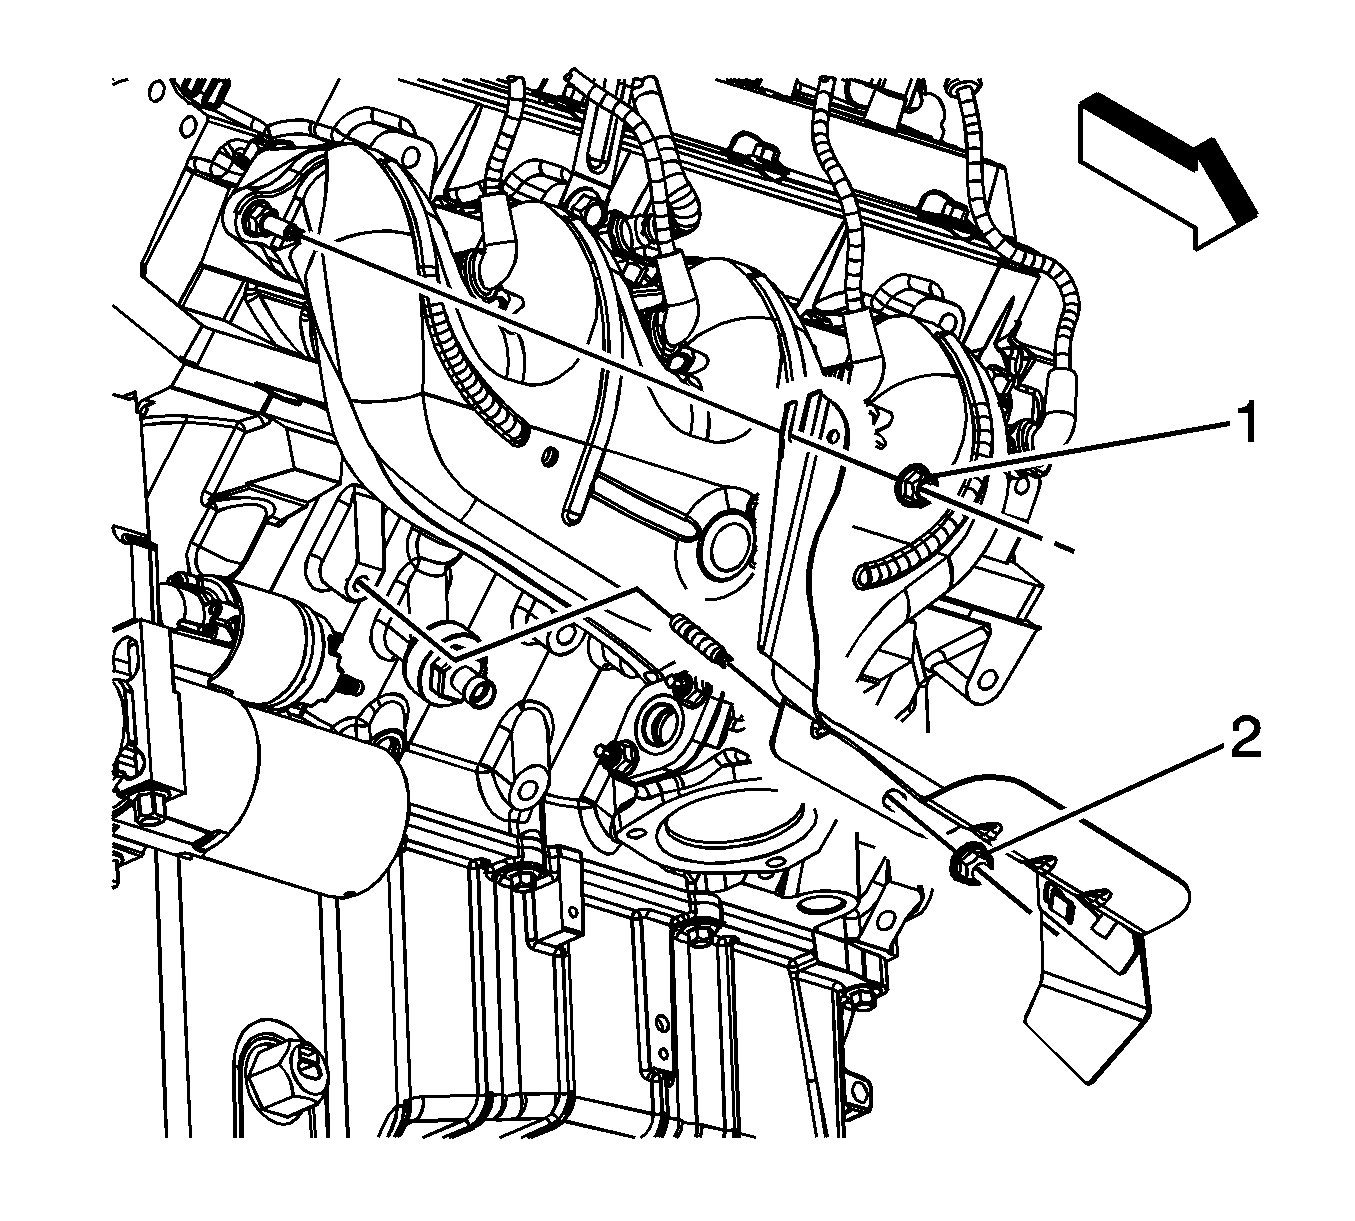
- Remove the starter heat shield and extension shield (C42 only) nuts (1, 2) and shields.
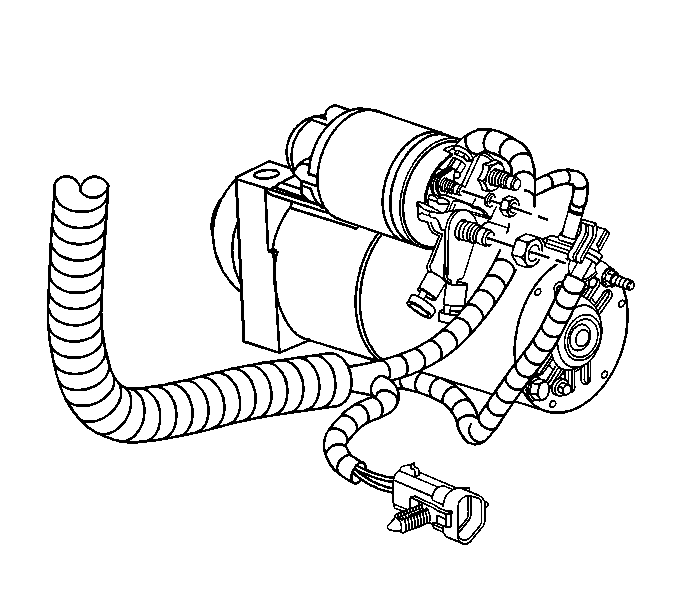
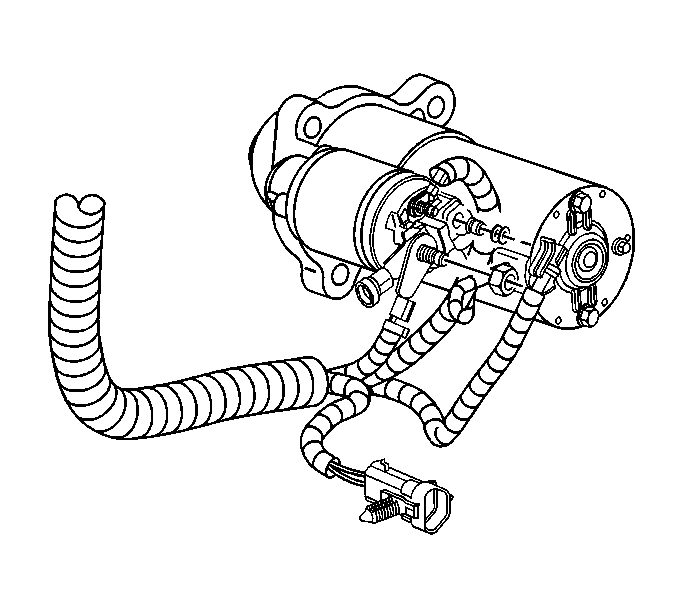
- Remove the starter motor solenoid lead nuts.
- If equipped with a automatic transmission, remove the positive cable and engine harness leads from the starter solenoid.
- If equipped with a manual transmission, remove the positive cable and engine harness lead from the starter solenoid.
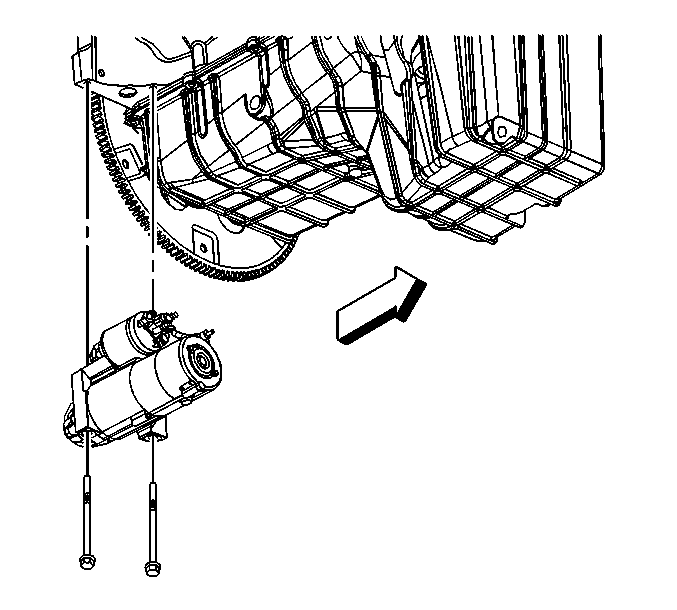
- If equipped with a automatic transmission, remove the starter motor bolts.
- If equipped with a manual transmission, remove the starter motor bolts.
- Remove the starter motor.
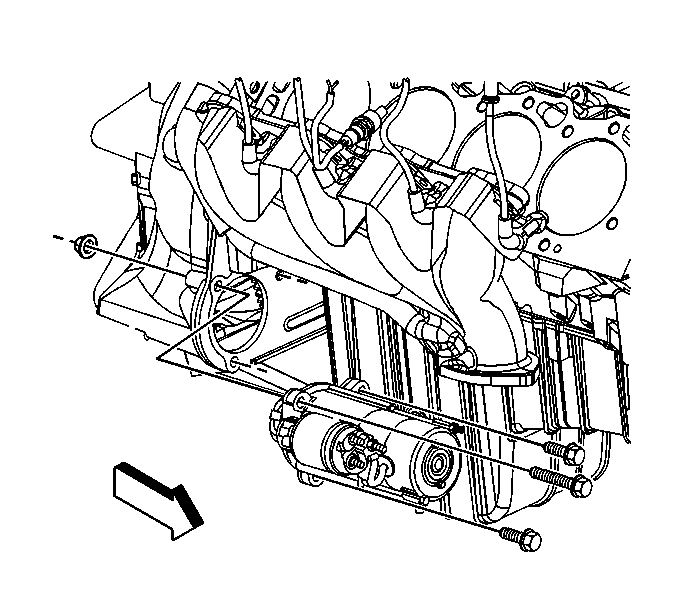
Installation Procedure
- Install the starter motor.
- If equipped with a manual transmission, install the starter motor bolts.
- If equipped with a automatic transmission, install the starter motor bolts.
- If equipped with a manual transmission, install the positive cable and engine harness lead to the starter solenoid.
- If equipped with a automatic transmission, install the positive cable and engine harness leads to the starter solenoid.
- Install the starter motor solenoid lead nuts.
- Install the starter heat shield and extension shield (C42) to the starter and engine.
- Lower the vehicle.
- Connect the negative battery cable. Refer to Battery Negative Cable Disconnection and Connection.

Caution: Refer to Fastener Caution in the Preface section.
Tighten
Tighten the starter motor bolts to 67 N·m (49 lb ft).

Tighten
Tighten the starter motor bolts to 50 N·m (37 lb ft).


Tighten
| • | Tighten the positive cable nut to 10 N·m (89 lb in). |
| • | Tighten the harness lead nut to 2 N·m (18 lb in). |

Tighten
| • | Tighten the shield nuts (1, 2) to 3 N·m (35 lb in). |
| • | Tighten the harness lead nuts to 5 N·m (44 lb in). |
Starter Replacement LG4
Removal Procedure
- Disconnect the negative battery cable. Refer to Battery Negative Cable Disconnection and Connection.
- Disconnect the electrical connectors from the starter motor.
- Remove the nuts and the washers that attach the starter motor to the engine.
- Remove the starter motor from the engine.
- Clean the following components:
- Inspect the pinion gear teeth for wear and damage.
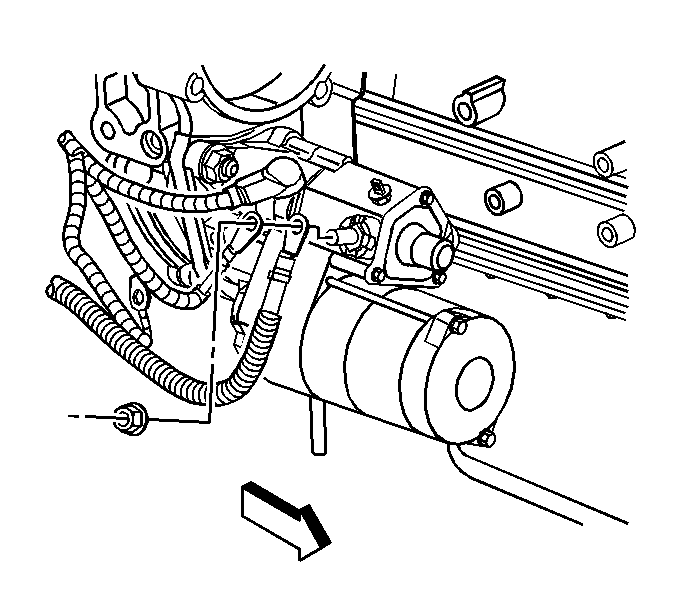
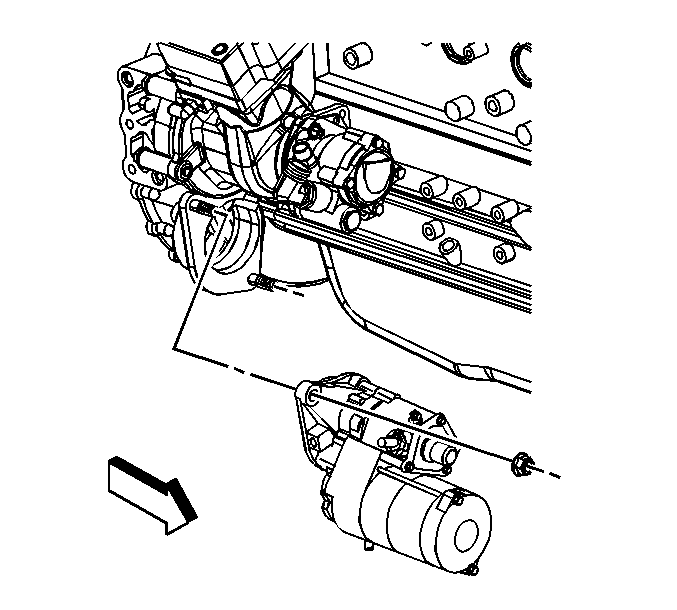
| • | The starter motor terminals |
| • | The electrical connectors |
Installation Procedure
- Connect the starter motor to the engine.
- Install the nuts and the washers that attach the starter motor to the engine.
- Connect the electrical connectors to the starter motor.
- Hold the hex-shaped base of the stud while tightening the positive battery cable nut.
- Tighten the positive battery cable nut to 21 N·m (16 lb ft).
- Tighten the solenoid bolt to 3.4 N·m (30 lb in).
- Connect the negative battery cable. Refer to Battery Negative Cable Disconnection and Connection.

Caution: Refer to Fastener Caution in the Preface section.

Tighten
Tighten the starter motor mounting nuts to 82 N·m (60 lb ft).
Tighten
Starter Replacement LG5
Removal Procedure
- Disconnect the negative battery cable. Refer to Battery Negative Cable Disconnection and Connection.
- Remove the starter ground cable from the starter. Refer to Battery Negative Cable Replacement.
- Remove the electrical connectors from the starter motor.
- Remove the starter motor bolts.
- Remove the starter motor from the engine.
- Clean the following components:
- Inspect the starter ring gear teeth for wear and damage.
Warning: Refer to Battery Disconnect Warning in the Preface section.
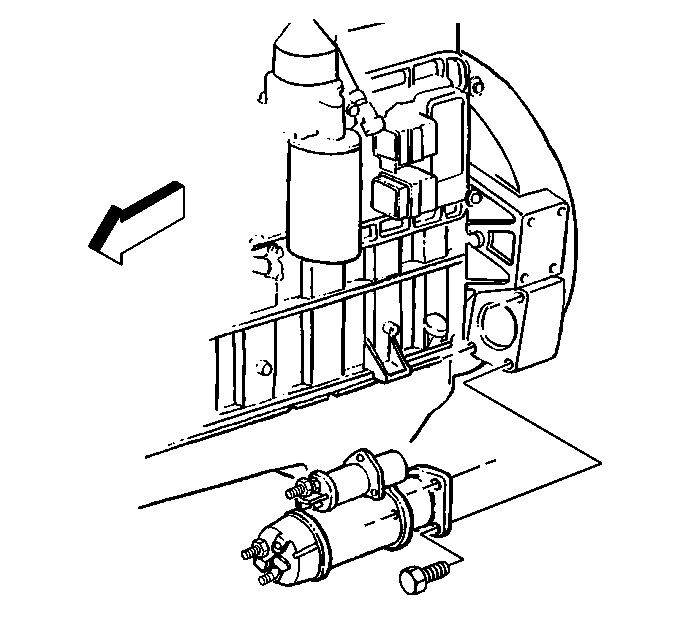
| • | The starter motor solenoid terminals |
| • | The electrical connector terminals |
Installation Procedure
- Install the starter motor to the engine.
- Install the starter motor bolts.
- Install the electrical connectors to the starter motor.
- Install the starter ground cable. Refer to Battery Negative Cable Replacement.
- Connect the negative battery cable. Refer to Battery Negative Cable Disconnection and Connection.

Caution: Refer to Fastener Caution in the Preface section.
Tighten
Tighten the starter motor bolts to 70 N·m (52 lb ft).
Tighten
| • | Tighten the battery positive cable nut to 30 N·m (22 lb ft). |
| • | Tighten the starter solenoid nut to 3 N·m (27 lb in). |
Starter Replacement LLY/LMM
Removal Procedure
Warning: Refer to Battery Disconnect Warning in the Preface section.
- Disconnect the negative battery cable. Refer to Battery Negative Cable Disconnection and Connection.
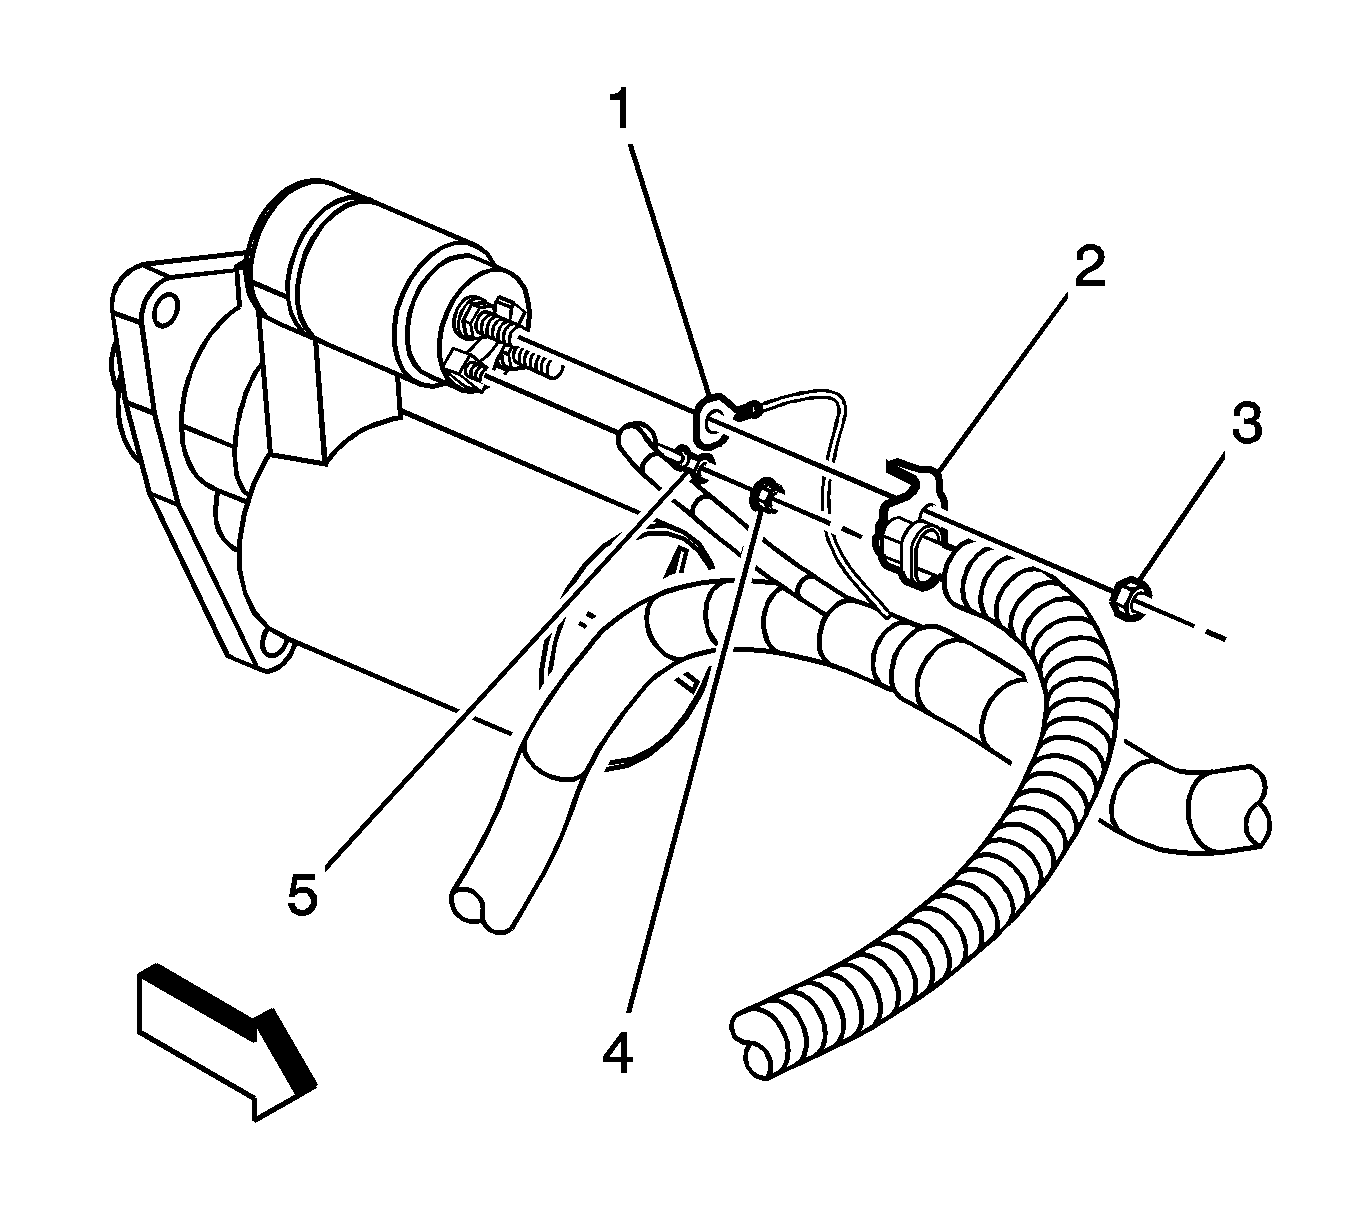
- Remove the starter solenoid BAT terminal nut (3) from the starter.
- Remove the positive battery cable lead (2) and the engine wiring harness lead (1) from the starter.
- Remove the starter solenoid S terminal nut (4) from the starter.
- Remove the engine wiring harness lead (5) from the starter.
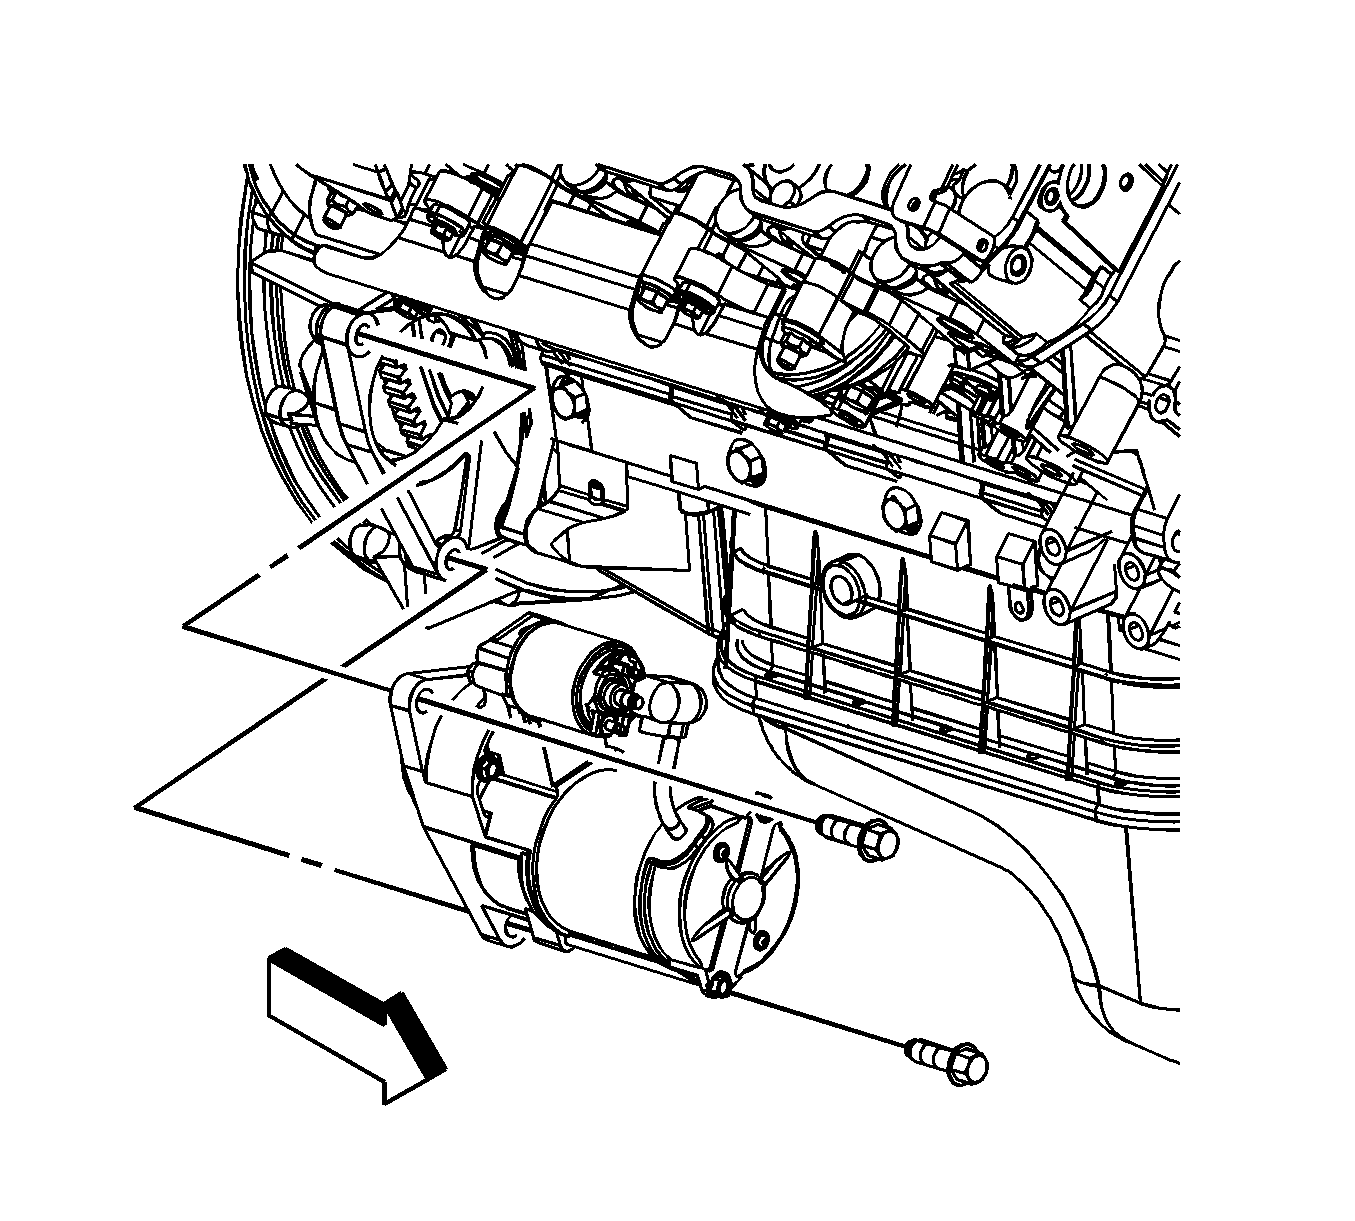
- Remove the starter motor bolts.
- Remove the starter motor.
Installation Procedure
- Install the starter motor.
- Install the starter motor bolts.
- Install the engine wiring harness lead (5) to the starter.
- Install the starter solenoid S terminal nut (4) to the starter.
- Install the engine wiring harness lead (1) and the positive battery cable lead (2) to the starter.
- Install the starter solenoid BAT terminal nut (3) to the starter.
- Connect the negative battery cable. Refer to Battery Negative Cable Disconnection and Connection.

Caution: Refer to Fastener Caution in the Preface section.
Tighten
Tighten the bolts to 85 N·m (62 lb ft).

Tighten
Tighten the nut to 3.3 N·m (29 lb in).
Tighten
Tighten the nut to 9 N·m (80 lb in).
