For 1990-2009 cars only
Removal Procedure
- Block the wheels.
- Release the parking brake.
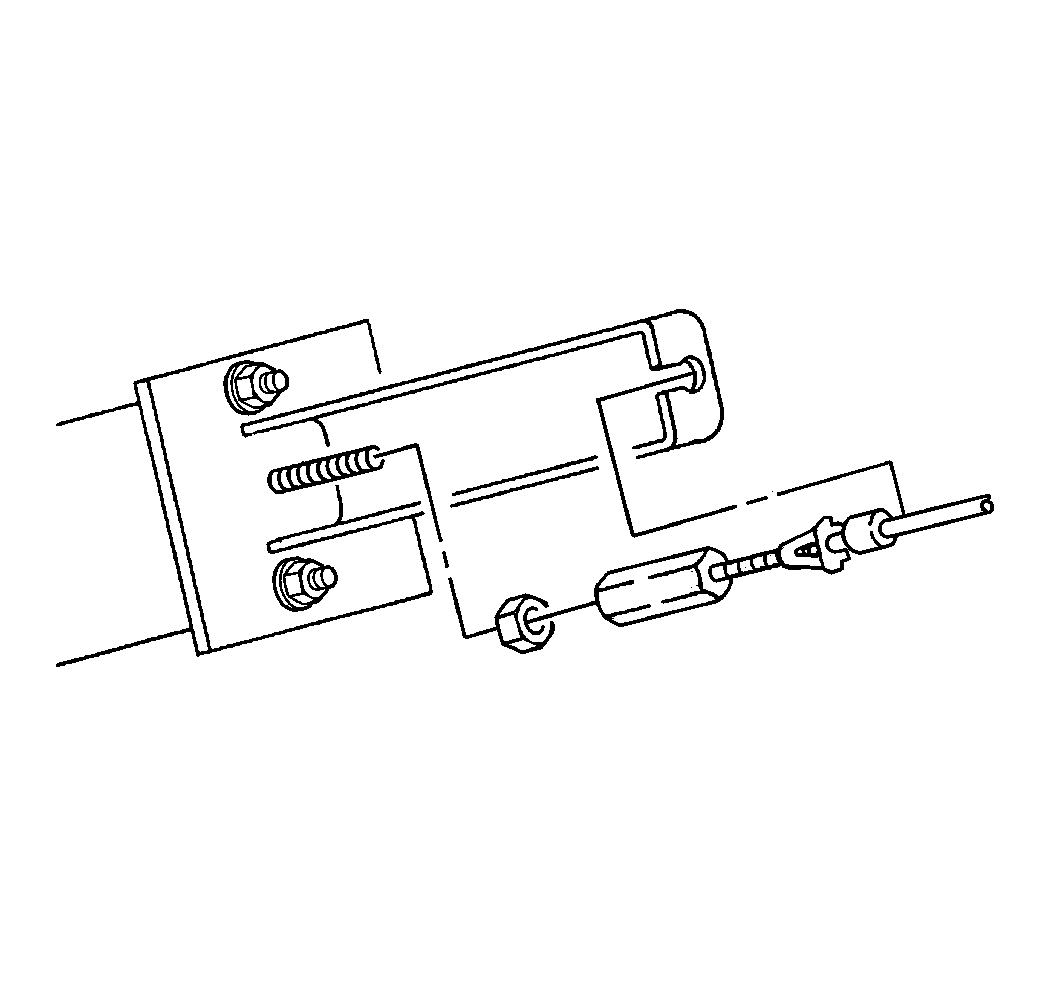
- Remove the jam nut on the actuator end of the cable at the 2-piece fitting.
- Remove the end fitting.
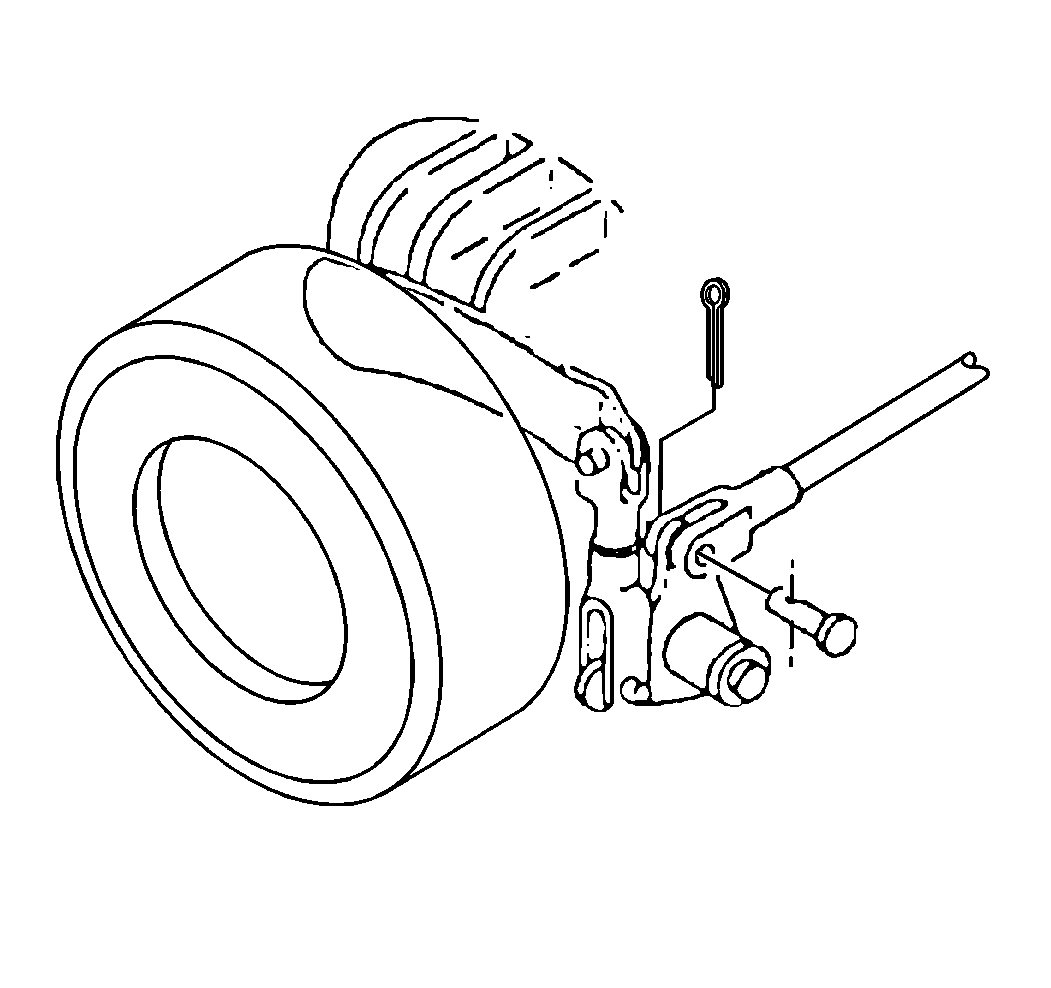
- Remove the cotter pin.
- Remove the cable clevis pin.
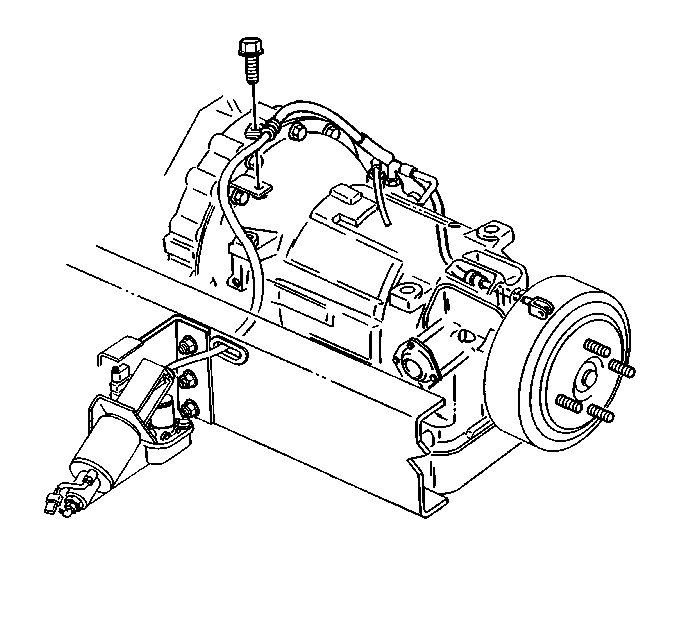
- Remove the fastener from the transmission bracket clip.
- Remove the fastener from the transmission housing bracket.
- Remove the fastener from the frame bracket.
- Remove the strap.
- Remove the cable assembly.


Installation Procedure
- Install the new cable assembly.
- Install the strap.
- Install the fastener to the frame bracket.
- Install the fastener to the transmission housing bracket.
- Install the fastener from the transmission bracket clip.
- Install the small and the large ends of the two-piece cable fitting at the actuator.
- Ensure that the small fitting bottoms at both the actuator and the large half of the two-piece fitting.
- Install the jam nut to the 2-piece fitting.
- Adjust the park brake lever. Refer to Parking Brake Adjustment.
- Remove the wheel blocks.

Caution: Refer to Fastener Caution in the Preface section.

Tighten
Tighten the fastener bracket to 50 N·m (37 lb ft).
Tighten
Tighten the fastener bracket to 35 N·m (26 lb ft).
Caution: Make sure that the clip has the bolt hole facing forward. If the clip is out of position, it may cause a binding condition in the parking brake released position.
Tighten
Tighten the fastener 64 N·m (47 lb ft).

Tighten
Torque the two pieces of the fitting together to 54 N·m (40 lb ft).
Tighten
Tighten the jam nut to 45 N·m (33 lb ft).
