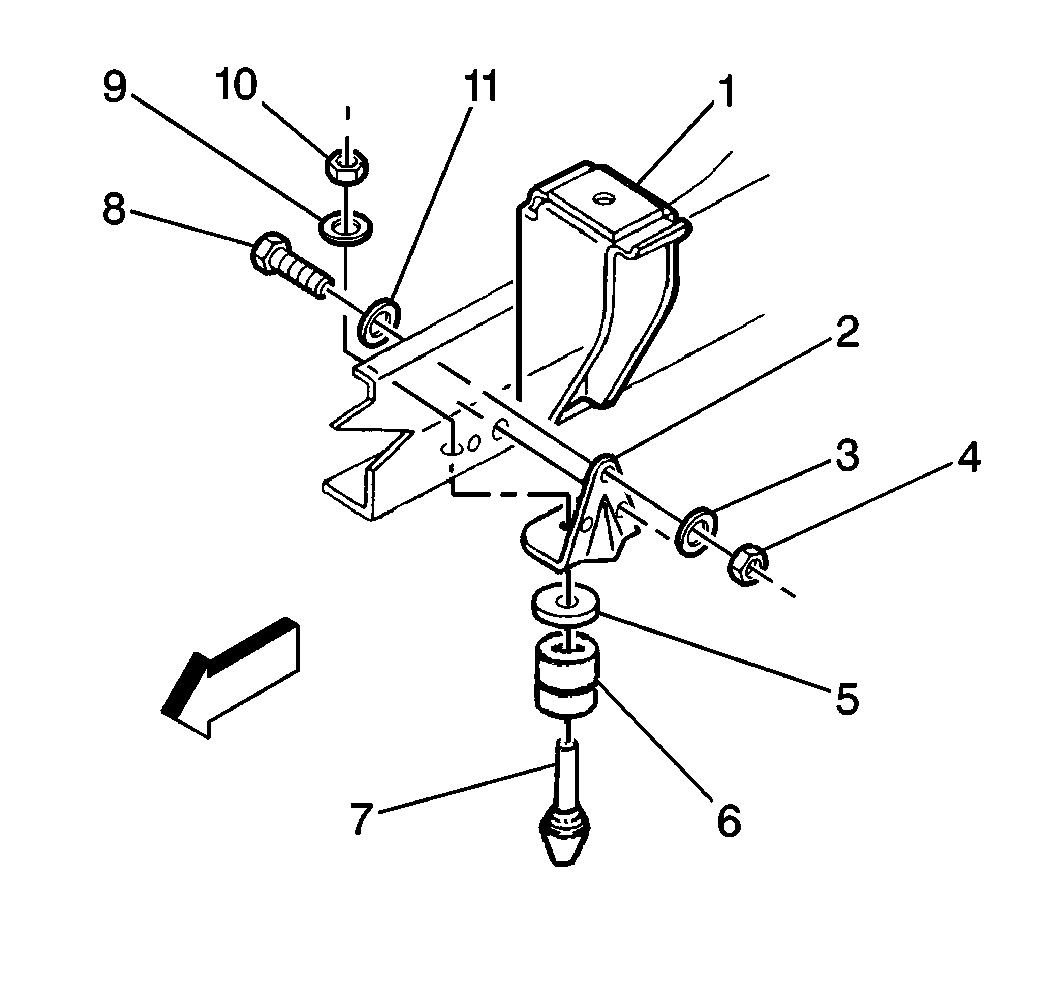
Removal Procedure
- Remove the heat shield that covers the bumper bracket bolts by performing the following steps:
| 1.1. | Remove the 2 bolts and nuts from the top of the shield. |
| 1.2. | Remove the bolt and nut from the bottom of the shield. |

- Remove the nut (10) and the washer (9).
- Remove the bumper stop (7) and the bumper (6).
- Remove the spacer (5), if equipped.
- Remove the following components:
- Remove the bumper bracket (2) from the frame (1).
Installation Procedure

- Install the bumper bracket (2) to the frame (1).
- Install the following components:
- Install the bumper stop (7) through the bumper (6).
- Install the spacer (5) on the bumper, if equipped.
- Install the bumper stop through the bracket (2) and the frame (1).
Caution: Refer to Fastener Caution in the Preface section.
- Install the washer (9) and the nut (10).
Tighten
| • | Tighten the spring bumper mounting nut (4) to 75 N·m (55 lb ft). |
| • | Tighten the bumper stop nut (10) to 50 N·m (37 lb ft). |


