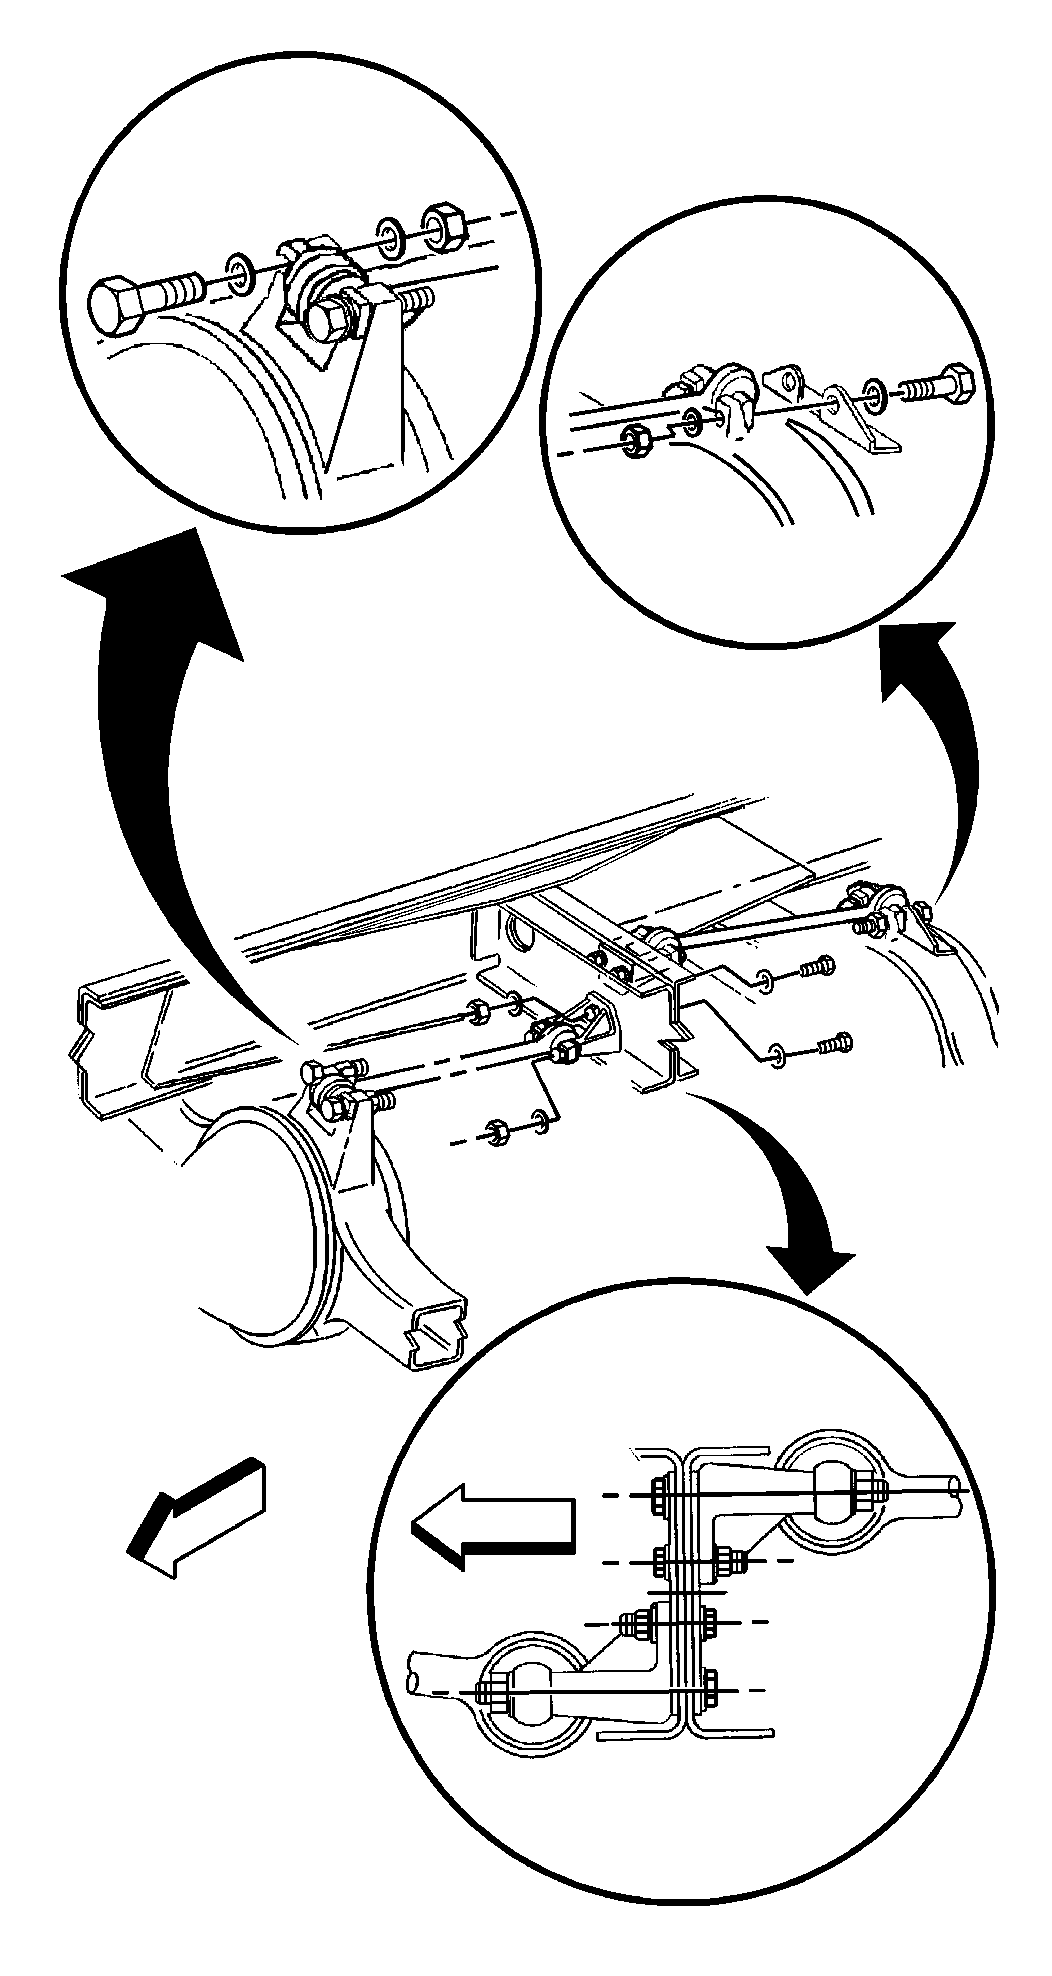
Torque Rod Replacement Longitudinal
Removal Procedure
- Set the parking brake.
- Block the front and the rear wheels.
- Remove the following components from the torque mounting brackets and the axle bracket:
- Remove the torque rod.

Note: In order to maintain proper driveline alignment, some models may use spacers or shims between the torque rod and torque rod mounting bracket, or between the mounting bracket and the frame crossmember. Note the number and position of spacers or shims for proper installation.
| • | The nuts |
| • | The washers |
| • | The bolts |
Installation Procedure
- Install the torque rod to frame mounting brackets.
- Install the following components:
- Install the torque rod to the axle mounting bracket.
- Install the following components:

Note: Use the same number of spacers or shims as previously used in order to ensure original driveline alignment.
Caution: Refer to Fastener Caution in the Preface section.
| • | The torque rod bolt |
| • | The washers |
| • | The nuts |
Tighten
Tighten the torque rod nut to 85 N·m (63 lb ft).
| • | The torque rod bolts |
| • | The washers |
| • | The nuts |
Tighten
Tighten the torque rod nut to 175 N·m (130 lb ft).
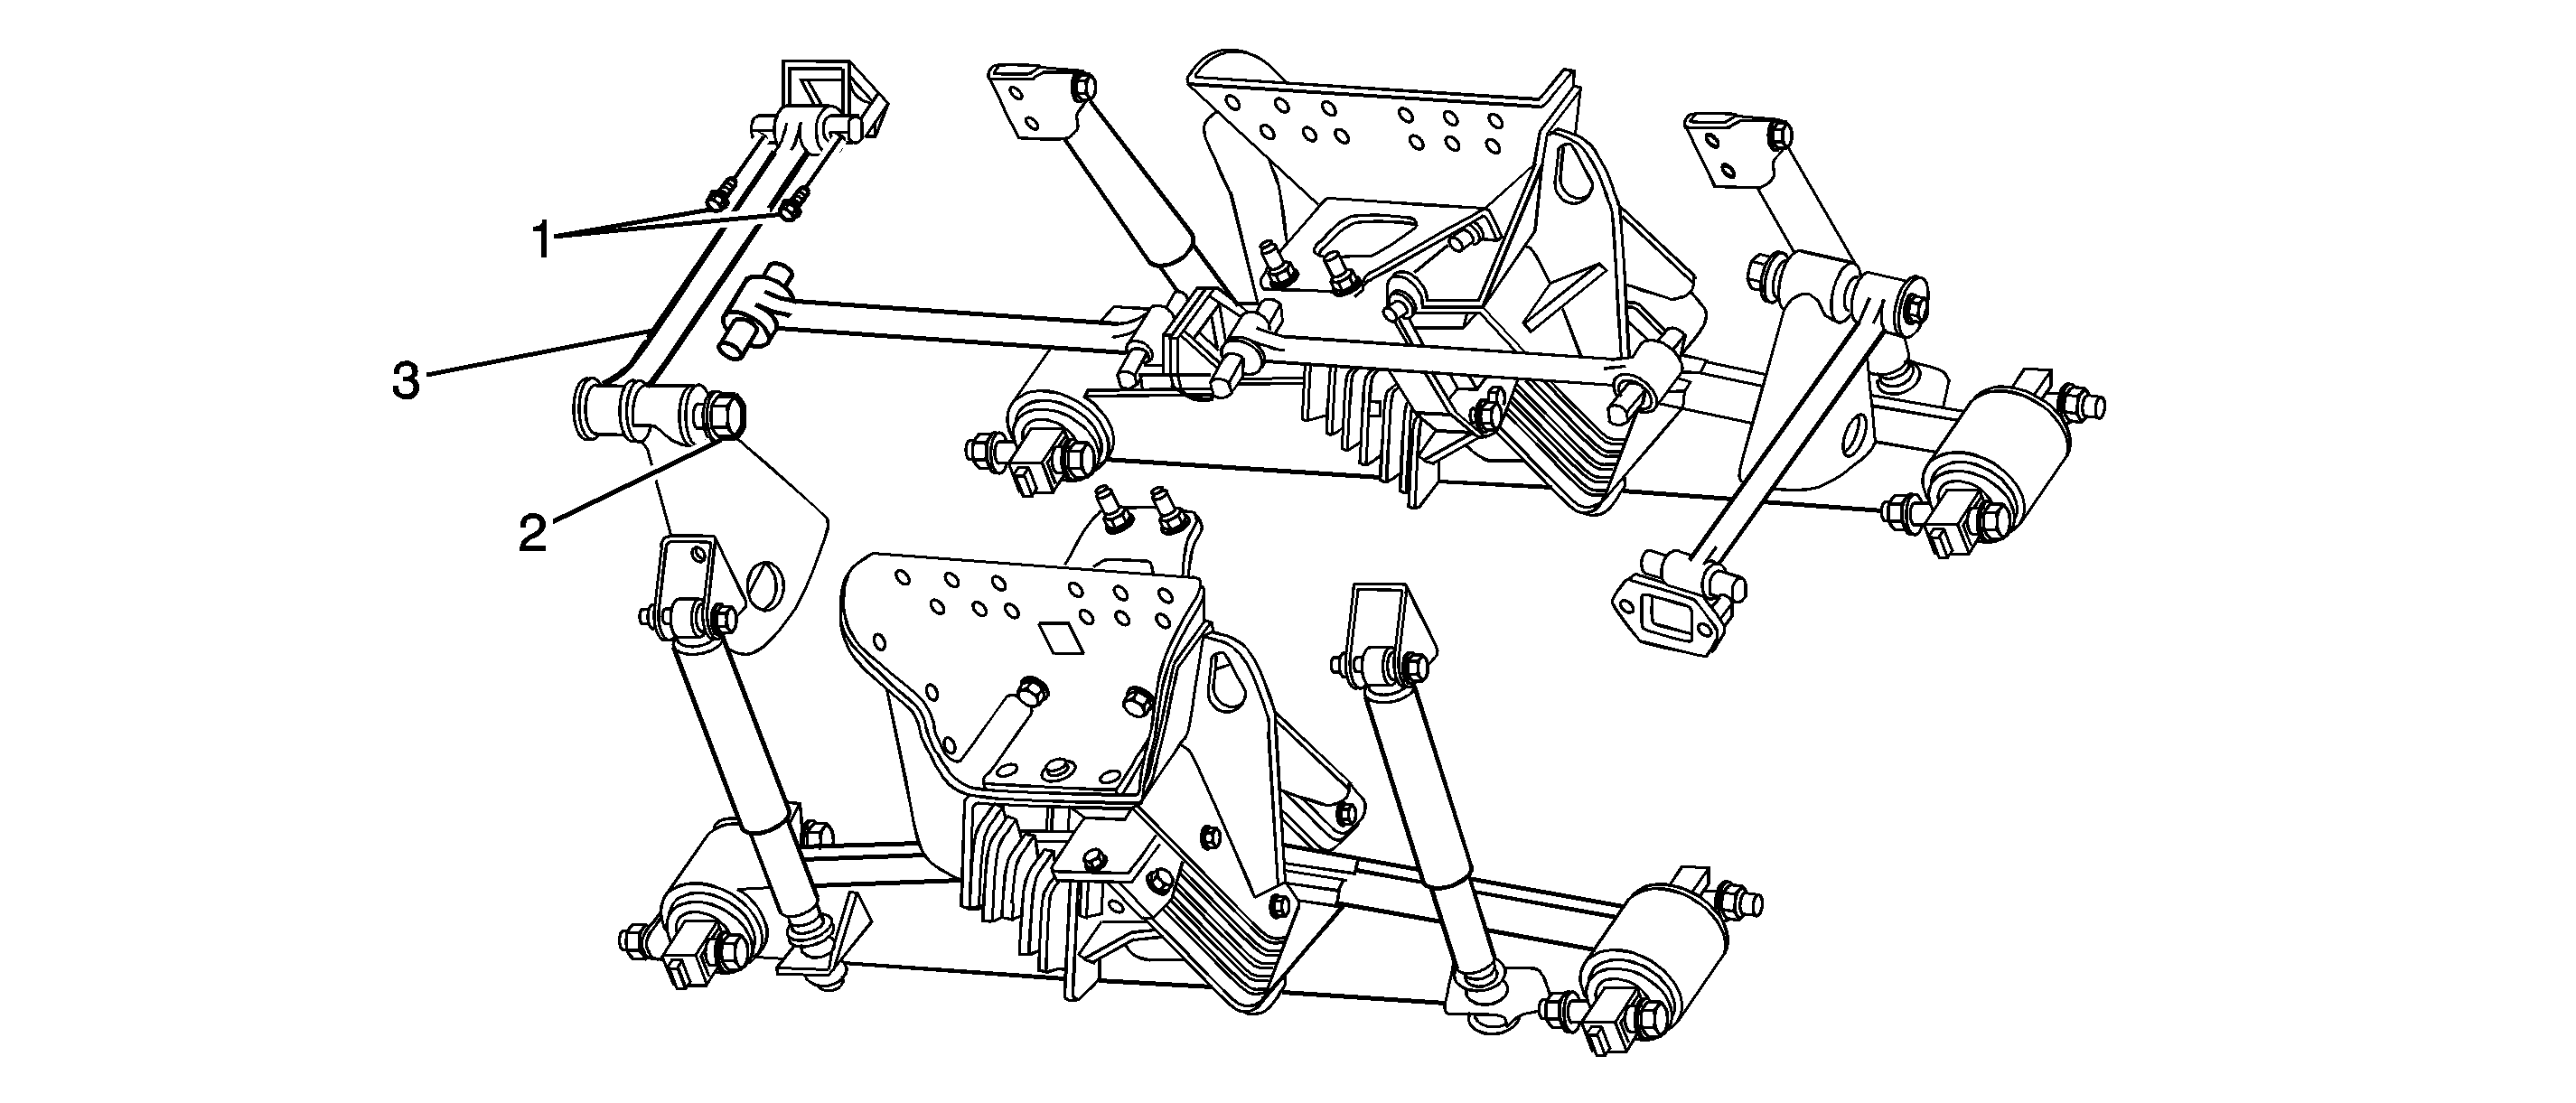
Torque Rod Replacement Transverse

Callout | Component Name |
|---|---|
Preliminary ProcedureRaise and support the vehicle. Refer to Lifting and Jacking the Vehicle. | |
1 | Transverse Torque Rod Bolt (Qty: 2) Caution: Refer to Fastener Caution in the Preface section. Tip Tighten |
2 | Transverse Torque Rod Nut Tip Tighten |
3 | Transverse Torque Rod Tip |
