For 1990-2009 cars only
Sealed Beam Headlamp Replacement Single
Removal Procedure
- Turn OFF the headlamp switch.
- Open the hood.
- Disconnect the electrical connector from the headlamp.
- Close the hood.
- Remove the headlamp bezel. Refer to Headlamp Bezel Replacement.
- Remove the retaining ring screws from the headlamp.
- Remove the retaining ring from the headlamp.
- Remove the headlamp from the housing.
Note: Do not move the adjustment screws.
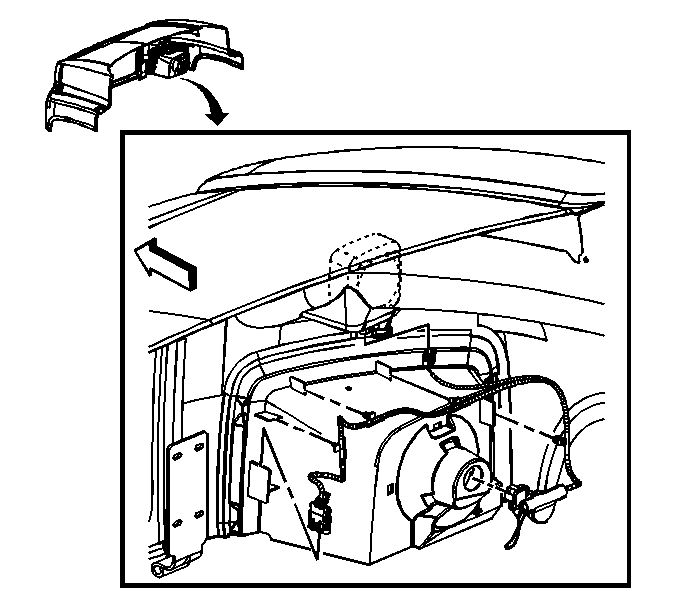
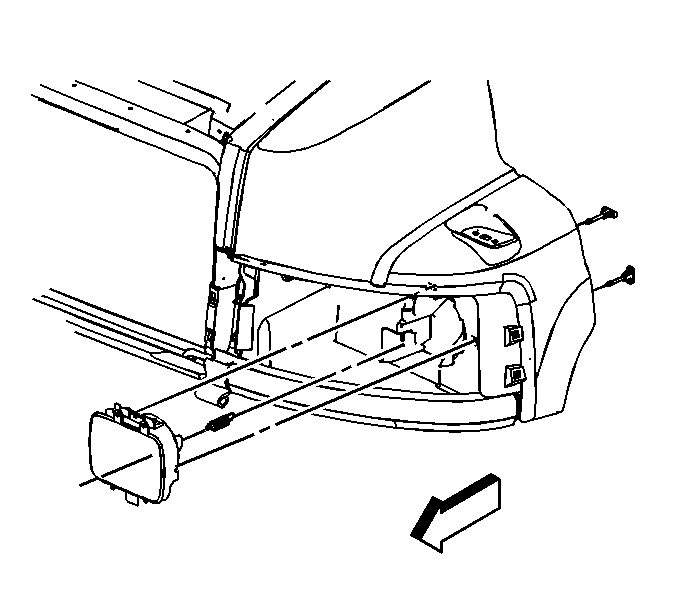
Installation Procedure
- Open the hood.
- Connect the electrical connector to the headlamp.
- Apply Lubricant GM P/N 12345996 (Canadian P/N 10953501) or equivalent to all 3 hood headlamp cavities (1).
- Close the hood.
- Install the headlamp to the housing.
- Install the retaining ring to the headlamp.
- Install the screws to the retaining ring.
- Install the headlamp bezel. Refer to Headlamp Bezel Replacement.

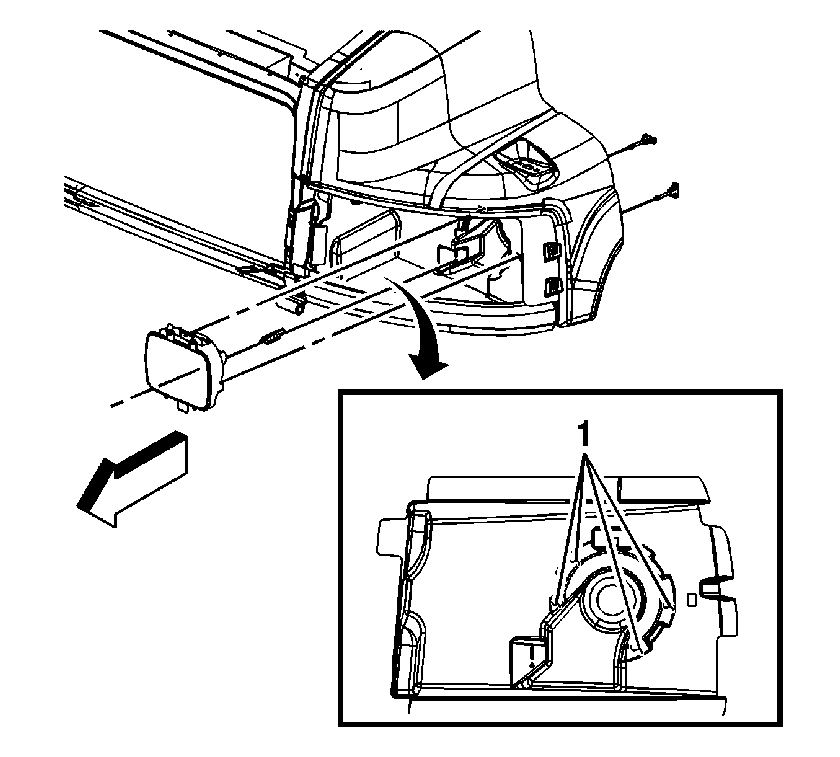
Caution: Refer to Fastener Caution in the Preface section.
Tighten
Tighten the screws to 1.2-1.6 N·m (10-14 lb in)
Sealed Beam Headlamp Replacement Dual
Removal Procedure
- Turn OFF the headlamp switch.
- Open the hood.
- Disconnect the electrical connector from the headlamp.
- Close the hood.
- Remove the headlamp bezel. Refer to Headlamp Bezel Replacement.
- Remove the retaining ring screws from the headlamp.
- Remove the retaining ring from the headlamp.
- Remove the headlamp from the housing.
Note: Do not move the adjustment screws.
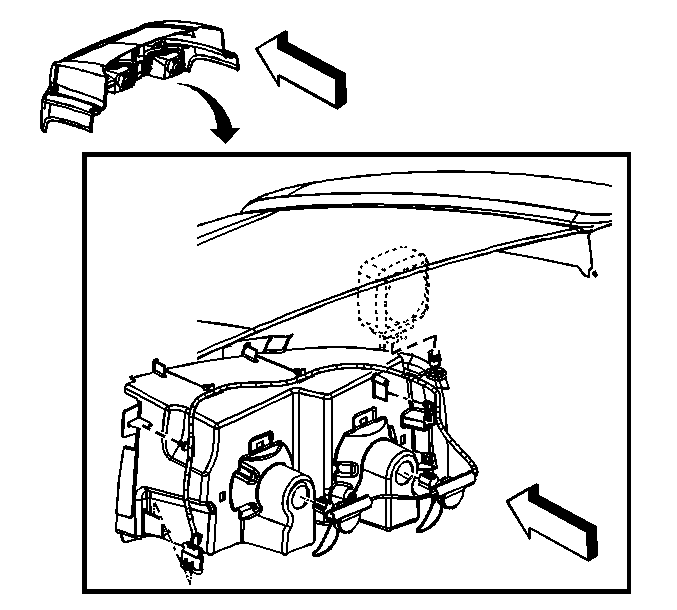
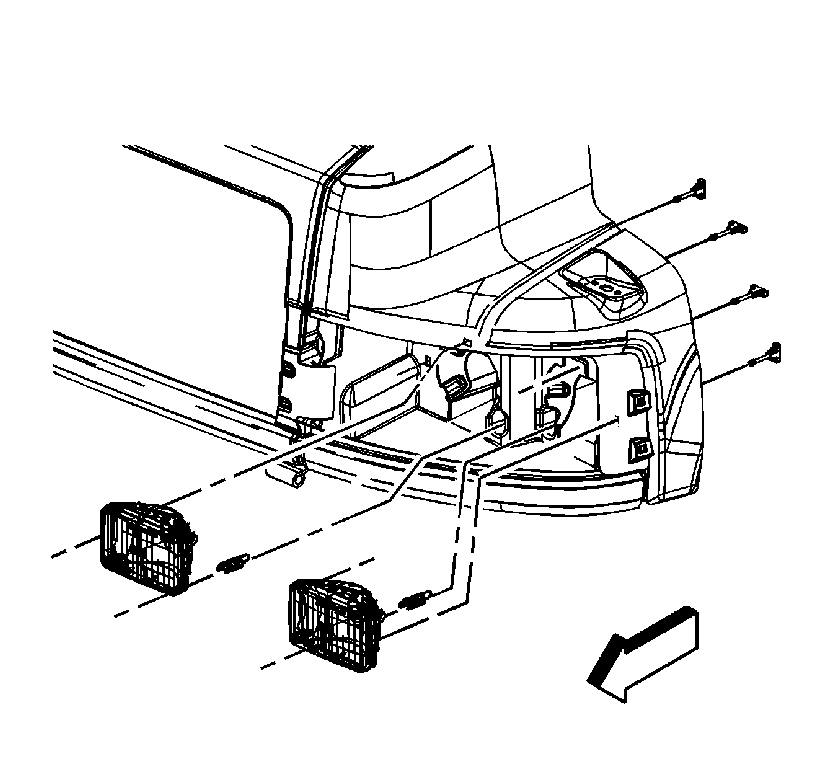
Installation Procedure
- Open the hood.
- Connect the electrical connector to the headlamp.
- Apply Lubricant GM P/N 12345996 (Canadian P/N 10953501) or equivalent to all 6 hood headlamp cavities (1).
- Close the hood.
- Install the retaining ring to the headlamp.
- Install the screws to the retaining ring.
- Install the headlamp to the housing.
- Install the headlamp bezel. Refer to Headlamp Bezel Replacement.

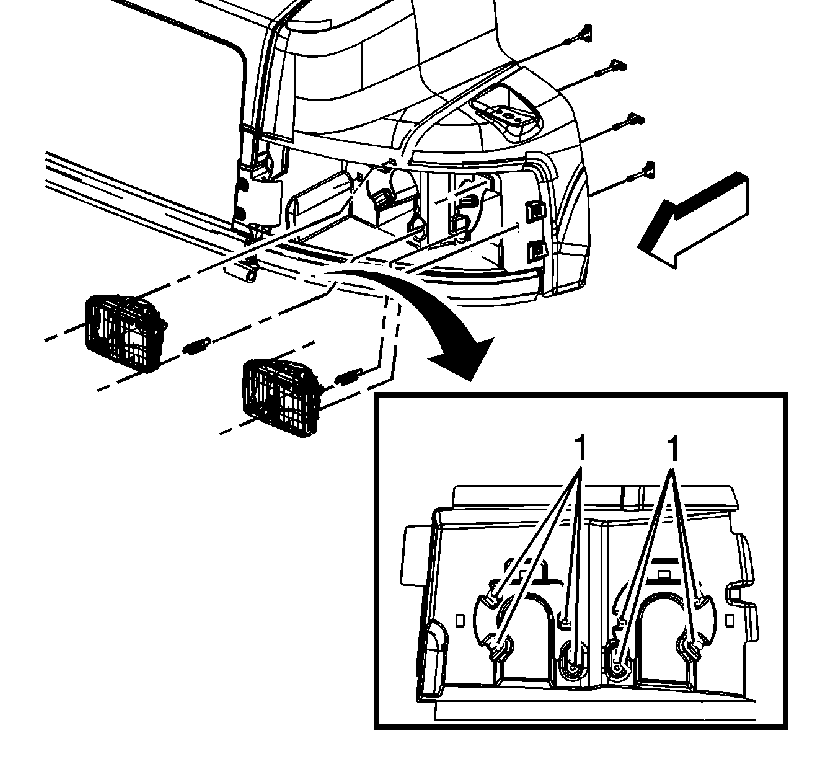
Caution: Refer to Fastener Caution in the Preface section.
Tighten
Tighten the screws to 1.9 N·m (17 lb in).
