Fuse Block Replacement Fuseblock
Removal Procedure
Caution: Unless directed otherwise, the ignition and start switch must be in the OFF or LOCK position, and all electrical loads must be OFF before servicing
any electrical component. Disconnect the negative battery cable to prevent an electrical spark should a tool or equipment come in contact with an exposed electrical terminal. Failure to follow these precautions may result in personal injury and/or damage to
the vehicle or its components.
- Disconnect
the negative battery cable.

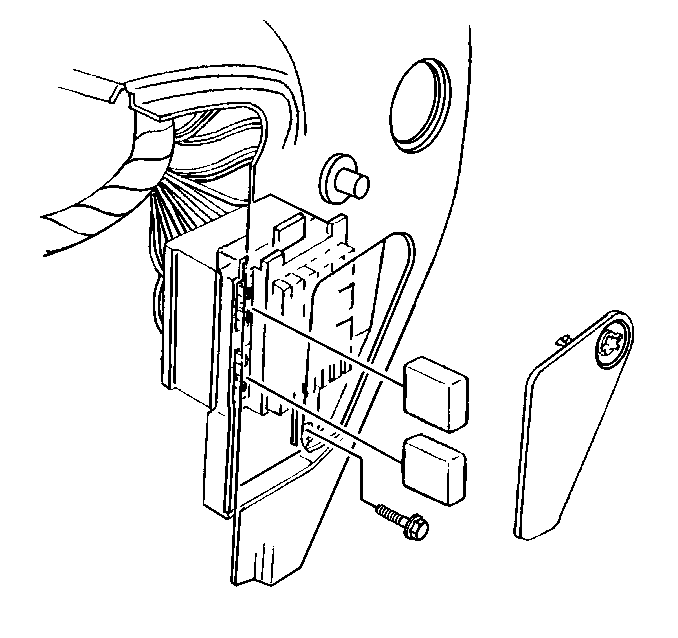
- Remove the fuse block
cover. The cover is on the left end of the instrument panel.
- Remove the fuse block.
| 3.1. | Remove the screw at the bottom of the fuse block. |
| 3.2. | Push the fuse block in at the bottom. The fuse block will pivot
clear of two mounting tabs at the top of the fuse block. |
| 3.3. | Push the fuse block back and away from the instrument panel. |
| 3.4. | Mark the fuse block and the wire locations for reassembly. |
- Remove the wires from the fuse block.
- Remove the fuse block from the vehicle.
- Remove the fuses from the block.
Installation Procedure

- Install the fuses into
the block.
- Install the fuse block into the vehicle.
- Install the wires to the fuse block in the original locations.
- Install the fuse block into the instrument panel.
| 4.1. | Place the two tabs at the at the top of the fuse block onto the
tabs of the instrument panel. |
| 4.2. | Push the bottom of the fuse block into place from behind the block.
Align the screw hole and attach the retaining screw. |
- Install the fuse block cover to the instrument panel.
- Connect the negative battery cable.
Fuse Block Replacement Convenience Center
Removal Procedure
Caution: Unless directed otherwise, the ignition and start switch must be in the OFF or LOCK position, and all electrical loads must be OFF before servicing
any electrical component. Disconnect the negative battery cable to prevent an electrical spark should a tool or equipment come in contact with an exposed electrical terminal. Failure to follow these precautions may result in personal injury and/or damage to
the vehicle or its components.
- Disconnect
the negative battery cable.

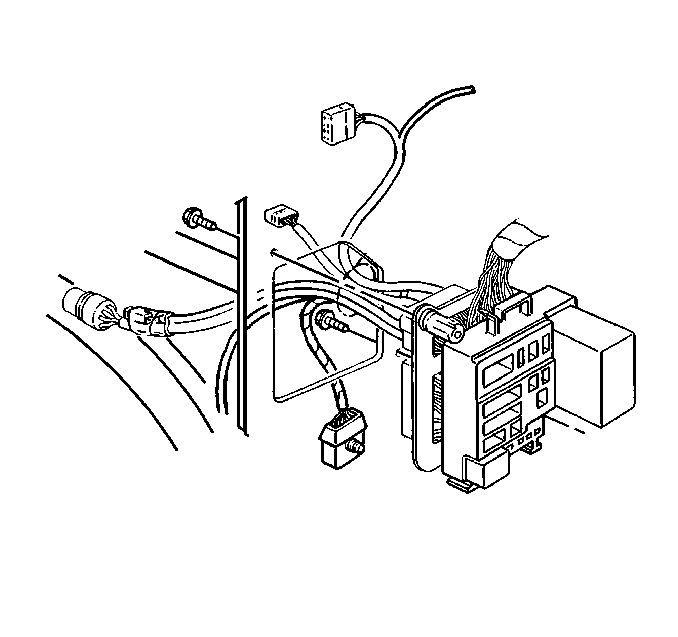
- Disconnect the wiring
connectors at the front of the convenience center.
Label the wires for reassembly.
- Disconnect the convenience center from the bulkhead connector.
| 3.1. | Disengage the tabs at the upper left and lower right posts. |
| 3.2. | The tabs clip into the bulkhead connector and these tabs separate
the bulkhead connector from the convenience center. |
- Disconnect the wiring connectors from the rear of the convenience
center.
Label the connectors for reassembly.
- Remove the convenience center from the vehicle.
Installation Procedure

- Install the convenience
center into the vehicle.
- Connect the wiring connectors to the rear of the convenience center
in the original locations.
- Connect the convenience center to the bulkhead connector.
Engage the post tabs of the convenience center to the bulkhead connector.
- Connect the wiring connectors to the front of the convenience
center in the original locations.
- Connect the negative battery cable.


