Rear Wheel Opening Flare Replacement Pickup
Removal Procedure
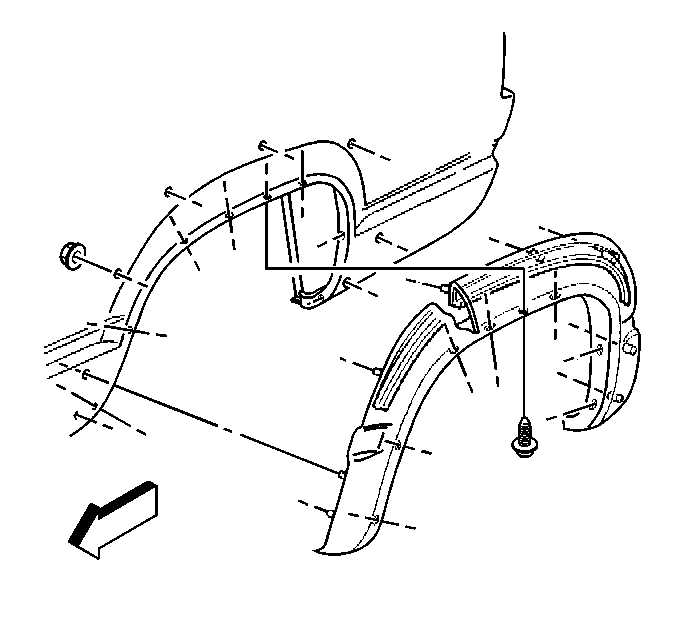
- Remove the tire and wheel assembly. Refer to Tire and Wheel Removal and Installation in Tires and Wheels.
- Remove the flare-to-quarter panel screws.
- Remove the inner fender water deflector.
- Remove the access plugs inside the quarter panel liner.
- Remove the quarter panel-to-flare nuts.
- Remove the hidden nuts between the fender and the outer panel and the inner wall of the bed.

Installation Procedure
- Install the hidden nuts between the fender outer panel and the inner wall of the bed.
- Install the inner fender water deflector.
- Install the fender-to-flare nuts.
- Install the flare-to-fender screws.
- Install the access plugs inside the fender liner.
- Install the tire and wheel assembly.
Notice: Use the correct fastener in the correct location. Replacement fasteners must be the correct part number for that application. Fasteners requiring replacement or fasteners requiring the use of thread locking compound or sealant are identified in the service procedure. Do not use paints, lubricants, or corrosion inhibitors on fasteners or fastener joint surfaces unless specified. These coatings affect fastener torque and joint clamping force and may damage the fastener. Use the correct tightening sequence and specifications when installing fasteners in order to avoid damage to parts and systems.
Tighten
Tighten the flare-to-fender nuts to 3 N·m (27 lb in).

Tighten
Tighten the flare-to-fender nuts to 3 N·m (27 lb in).
Tighten
Tighten the flare-to-fender screws to 2 N·m (18 lb in).
Rear Wheel Opening Flare Replacement Utility
Removal Procedure
- Remove the flare-to-fender screws.
- Install the rear seat blower motor cover, if equipped. Refer to the Rear Quarter Trim Panel Replacement in Interior Trim.
- Remove the quarter panel interior trim. Refer to the Rear Quarter Trim Panel Replacement in Interior Trim.
- Remove the flare-to-quarter panel nuts from the inside wheel well.
- Remove the flare from the vehicle.

Installation Procedure
- Install the flare to the vehicle with the nuts and the screws.
- Install the quarter panel interior trim. Refer to the Rear Quarter Trim Panel Replacement in Interior Trim.
- Install the rear seat blower motor cover, if equipped.

Notice: Use the correct fastener in the correct location. Replacement fasteners must be the correct part number for that application. Fasteners requiring replacement or fasteners requiring the use of thread locking compound or sealant are identified in the service procedure. Do not use paints, lubricants, or corrosion inhibitors on fasteners or fastener joint surfaces unless specified. These coatings affect fastener torque and joint clamping force and may damage the fastener. Use the correct tightening sequence and specifications when installing fasteners in order to avoid damage to parts and systems.
Tighten
| • | Tighten the flare-to-fender nuts to 3 N·m (27 lb in). |
| • | Tighten the flare-to-fender screws to 2 N·m (18 lb in). |
Rear Wheel Opening Flare Replacement Z-71 Tahoe
Removal Procedure
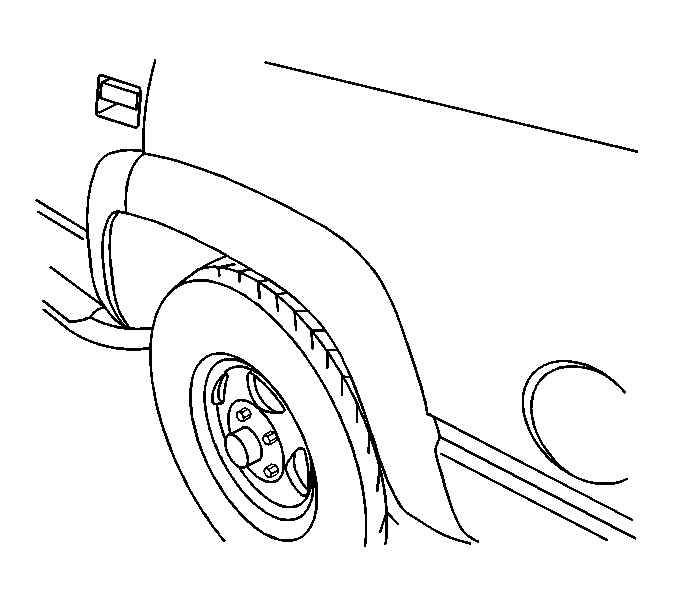
- Remove the six screws from the wheel opening and the three screws from the rear of the rear door.
- Grasping the wheel flare with 2 hands by the attachment flange and beginning at the lower end begin to pull it free of the body.
- In most cases especially if the flare was recently applied the flare will pull free leaving the minimum of tape residue. If acrylic foam residue is left on the painted body use a 3M Scotchbrite molding adhesive and strip removal disc (3M part 07501) or the equivalent. Follow the instructions and be sure not to exceed 4500 RPM spindle speed. The rotating disc will remove all the tape residue from the body without damaging the paintwork.

Installation Procedure
Important: Apply in an environment that is free from dust or other dirt that could come in contact with the sticky backing. This could cause improper adhesion.
- Clean the area where the molding or the emblem will be mounted.
- Dry the areas thoroughly.
- The area should be at room temperature. (20.9-23.6°C or 70-75°F) for proper adhesion.
- Install a new wheel flare, locating first the molded in locator followed by the six screws.
- Install the rear of door flare as an assembly by screwing the three screws thru the door.
- Remove the red tape liner by pulling on the 2 tape tabs provided. Pull steadily and as close as possible to the direction of the tape strip to avoid tearing the red tape liner before the tape liner is fully removed. If the tape liner should tear before the tape liner is fully removed grasp the second tape tab provided and pull from the other direction.
- Finally, wet-out the adhesive tape by using a hand-held hard rubber roller. A pressure of about 30 Kg is required which can easily be developed by using bodyweight to lean against the roller.
Use a suitable solvent, such as a mixture of 50 percent alcohol and 50 percent water in order to clean the areas.

