For 1990-2009 cars only
Auxiliary Air Conditioning Evaporator Tube Replacement Suburban XL
Tools Required
J 39400-A Halogen Leak Detector
Removal Procedure
- Recover the refrigerant from the system. Refer to Refrigerant Recovery and Recharging .
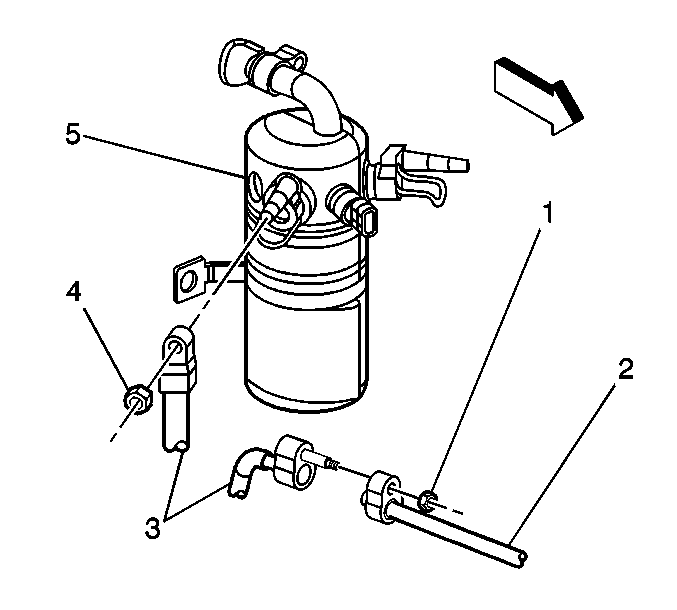
- Remove the auxiliary A/C evaporator tubes (3) from the condenser tube (2) and the accumulator (5).
- Loosen the right front wheelhouse to gain access to the clamp behind the wheelhouse.
- Raise the vehicle. Refer to Lifting and Jacking the Vehicle .
- Remove the right assist step. Refer to Assist Step Replacement .
- Remove the front wheelhouse liner. Refer to Front Wheelhouse Liner Replacement - Right Side .
- Remove the rear wheelhouse liner. Refer to Rear Wheelhouse Panel Liner Replacement .
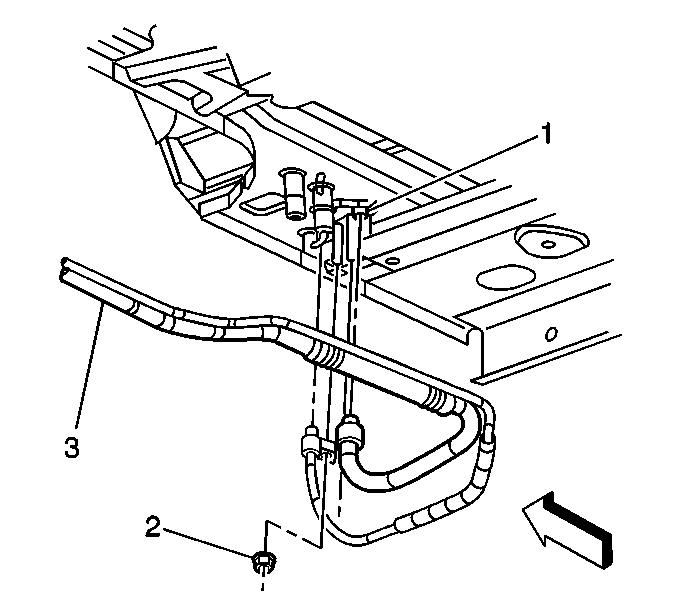
- Remove the retaining nut (2) and the auxiliary A/C evaporator tubes (3) from the auxiliary HVAC module.
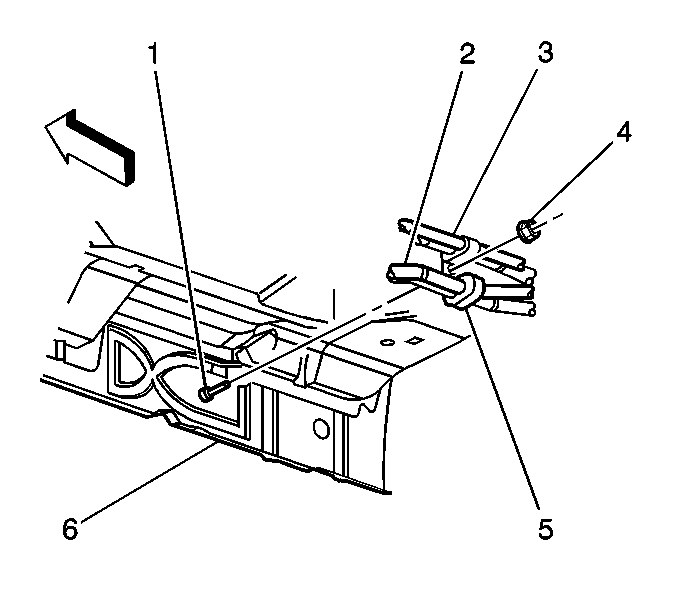
- Remove the heater/A/C tubes retaining nut (4) from the stud (1) at the frame (6).
- Remove the auxiliary A/C evaporator tubes (3) from the clamps (5).
- Remove the auxiliary A/C evaporator tubes from the vehicle.


Installation Procedure
Important: The replacement A/C and heater pipes are shipped in two sections and spliced together upon installation. Refer to Auxiliary Heater and Air Conditioning Pipe Repair .
- Install the auxiliary A/C evaporator tubes to the vehicle.
- Install the auxiliary A/C evaporator tubes (3) to the clamps (5).
- Install the heater/A/C tubes retaining nut (4) to the stud (1) at the frame (6).
- Install the auxiliary A/C evaporator tubes (2, 3) and the retaining nut to the auxiliary HVAC module.
- Lower the vehicle.
- Install the rear wheelhouse liner. Refer to Rear Wheelhouse Panel Liner Replacement .
- Install the right assist step. Refer to Assist Step Replacement .
- Install the front wheelhouse liner. Refer to Front Wheelhouse Liner Replacement - Right Side .
- Install the auxiliary A/C evaporator tubes (3) to the condenser tube (2) and the accumulator (5).
- Recharge the refrigerant to the system. Refer to Refrigerant Recovery and Recharging .
- Leak test the fittings of the component using the J 39400-A .

Notice: Refer to Fastener Notice in the Preface section.
Tighten
Tighten the nut to 7 N·m (62 lb in).

Tighten
Tighten the nut to 16 N·m (12 lb ft).

Tighten
Tighten the nuts to 16 N·m (12 lb ft).
