For 1990-2009 cars only
Removal Procedure
Note: Clean the fuel connections and surrounding areas prior to disconnecting the lines in order to avoid possible contamination.
- Remove the fuel fill cap.
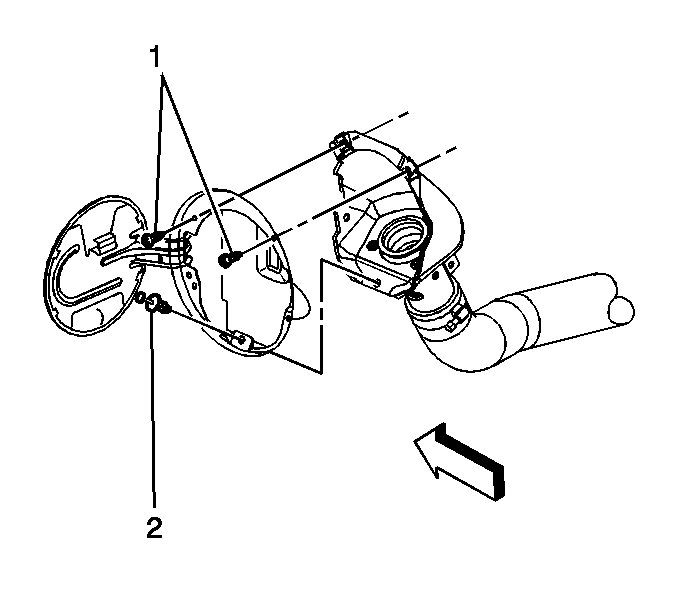
- Remove the fuel tank filler housing to body TORX® screws (1) and retainer (2).
- Remove the spare tire stowage lock cylinder, if necessary.
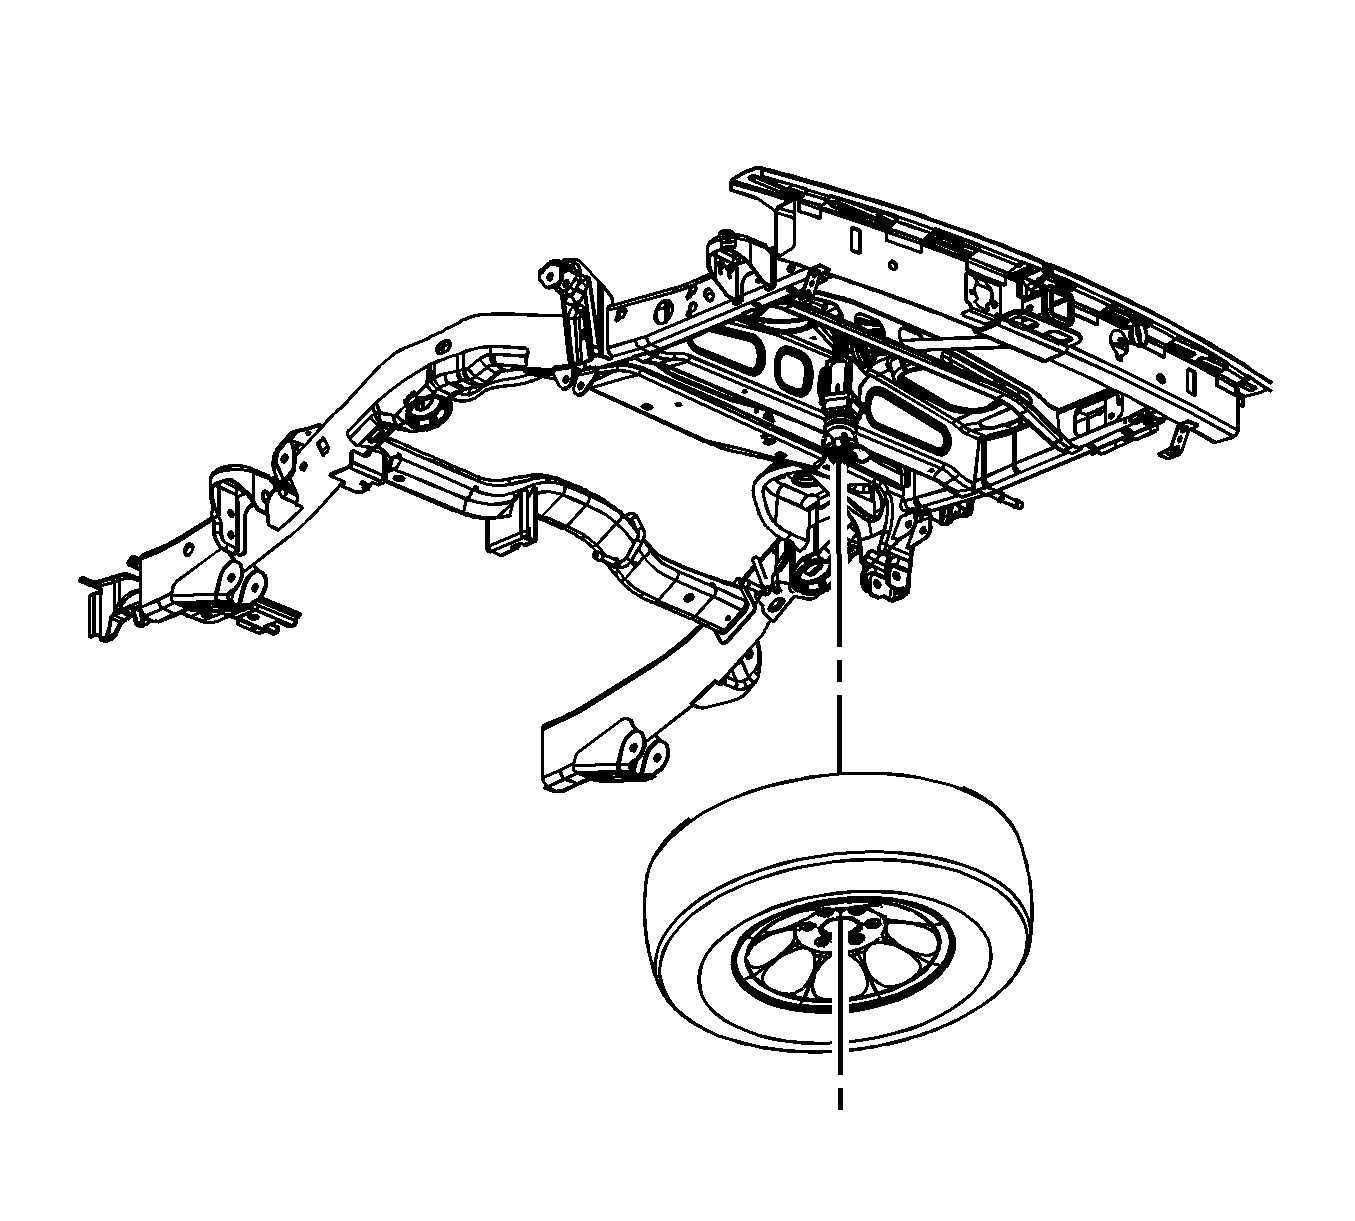
- Remove the spare tire, if necessary.
- Raise and support the vehicle. Refer to Lifting and Jacking the Vehicle.
- Remove the rear axle vent hose clip (1) from the fill pipe.
- If necessary, remove the air suspension hose at the fill pipe.
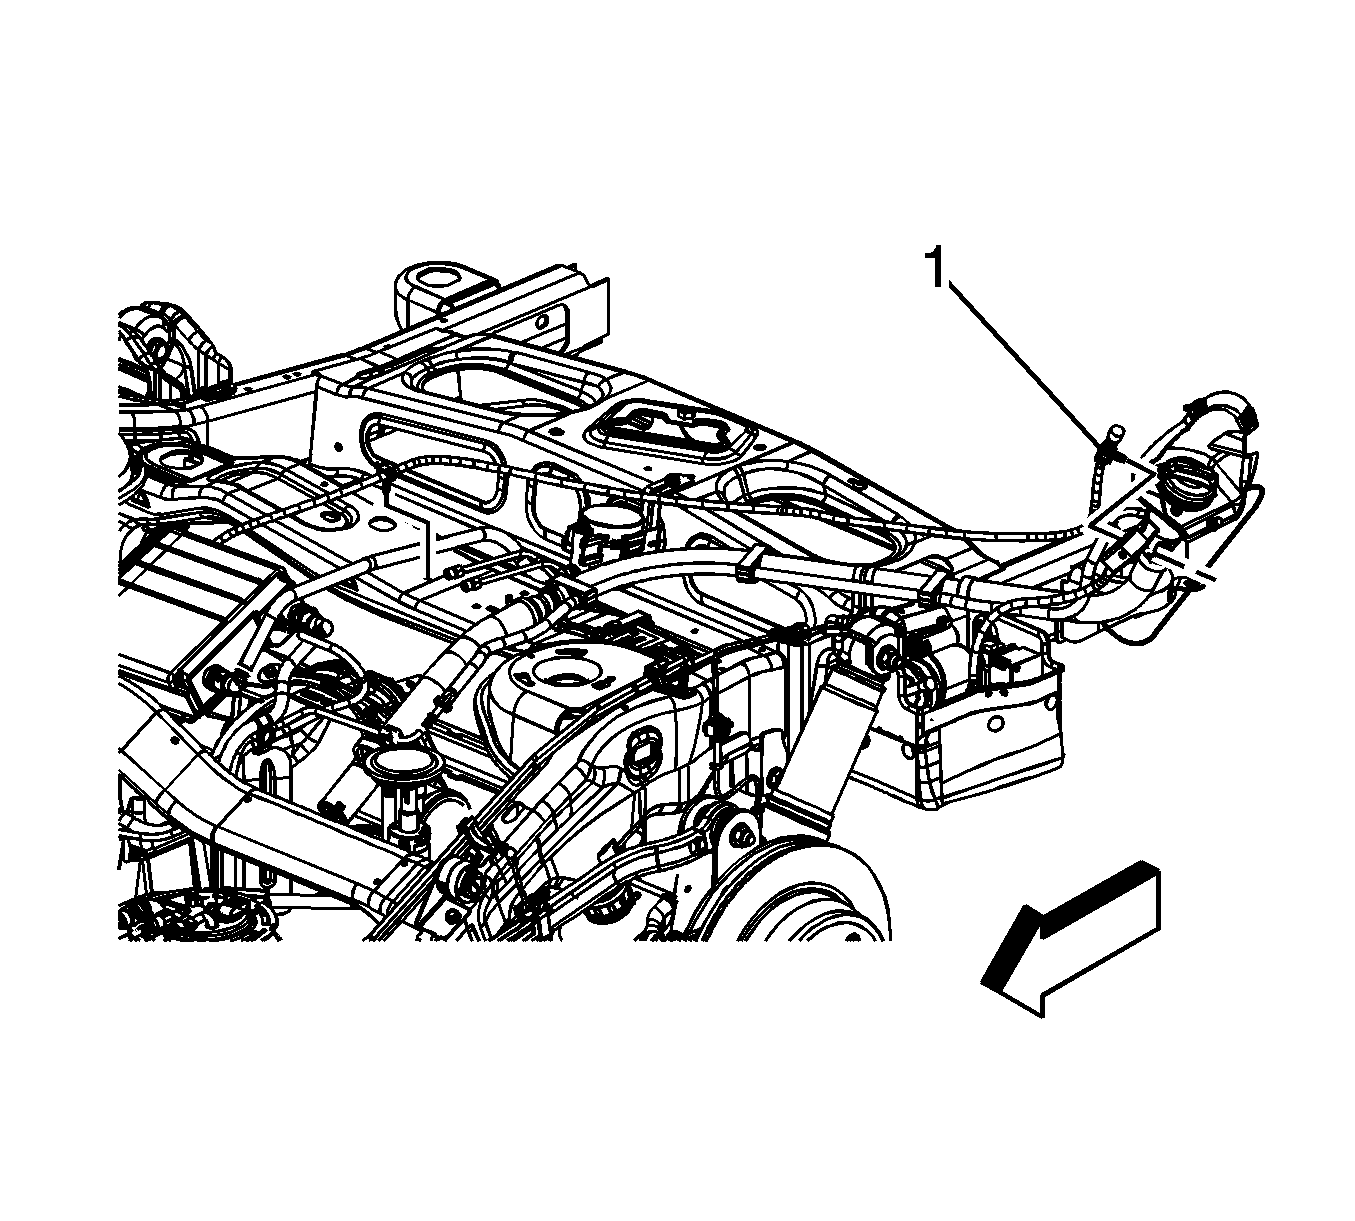
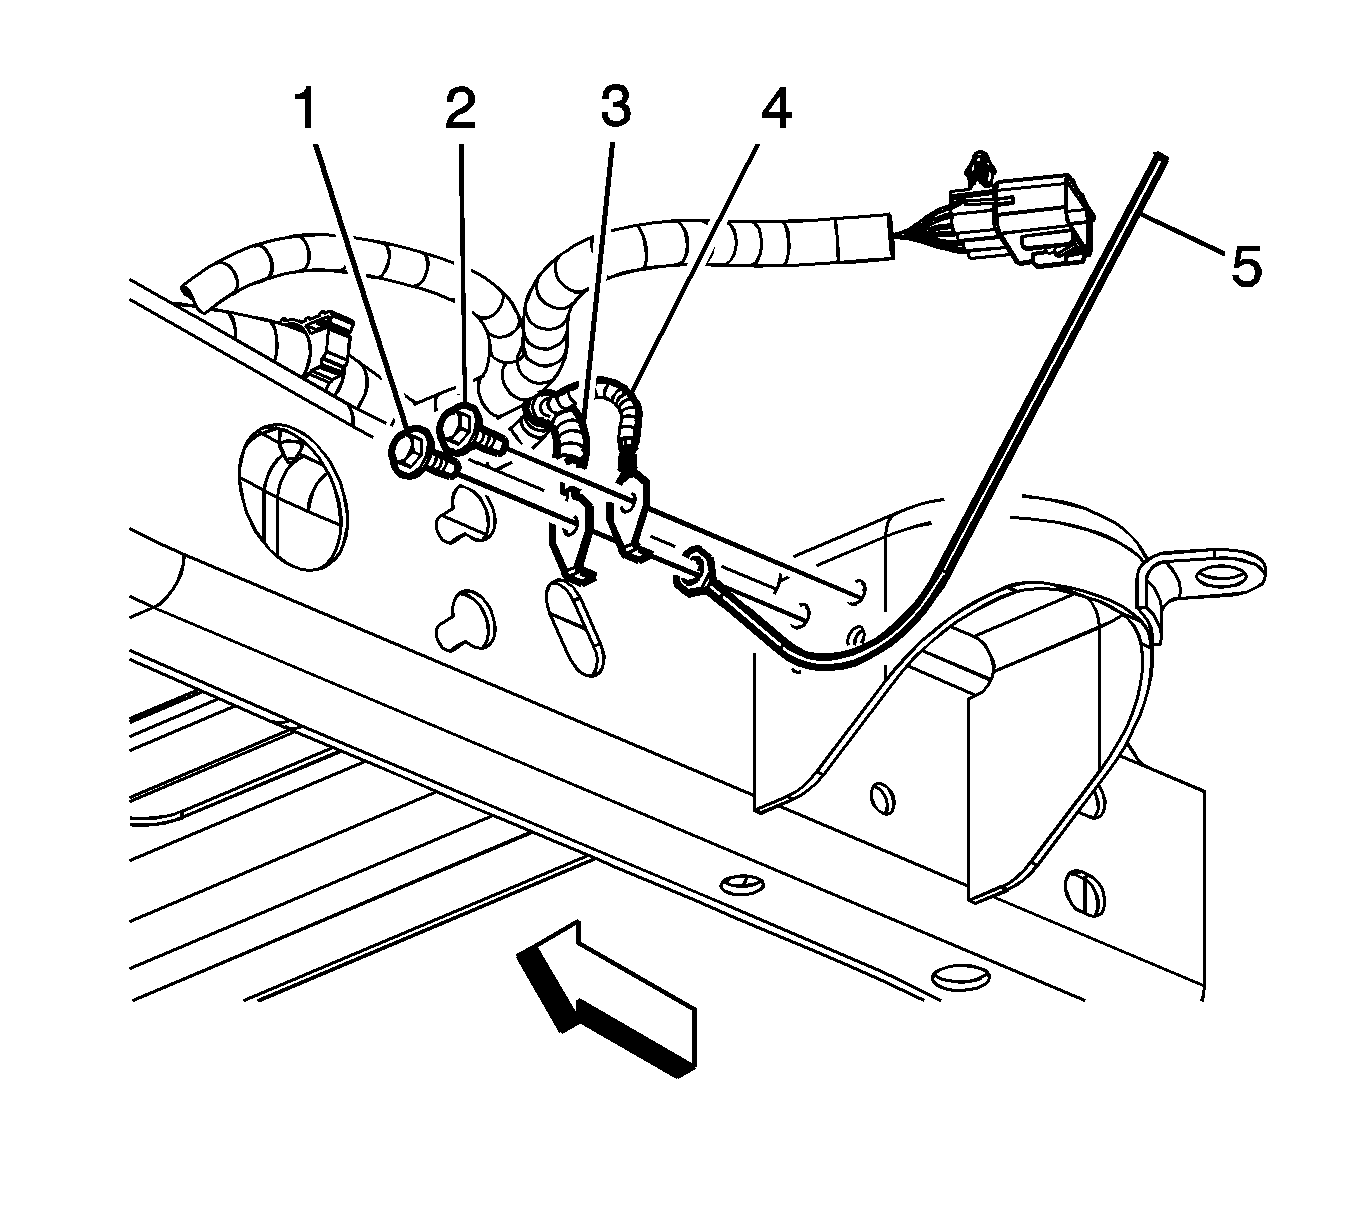
- Remove the chassis wiring harness ground bolt (2).
- Remove the left rear lamp ground wire (4) and fill pipe ground strap (5) from the frame.
- Loosen the fuel fill hose clamp (1).
- Remove the fuel fill hose from the fuel tank.
- Loosen the fuel fill pipe vent hose clamp (2) at the fuel tank vent valve.
- Disconnect the fuel fill pipe vent line quick connect fitting (3) from the evaporative emission (EVAP) canister vent solenoid valve. Refer to Plastic Collar Quick Connect Fitting Service.
- Remove the fuel fill pipe bracket bolts (2, 4).
- Cap the fuel tank opening and EVAP vent line in order to prevent fuel/EVAP system contamination.
- Remove the fuel fill pipe assembly.
- If replacing any serviceable part of the fill pipe assembly proceed to the disassemble procedure, otherwise proceed to the installation procedure.
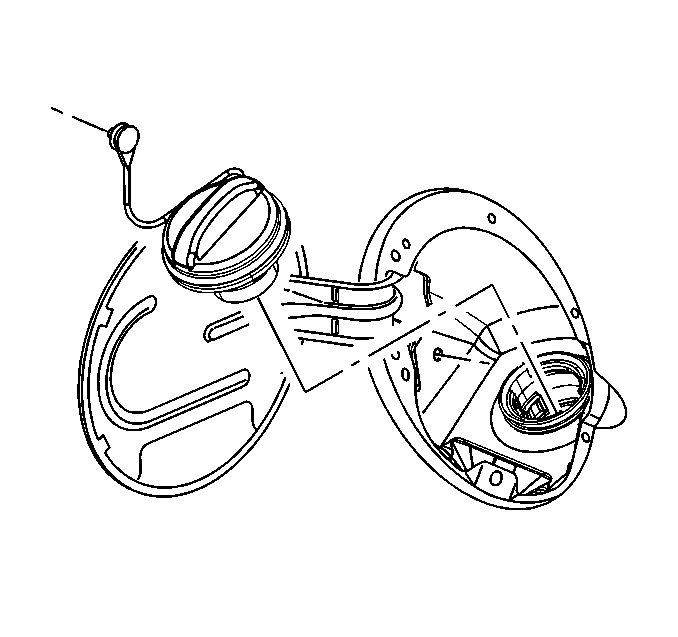
Disassemble
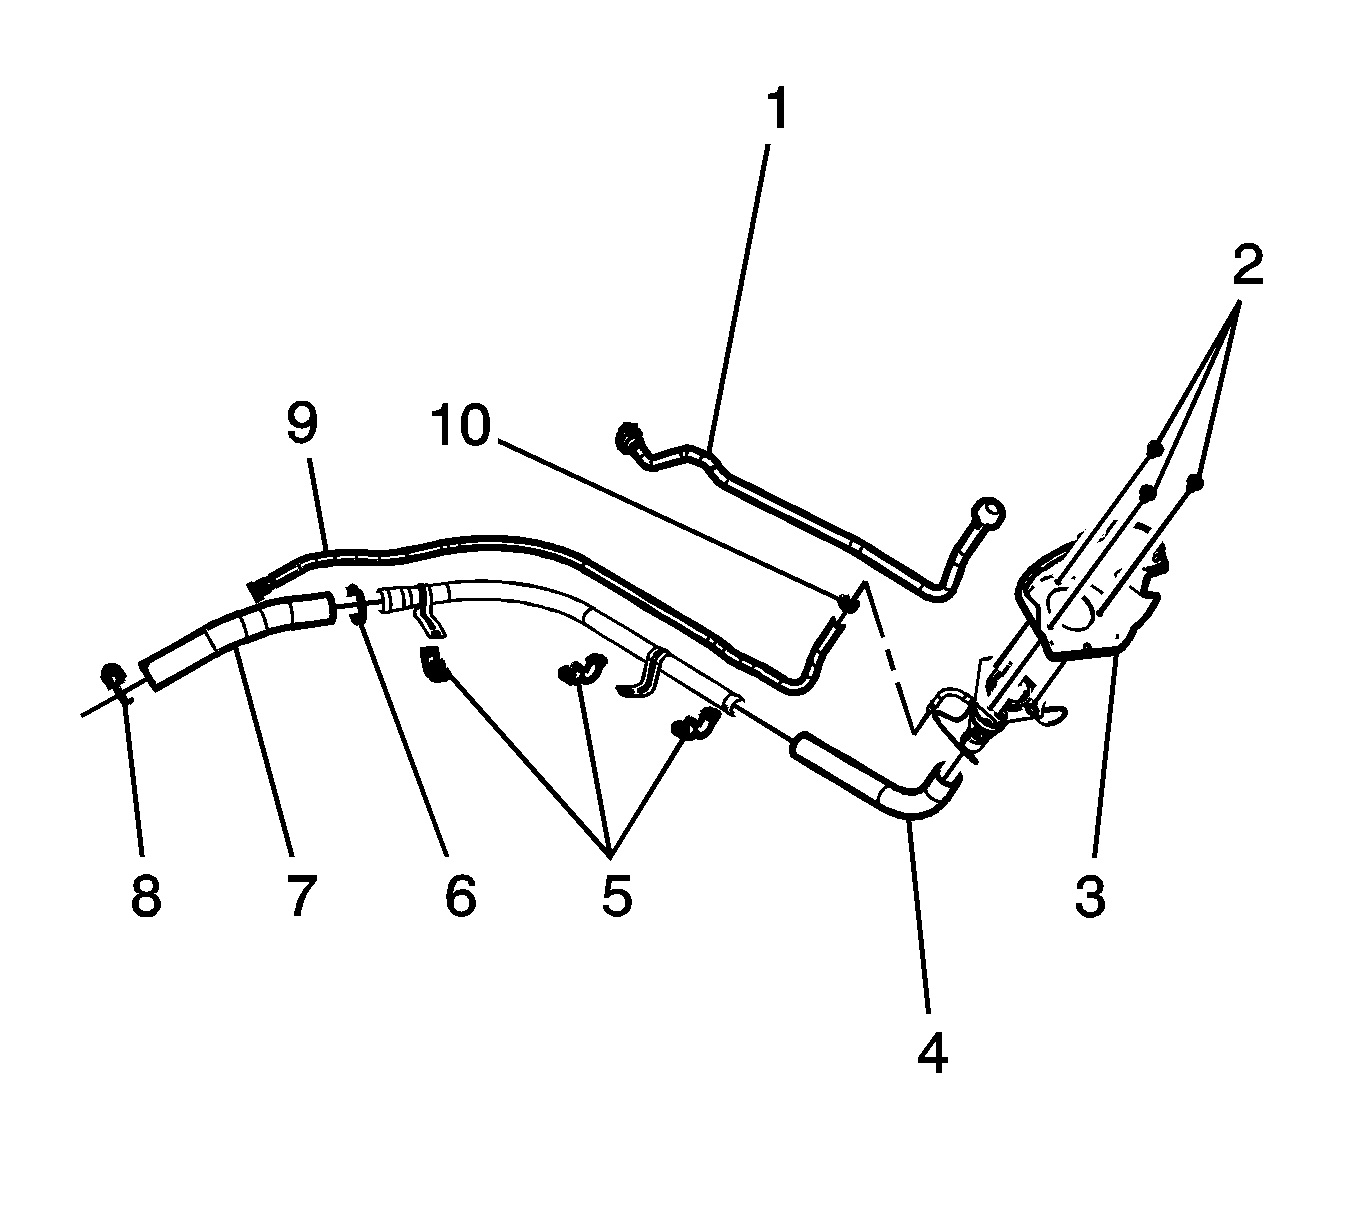
| • | Fuel tank filler vent hose (1) |
| • | Fuel tank fill pipe housing bolts (2) |
| • | Fuel tank fill pipe housing (3) |
| • | Fuel tank fill hose (4) |
| • | Fuel tank fill pipe clip (5) |
| • | Fuel tank fill hose clamp (6) |
| • | Fuel tank fill hose (7) |
| • | Fuel tank fill hose clamp (8) |
| • | Evaporative emission hose (9) |
| • | Evaporative emission hose clamp (10) |
Assemble
Caution: Refer to Fastener Caution in the Preface section.
| • | Evaporative emission hose clamp (10) |
Tighten
Tighten the clamp to 2.5 N·m (22 lb in).
| • | Evaporative emission hose (9) |
| • | Fuel tank fill hose clamp (8) |
Tighten
Tighten the clamp to 2.5 N·m (22 lb in).
| • | Fuel tank fill hose (7) |
| • | Fuel tank fill hose clamp (6) |
Tighten
Tighten the clamp to 2.5 N·m (22 lb in).
| • | Fuel tank fill pipe clip (5) |
| • | Fuel tank fill hose (4) |
| • | Fuel tank fill pipe housing (3) |
| • | Fuel tank fill pipe housing bolts (2) |
Tighten
Tighten the bolts to 2.3 N·m (20 lb in).
| • | Fuel tank filler vent hose (1) |
Installation Procedure
- Remove the caps from the fuel tank opening and the EVAP vent line.
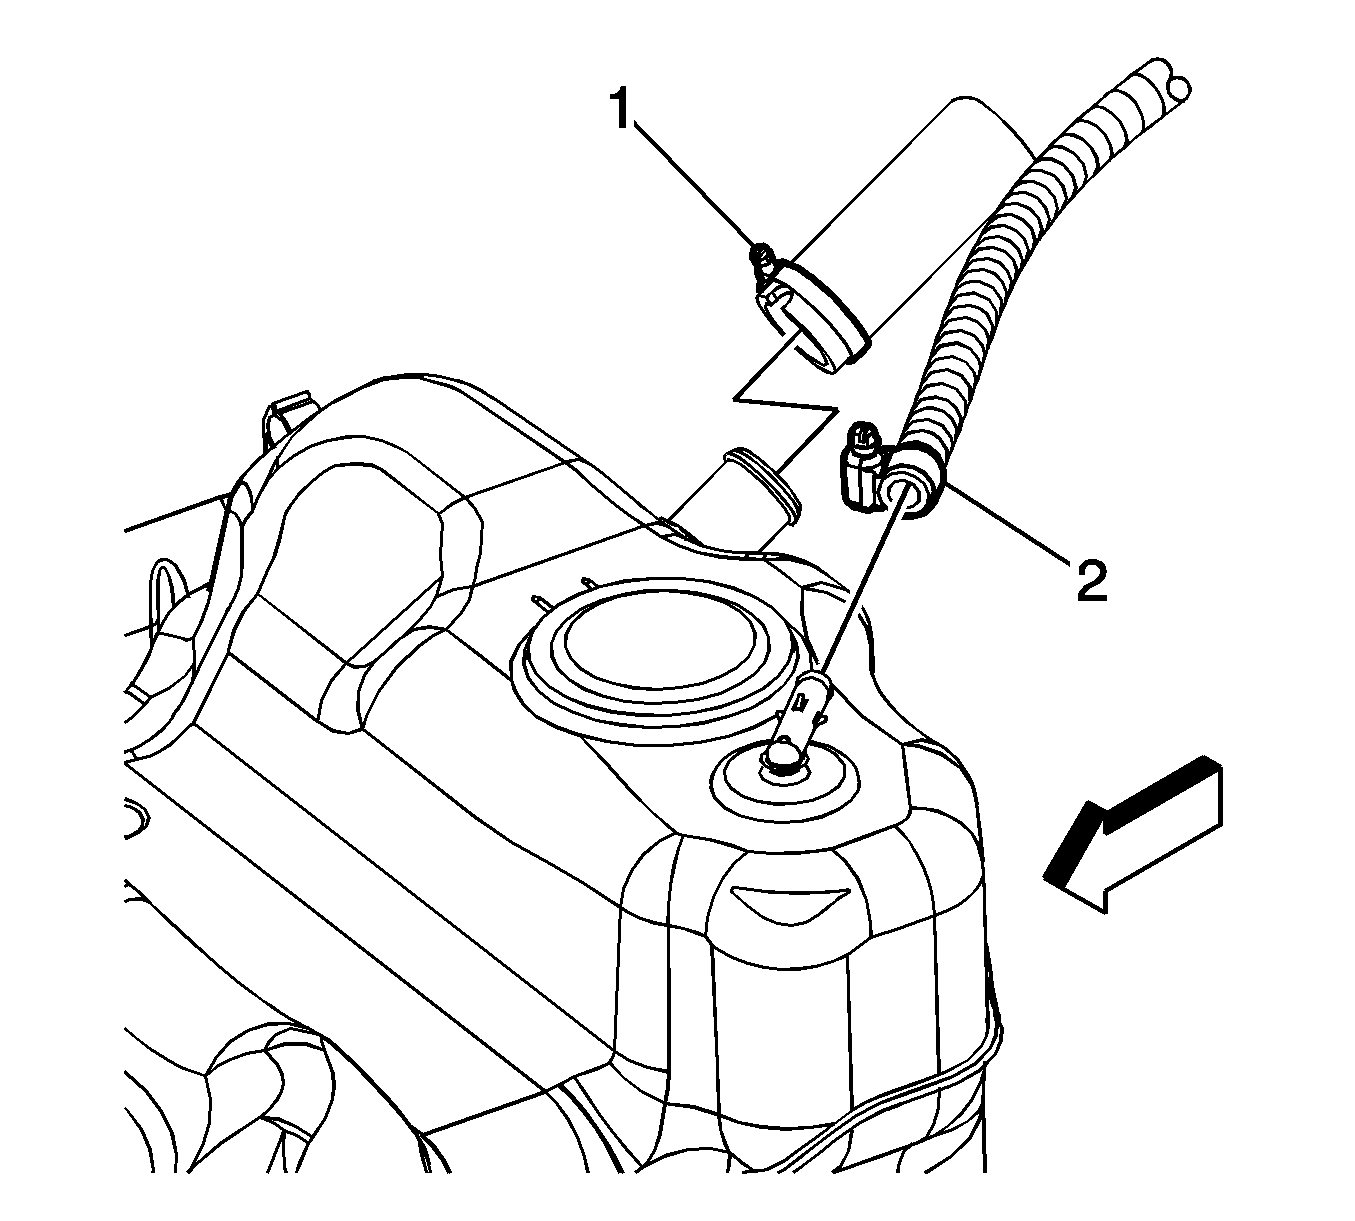
- Install the fuel fill hose to the fuel tank. Ensure that the notch in the hose is aligned with the notch on the fuel tank.
- Install the fuel fill pipe vent hose to the fuel tank vent valve.
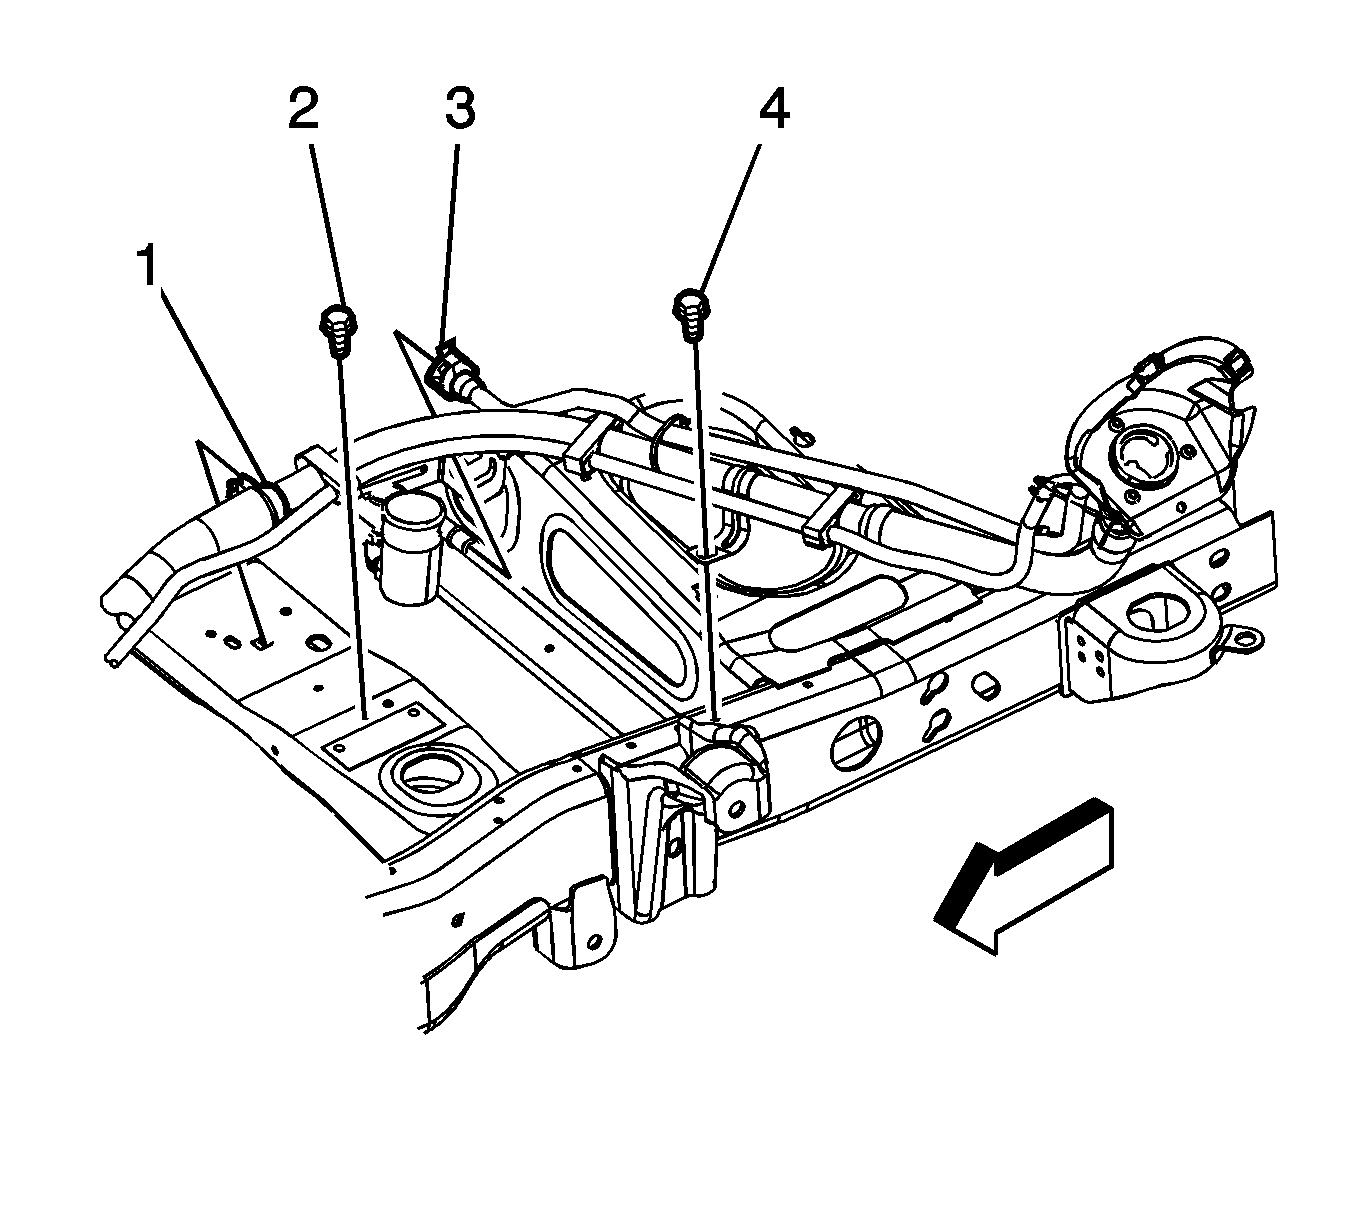
- Install the tab (1) on the fuel fill pipe to the notch in the frame.
- Install the fuel fill pipe bracket bolts (2, 4).
- Connect the fuel fill pipe vent line quick connect fitting (3) to the EVAP canister vent solenoid valve. Refer to Plastic Collar Quick Connect Fitting Service.
- Tighten the fuel fill hose clamp (1).
- Tighten the fuel fill pipe vent hose clamp (2) at the fuel tank vent valve.
- Position the fill pipe ground strap (5) to the left rear lamp ground wire (4).
- Install the rear lamp ground wire (4) and ground strap (5) to the frame. Insert the lamp ground wire anti-rotation tab into the hole in the frame.
- Install the chassis wiring harness ground bolt.
- If necessary, install the air suspension hose at the fill pipe.
- Install the rear axle vent hose clip (1) to the fill pipe.
- Lower the vehicle.
- Install the fuel tank filler housing to body TORX® screws (1) and retainer (2).
- Install the spare tire, if necessary.
- Install the spare tire stowage lock cylinder, if necessary.
- Install the fuel fill cap.
Tighten
Tighten the bolt to 12 N·m (106 lb in).
Tighten
Tighten the clamp to 2.5 N·m (22 lb in).
Tighten
Tighten the clamp to 2.5 N·m (22 lb in).
Tighten
Tighten the bolt to 9 N·m (80 lb in).
Tighten
Tighten the screws to 2.3 N·m (20 lb in).
