For 1990-2009 cars only
Removal Procedure
- Remove the floor console bezel. Refer to Floor Console Bezel Replacement in Instrument Panel, Gages and Console.
- Remove the floor console cupholder. Refer to Cupholder Replacement in Instrument Panel, Gages and Console.
- Remove the floor console storage bin. Refer to Front Floor Console Compartment Replacement in Instrument Panel, Gages and Console.
- Remove the floor console end panel. Refer to Center Console End Panel Replacement in Instrument Panel, Gages and Console.
- Move the drivers seat fully forward.
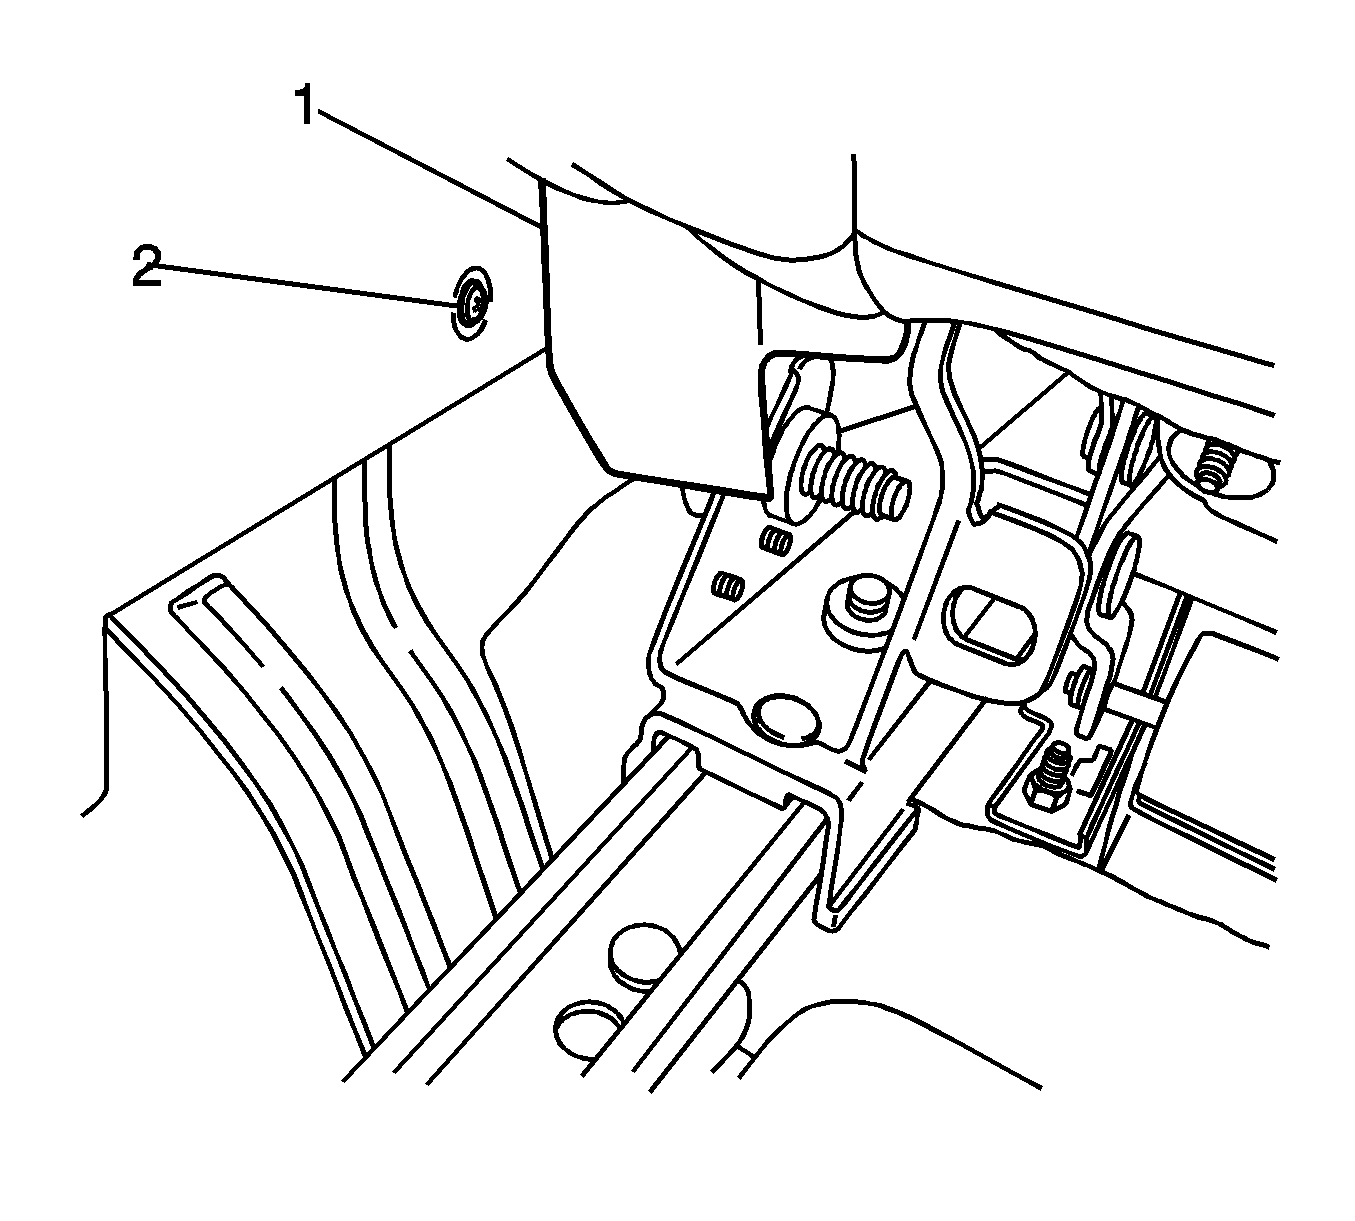
- Reposition the inboard seat track trim (1) in order to gain access to the rear console side panel screw (2).
- Remove the rear console side panel screw.
- Move the drivers seat to the fully rearward.
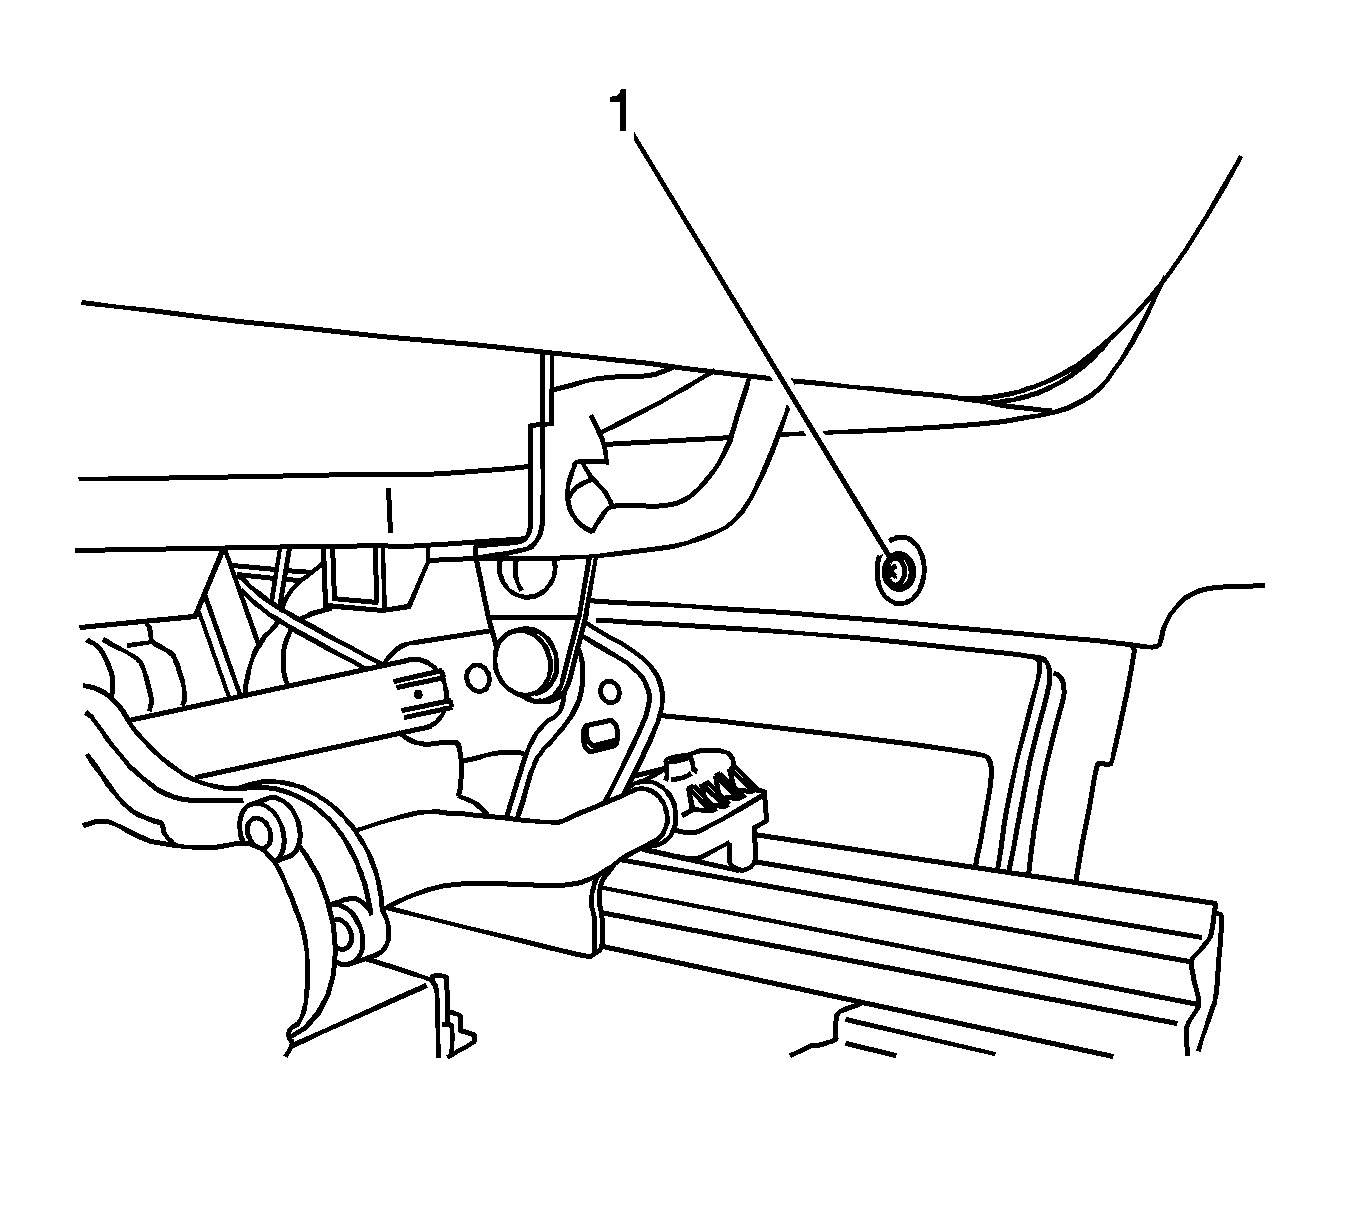
- Remove the front console side panel screw (1).
- Carefully pull outward on the trim panel to release the trim panel clips.
- Release the microphone electrical connector clip from the console.
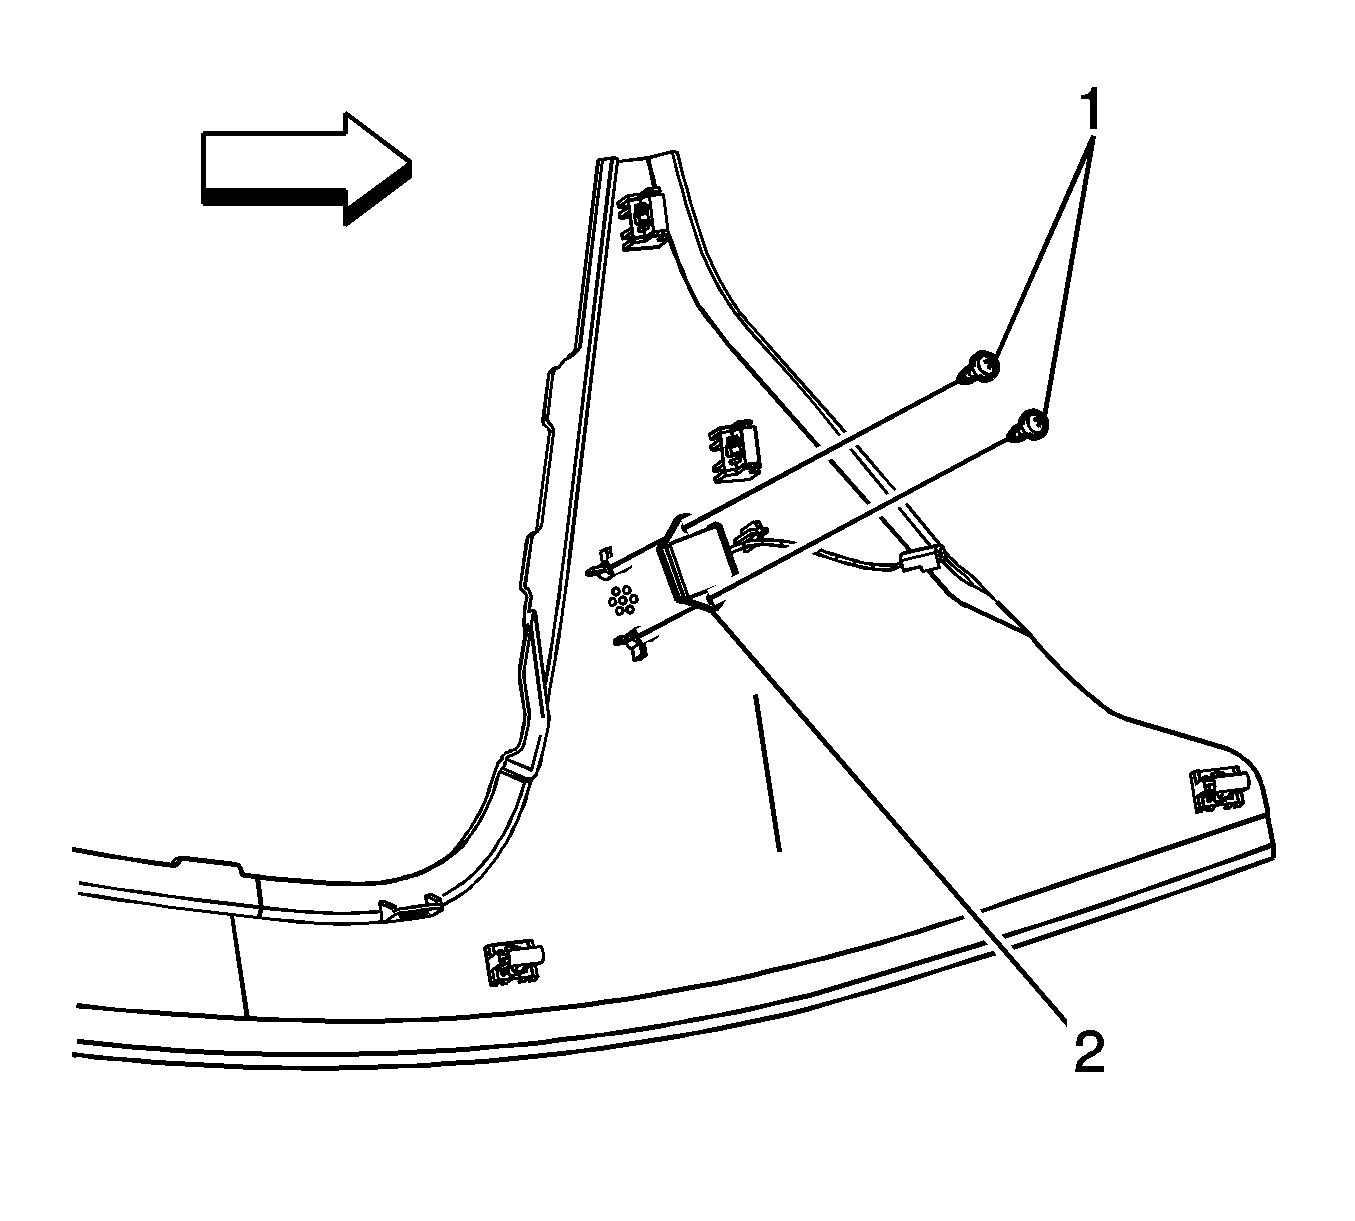
- Disconnect the radio volume compensator microphone (2) electrical connector.
- Remove the screws (1) that retaining the radio volume compensator microphone (2) to the floor console trim panel.
- Remove the radio volume compensator microphone (2) from the floor console side trim panel.


Important: The floor console drivers side trim panel can not be removed until the noise compensation microphone electrical connector hold down clip is released from the console.

Installation Procedure
- Install the radio volume compensator microphone (2) to the floor console side trim panel.
- Install the radio volume compensator microphone screws (1).
- Align the side trim panel to the floor console and connect the radio volume compensator microphone (2) electrical connector.
- Install the electrical connector hold down clip to the floor console.
- Align the trim panel to the floor console, push the panel towards the floor console to engage the panel clips.
- Install the front console side panel screw (1).
- Move the front seat fully forward.
- Install the rear console side panel screw (2).
- Reposition the inboard seat track trim (1).
- Install the floor console storage bin. Refer to Front Floor Console Compartment Replacement in Instrument Panel, Gages and Console.
- Install the floor console end panel. Refer to Center Console End Panel Replacement in Instrument Panel, Gages and Console.
- Install the floor console cupholder. Refer to Cupholder Replacement in Instrument Panel, Gages and Console.
- Install the floor console bezel. Refer to Floor Console Bezel Replacement in Instrument Panel, Gages and Console.

Notice: Refer to Fastener Notice in the Preface section.
Tighten
Tighten the screws to 2 N·m (18 lb in).

Tighten
Tighten the screws to 2 N·m (18 lb in).

Tighten
Tighten the retaining screw to 2 N·m
(18 lb in).
