For 1990-2009 cars only
Removal Procedure
- Turn the ignition key to the OFF position.
- Remove the air inlet grille panel. Refer to Air Inlet Grille Panel Replacement in Body Front End.
- Remove the connector position assurance (CPA) and disconnect the wiper motor electrical connector.
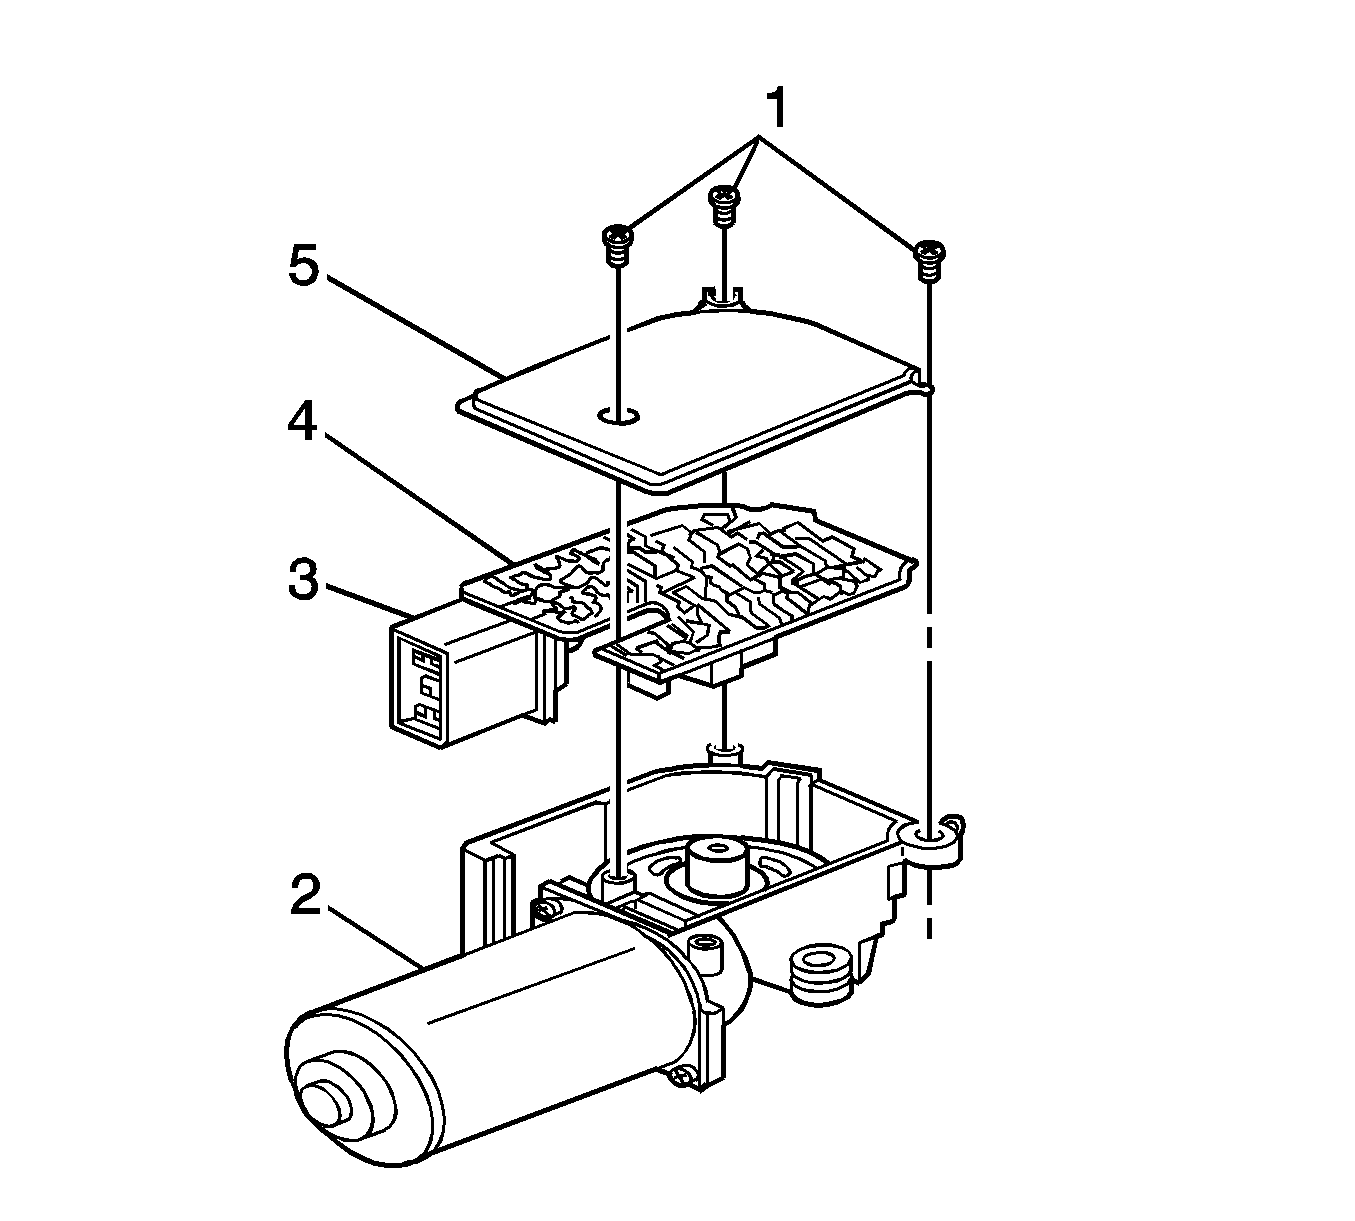
- Remove the 3 screws (1) that secure the cover (5) to the wiper motor (2) and remove the cover.
- Inspect for sealant on the inside of the cover and then discard the cover and screws (1).
- Carefully remove the module (4) (circuit board) from the wiper motor by lifting up on the end of the module electrical connector (3).
- If necessary, remove any old sealant from the wiper motor housing.

Important: If sealant was found on the old cover, it will be necessary to remove any old sealant from the motor housing.
Installation Procedure
- Install the module into the wiper motor housing, ensuring that the module is fully seated. When fully seated, the edges of the module circuit board will be flush (even) with the motor housing along all sides.
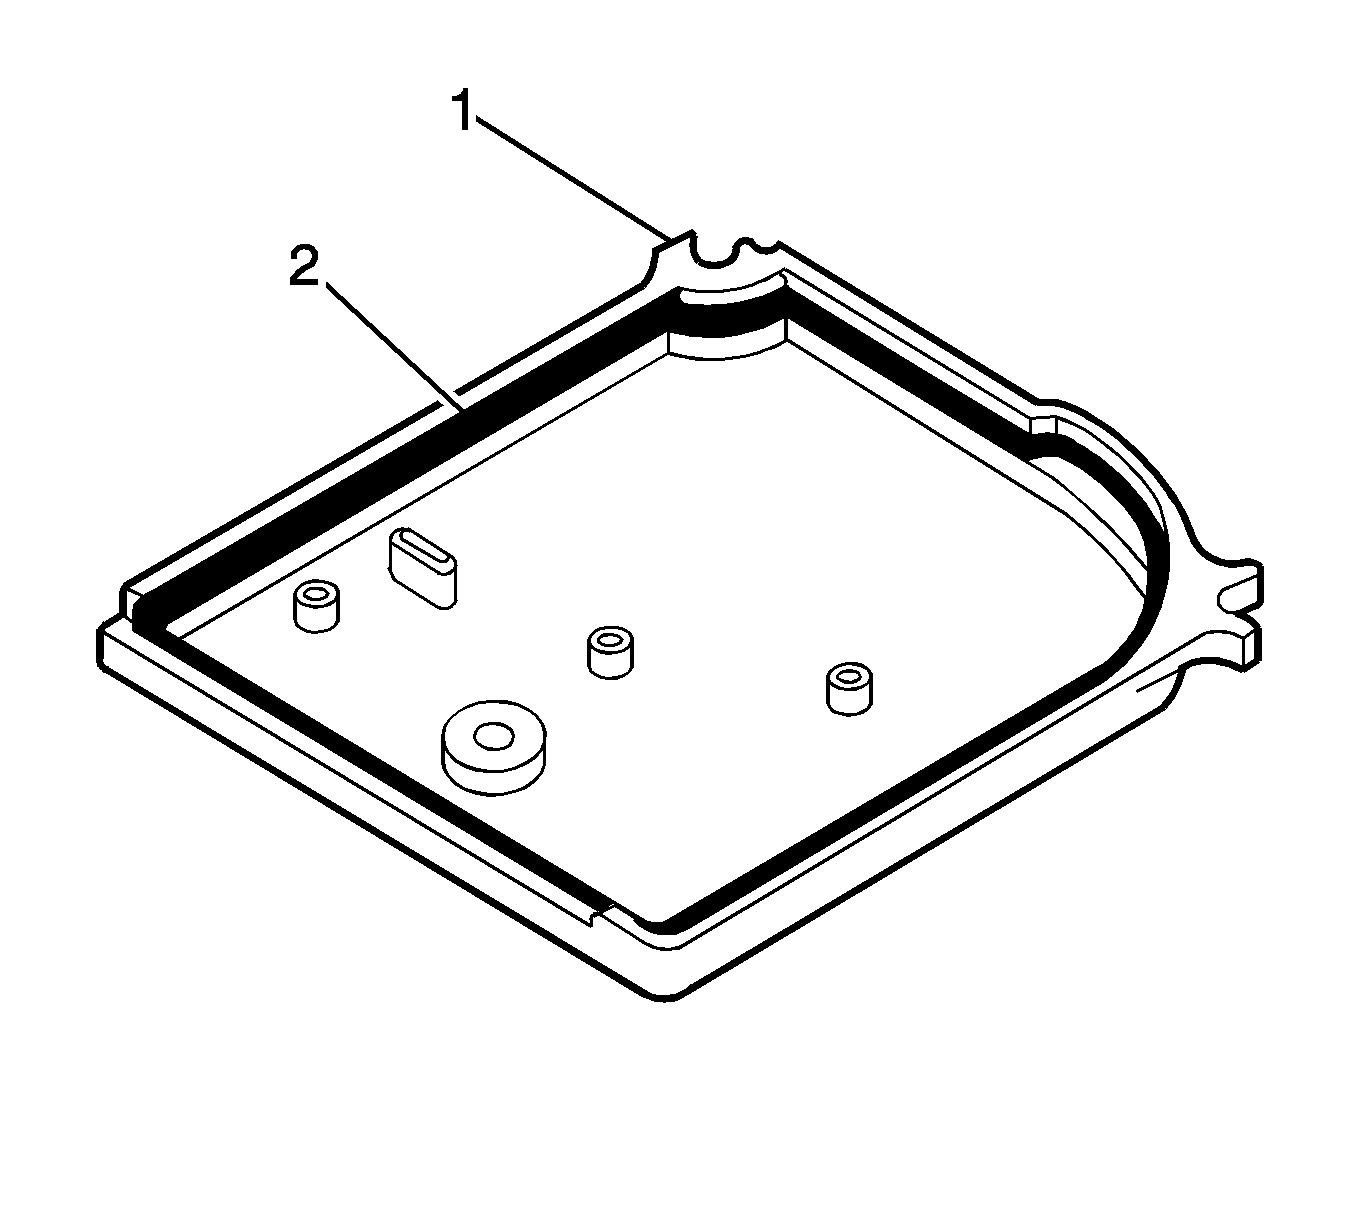
- Carefully apply a bead of silicone sealant, GM P/N 12345739 (or GE-162 sealant or equivalent) in the groove (2) of the NEW cover (1). Remove any excess sealant that is outside of the groove.
- Install the new cover (5) on the wiper motor housing.
- Install the 3 screws (1).
- Reconnect the wiper motor electrical connector to the wiper motor assembly.
- Install the CPA.
- Install the air inlet grille panel. Refer to Air Inlet Grille Panel Replacement in Body Front End.
- Turn the ignition key to the ON position and inspect the wiper system for proper operation (delay/low/high/ect.).

Important: Only apply enough sealant to fill the groove in the cover.

Important: When handling the new module cover, be careful not to bend the electrical contacts on the bottom side of the module (4).
Notice: Refer to Fastener Notice in the Preface section.
Tighten
Tighten the 3 screws to 2.6N·m (23 lb in).
