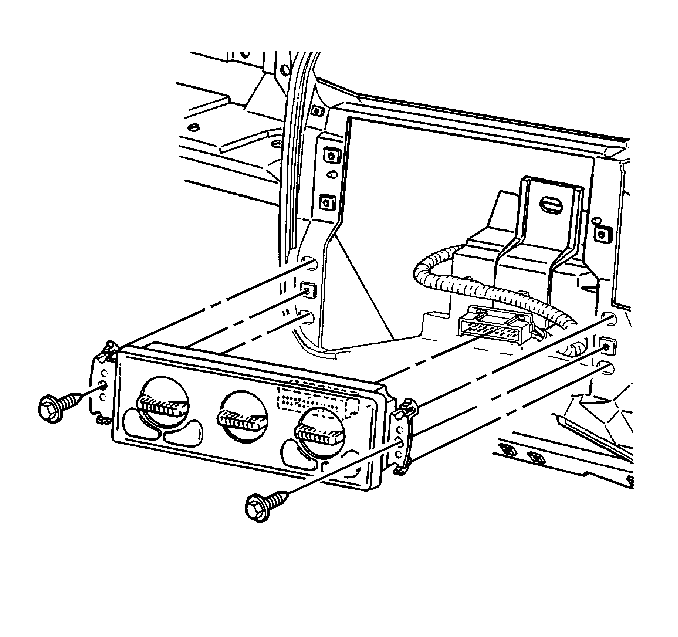
Removal Procedure

- Remove the instrument panel accessory trim plate. Refer to
Instrument Panel Cluster Trim Plate Bezel Replacement
in Instrument Panel, Gauges and Console.
- Remove the control assembly retaining screws.
- Depress the control assembly retaining tabs and remove the control assembly from the instrument panel.
- Disconnect the electrical connectors from the control assembly.
- Remove the control assembly bulb from the control assembly and retain.
Installation Procedure
- Install the control assembly bulb to the control assembly.

- Connect the electrical connectors to the control assembly.
- Install the control assembly into the instrument panel, ensuring that the control assembly retaining tabs lock into place.
- Install the control assembly retaining screws.
- Install the instrument panel accessory trim plate. Refer to
Instrument Panel Lower Trim Panel Replacement
in Instrument Panel, Gauges and Console.
Important: Vehicles equipped with an Auxiliary Computer Climate Control System (ECC) and a rear overhead control assembly (without a sunroof) require a special configuration procedure to be performed after the main control assembly in the I/P is replaced. Failure to perform the configuration procedure may result in the auxiliary control unit operating improperly.
- Perform the configuration procedure if necessary.
| • | Turn ON the ignition, with the engine OFF. |
| • | Select Special Functions. |
| • | Select Aux. HVAC (RPO C69). |
| • | Use the Enter Key to select Programmed. An asterisk will appear by Aux. HVAC (RPO C69) when it is programmed. |
| • | Press the Save Options Softkey. |


