Rear Seat Replacement Extended Cab
Removal Procedure
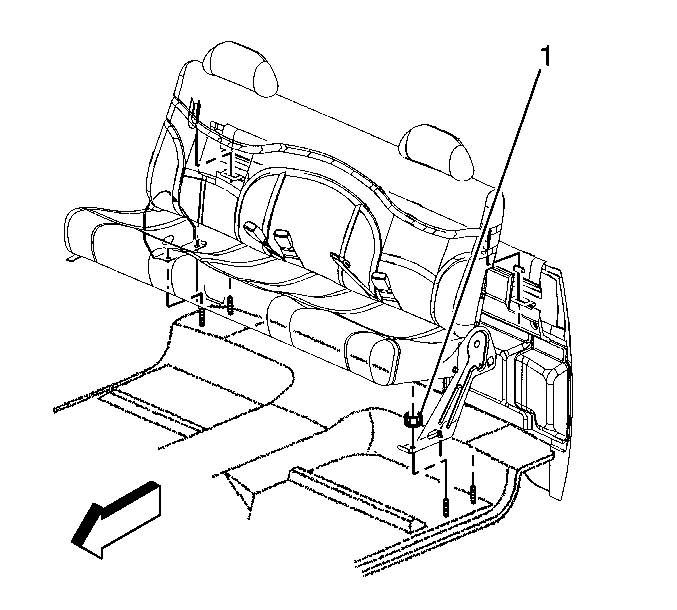
- Pull the seat belt buckles through the seat cushion and seat back.
- Fold the seat up.
- Remove the seat retaining bolts (1).
- Lift the rear seat from the retaining hooks.
- Remove the seat from the vehicle.
Installation Procedure
- Place the seat back clips on the retaining hooks.
- Fold the seat down.
- Install the seat retaining bolts (1).
- Pull the seat belt buckles through the seat cushion and seat back.
Notice: Use the correct fastener in the correct location. Replacement fasteners must be the correct part number for that application. Fasteners requiring replacement or fasteners requiring the use of thread locking compound or sealant are identified in the service procedure. Do not use paints, lubricants, or corrosion inhibitors on fasteners or fastener joint surfaces unless specified. These coatings affect fastener torque and joint clamping force and may damage the fastener. Use the correct tightening sequence and specifications when installing fasteners in order to avoid damage to parts and systems.

Tighten
Tighten the seat retaining bolts to 55 N·m (41 lb ft).
Rear Seat Replacement Extended Cab w/4th Door
Removal Procedure
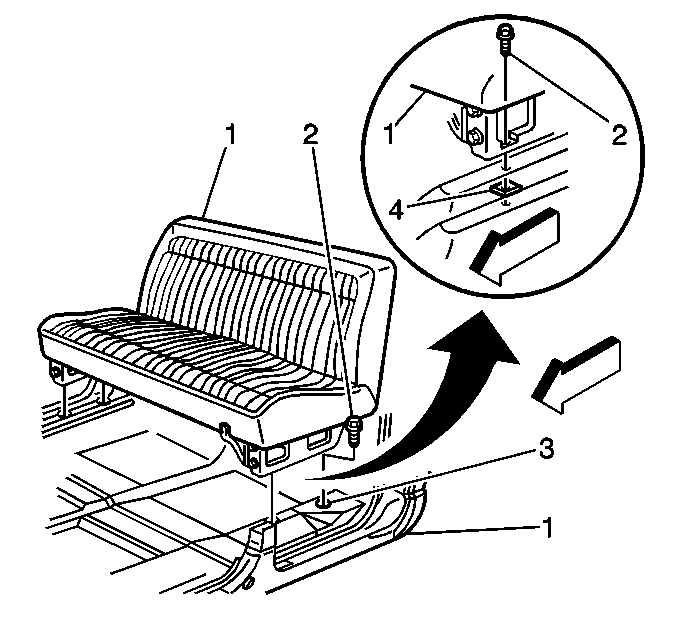
- Remove the front and the rear leg trim covers.
- Remove the seat retaining bolts (2).
- Remove the seat from the vehicle.
Installation Procedure
- Install the seat into the vehicle.
- Install the seat retaining bolts (2).
- Install the front and the rear leg trim covers.


Notice: Use the correct fastener in the correct location. Replacement fasteners must be the correct part number for that application. Fasteners requiring replacement or fasteners requiring the use of thread locking compound or sealant are identified in the service procedure. Do not use paints, lubricants, or corrosion inhibitors on fasteners or fastener joint surfaces unless specified. These coatings affect fastener torque and joint clamping force and may damage the fastener. Use the correct tightening sequence and specifications when installing fasteners in order to avoid damage to parts and systems.
Tighten
Tighten the seat retaining bolts to 55 N·m (41 lb ft).
Rear Seat Replacement 60/40 Split
Removal Procedure
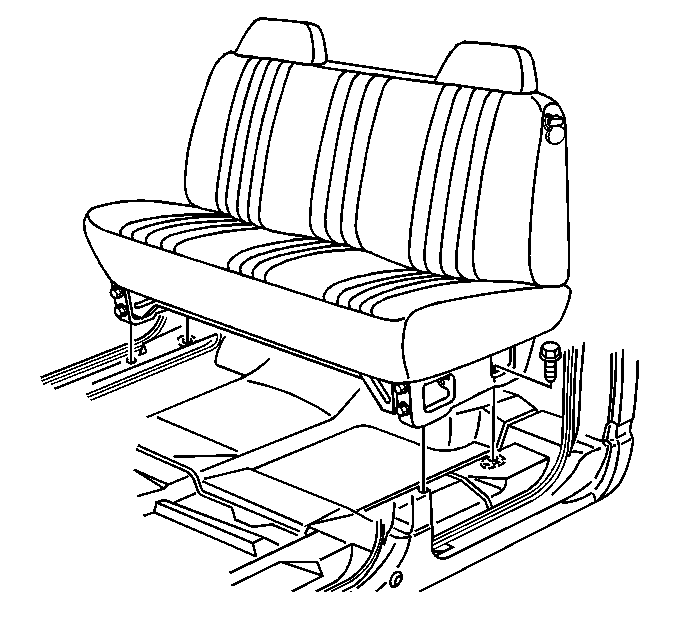
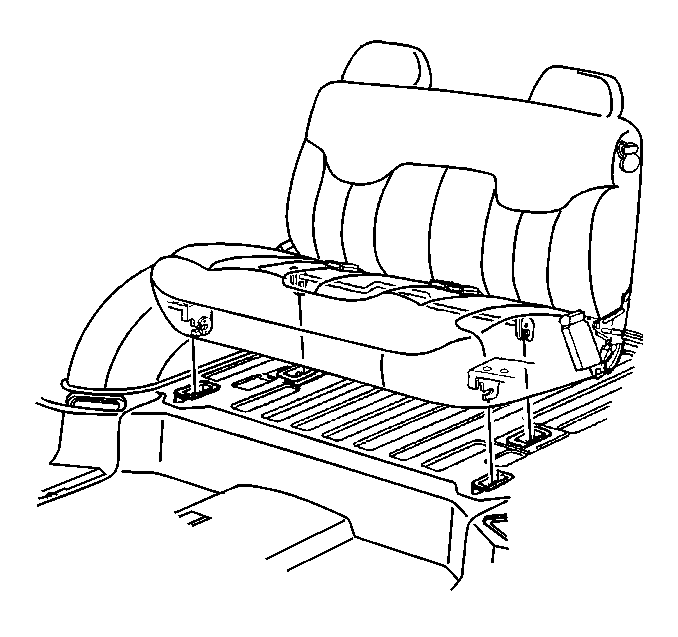
- Remove the front and the rear leg trim covers.
- Remove the seat retaining bolts.
- Remove the seat from the vehicle.
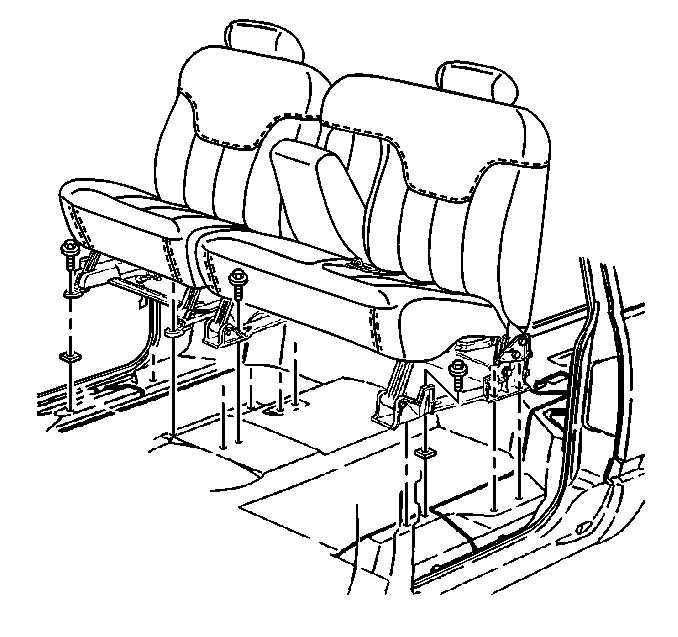
Installation Procedure
- Install the seat into the vehicle.
- Install the seat retaining bolts.
- Install the front and the rear leg trim covers.


Notice: Use the correct fastener in the correct location. Replacement fasteners must be the correct part number for that application. Fasteners requiring replacement or fasteners requiring the use of thread locking compound or sealant are identified in the service procedure. Do not use paints, lubricants, or corrosion inhibitors on fasteners or fastener joint surfaces unless specified. These coatings affect fastener torque and joint clamping force and may damage the fastener. Use the correct tightening sequence and specifications when installing fasteners in order to avoid damage to parts and systems.
Tighten
Tighten the seat retaining bolts to 55 N·m (41 lb ft).
Rear Seat Replacement Suburban/Yukon XL 40/40 Bucket
Removal Procedure
- Remove the front and the rear leg trim covers.
- Remove the seat retaining bolts.
- Remove the seat from the vehicle.
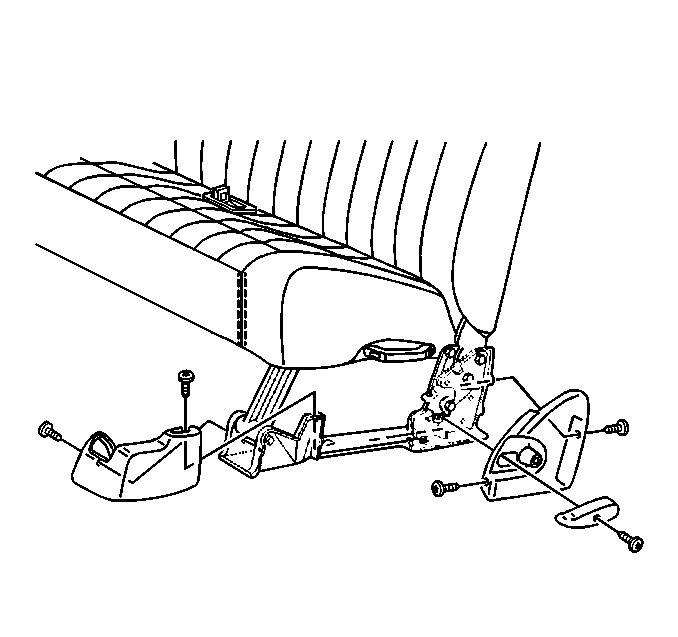
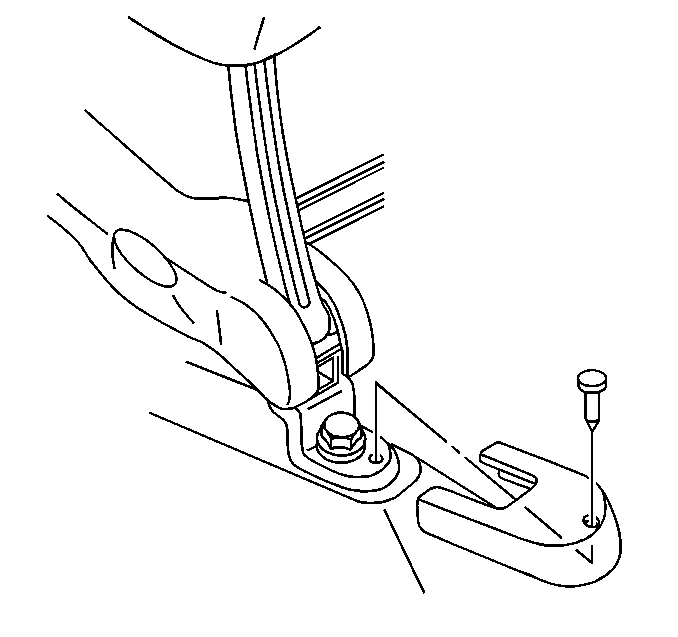
Installation Procedure
- Install the seat into the vehicle.
- Install the seat retaining bolts.
- Install the front and the rear leg trim covers.


Notice: Use the correct fastener in the correct location. Replacement fasteners must be the correct part number for that application. Fasteners requiring replacement or fasteners requiring the use of thread locking compound or sealant are identified in the service procedure. Do not use paints, lubricants, or corrosion inhibitors on fasteners or fastener joint surfaces unless specified. These coatings affect fastener torque and joint clamping force and may damage the fastener. Use the correct tightening sequence and specifications when installing fasteners in order to avoid damage to parts and systems.
Tighten
Tighten the seat retaining bolts to 55 N·m (14 lb ft).

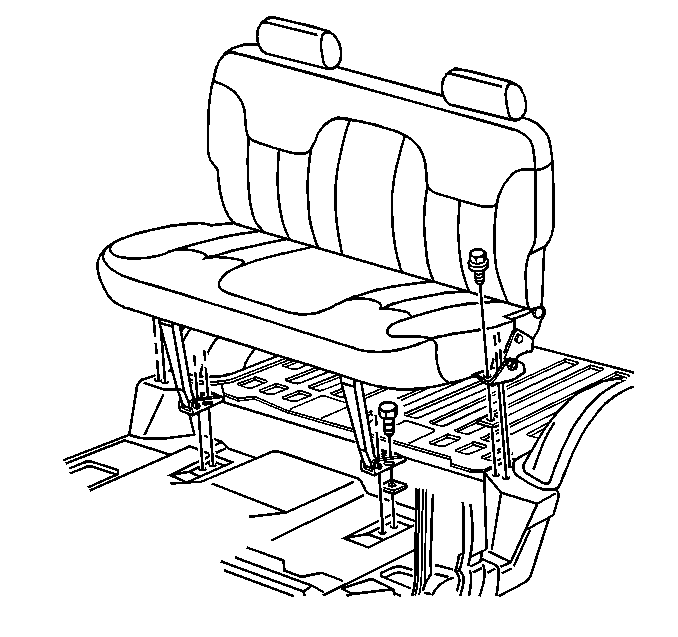
Rear Seat Replacement Suburban/Yukon XL 2nd Rear Bench
Removal Procedure
- Remove the front leg trim covers.
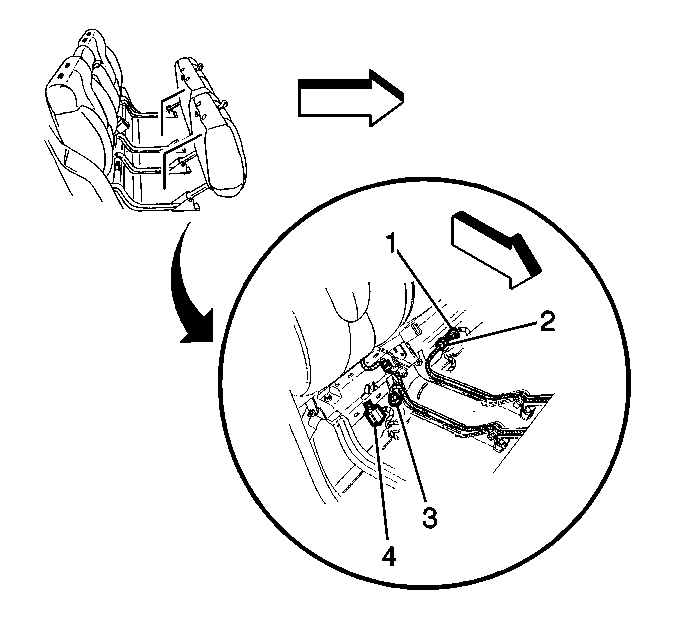
- Disconnect the electrical connectors (1,3,4).
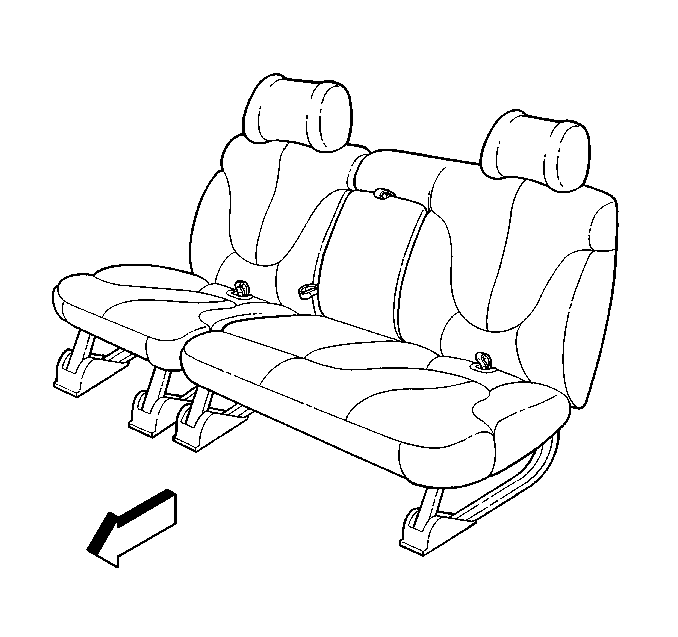
- Remove the seat retaining bolts.
- Remove the seat from the vehicle.
Installation Procedure
- Install the seat into the vehicle.
- Connect the electrical connectors (1,3,4).
- Install the seat retaining bolts.
- Install the front leg trim covers.


Notice: Use the correct fastener in the correct location. Replacement fasteners must be the correct part number for that application. Fasteners requiring replacement or fasteners requiring the use of thread locking compound or sealant are identified in the service procedure. Do not use paints, lubricants, or corrosion inhibitors on fasteners or fastener joint surfaces unless specified. These coatings affect fastener torque and joint clamping force and may damage the fastener. Use the correct tightening sequence and specifications when installing fasteners in order to avoid damage to parts and systems.
Tighten
Tighten the retaining bolts to 55 N·m (41 lb ft).
Rear Seat Replacement Tahoe/Yukon 50/50 Split 2nd Rear
Removal Procedure
- Remove the quick release latch plates for the lap/shoulder belts by pressing a drift punch or a similar tool into the release hole of the seat belt buckle while pulling on the safety belt.
- Pull up on the handle at the rear of the seat.
- Roll the seat forward.
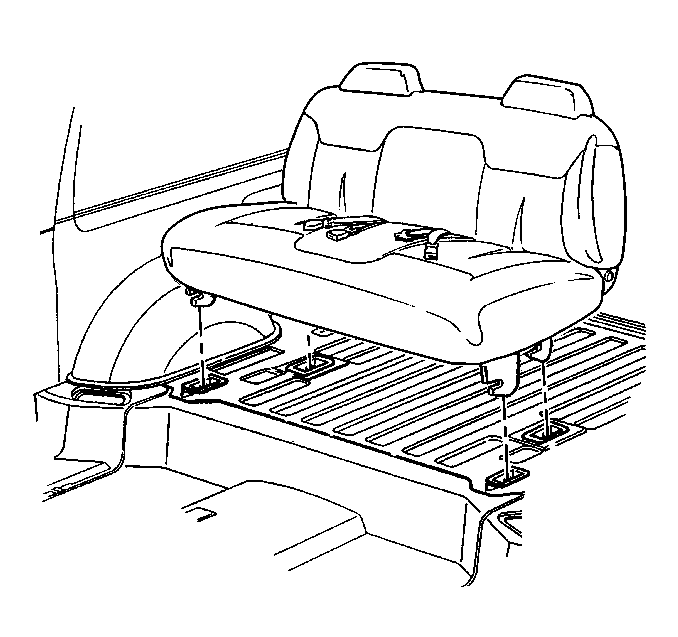
- Lift the seat up and out of the floor rails.
- Remove the seat from the vehicle.
Installation Procedure
- Install the seat into the vehicle.
- Align the seat attaching points with the slots in the floor rail.
- Push the seat forward in the rail in order to lock the front of the seat risers onto the pins on the inside of the floor rail.
- Roll the seat back and down in order to secure the seat into place.
- Install the quick release latch plate for the lap/shoulder belt by inserting the latch plate into the seat belt buckle and pushing in order to engage the latch plate with the seat belt buckle.

