Oil Pan Installation C/K/G/C3500HD
- Apply sealant GM P/N United States 12346141, GM P/N Canada 10953433, to the side of the front cover (1) and rear (2) crankshaft bearing cap, on both the left and right sides (four locations total).
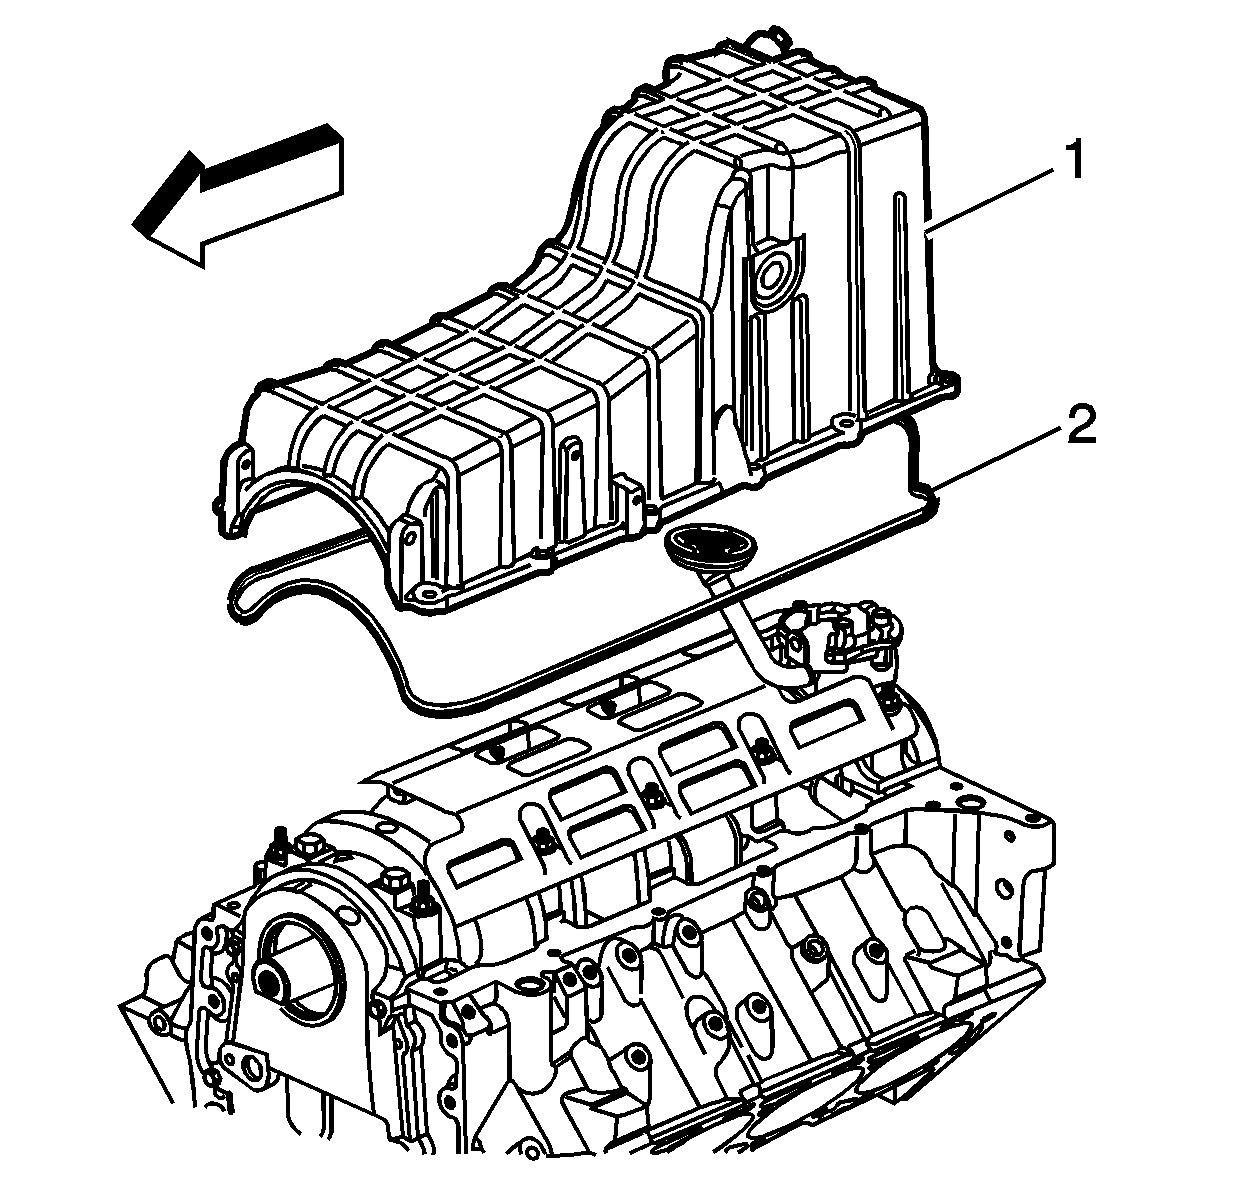
- Install the new oil pan gasket (2) into the oil pan groove.
- Install the oil pan (1).
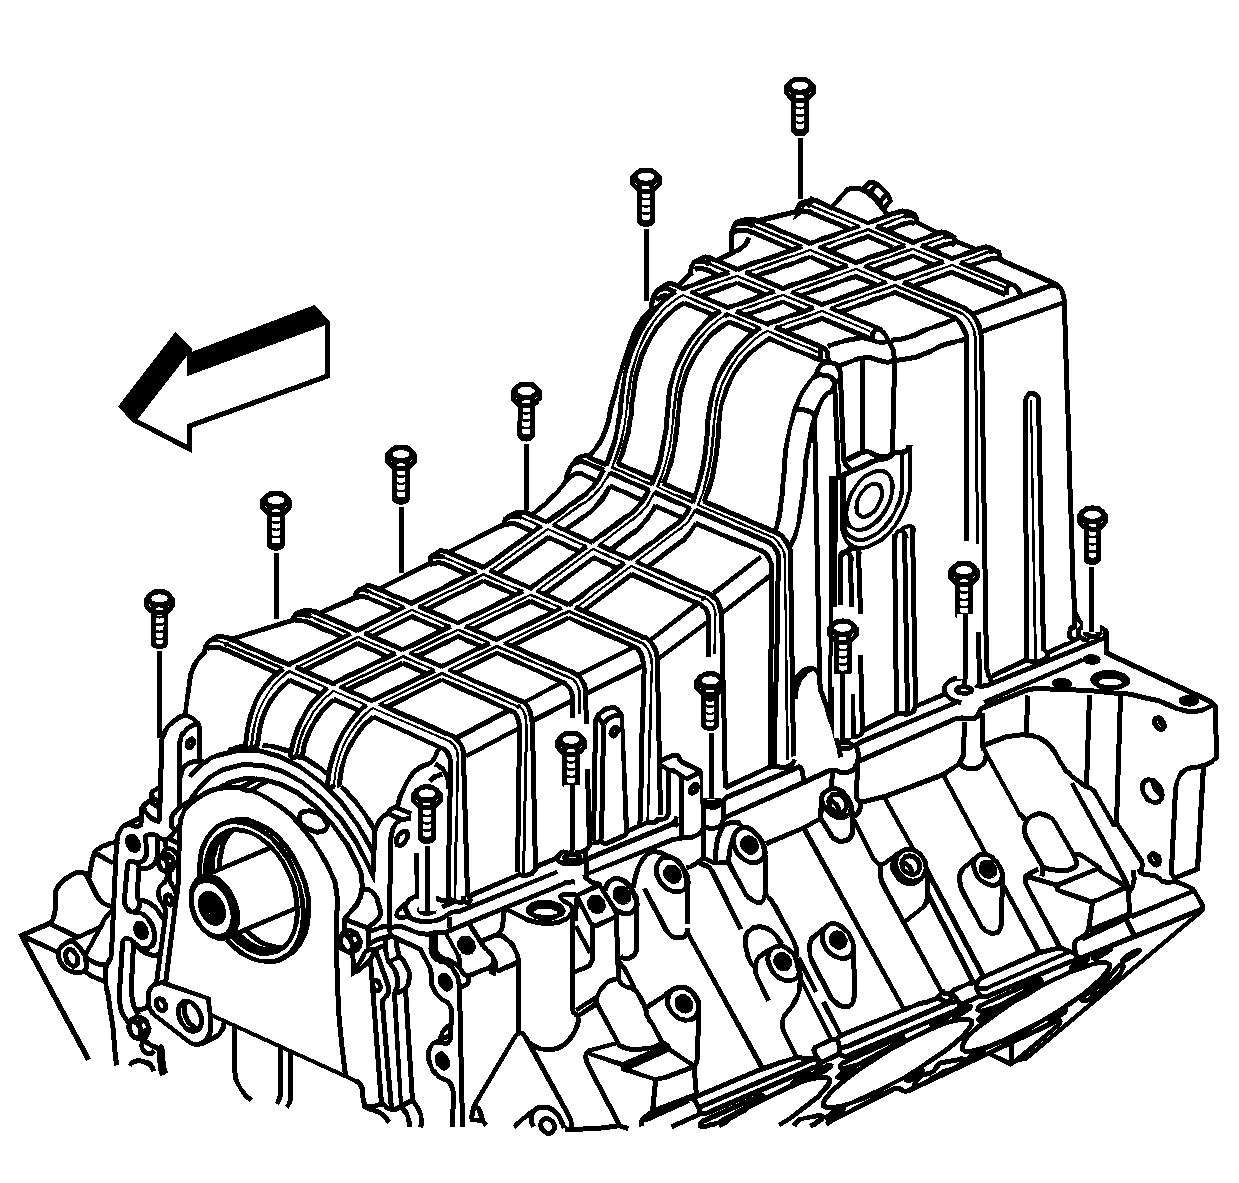
- Install the oil pan bolts.
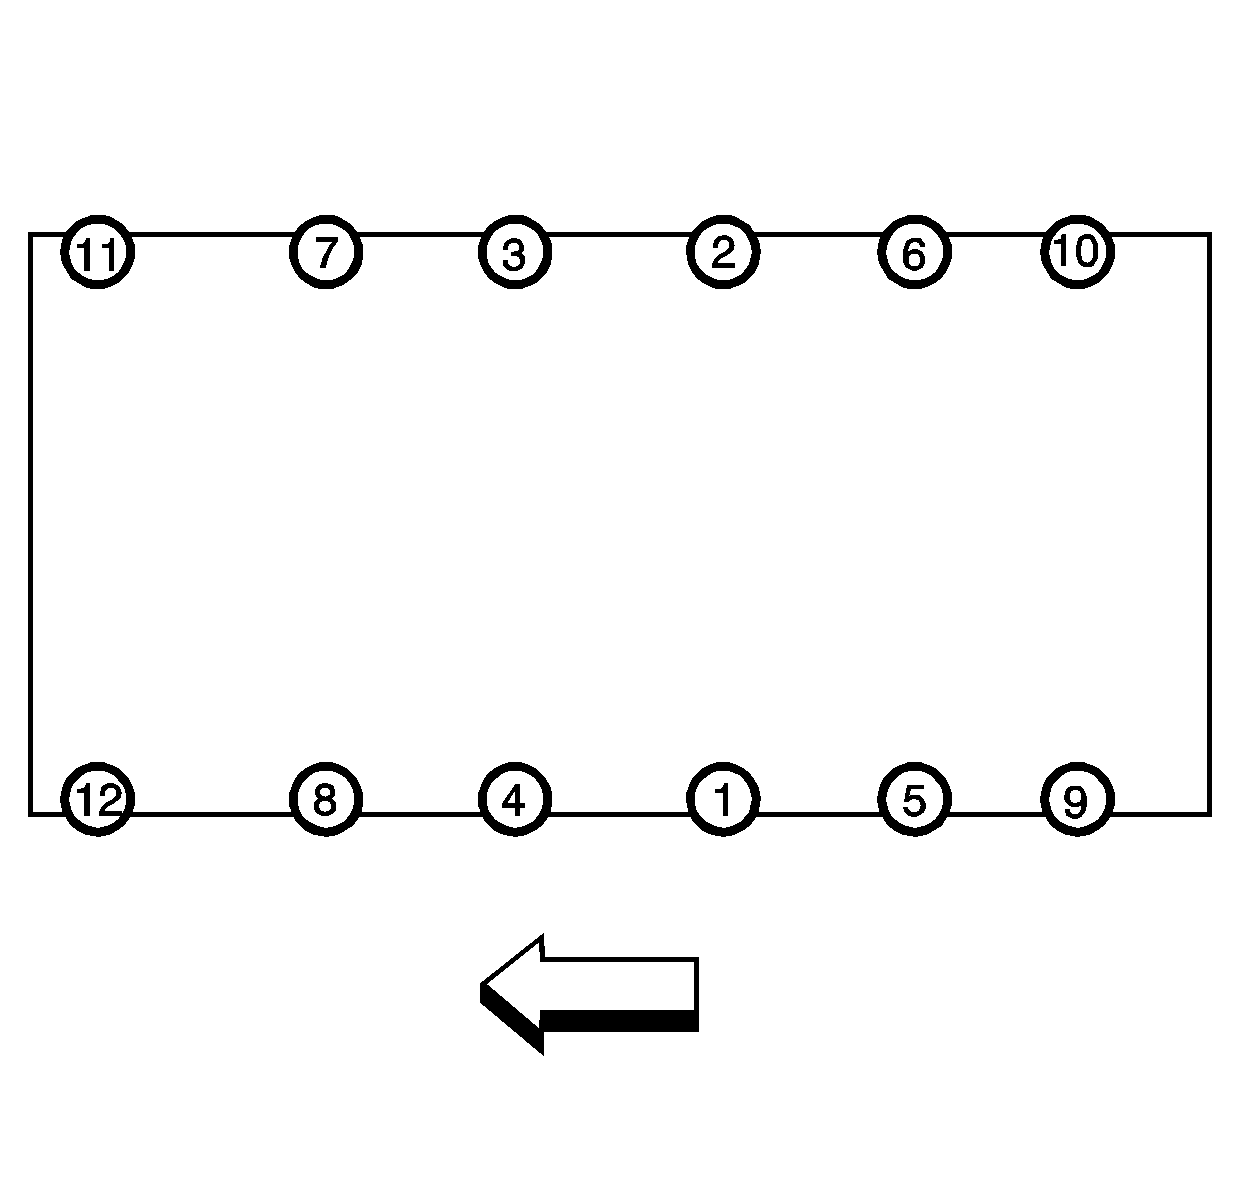
- Tighten the oil pan bolts in sequence.
- Install the oil pan drain plug.
- Install the oil level switch, if applicable.
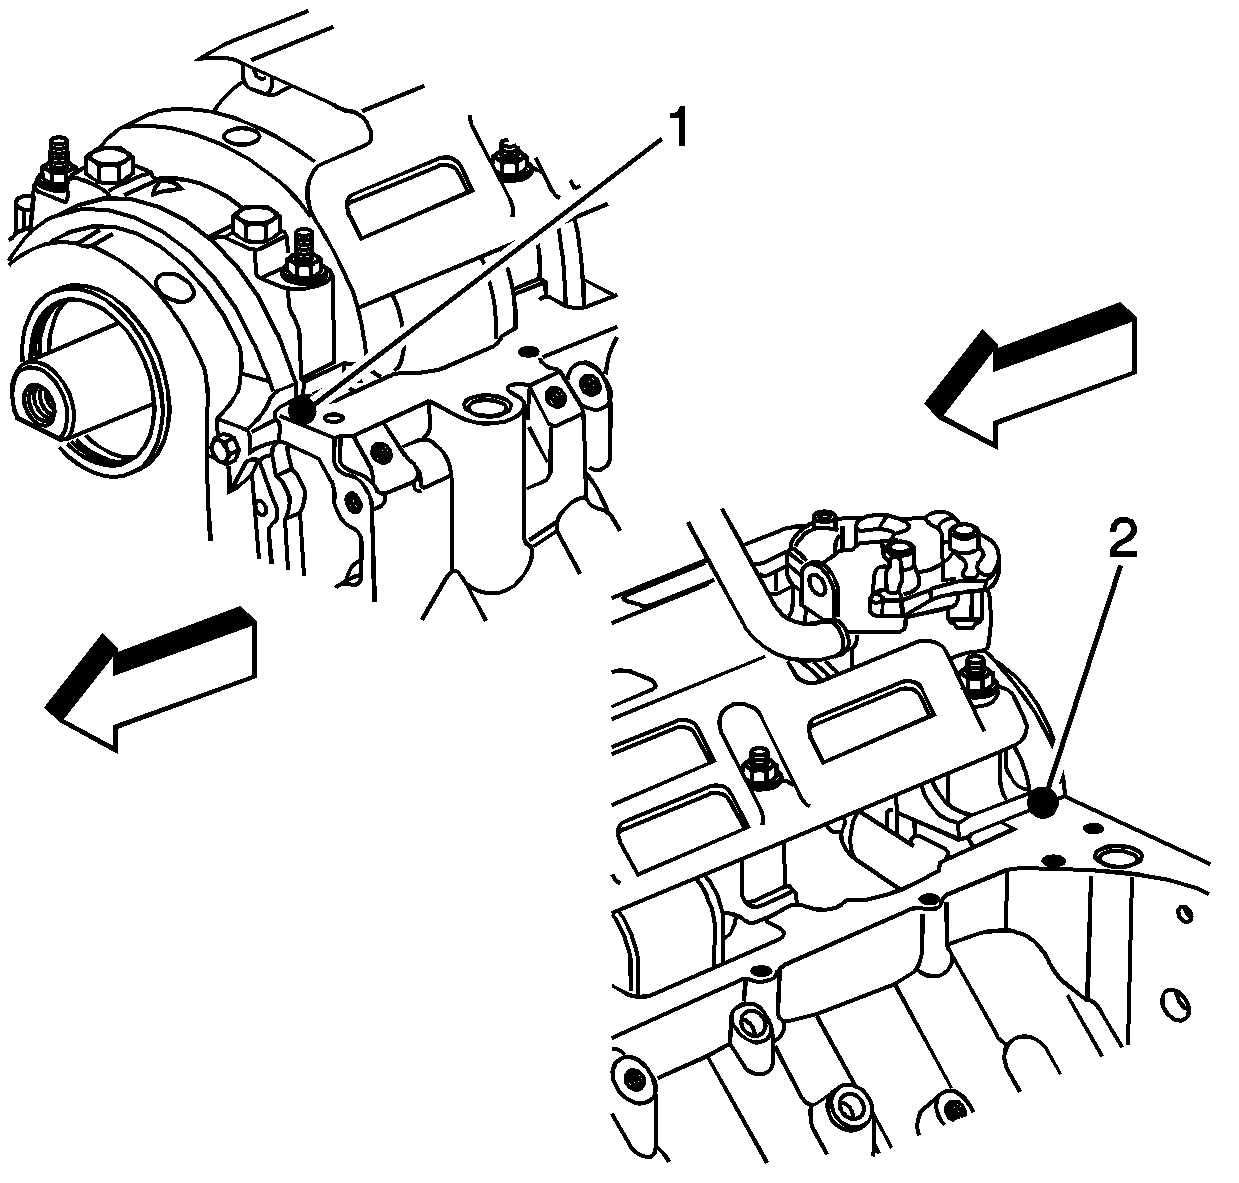
Important: The oil pan must be installed within five minutes of the sealer being applied or the sealer will begin to cure, causing an inadequate seal.
Notice: Use the correct fastener in the correct location. Replacement fasteners must be the correct part number for that application. Fasteners requiring replacement or fasteners requiring the use of thread locking compound or sealant are identified in the service procedure. Do not use paints, lubricants, or corrosion inhibitors on fasteners or fastener joint surfaces unless specified. These coatings affect fastener torque and joint clamping force and may damage the fastener. Use the correct tightening sequence and specifications when installing fasteners in order to avoid damage to parts and systems.
Tighten
| • | Tighten the oil pan bolts in sequence to 10 N·m (88 lb in) in a first pass. |
| • | Tighten the oil pan bolts in sequence to 25 N·m (18 lb ft) in a second pass. |
Tighten
Tighten the oil pan drain plug to 28 N·m (21 lb ft).
Tighten
Tighten the oil level switch to 20 N·m (15 lb ft).
Oil Pan Installation Medium Duty
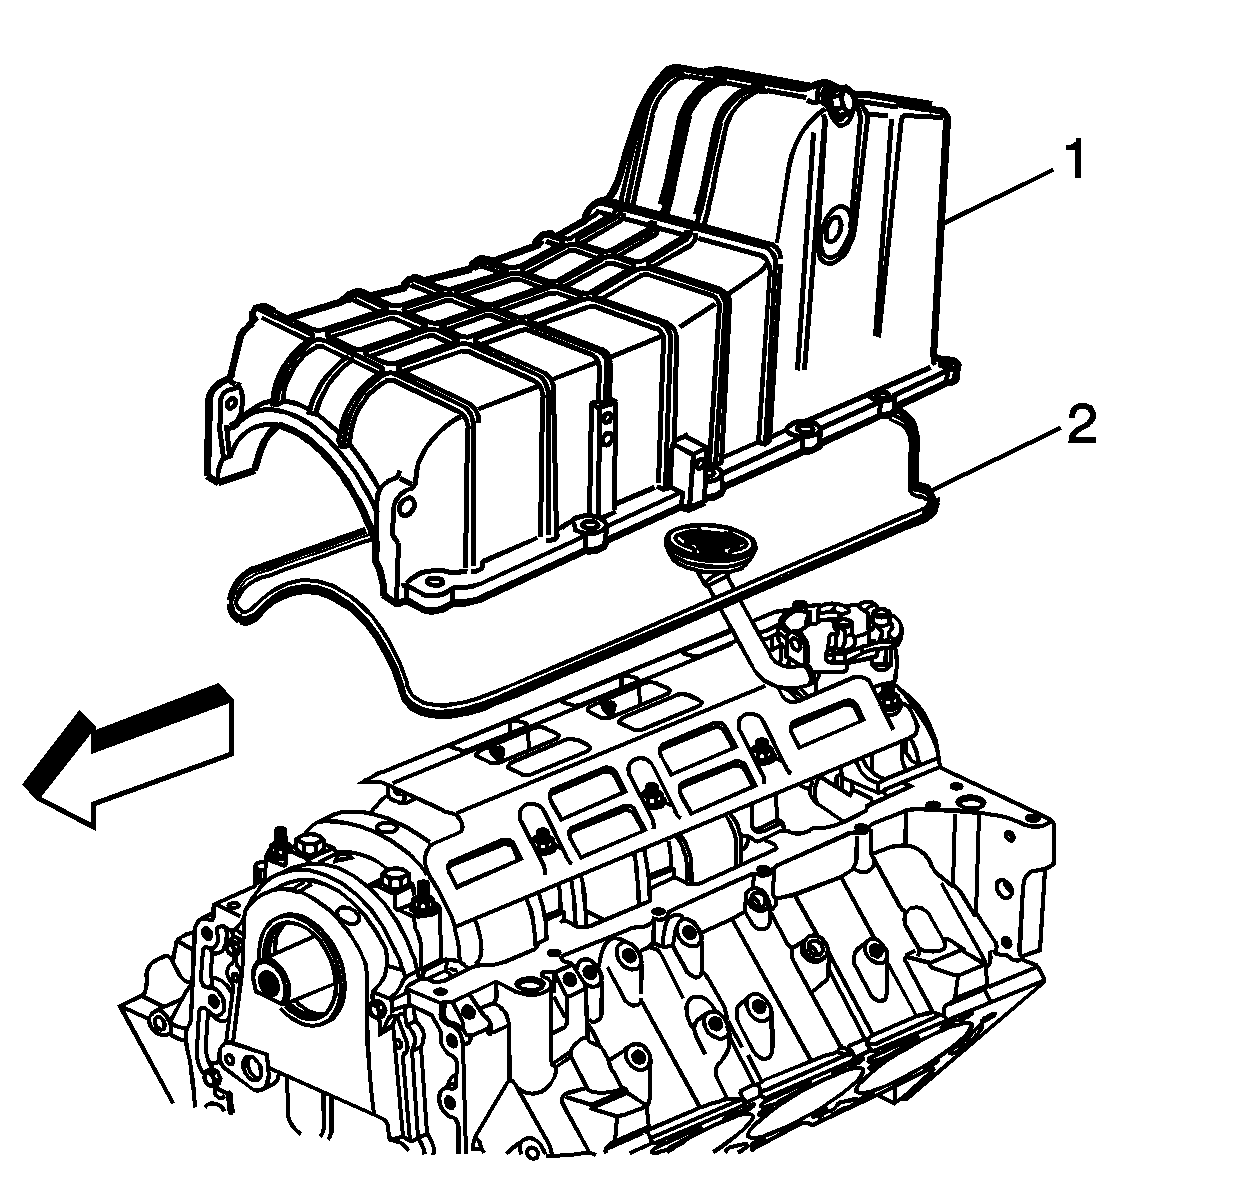
- Apply sealant GM P/N United States 12346286, GM P/N Canada 10953472, to the side of the front cover (1) and rear (2) crankshaft bearing cap, on both the left and right sides (four locations total).
- Install the new oil pan gasket (2) into the oil pan groove.
- Install the oil pan (1).
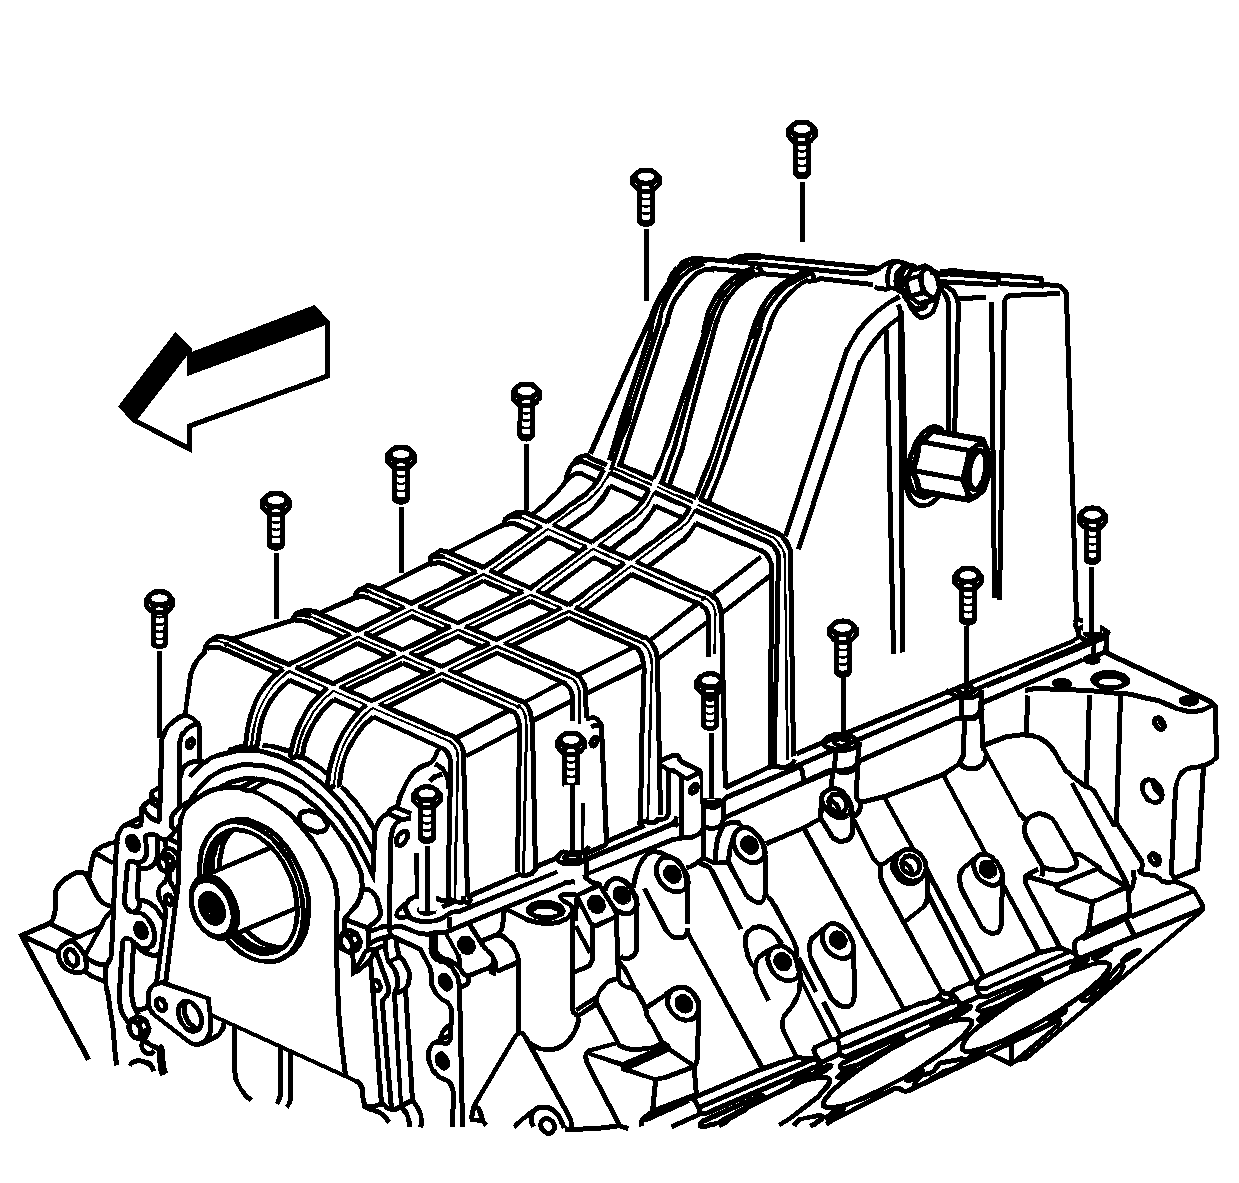
- Install the oil pan bolts.
- Tighten the oil pan bolts in sequence.
- Install the oil pan drain plug.
- Install the oil level switch.

Important: The oil pan must be installed within five minutes of the sealer being applied or the sealer will begin to cure, causing an inadequate seal.

Notice: Use the correct fastener in the correct location. Replacement fasteners must be the correct part number for that application. Fasteners requiring replacement or fasteners requiring the use of thread locking compound or sealant are identified in the service procedure. Do not use paints, lubricants, or corrosion inhibitors on fasteners or fastener joint surfaces unless specified. These coatings affect fastener torque and joint clamping force and may damage the fastener. Use the correct tightening sequence and specifications when installing fasteners in order to avoid damage to parts and systems.
Tighten
| • | Tighten the oil pan bolts in sequence to 10 N·m (88 lb in) in a first pass. |
| • | Tighten the oil pan bolts in sequence to 25 N·m (18 lb ft) in a second pass. |
Tighten
Tighten the oil pan drain plug to 28 N·m (21 lb ft).
Tighten
Tighten the oil level switch to 20 N·m (15 lb ft).
