For 1990-2009 cars only
Overlap/Backing Plate Sectioning Bonding/Overlap

Important: Before starting the repair, refer to Metal Panel Bonding for proper adhesive applicator preparations and general information.
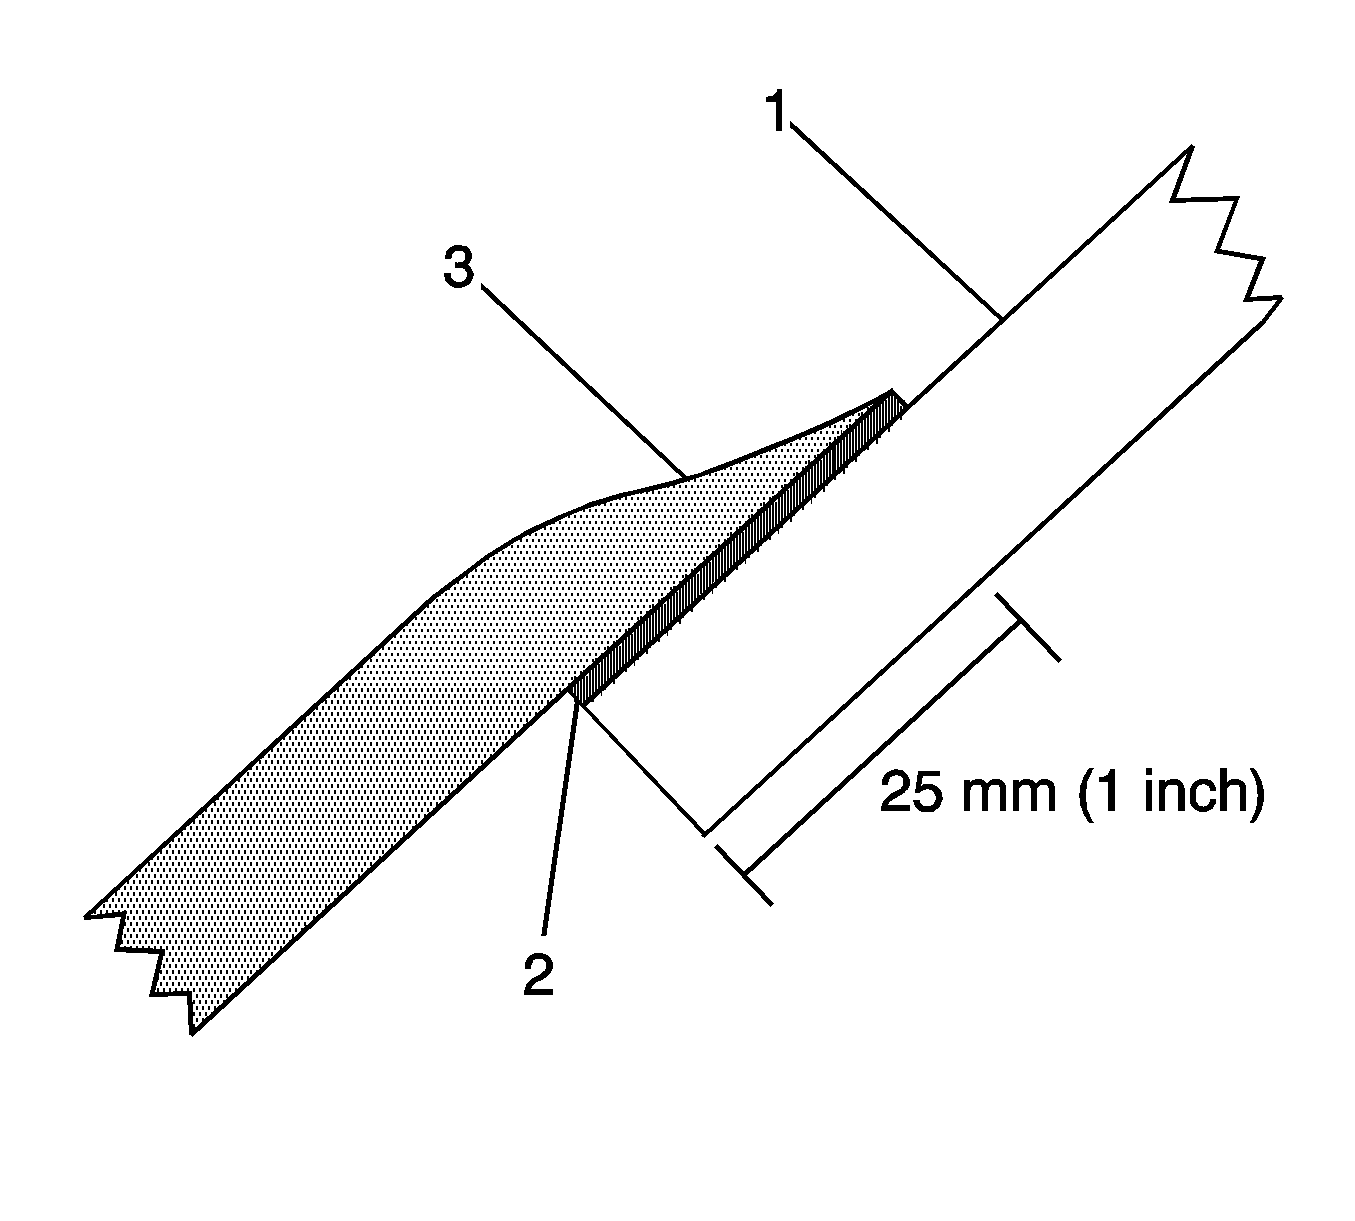
- Fit the service panel to the vehicle to ensure a proper fit of a maximum 25 mm (1 in) overlap.
- Grind a 25 mm (1 in) area of the outer surface on the vehicle panel to remove any corrosion, E-coat, primers, coatings and galvanizing that may be present (1).
- At the section joint on the service panel, grind a 25 mm (1 in) area of the back side to remove any corrosion, E-coat, primers, coatings and galvanizing that may be present (2).
- Bevel the service panel at the section edge to approximately 10 degrees (3).
- Clean the mating surfaces.
- Apply a 3-6 mm (1/8-1/4 in) bead of metal panel bonding adhesive to both of the mating surfaces.
- Using small acid brush, spread a coat of adhesive to cover all the bare metal surfaces to ensure corrosion protection.
- Apply a 9-13 mm (3/8-1/2 in) bead of metal panel bonding adhesive to the sectioning part mating surfaces.
- Position the service panel to the body. Clamp the service panel into position.
- Install the screws or clamp the overlap sectioning location.
- Using lacquer thinner, remove the excess adhesive from the overlap section.
- Allow the adhesive to cure. Remove the screws or clamps from the overlap section.
- Remove any remaining adhesive where body filler will be applied.
- Recess the screw holes with a punch and hammer as necessary.
- Apply a fiberglass-filled body filler for the overlap section and screw holes for the first coat.
- Apply a lightweight body filler to the overlap section for the second coat.
Important: The adhesive has a 40-50 minute working time.
Important: DO NOT pull the service panels apart after the panels have been joined together. Slide the panels against each other to realign the panels.
Important: Always follow the system manufacturer's instructions for application, handling, and curing.
