For 1990-2009 cars only
Auxiliary HVAC Module Replacement Standard Wheelbase
Special Tools
J 39400-A Halogen Leak Detector
Removal Procedure
- Recover the refrigerant from the A/C system. Refer to Refrigerant Recovery and Recharging.
- Drain the engine coolant. Refer to Cooling System Draining and Filling.
- Raise the vehicle. Refer to Lifting and Jacking the Vehicle.
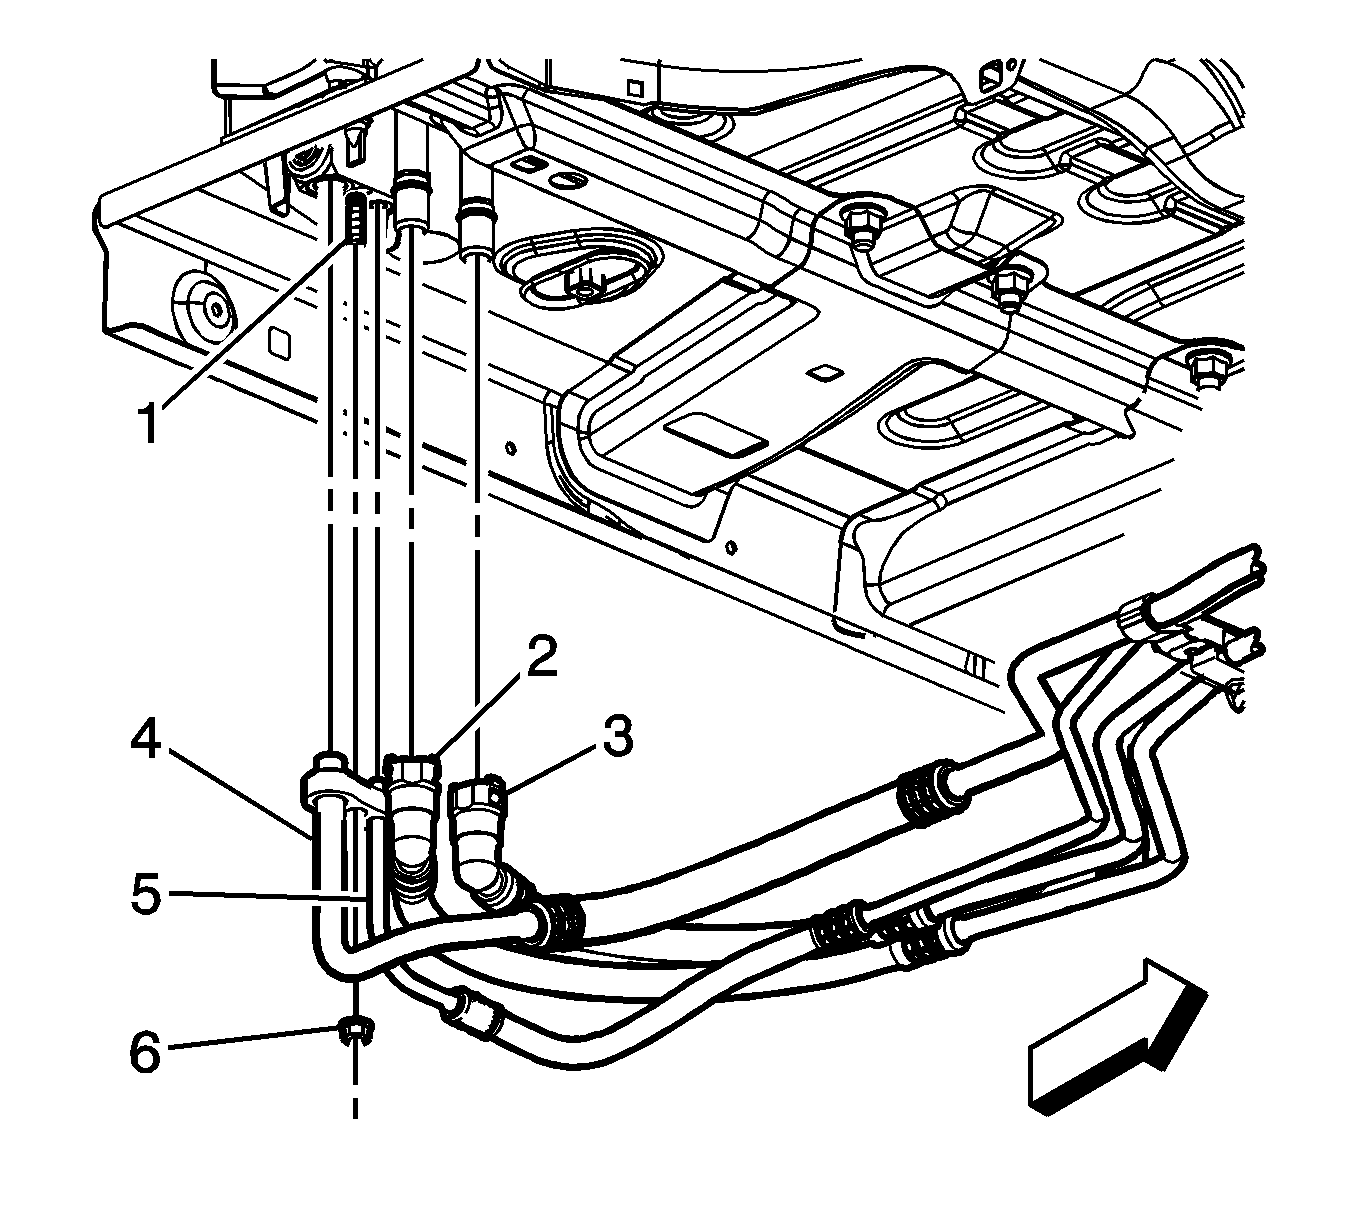
- Disconnect the heater lines (2, 3) from the auxiliary HVAC module at the underside of the vehicle.
- Disconnect the air conditioning lines (4, 5) from the auxiliary HVAC module at the underside of the vehicle.
- Remove the nuts (6) from the studs (1) that secure the auxiliary HVAC module to the underside of the vehicle.
- Lower the vehicle.
- Remove the right rear quarter trim panel. Refer to Rear Quarter Trim Panel Replacement - Right Side.
- Disconnect the electrical connectors from the Auxiliary HVAC module.
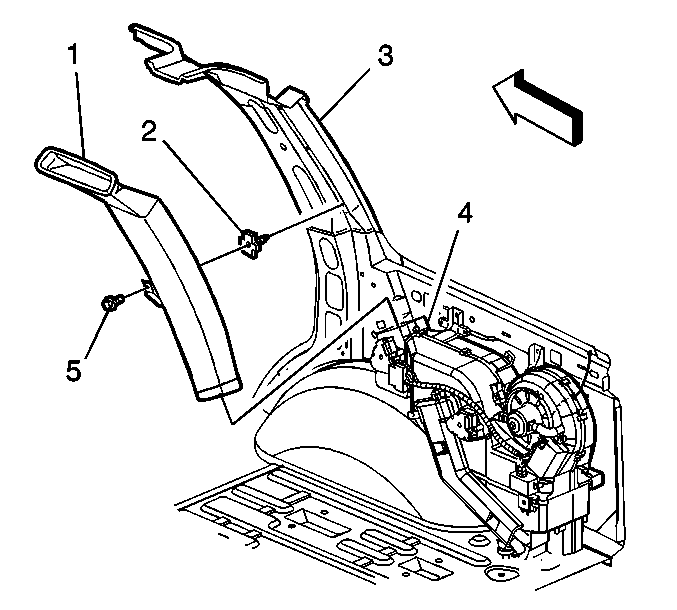
- Remove the fastener (5) for the upper auxiliary air duct (1). Carefully slide the duct up, into the headliner, until the bottom edge of the duct is above the air distributor duct.
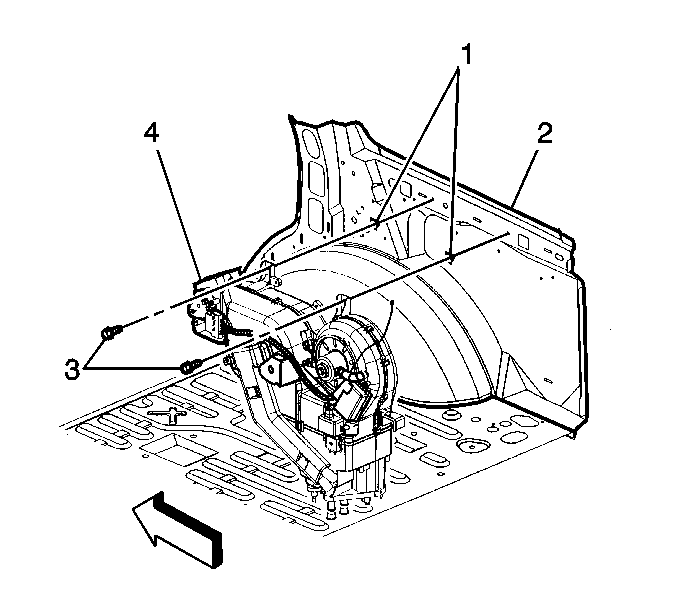
- Remove the fasteners (3) retaining the auxiliary HVAC module to the vehicle.
- Remove the auxiliary HVAC module (4) from the vehicle.
Installation Procedure
- Install the auxiliary HVAC module assembly (4) to the vehicle.
- Install the 2 bolts (3) inside the vehicle in order to retain the auxiliary HVAC module to the vehicle.
- Install the upper auxiliary air duct (1) to the air distributor duct. Install the fastener (5).
- Connect the electrical connectors to the auxiliary HVAC module.
- Install the right rear quarter trim panel. Refer to Rear Quarter Trim Panel Replacement - Right Side.
- Raise the vehicle.
- Install the nuts (6) that secure the auxiliary HVAC module to the vehicle and tighten to 9 N·m (80 lb in).
- Install the air conditioning lines (4, 5) and the nut (4) to the auxiliary HVAC module and tighten to 16 N·m (12 lb ft).
- Install the heater lines (2, 3) to the auxiliary HVAC module at the underside of vehicle.
- Lower the vehicle.
- Fill the engine coolant. Refer to Cooling System Draining and Filling.
- Recharge the refrigerant to the system. Refer to Refrigerant Recovery and Recharging.
- Leak test the fittings of the component using the J 39400-A .
Caution: Refer to Fastener Caution in the Preface section.
Auxiliary HVAC Module Replacement Extended Wheelbase
Special Tools
J 39400-A Halogen Leak Detector
Removal Procedure
- Recover the refrigerant from the A/C system. Refer to Refrigerant Recovery and Recharging.
- Drain the engine coolant. Refer to Cooling System Draining and Filling.
- Raise the vehicle. Refer to Lifting and Jacking the Vehicle.
- Disconnect the heater lines (2, 3) from the auxiliary HVAC module at the underside of the vehicle.
- Disconnect the air conditioning lines (4, 5) from the auxiliary HVAC module at the underside of the vehicle.
- Remove the nuts (6) from the studs (1) that secure the auxiliary HVAC module to the underside of the vehicle.
- Lower the vehicle.
- Remove the right rear quarter trim panel. Refer to Rear Quarter Trim Panel Replacement - Right Side.
- Disconnect the electrical connectors from the auxiliary HVAC module.
- Remove the forward auxiliary air duct from HVAC module.
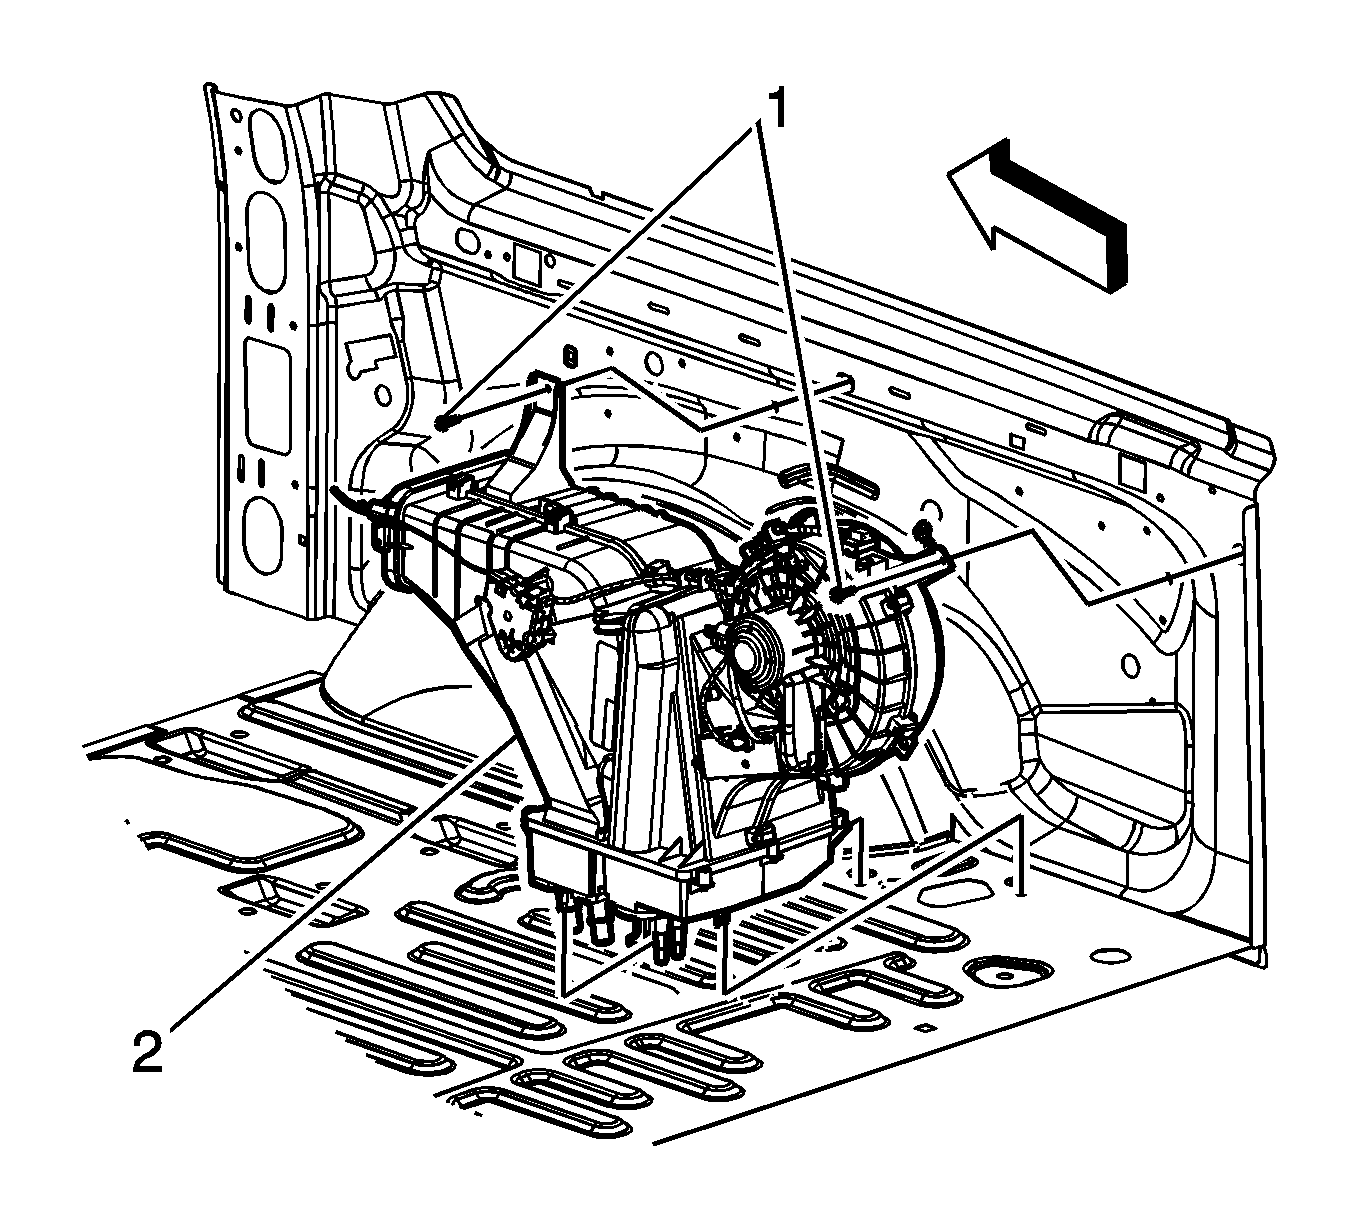
- Remove the fasteners (1) retaining the auxiliary HVAC module to the vehicle.
- Remove the auxiliary HVAC module (2) from the vehicle.
Installation Procedure
- Install the auxiliary HVAC module assembly (2) to the vehicle.
- Install the 2 bolts (1) inside the vehicle in order to retain the auxiliary HVAC module to the vehicle.
- Install the forward auxiliary air duct.
- Connect the electrical connectors to the auxiliary HVAC module.
- Install the right rear quarter trim panel. Refer to Rear Quarter Trim Panel Replacement - Right Side.
- Raise the vehicle.
- Install the nuts (6) that secure the auxiliary HVAC module to the vehicle and tighten to 9 N·m (80 lb in).
- Install the air conditioning lines (4, 5) and the nut to the auxiliary HVAC module and tighten to Tighten the nut to 16 N·m (12 lb ft).
- Install the heater lines (2, 3) to the auxiliary HVAC module at the underside of vehicle.
- Lower the vehicle.
- Fill the engine coolant. Refer to Cooling System Draining and Filling.
- Recharge the refrigerant to the system. Refer to Refrigerant Recovery and Recharging.
- Leak test the fittings of the component using the J 39400-A .
Caution: Refer to Fastener Caution in the Preface section.
