For 1990-2009 cars only
Inspection Procedure
- Inspect the valve body to spacer plate gasket for valve body channel witness marks. The witness marks should be complete. Incomplete witness marks may be caused by an uneven case surface. Incomplete witness marks may also be caused by cross-channel leaks.
- Inspect the valve body casting for the following conditions:
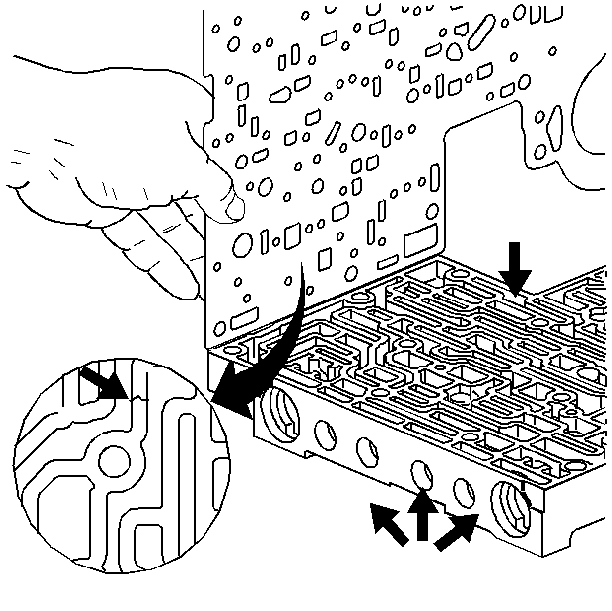
| • | Porosity |
| • | Cracks |
| • | Damaged machined surfaces |
| • | Chips or debris |
Cleaning Procedure
- Clean all the valves, springs, bushings, and the control valve body in clean solvent.
- Dry all the parts using compressed air.
Control Valve Body Assembly
- Install the following items:
- Install the following items:
- Install the following items:
- Install the following items:
- Install the following items:
- Install the following items:
- Install the following items:
- Install the following items:
- Install the following items:
- Install the following items:
- Install the following items:
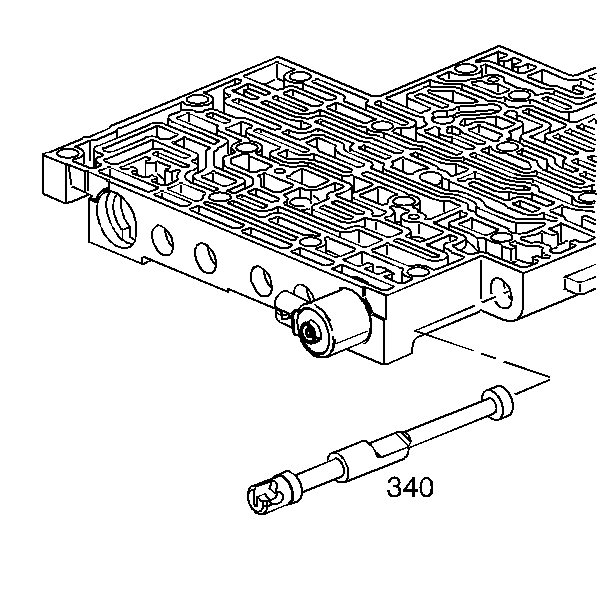
- Install the manual valve (340).
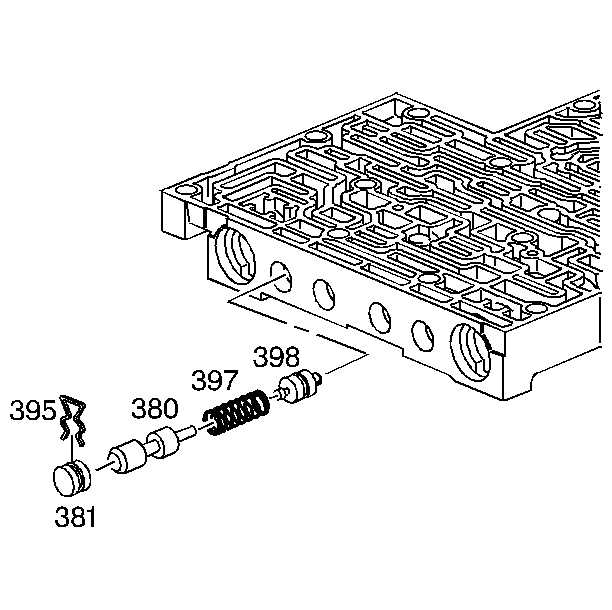
Caution: Valve springs can be tightly compressed. Use care when removing retainers and plugs. Personal injury could result.
Important: Lubricate all parts with Dexron®-lll automatic transmission fluid before installation.
| 1.1. | The isolator valve (398) |
| 1.2. | The regulator apply spring (397) |
| 1.3. | The regulator apply valve (380) |
| 1.4. | The bore plug (381) |
| 1.5. | The bore plug retainer (395) |
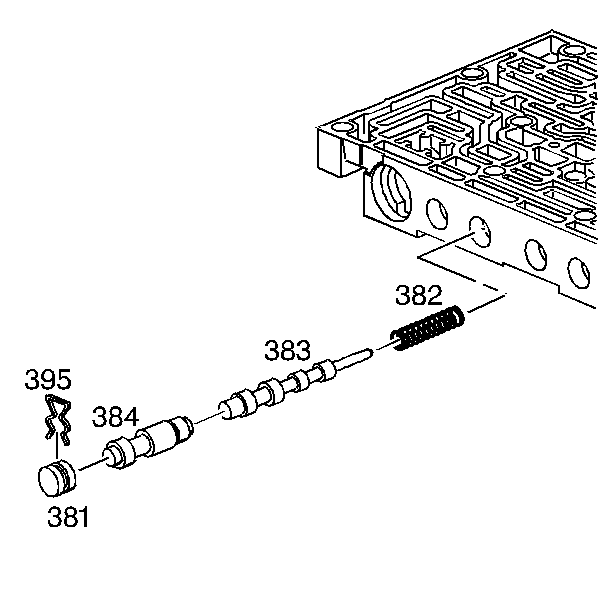
| 2.1. | The 4-3 sequence valve spring (382) |
| 2.2. | The 4-3 sequence valve (383) |
| 2.3. | The 3-4 relay valve (384) |
| 2.4. | The bore plug (381) |
| 2.5. | The bore plug retainer (395) |
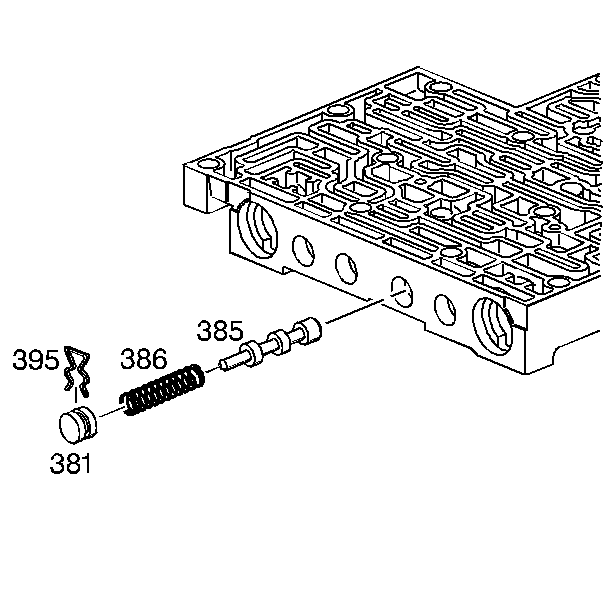
| 3.1. | The 3-4 shift valve (385) |
| 3.2. | The 3-4 shift valve spring (386) |
| 3.3. | The bore plug (381) |
| 3.4. | The bore plug retainer (395) |
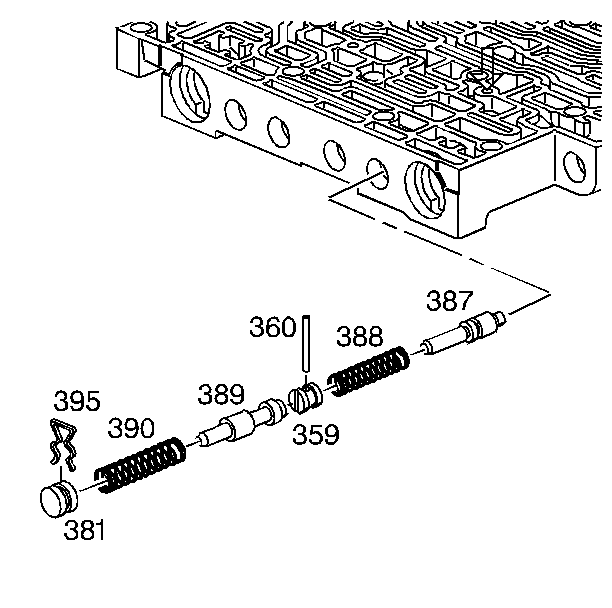
| 4.1. | The reverse abuse valve (387) |
| 4.2. | The reverse abuse valve spring (388) |
| 4.3. | The bore plug (359) |
| 4.4. | The coiled spring pin (360) |
| 4.5. | The 3-2 downshift valve (389) |
| 4.6. | The 3-2 downshift valve spring (390) |
| 4.7. | The bore plug (381) |
| 4.8. | The bore plug retainer (395) |
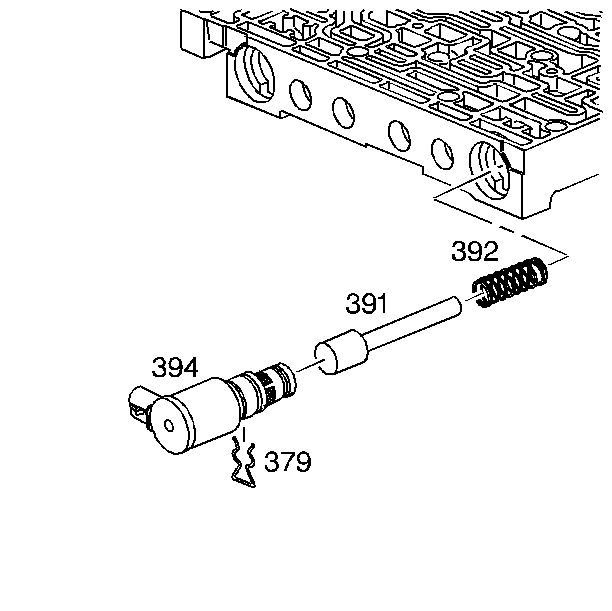
| 5.1. | The 3-2 control valve spring (392) |
| 5.2. | The 3-2 control valve (391) |
| 5.3. | The 3-2 control solenoid (394) |
| 5.4. | The solenoid retainer (379) |
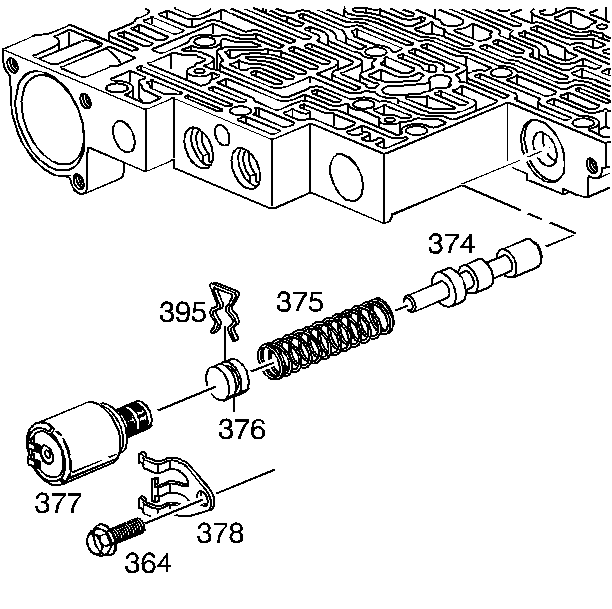
| 6.1. | The actuator feed limit valve (374) |
| 6.2. | The actuator feed limit valve spring (375) |
| 6.3. | The bore plug (376) |
| 6.4. | The bore plug retainer (395) |
| 6.5. | The pressure control solenoid (377) |
| 6.6. | The solenoid retainer (378) |
| 6.7. | The solenoid retainer bolt (364) |
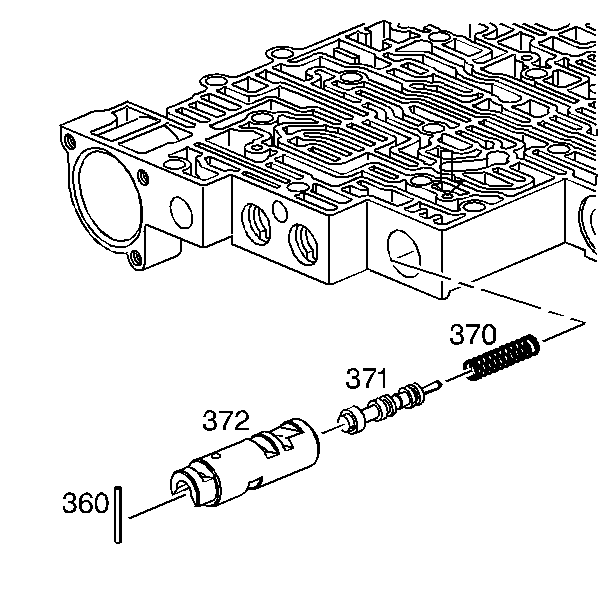
| 7.1. | The 1-2 accumulator valve spring (370) |
| 7.2. | The 1-2 accumulator valve (371) in the 1-2 accumulator valve sleeve (372) |
| 7.3. | The 1-2 accumulator valve and sleeve assembly |
| 7.4. | The coiled spring pin (360) |
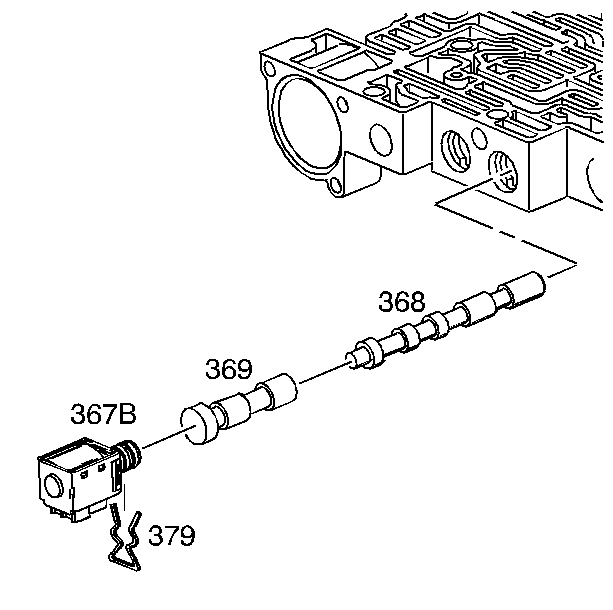
| 8.1. | The 2-3 shift valve (368) |
| 8.2. | The 2-3 shuttle valve (369) |
| 8.3. | The 2-3 shift solenoid valve (367B) |
| 8.4. | The solenoid retainer (379) |
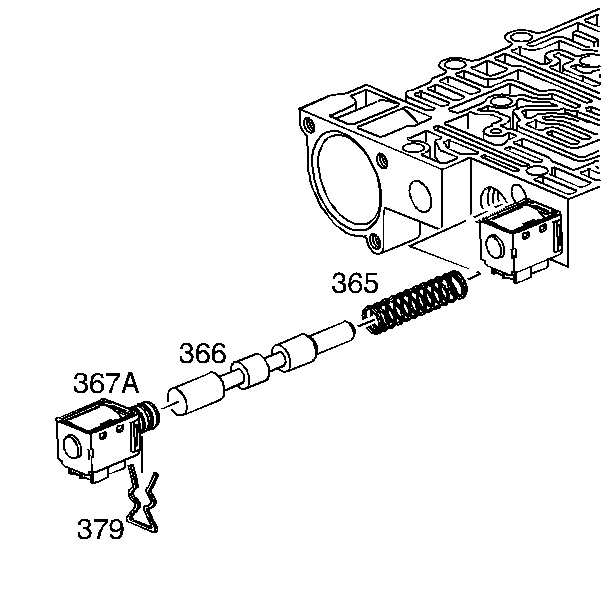
| 9.1. | Install the 1-2 shift valve spring (365) |
| 9.2. | The 1-2 shift valve (366) |
| 9.3. | The 1-2 shift solenoid valve (367A) |
| 9.4. | The solenoid valve retainer |
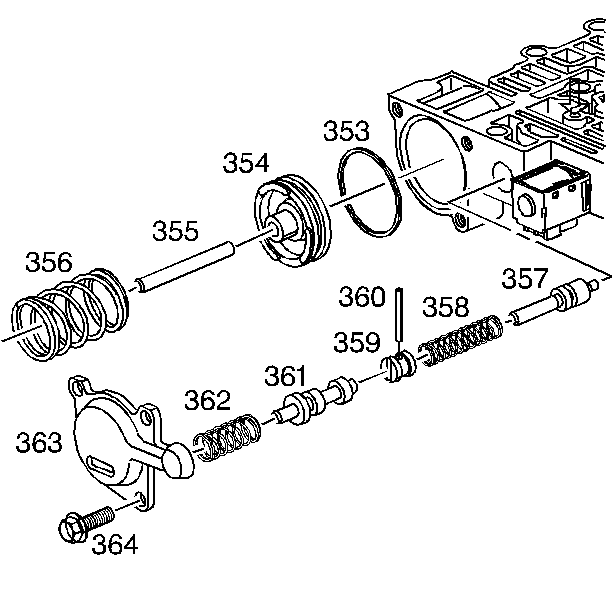
| 10.1. | The forward abuse valve (357) |
| 10.2. | The forward abuse valve spring (358) |
| 10.3. | The bore plug (359) |
| 10.4. | The coiled spring pin (360) |
| 10.5. | The low overrun valve (361) |
| 10.6. | The low overrun valve spring (362) |
| 11.1. | The forward accumulator oil seal (353) on the forward accumulator piston (354) |
| 11.2. | The forward accumulator pin (355) |
| 11.3. | The forward accumulator piston (354) |
| 11.4. | The forward accumulator spring (356) |
| 11.5. | The forward accumulator cover (363) |
| 11.6. | The forward accumulator cover bolts (364) |
