For 1990-2009 cars only
Front Bumper Filler Replacement Old Style
Removal Procedure
- Remove the front grille. Refer to Grille Replacement .
- Disconnect the electrical connector from the fog lamps, if equipped.
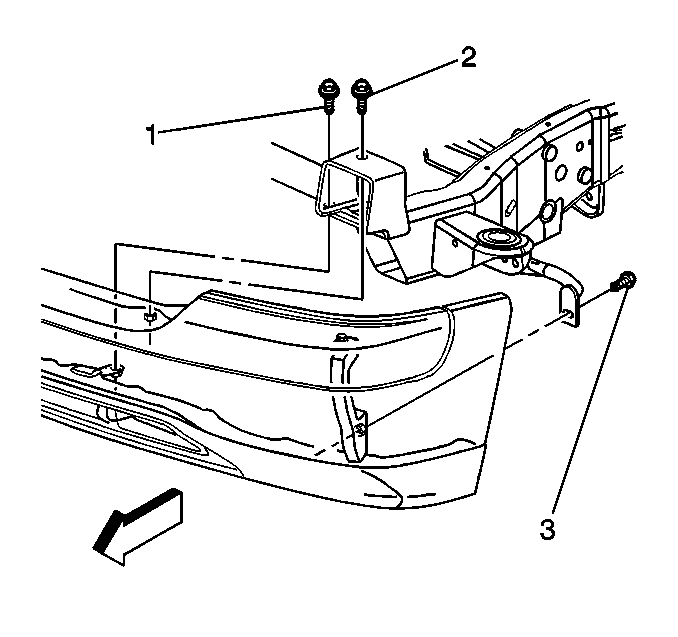
- Remove the retaining bolts (1, 2) from the front bumper.
- Remove the brace bolt (3) from the front bumper.
- Remove the front bumper assembly from the vehicle.
- Remove the air deflector from the bumper if necessary. Refer to Front Bumper Fascia Air Deflector Replacement .
- Remove the fog lamps, if equipped. Refer to Front Fog Lamp Replacement .
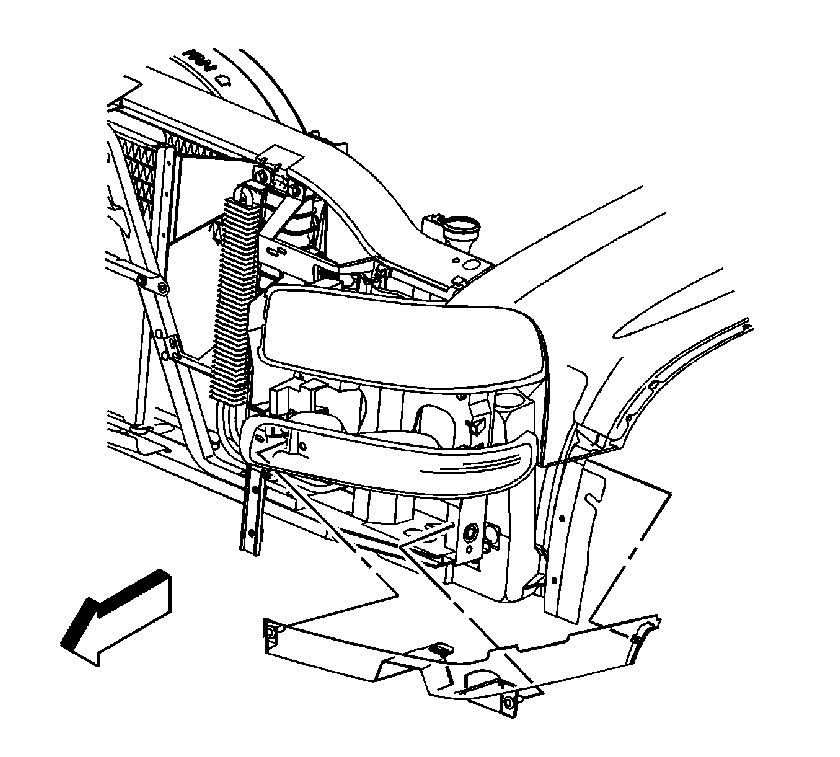
- Remove the S-clip securing the bumper filler panel to the wheelhouse splash shield.
- Remove the fastener securing the filler panel to the radiator support.
- Remove the fastener securing the filler panel to the headlamp bracket.
- Remove the bumper filler from the vehicle.


Installation Procedure
- Install the bumper filler from the vehicle.
- Install the fasteners securing the filler panel to the headlamp bracket and the radiator support.
- Install the fog lamps, if equipped. Refer to Front Fog Lamp Replacement .
- Install the air deflector to the bumper if necessary. Refer to Front Bumper Fascia Air Deflector Replacement .
- Position the front bumper assembly on the vehicle.
- Install the retaining bolts (1, 2) to the front bumper.
- Tighten the bracket bolt (1) to 85 N·m (63 lb ft).
- Tighten the bracket bolt (2) to 85 N·m (63 lb ft).
- Tighten the brace bolt to 55 N·m (41 lb ft).
- Connect the electrical connector to the fog lamps, if equipped.
- Install the front grille. Refer to Grille Replacement .

Notice: Refer to Fastener Notice in the Preface section.
Tighten
Tighten the filler panel to the headlamp bracket and the radiator support to 9 N·m (80 lb in).

Important: Tighten the bolts in the following sequence.
Tighten

