For 1990-2009 cars only
Removal Procedure
- Position the steering column shift lever to the park position.
- Remove the instrument panel knee bolster. Refer to Knee Bolster Replacement in Instrument Panel, Gages, and Console.
- Remove the driver's seat. Refer to Front Seat Replacement - Bucket in Seats.
- Pull back the carpet and insulation around the driver's area.
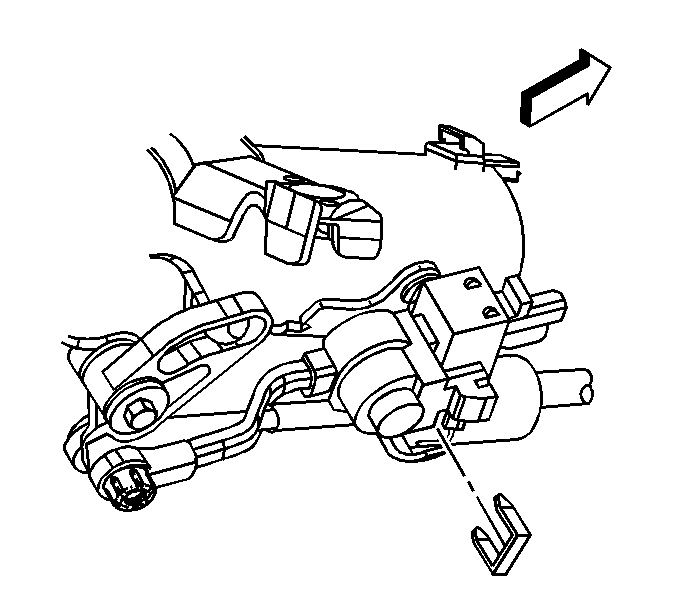
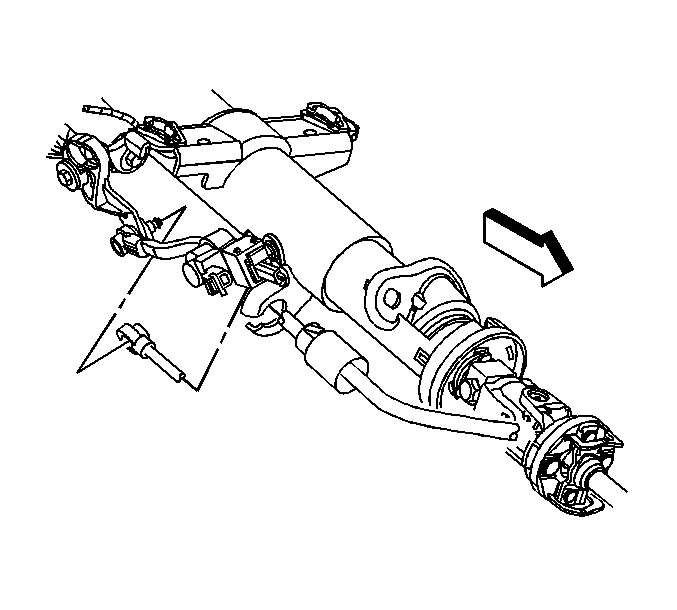
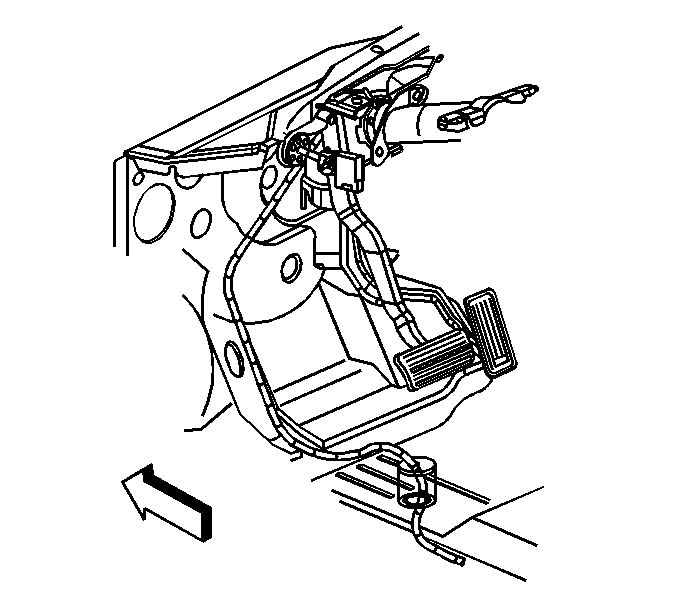
- Remove the retainer securing the cable to the steering column.
- Remove the cable end from the steering column ball stud.
- Depress the tangs and remove the cable from the steering column bracket.
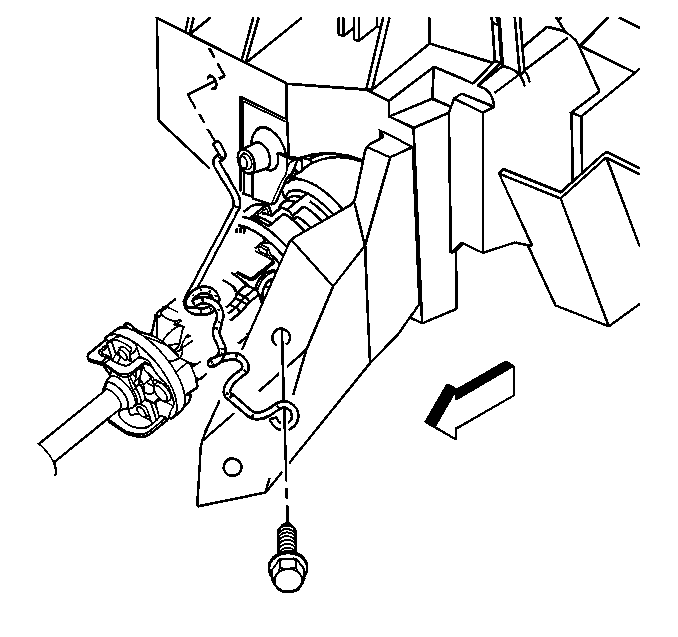
- Remove the bolt securing the cable support to the brace.
- Remove the range selector cable from the support.
- Remove the cable grommet from the floor panel.
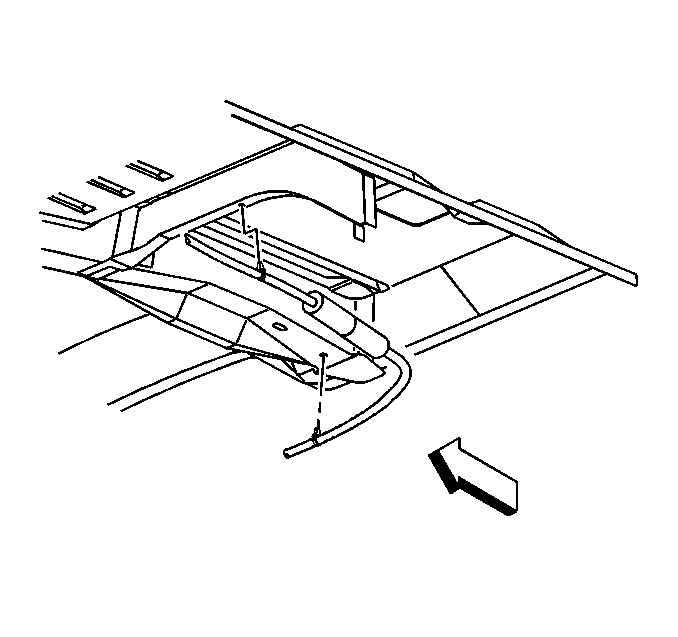
- Raise and suitably support the vehicle. Refer to Lifting and Jacking the Vehicle in General Information.
- Remove the clips on the cable from the floor panel reinforcement.
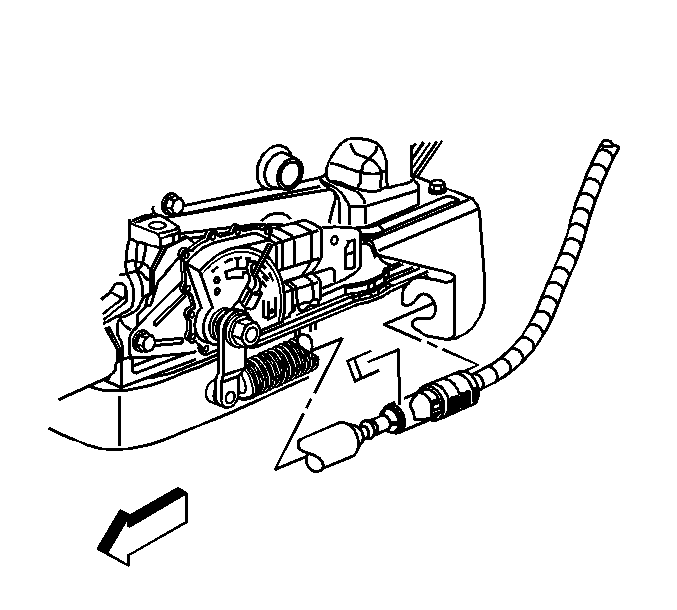
- Ensure the transmission manual shaft is positioned in mechanical park.
- Remove the retainer that secures the cable to the bracket.
- Remove the cable clip on the transfer case, if equipped.
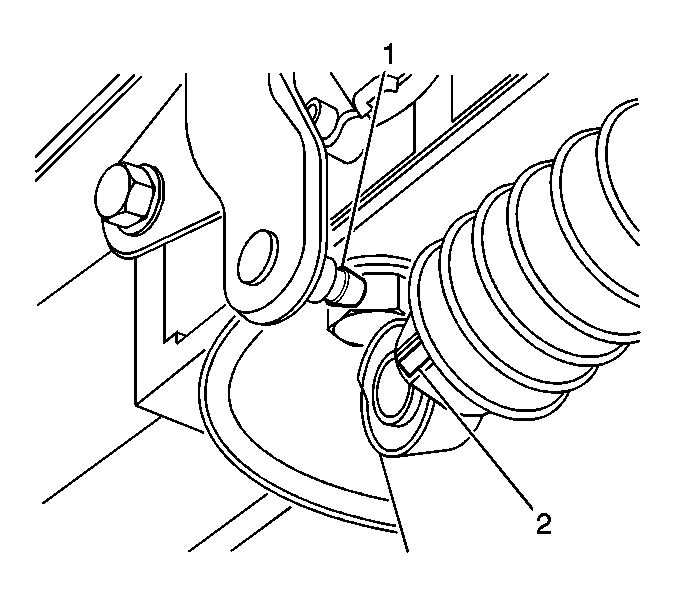
- Remove the range selector cable end (2) from the transmission range selector lever ball stud (1).
- Depress the tangs and remove the cable from the bracket.
- Lower the vehicle and ensure that the steering column shift lever is still in the park position.
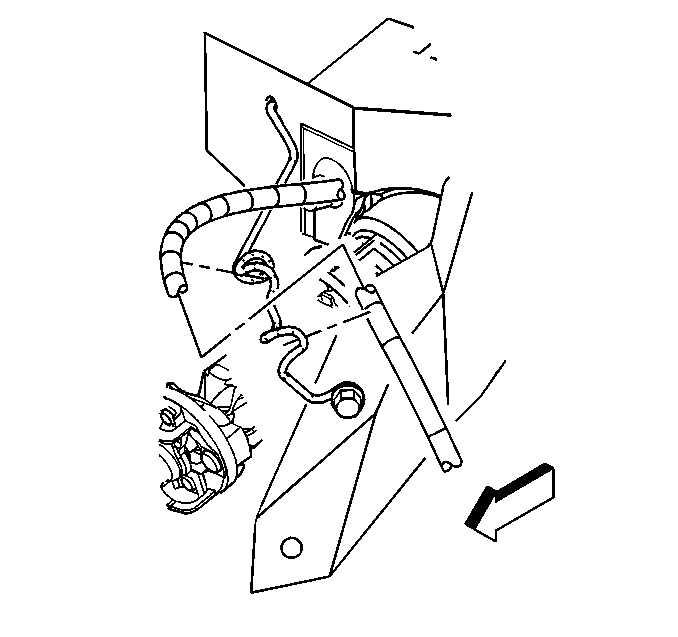
Important: Avoid unnecessary twisting/bending of the range selector cable when removing the cable from the support.
Installation Procedure
- Ensure that the transmission manual shaft lever is in the mechanical park position.
- Align and install the cable to the bracket.
- Install the range selector cable end (2) to the transmission range selector lever ball stud (1).
- Install the cable clip on the transfer case, if equipped.
- Install the retainer that secures the cable to the bracket.
- Install the clips on the cable to the floor panel reinforcement.
- Lower the vehicle.
- Install the cable grommet to the floor panel.
- Install the range selector cable to the support.
- Install the bolt securing the cable support to the brace.
- Install the cable to the steering column bracket.
- Ensure the tangs fully seat (snap) into the steering column bracket.
- Install the cable end to the steering column ball stud.
- Install the retainer securing the cable to the steering column.
- Position the carpet and insulation around the driver's area.
- Install the driver's seat. Refer to Front Seat Replacement - Bucket in Seats.
- Install the instrument panel knee bolster. Refer to Knee Bolster Replacement in Instrument Panel, Gages, and Console.
- Test the transmission for proper shift operation.
- If all of the gear positions cannot be achieved, adjust the cable. Refer to Range Selector Lever Cable Adjustment .


Important: Avoid unnecessary twisting/bending of the range selector cable when installing the cable to the support.
Notice: Refer to Fastener Notice in the Preface section.

Tighten
Tighten the bolt to 10 N·m (89 lb in).


