- Clean the filter screen thoroughly with solvent. Air dry.
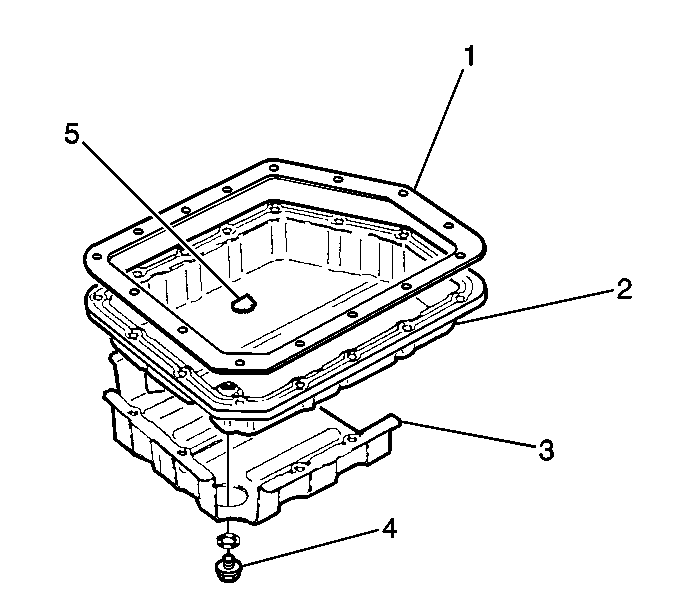
- Clean the bottom of the transaxle fluid pan (2) and the transaxle fluid pan magnet (5) thoroughly with solvent. Air dry.
- Install the filter screen, the solenoid wire clamp, and the filter screen bolts.
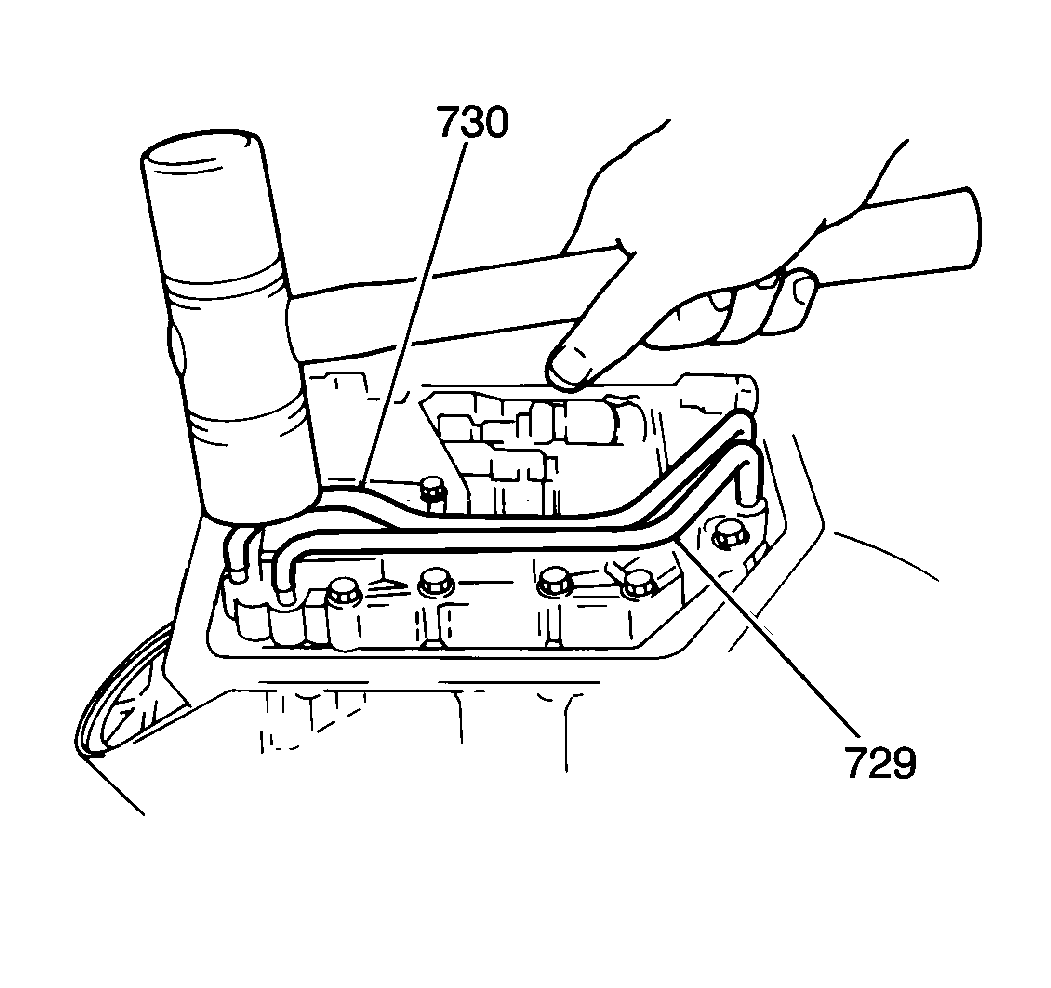
- Install the forward clutch accumulator fluid pipe (729) and the second brake fluid pipe (730). Gently tap the fluid pipes with a rubber mallet until the pipes are seated.
- Install a new fluid pan gasket on the transaxle case.
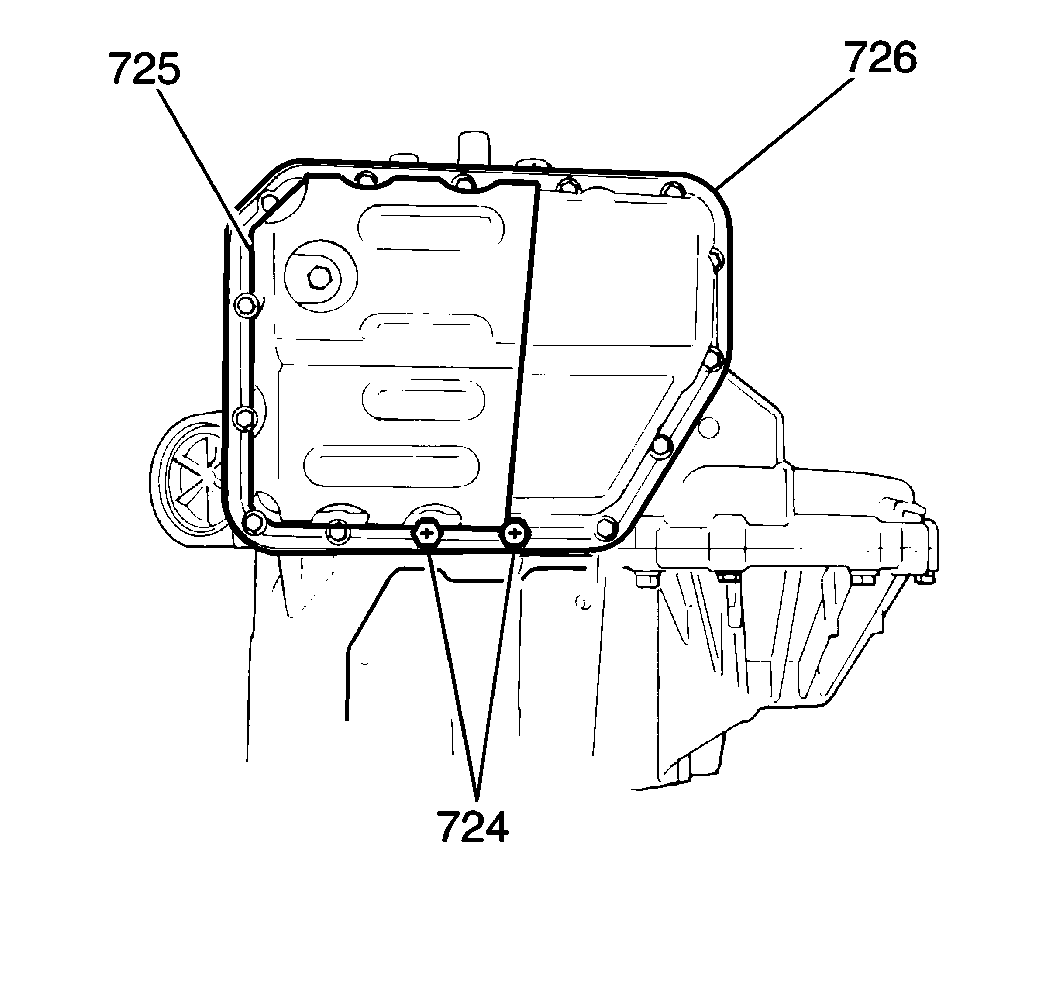
- Install the transaxle fluid pan (726) and the fluid pan guard (725) on the transaxle case.
- Install the fluid pan bolts.
- Install the fluid pan drain plug.
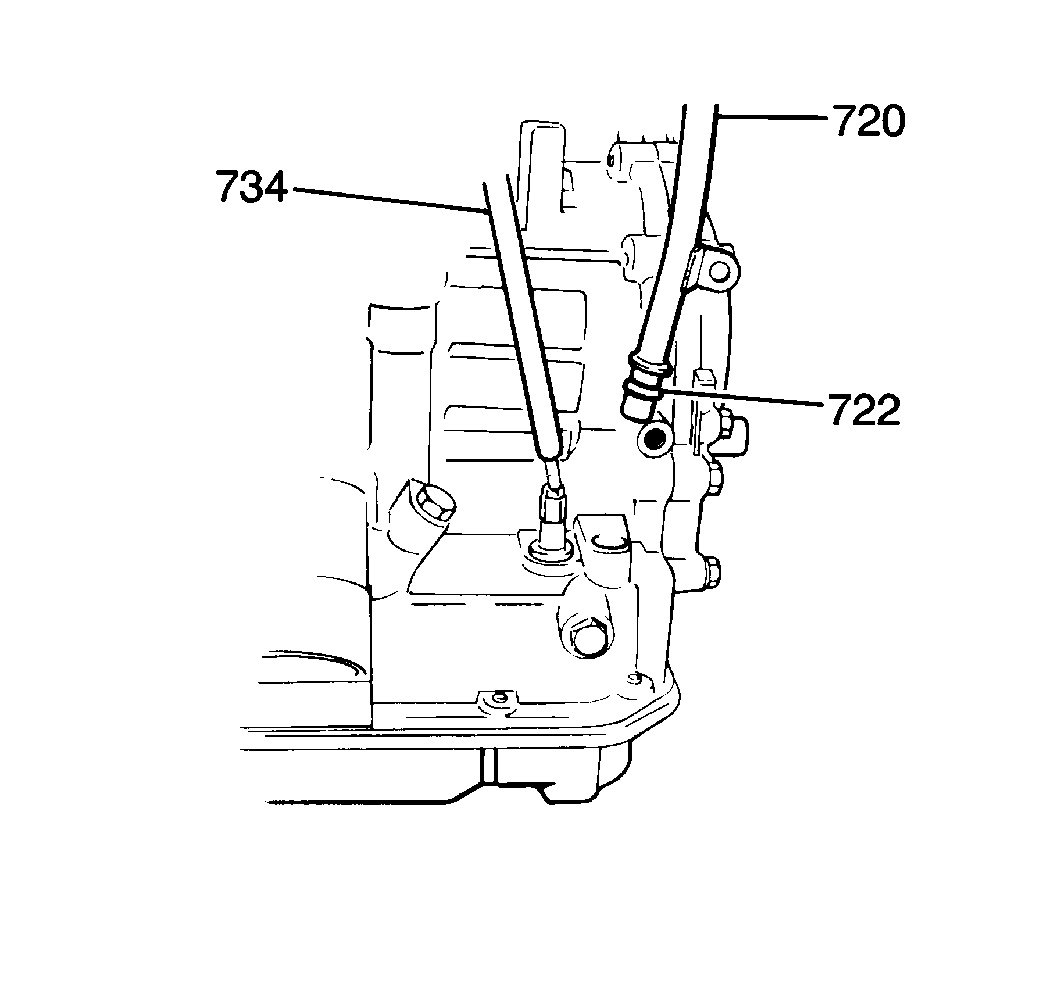
- Inspect the filler tube O-ring (722) on the end of the fluid filler tube (720) and replace as necessary.
- Install the filler tube bracket bolt.
- Install the fluid level indicator.

Notice: Use the correct fastener in the correct location. Replacement fasteners must be the correct part number for that application. Fasteners requiring replacement or fasteners requiring the use of thread locking compound or sealant are identified in the service procedure. Do not use paints, lubricants, or corrosion inhibitors on fasteners or fastener joint surfaces unless specified. These coatings affect fastener torque and joint clamping force and may damage the fastener. Use the correct tightening sequence and specifications when installing fasteners in order to avoid damage to parts and systems.
Tighten
Tighten the filter screen bolts to 4 N·m (35 lb in).


Important: Two of the 15 fluid pan bolts have cross-recesses in their heads (724). Apply Loctite® pipe sealant GM P/N 1052080, or equivalent, to the threaded portion of only these two bolts and install the cross-recessed bolts (724) in their proper positions as shown in the illustration. Do not apply sealant to the remaining 13 bolts.
Tighten
Tighten the fluid pan bolts to 6 N·m (53 lb in).
Tighten
Tighten the fluid pan drain plug to 23 N·m (17 lb ft).

Tighten
Tighten the filler tube bracket bolt to 4 N·m (35 lb in).
