GM Service Manual Online
For 1990-2009 cars only

Tools Required

    • J 34673 Flat Gage Bar
    • J 36850 Transjel® Transmission Assembly Lubricant

Removal Procedure


    Object Number: 144036  Size: SH
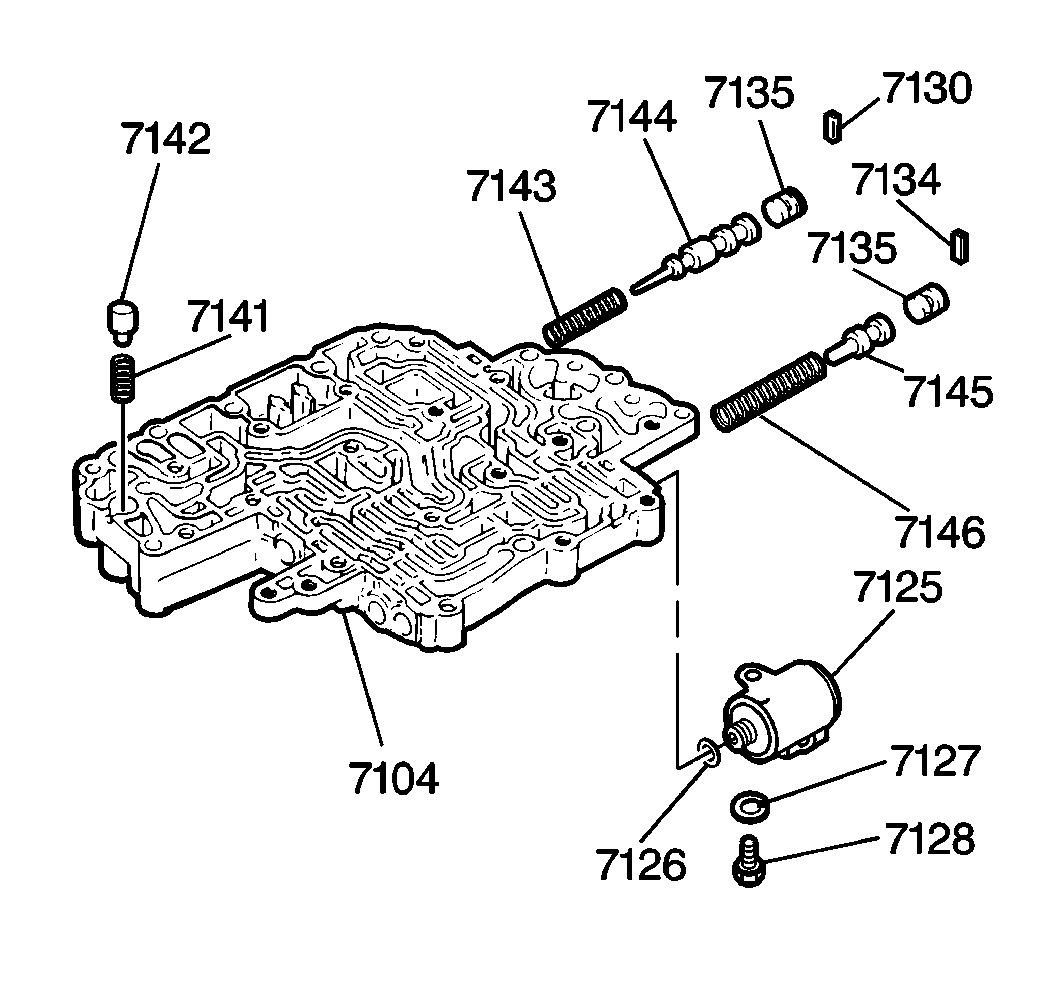
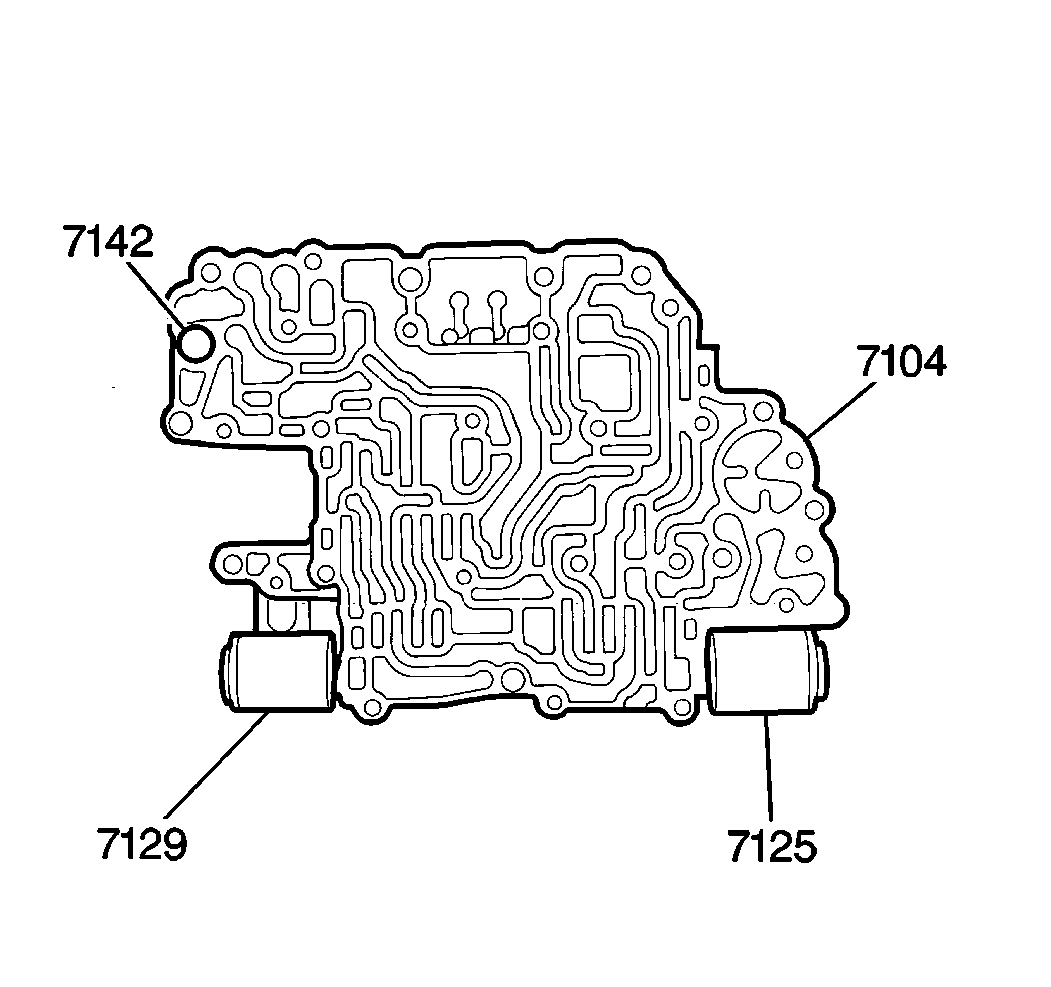
  1. Remove one bolt and the direct clutch solenoid (7125) from the lower valve body.
  2. Remove one bolt and the second brake solenoid (7129) from the lower valve body.

  3. Object Number: 144059  Size: SH
  4. Remove the following parts from the lower valve body:
  5. • The cooler bypass valve (7142) and spring (7141)
    • The number 2 valve body key (7134) and shift valve plug (7135)
    • The 2-3 shift valve (7145) and spring (7146)
    • The number 1 valve body key (7130) and shift valve plug (7135)
    • The secondary regulator valve (7144) and spring (7143)

    Object Number: 144055  Size: SH
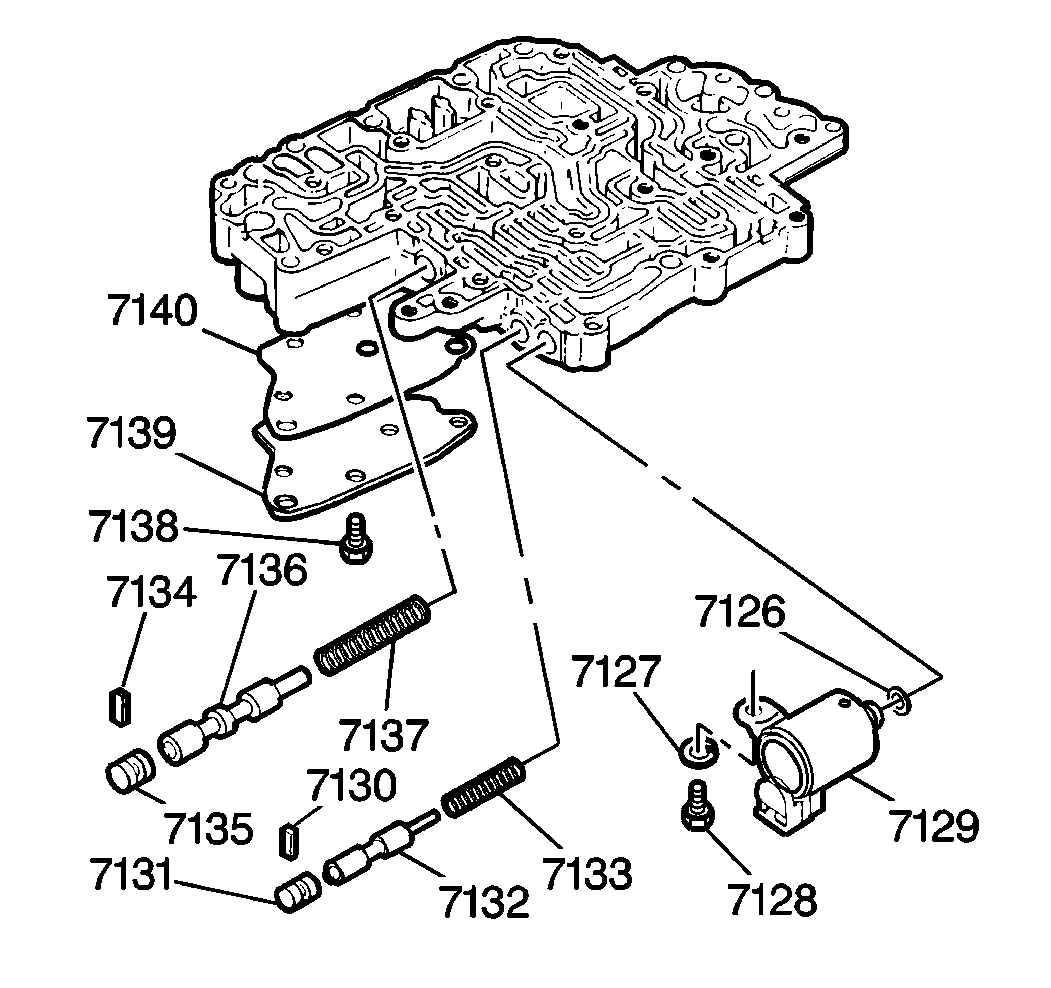
  6. Remove the following parts from the lower valve body:
  7. • The number 1 valve body key (7130) and the B2 control valve plug (7131)
    • The B2 control valve (7132) and spring (7133)
    • The number 2 valve body key (7134) and shift valve plug (7135)
    • The 1-2 shift valve (7136) and spring (7137)
  8. Remove six bolts (7138) in order to release the lower valve body cover (7139) and the lower valve body gasket (7140).
  9. Clean all parts thoroughly with solvent. Air dry.

  10. Object Number: 144036  Size: SH
  11. Inspect the lower valve body for the following conditions:
  12. • Valve bores for distortion or damage
    • Fluid passages for blockage
    • Surface warp. Place a J 34673 across the lower valve body mating surface. Rotate the tool every 30 degrees checking for surface warp. If lower valve body surface warp exists, replace the lower valve body.
  13. Inspect all valves, springs and attaching parts for unusual wear or damage. Replace as necessary.
  14. Inspect the direct clutch and the second brake solenoid O-rings for cuts or damage. Replace as necessary.

Installation Procedure

    Notice: Use the correct fastener in the correct location. Replacement fasteners must be the correct part number for that application. Fasteners requiring replacement or fasteners requiring the use of thread locking compound or sealant are identified in the service procedure. Do not use paints, lubricants, or corrosion inhibitors on fasteners or fastener joint surfaces unless specified. These coatings affect fastener torque and joint clamping force and may damage the fastener. Use the correct tightening sequence and specifications when installing fasteners in order to avoid damage to parts and systems.

    Object Number: 144055  Size: SH

    Important: Apply a thin coat of J 36850 to all parts prior to assembly.

  1. Attach the lower valve body cover (7139) and gasket (7140) onto the lower valve body (7104). Secure with six bolts (7138).
  2. Tighten
    Tighten the lower valve body cover bolts to 4 N·m (35 lb in).

  3. Install the following parts into the lower valve body (7104):
  4. • The 1-2 shift valve (7136) and spring (7137)
    • The number 2 valve body key (7134) and shift valve plug (7135)
    • The B2 control valve (7132) and spring (7133)
    • The number 1 valve body key (7130) and the B2 control valve plug (7131)

    Object Number: 144059  Size: SH
  5. Install the following parts into the lower valve body:
  6. • The secondary regulator valve (7144) and spring (7143)
    • The number 1 valve body key (7130) and shift valve plug (7135)
    • The 2-3 shift valve (7145) and spring (7146)
    • The number 2 valve body key (7134) and shift valve plug (7135)
    • The cooler bypass valve (7142) and spring (7141)

    Object Number: 144036  Size: SH
  7. Install the second brake solenoid (7129) to the lower valve body (7104). Secure with one bolt.
  8. Tighten
    Tighten the second brake solenoid retaining bolt to 4 N·m (35 lb in).

  9. Install the direct clutch solenoid (7125) to the lower valve body (7104). Secure with one bolt.
  10. Tighten
    Tighten the direct clutch solenoid retaining bolt to 4 N·m (35 lb in).

  11. Inspect all valves for smooth operation.