For 1990-2009 cars only
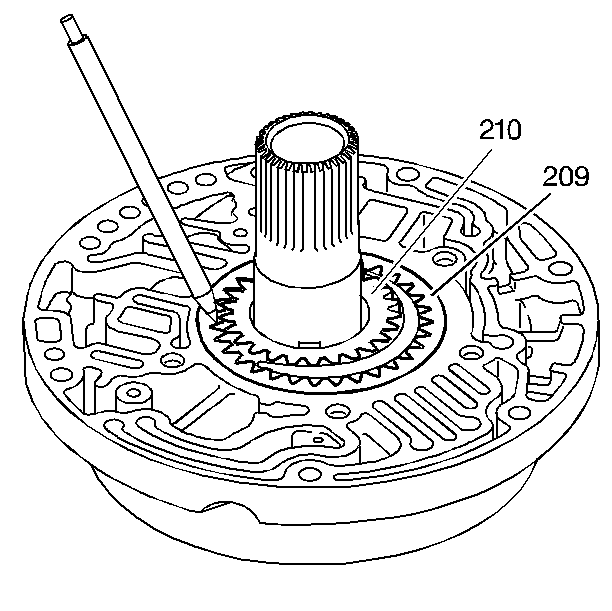
- Remove the oil pump drive gear (210) and driven gear (209). Mark the location of the oil pump drive and driven gears to assure proper assembly.
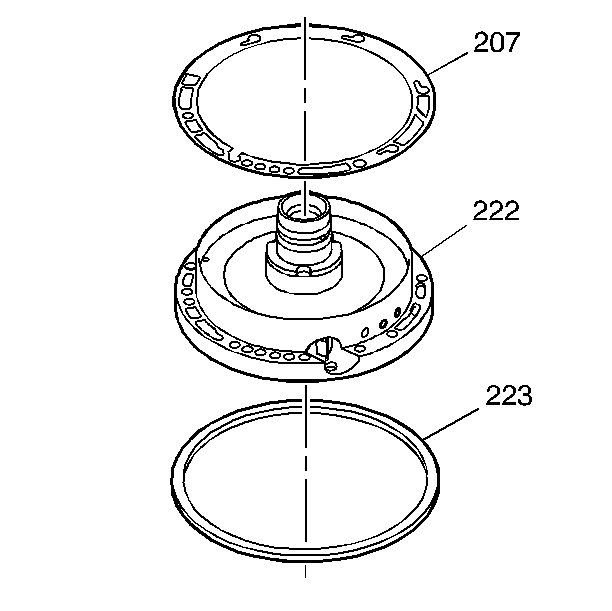
- Remove the oil pump to case gasket (207).
- Remove the oil pump outer seal (223).
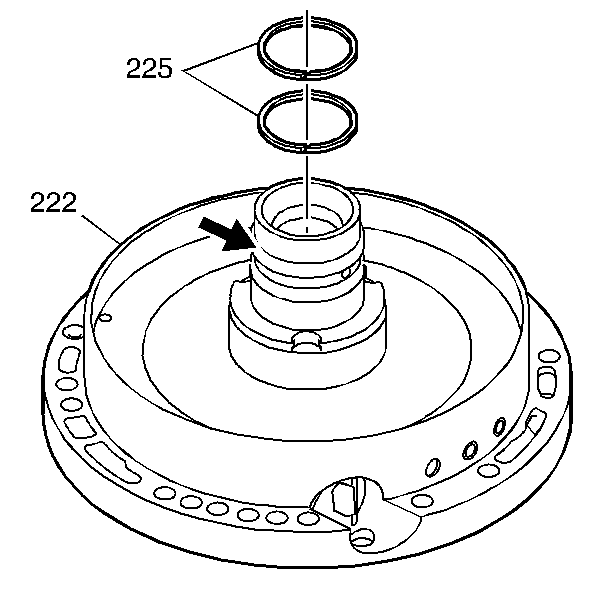
- Remove the second clutch oil seal rings (225).
- Inspect the oil seal rings for wear and damage.
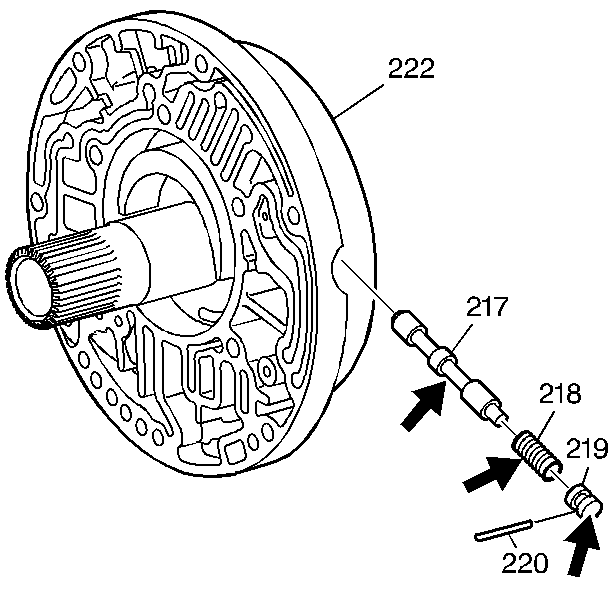
- Remove the converter clutch control valve bore plug retainer pin (220).
- Remove the clutch control valve bore plug (219).
- Remove the clutch control valve spring (218).
- Remove the clutch control valve (217).
- Inspect the converter clutch control valve for:
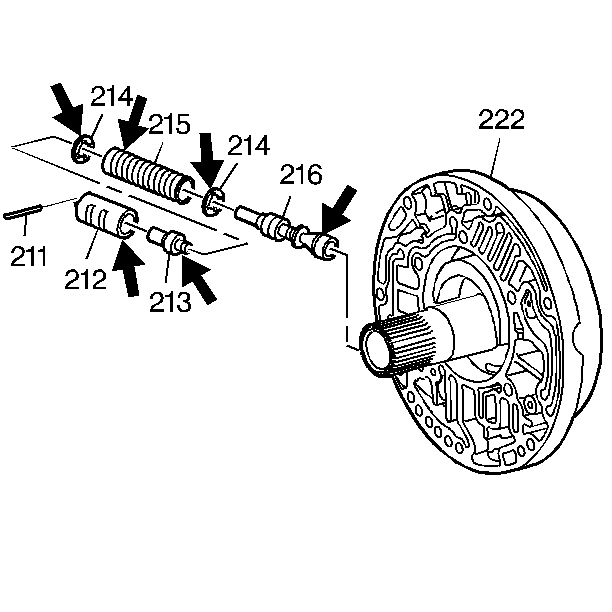
- Remove the oil pump boost valve sleeve retainer pin (211). Apply thumb pressure on the oil pump boost valve sleeve (212) to relieve the spring tension from the retainer pin.
- Remove the oil pump boost valve sleeve (212).
- Remove the oil pump boost valve (213).
- Remove the pressure regulator valve spring (215) and spring seats (214).
- Remove the pressure regulator valve (216).
- Inspect the oil pump boost valve and the pressure regulator valve for:
Important: Do not remove the converter clutch control valve, the pressure regulator valve or the reverse boost valve unless determined by fluid pressure checks to be malfunctioning.
Caution: Valve Springs can be tightly compressed. Use care when removing retainers and plugs. Personal injury could result.
| • | nicks |
| • | scoring |
| • | damage |
| • | nicks |
| • | scoring |
| • | damage |
