- Remove the following components
from the rear case:
| • | The four-wheel drive switch |
- Remove the following components from the rear of the case (if
equipped):
| • | The four-wheel drive low switch and the steel ball |
- Remove the following components from the rear case:
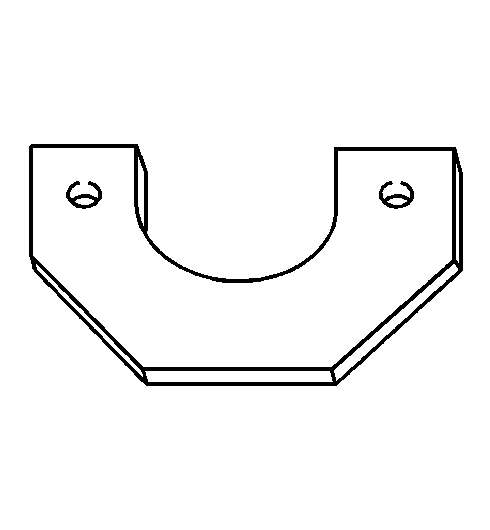
| • | The speedometer driven gear case |
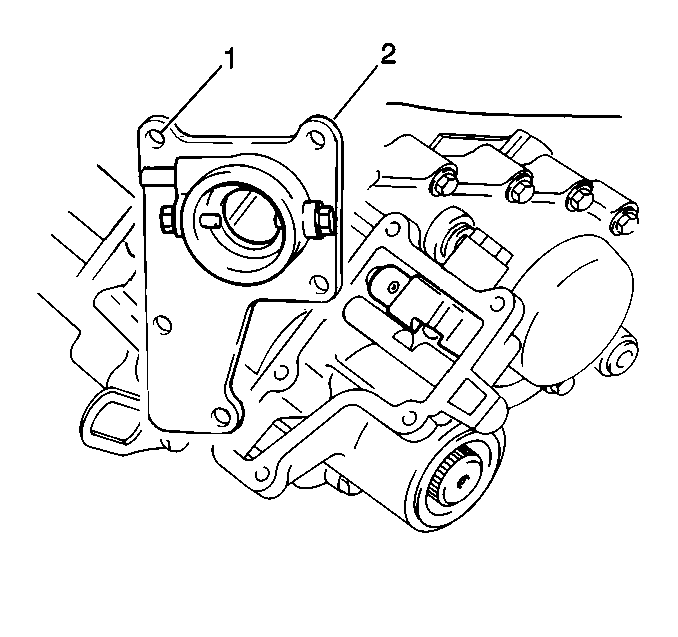
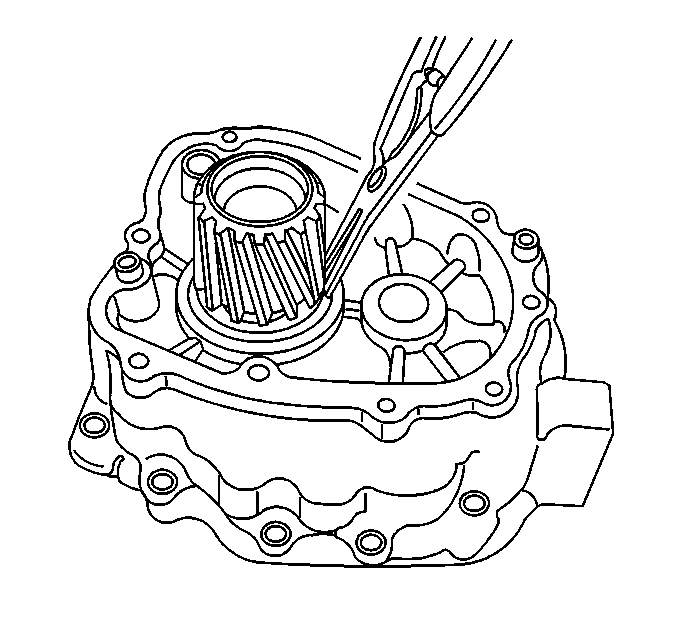
- Remove the following components
from the rear case:
| • | The gearshift lever case (1) |
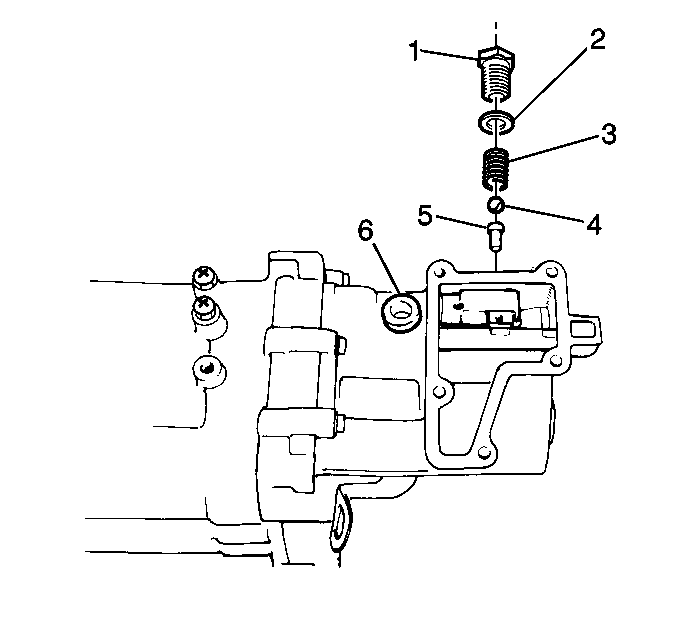
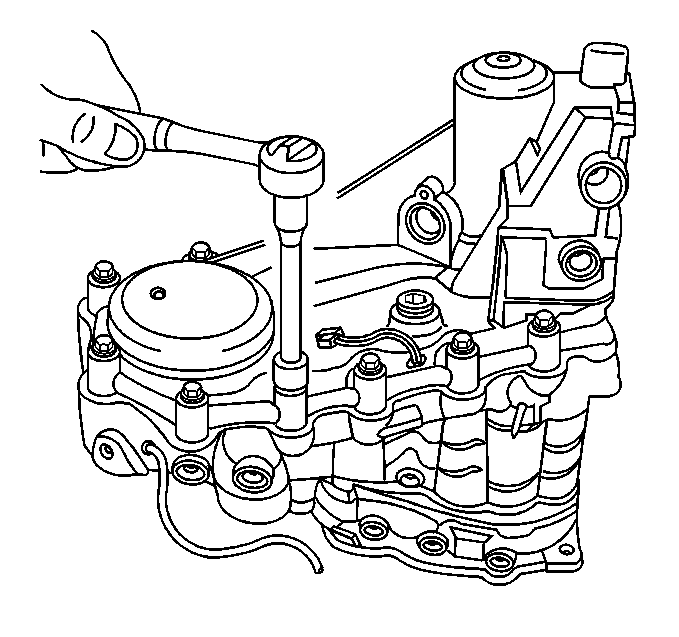
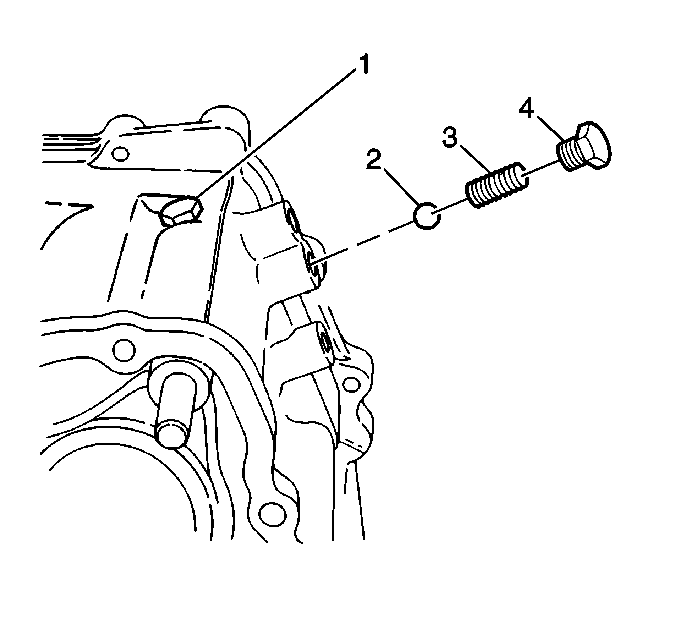
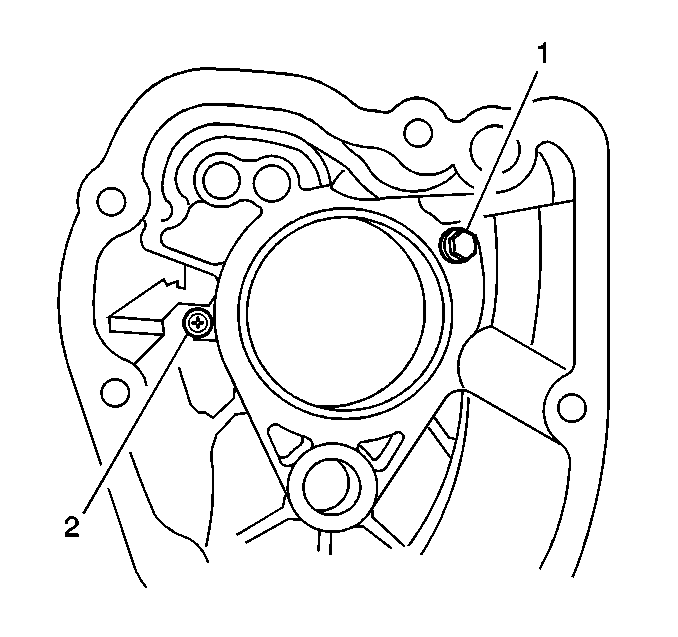
- Remove the following components
from the rear case (6):
| • | The select return spring bolt (1) |
| • | The select return spring (3) |
| • | The select return ball (4) |
| • | The select return pin (5) |
Important: After you remove the rear case, use a magnet in order to extract the
pin from the case.
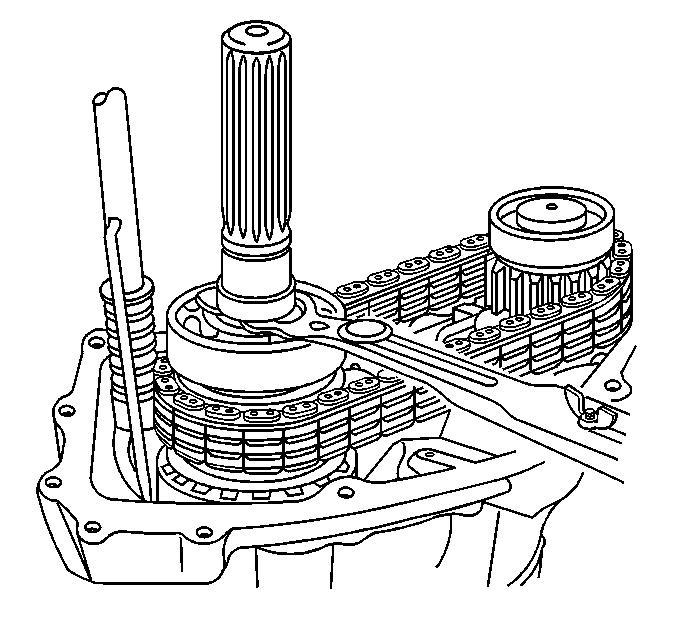
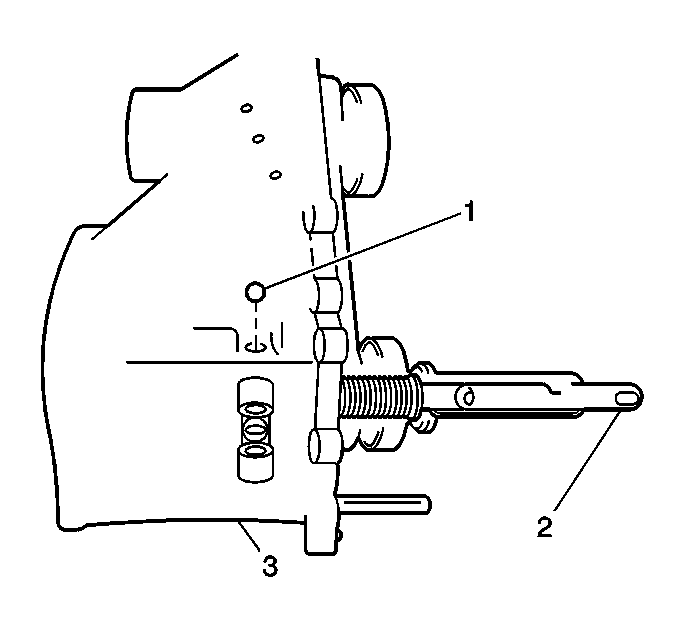
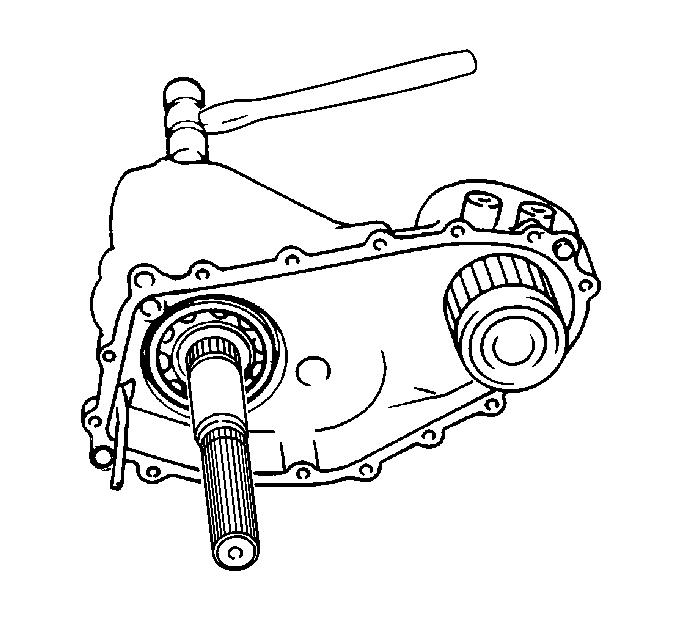
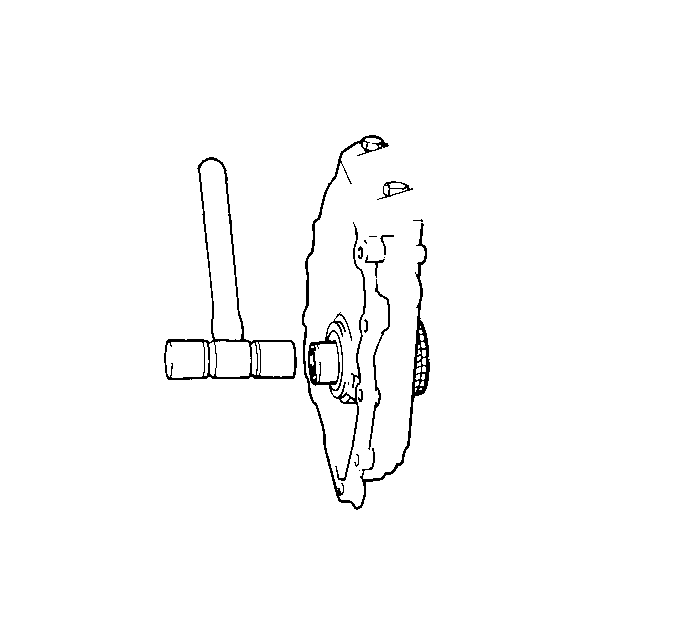
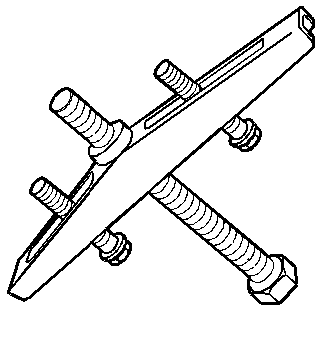
- Using a standard drift punch (2) and a hammer (1), drive
the roll pin from the reduction shift yoke. This procedure will cause the
pin to fall into the transfer case assembly.
- Slide the reduction shift yoke rearward. Pull the reduction shift
yoke off the reduction shift shaft and out of the rear case.
- Remove the 15 rear
case bolts.
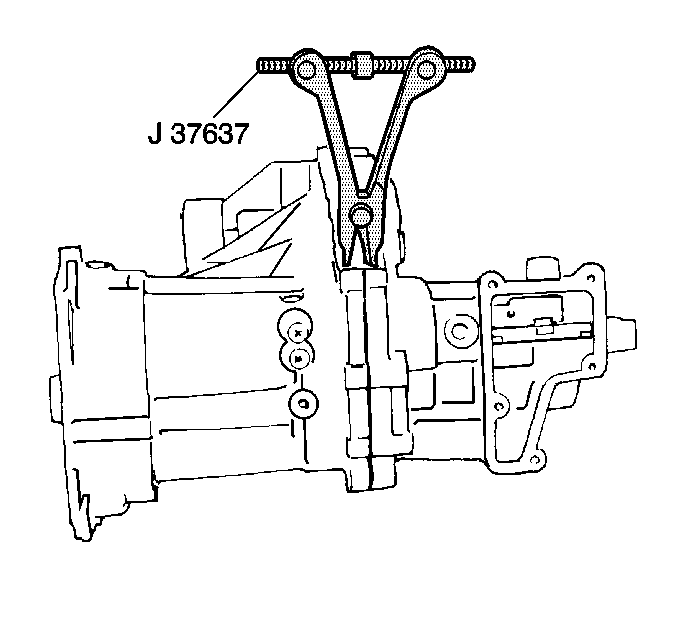
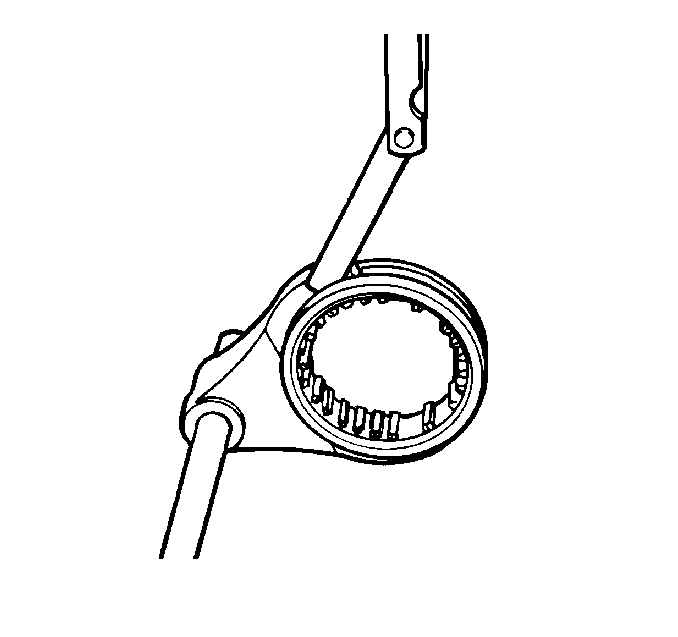
- Separate the rear case
from the center case using a J 37637
.
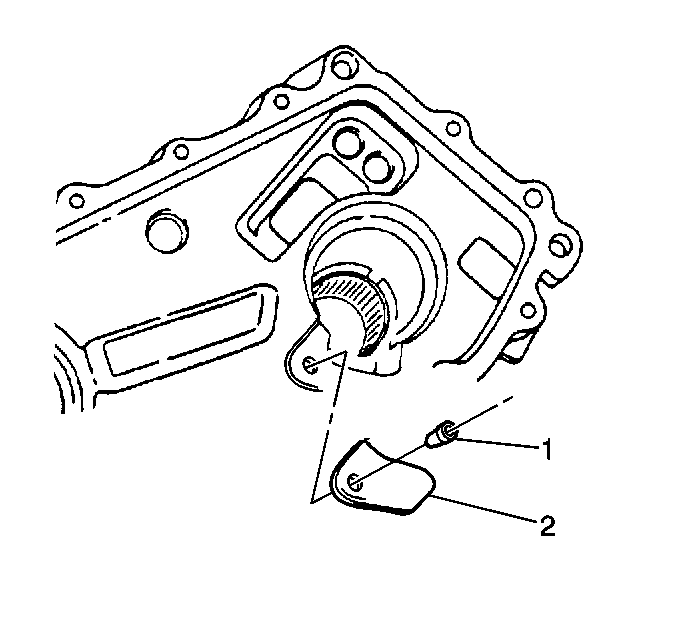
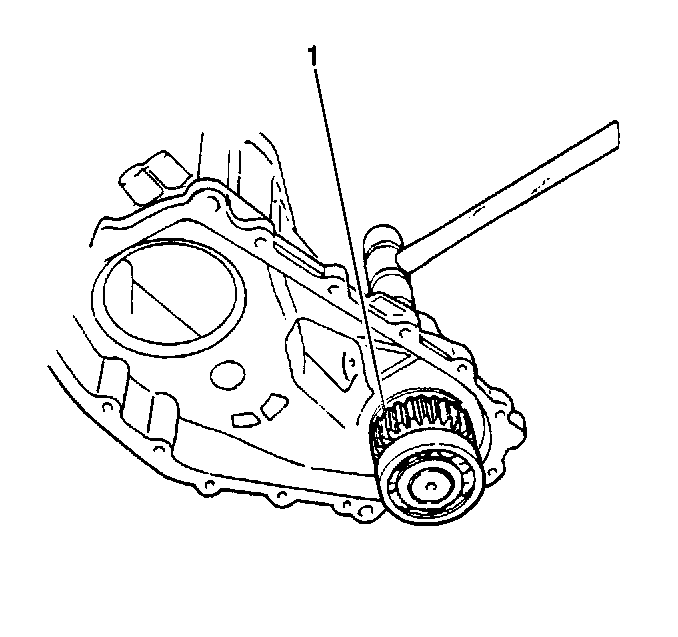
Using a magnet, remove the shift yoke roll pin from inside the rear
transfer case.
- Remove the selective shim from the top of the rear output shaft
rear bearing.
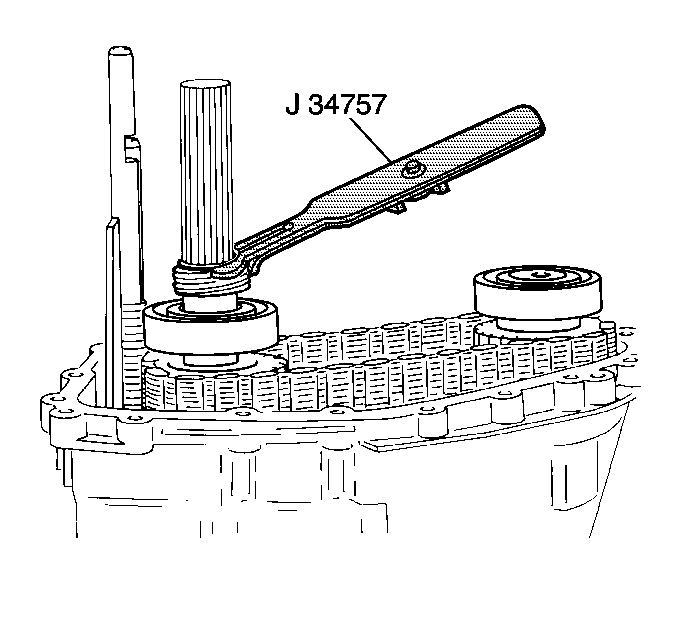
- Use J 34757
in order to remove the following components
from the rear output shaft:
| • | The speedometer drive gear C-clip |
| • | The speedometer drive gear |
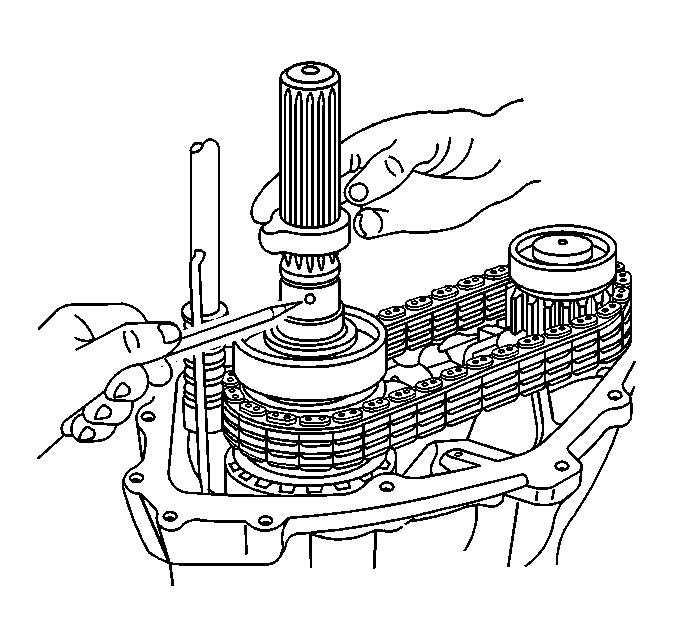
- Carefully remove the drive
gear ball from the rear output shaft.
- Use J 34757
in order to remove the rear output shaft
rear bearing C-clip from the rear output shaft.
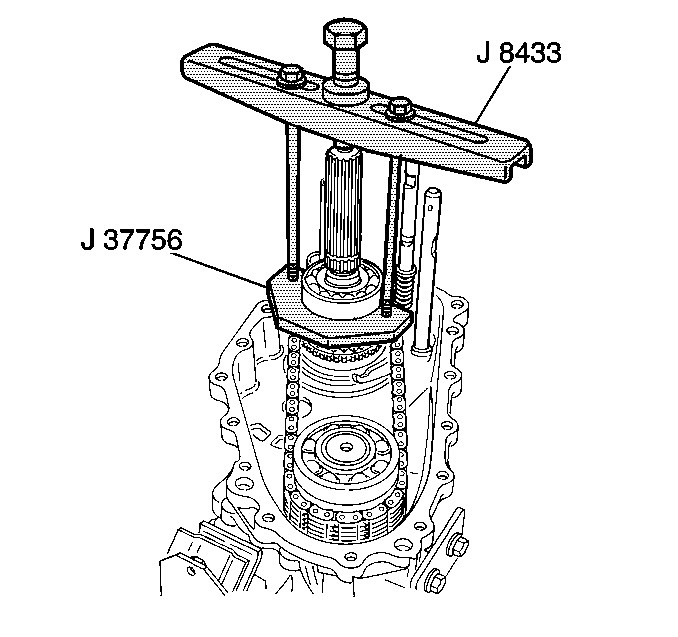
- Use J 8433
with J 37756
in order to remove the rear output shaft rear bearing from
the rear output shaft.
Important: Do not lose the rear output shaft washer ball underneath the drive sprocket
bushing during the sprocket bushing removal.
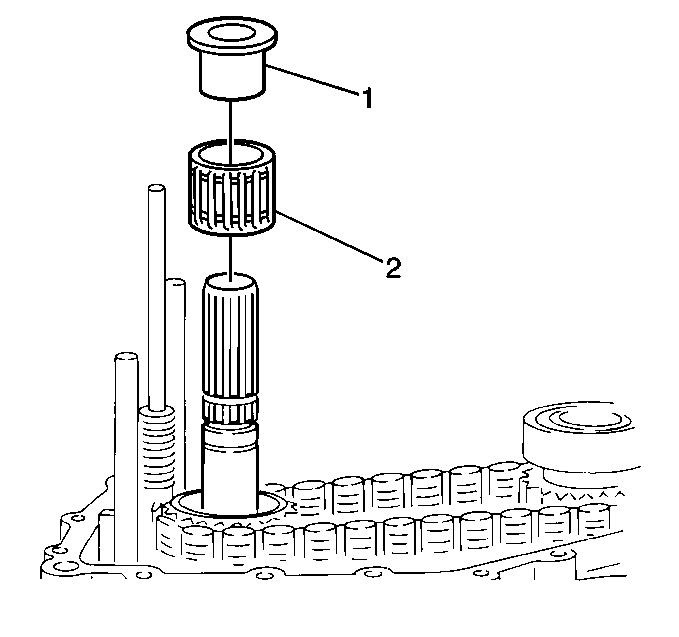
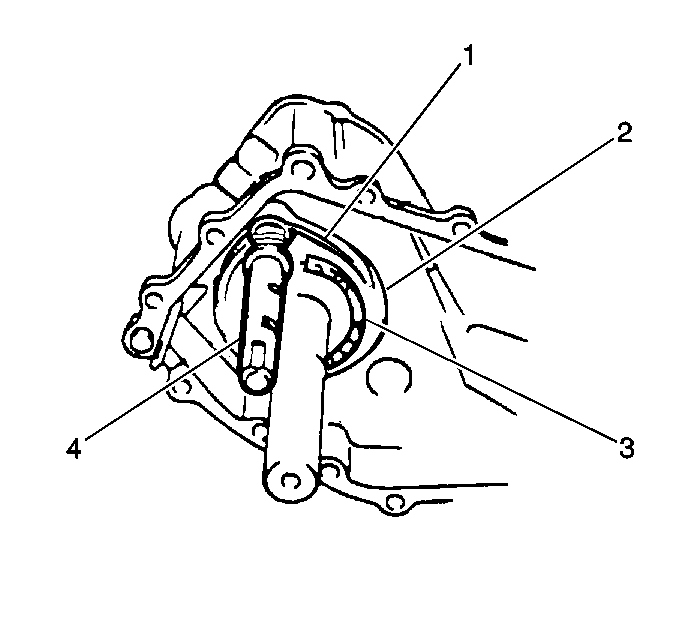
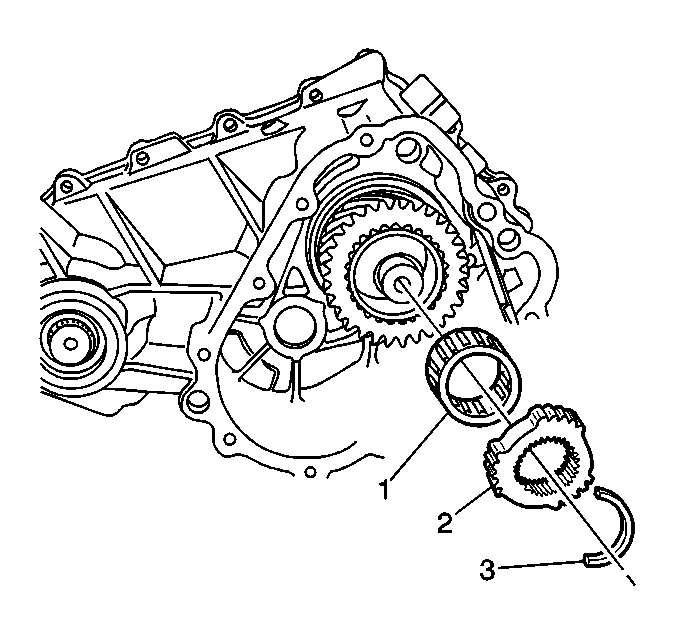
- Remove the following components:
| • | The drive sprocket bushing (1) output shaft |
| • | The drive sprocket needle bearing (2) output shaft |

- Remove the following components
from the rear output shaft:
| • | The synchronizing plate (1) |
- Remove the following drive
components from the rear output shaft and the front output shaft:
| • | The rear output shaft washer ball |
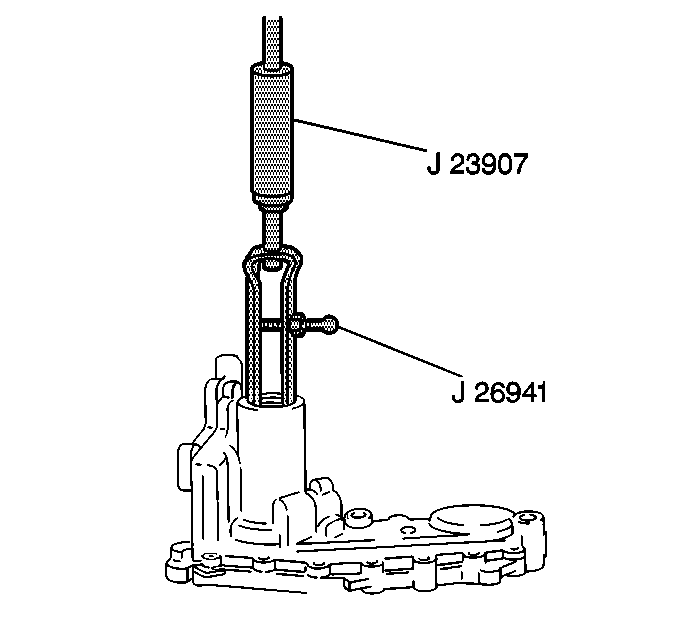
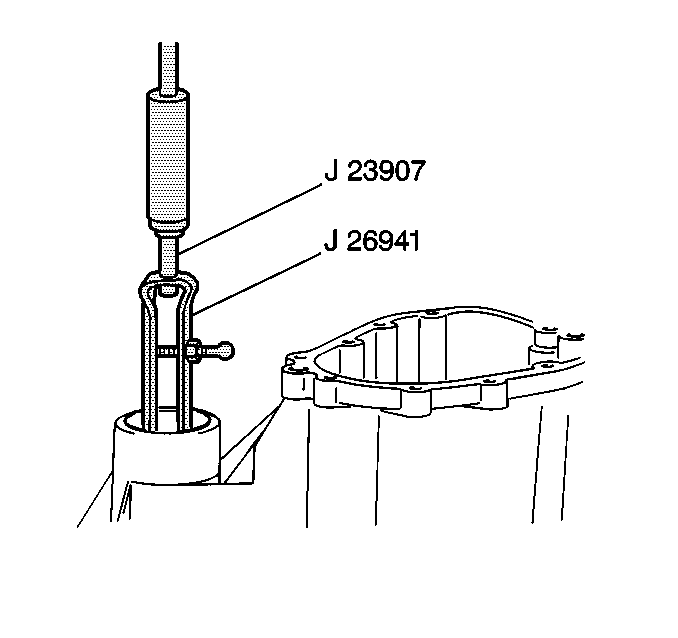
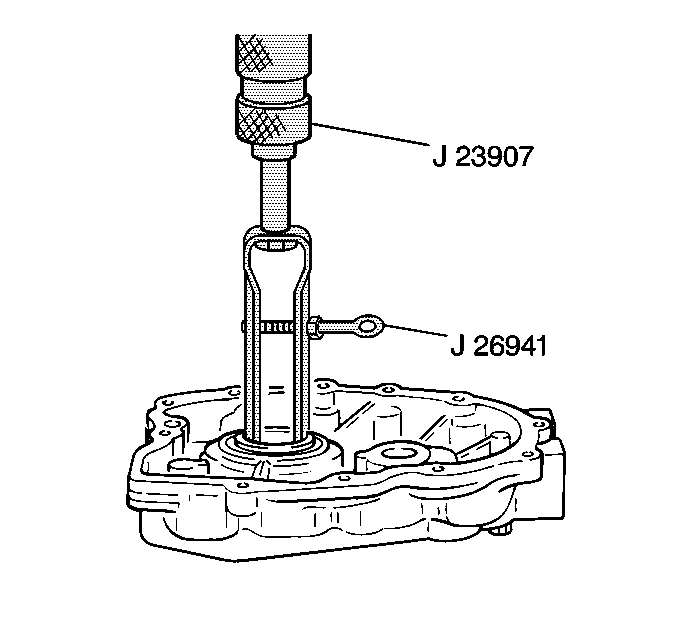
- Use J 26941
with J 23907
in order to remove the rear output shaft oil seal from the
rear case.
- Remove the following components
from the rear case:
- Use J 26941
and a hammer in order to remove the rear
output shaft needle bearing from the rear case.
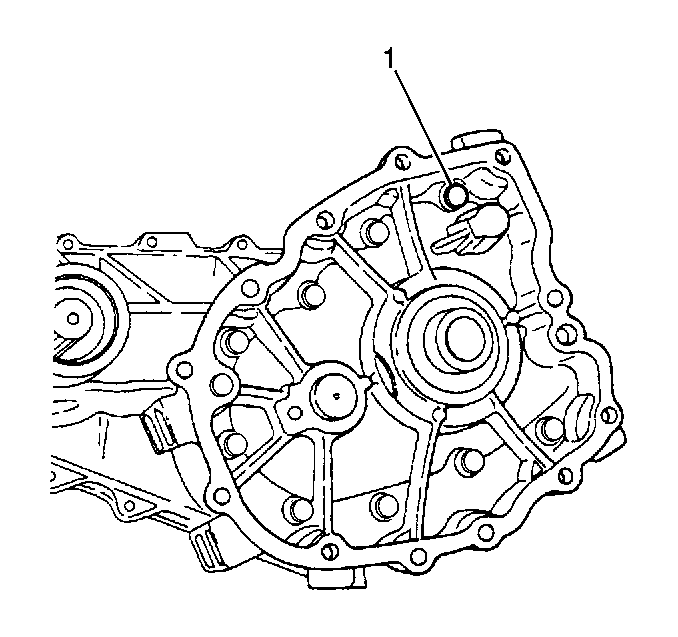
- Remove the following components
from the front case:
| • | The countershaft case plate (1) |
- Remove the 9 front
case bolts (1) from the front case.
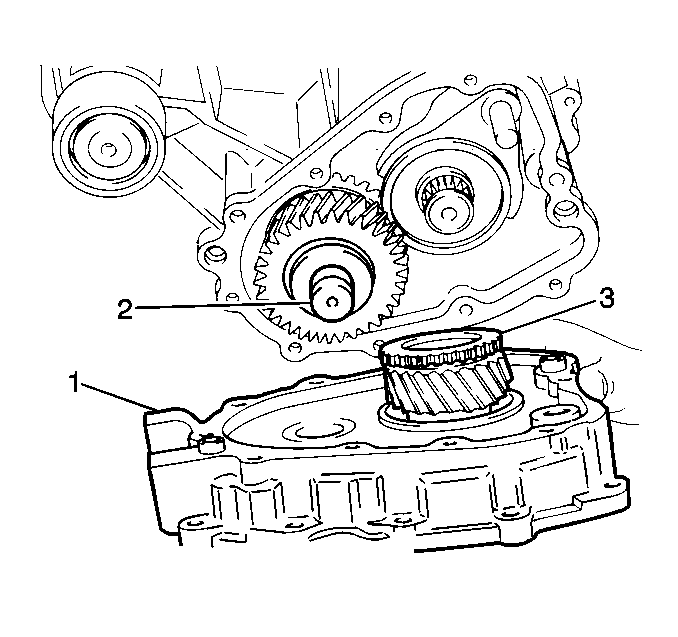
- Separate the front case
from the center case (1).
- Remove the countershaft assembly (3) from the center case.
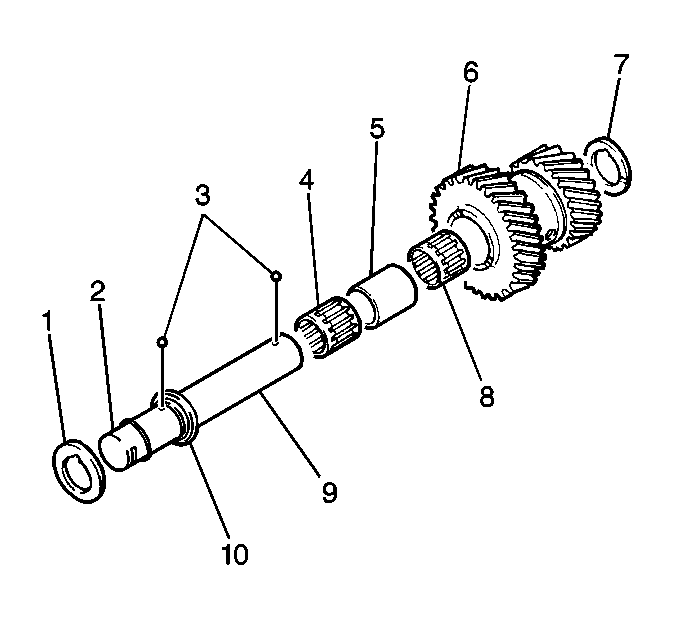
Important: Do not lose the countershaft washer balls which come out from between
the countershaft (9) and the countershaft washers (1,7).
- Remove the following components from the countershaft (9):
| • | The countershaft washers (1,7) |
- Remove the following components from the countershaft:
| • | The countershaft needle bearings (4,8) |
| • | The countershaft spacer (5) |
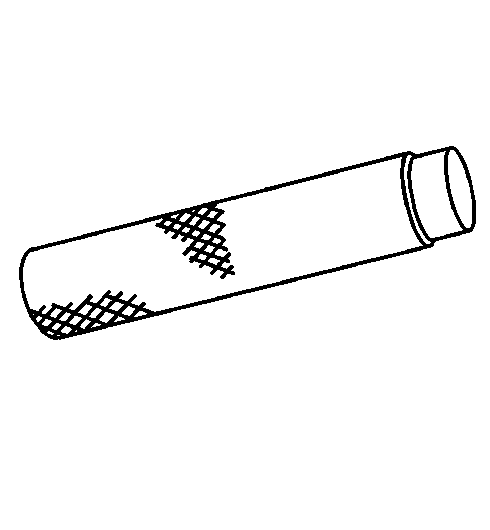
- Inspect the countershaft friction ring for excessive wear or damage.
Replace as necessary.
- Inspect the countershaft O-ring for cuts or other damage. Replace
as necessary.
Important: Do NOT remove either the countershaft friction ring (10) or the
O-ring (2) unless absolutely necessary. If you remove either one, replace
with new components.
- Remove the countershaft O-ring from the countershaft.
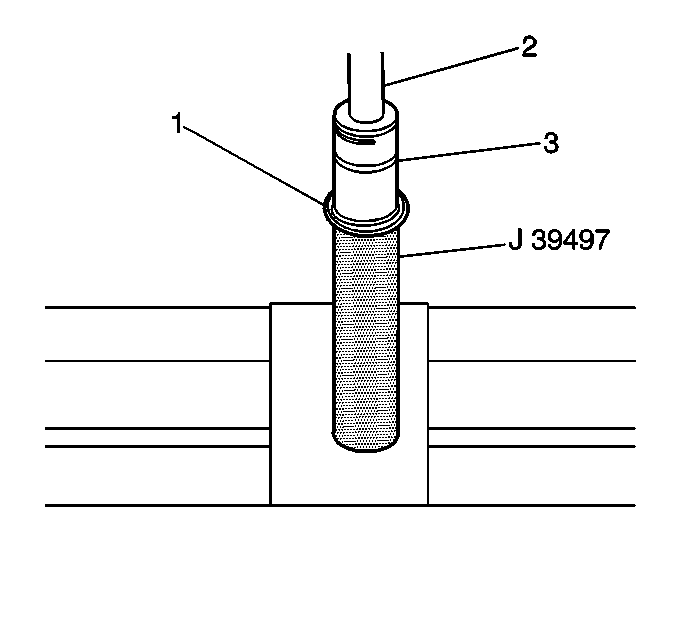
- Use J 39497
and a press arbor (2) in order
to remove the countershaft friction ring (1) from the countershaft (3).
- Remove the following components
from the center case:
| • | The 2 locating screws (4) |
| • | The 2 locating springs (3) |
| • | The 2 locating balls (2) |
Important: Observe the alignment marks on the following components in order to
ensure correct alignment during assembly:
| • | The caged needle bearing |
| • | The reduction clutch sleeve and hub |
| • | The front drive clutch sleeve and hub |
- Remove the following components from the rear output shaft, in front
of the center case:
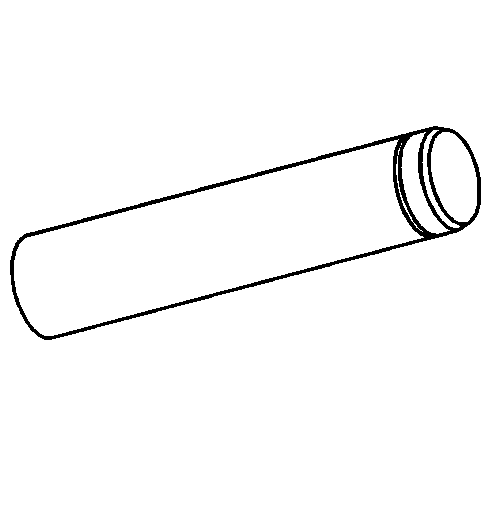
| • | The reduction shift shaft (2) |
| • | The reduction shift fork (1) |
| • | The reduction clutch sleeve (3) |
- Remove the following components
from the rear output shaft, in the rear of the center case:
| • | The front drive shift shaft (4) |
| • | The front drive shift fork (1) |
| • | The front drive clutch sleeve (2) |
| • | The front drive clutch hub (3) |
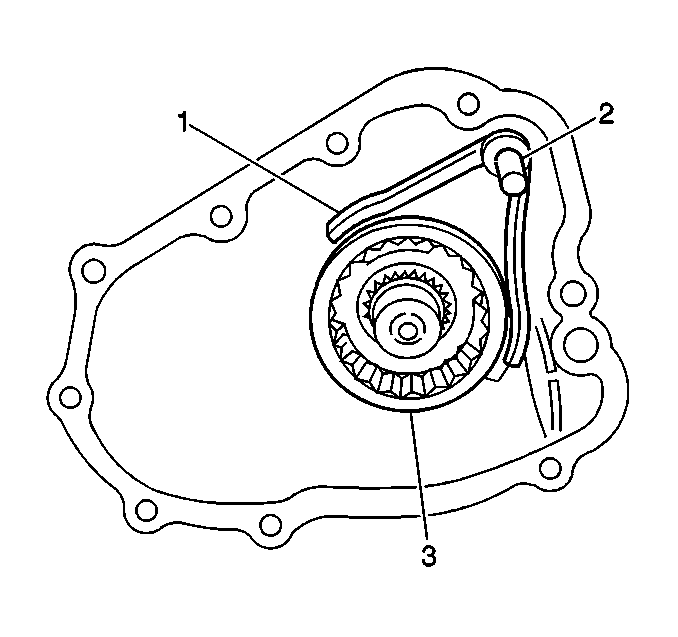
- Remove the interlock ball (1)
from the center case passage.
- Use J 34757
in order to remove the reduction hub
C-clip (3) from the rear output shaft.
- Remove the following components from the rear output shaft.
| • | The reduction clutch hub (2) |
| • | The low output gear needle bearing (1) |
- Use a plastic mallet in
order to remove the rear output shaft from the center case.
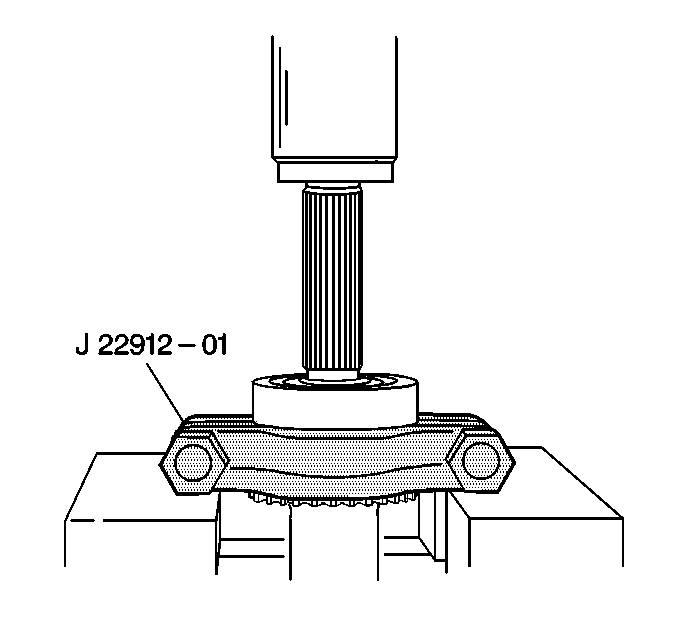
- Use J 22912-O1
and a press arbor in order to remove
the rear output shaft front bearing from the rear output shaft.
- Using a plastic mallet,
remove the front output shaft and the bearings from the center case.
- Remove the following components
from the center case:
- Use J 26941
with J 23907
in order to remove the front output shaft oil seal from the
center case.
- Using J 26941
and a hammer, remove the front output
shaft needle bearing from the center case.
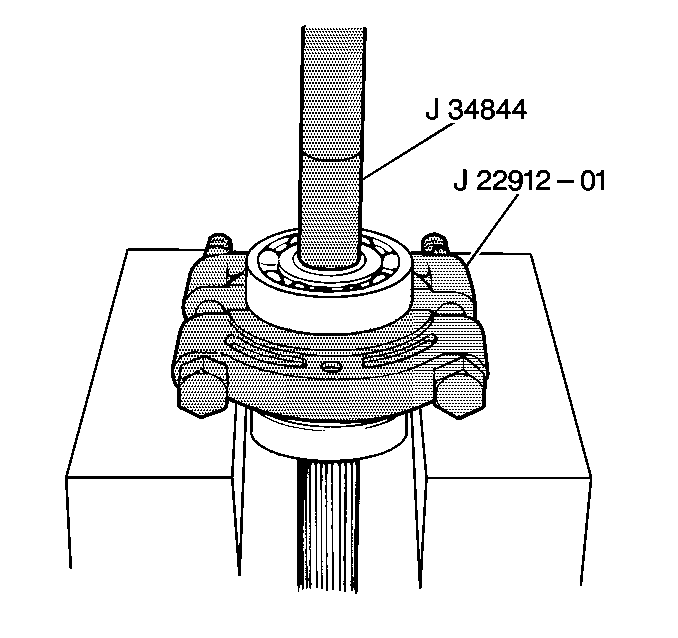
- Use J 22912-O1
with J 34844
and a press arbor in order to remove the front output shaft
bearings from the front output shaft.
- Loosen the center bearing
snap ring within the input gear. You cannot remove this snap ring at this
time.
- Using a plastic mallet,
remove the input gear assembly from the front case.
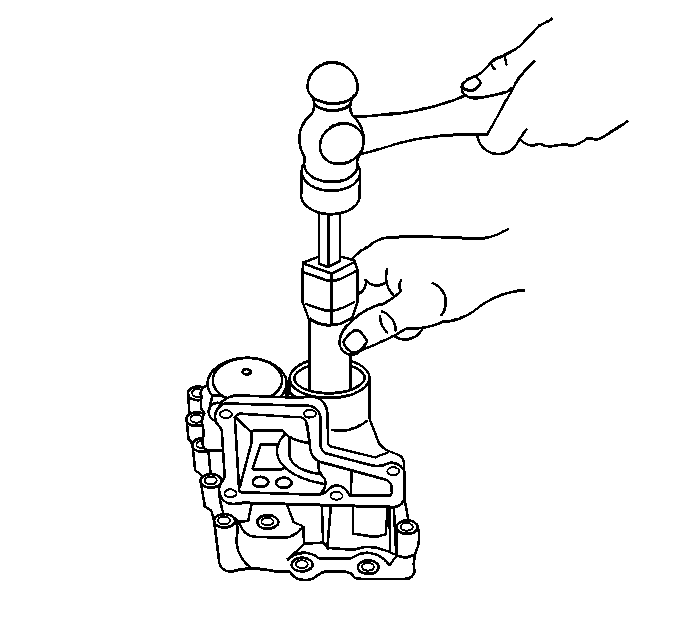
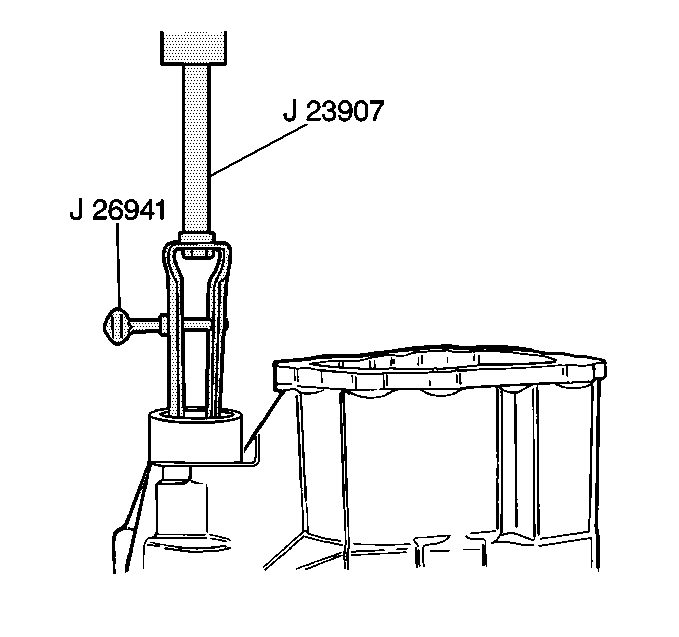
- Using J 26941
with J 23907
, remove the input gear oil seal from the front case.
Important: During gear assembly removal, the bearing may move, binding the snap
ring in its groove. Apply light pressure with the mallet in order to slide
the bearing back to its original position before you attempt to remove the
snap ring.
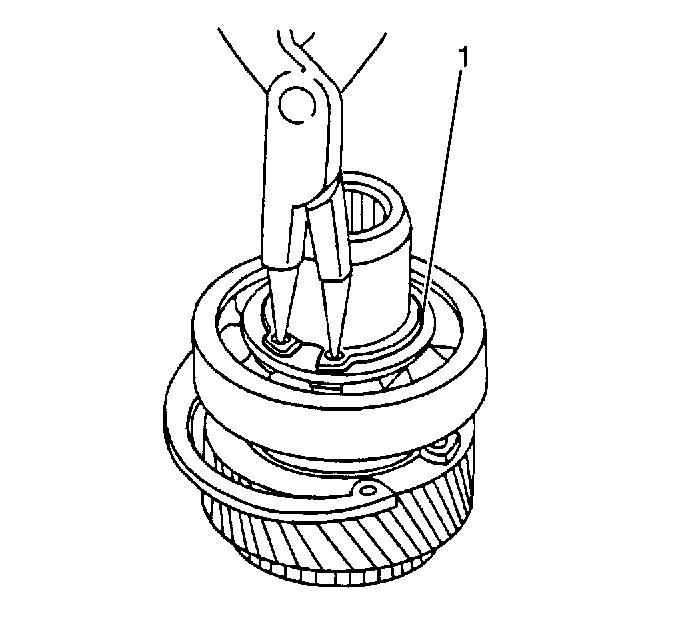
- Using snap ring pliers, remove the side bearing snap ring (1) from
the input gear.
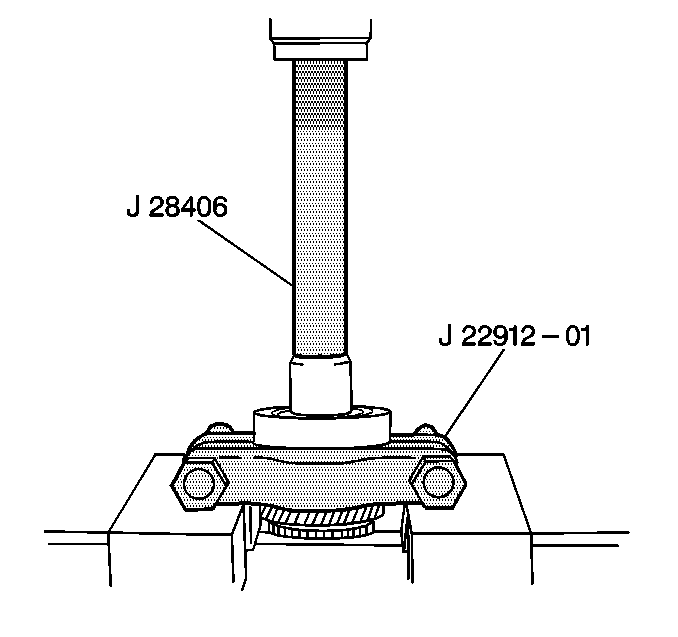
- Use J 22912-O1
with J 28406
and a press arbor in order to remove the input gear bearing
from the input gear.
- Remove the center bearing snap ring from the input gear.
- Remove one roll pin from
the reduction shift fork.
- Remove the reduction roll fork from the reduction shift shaft.
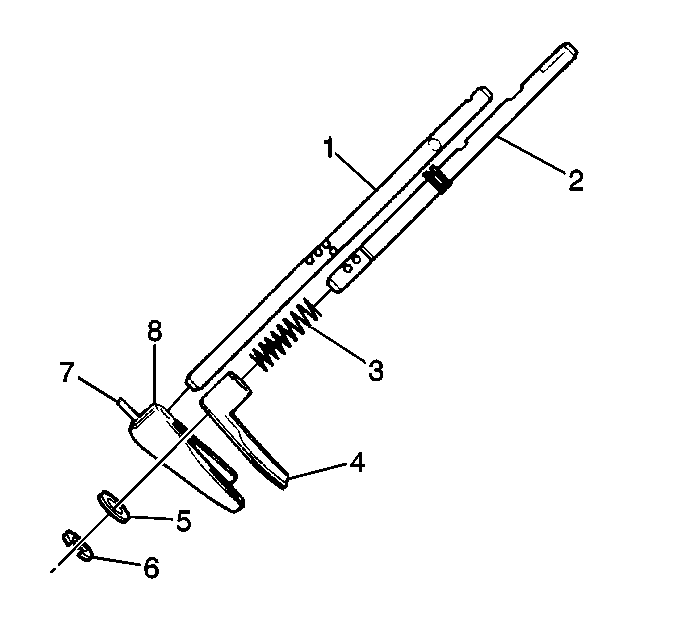
- Remove the following components from the front drive shift shaft:
| • | The shaft stop washer (5) |
| • | The front drive shift fork (4) |
| • | The front drive fork spring (3) |
Important: Careful cleaning of the component mating surfaces will ensure proper
case sealing.
- Clean the following components with solvent and dry thoroughly:
- Clean all of the internal components with solvent and dry thoroughly.
- Inspect the following components for cracks or porosity:
| • | The gearshift lever case |
- Inspect the drive teeth and the clutching teeth of all of the
gears and sprockets for the following conditions:
- Inspect the shift shafts and the forks for the following conditions:
- Inspect each ball bearing for smooth rotation. If the rotation
is abnormal, replace the ball bearing.
- Inspect the needle bearing and the bearing contacting surface
for damage. Replace as required.
- Inspect the gear tooth surface and the shift mechanism. Correct
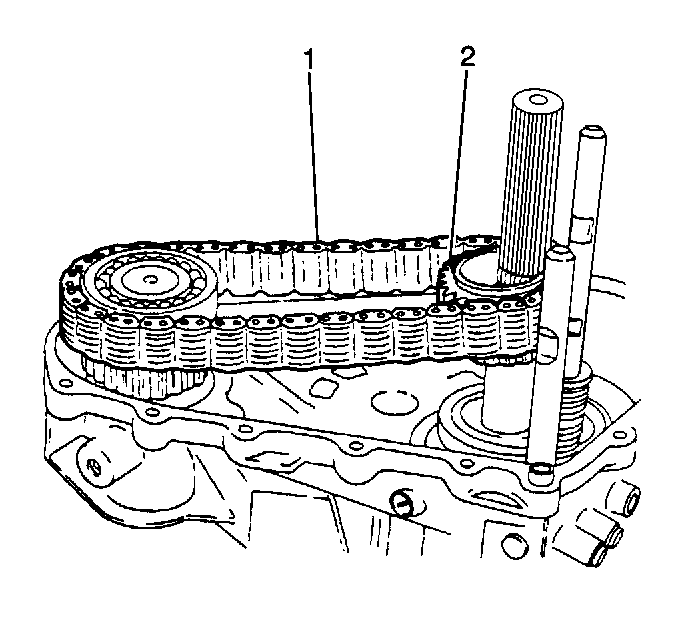
an abnormal mechanism or replace as required.
- Inspect the drive chain and the sprockets for abnormal wear or
damage. Replace as required.
- Inspect the oil seal for leakage and inspect the oil seal lip
for excessive hardness.
inspect the corresponding surface of the shaft where the oil seal lip
contacts. Correct an abnormal condition or replace as required.
- Inspect the gear tooth surface of the speedometer drive gear.
Replace a damaged gear.
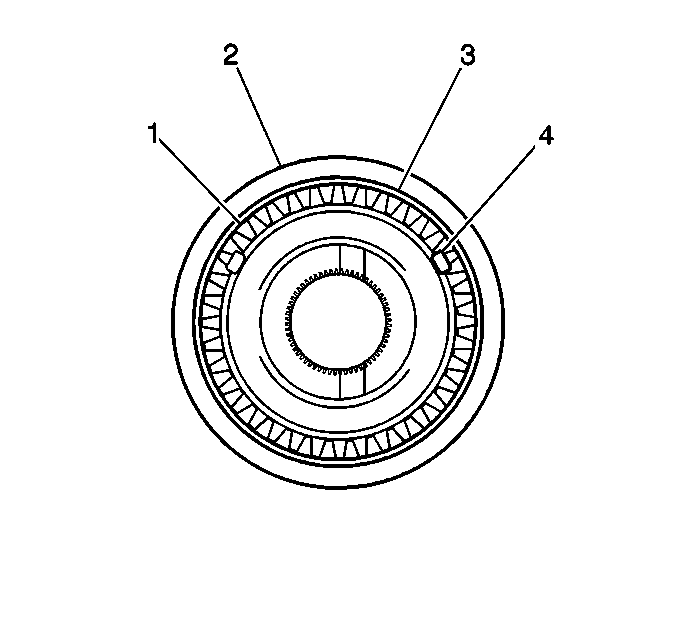
- Inspect the clutch hubs (1)
and
the sleeves (2) for the following conditions:
- Inspect the locating springs
for the
following conditions:
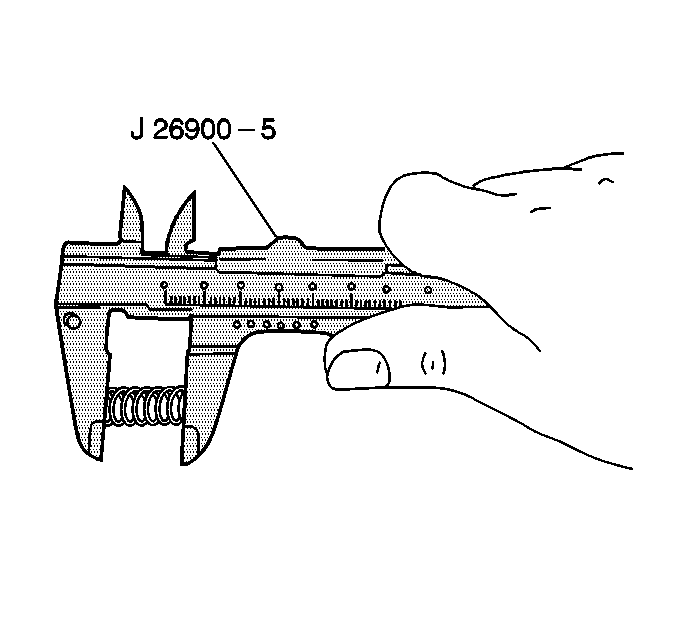
- Use J 26900-5
in order to
measure each locating spring.
Measurement
Standard spring length is 19.5 mm (0.768 in).
If a spring length measures below 18.0 mm (0.709 in),
replace the springs as necessary.
- Use a feeler gage in order
to measure
the shift fork-to-clutch sleeve clearance.
Measurement
The maximum shift fork-to-clutch sleeve clearance is 1.0 mm (0.039 in).
If the clearance is greater than 1.0 mm (0.039 in), replace
the shift fork and the clutch sleeve as necessary.
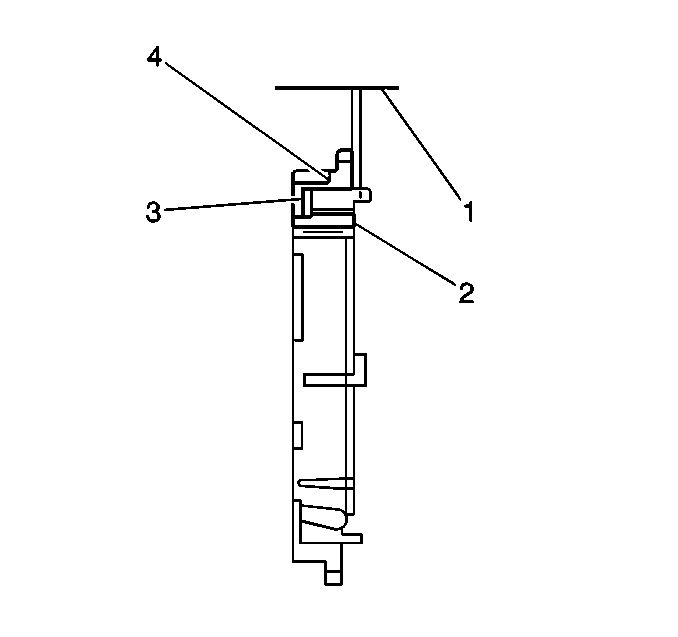
- Assemble the following components:
| • | The synchronizer outer ring (4) |
- Measure the step difference (1) between the outer ring
and the inner ring.
Measurement
The standard difference between the inner ring and the outer ring is
1.0-1.4 mm (0.039-0.055 in).
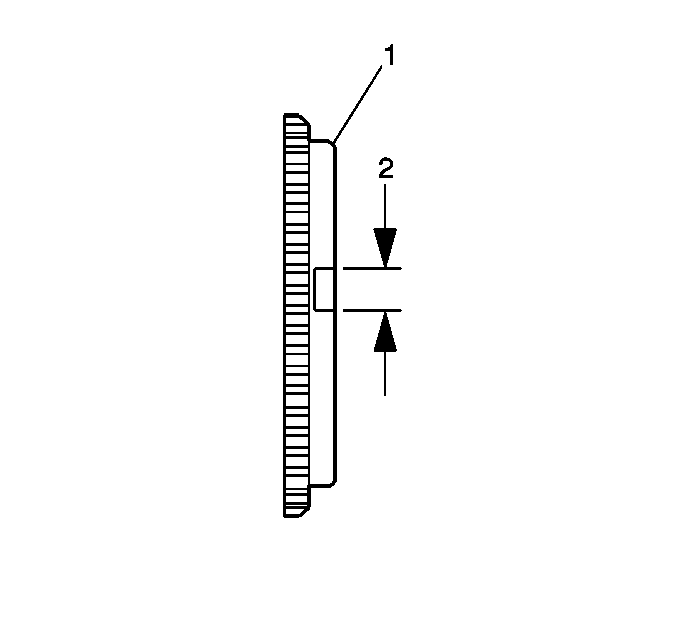
- Measure the key slot width (2)
in the synchronizer outer ring (1) and inspect each chamfered tooth
of the gear and the synchronizer ring. If necessary, replace the outer ring.
Measurement
The maximum slot width in the outer ring is 10.1 mm (0.397 in).
