Tools Required
J 26900-6 Dial Caliper

Notice: When disassembling the upper valve body, keep all valve springs, spring
seats and plugs with their respective valves. Most valve springs are of different
sizes and CANNOT be interchanged. Make sure all parts are clean and dry before
assembly.
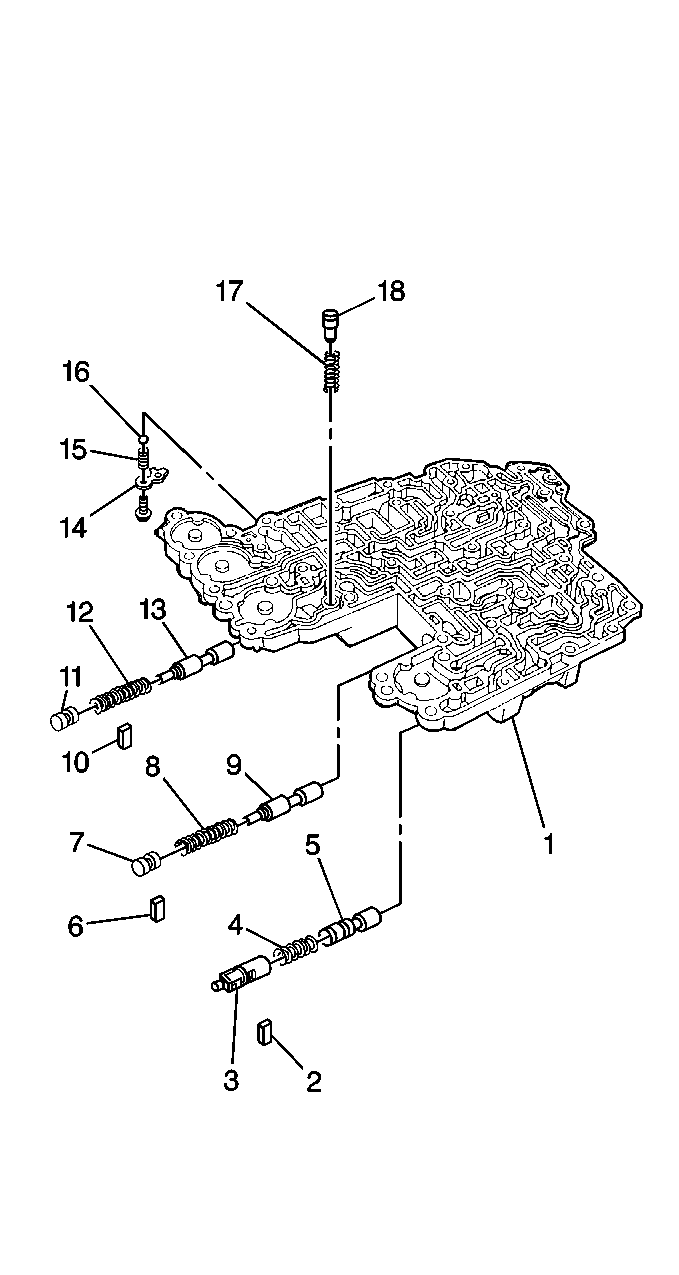
- Remove the following components from the lower valve body (1):
| • | The cooler by-pass valve spring (17) |
| • | The cooler by-pass valve (18) |
- Remove the following components from the lower valve body:
| • | Pressure relief valve screw |
| • | Pressure relief valve retainer (14) |
| • | Pressure relief valve spring (15) |
| • | Pressure relief valve check ball (16) |
- Remove the following components from the lower valve body:
| • | The second coast modulator valve plug (11) |
| • | The second coast modulator valve spring (12) |
| • | The second coast modulator valve (13) |
- Remove the following components from the lower valve body:
| • | The low coast modulator valve plug (7) |
| • | The low coast modulator valve spring (8) |
| • | The low coast modulator valve (9) |
- Remove the following components from the lower valve body:
| • | The accumulator control valve plug (3) |
| • | The accumulator control valve spring (4) |
| • | The accumulator control valve (5) |

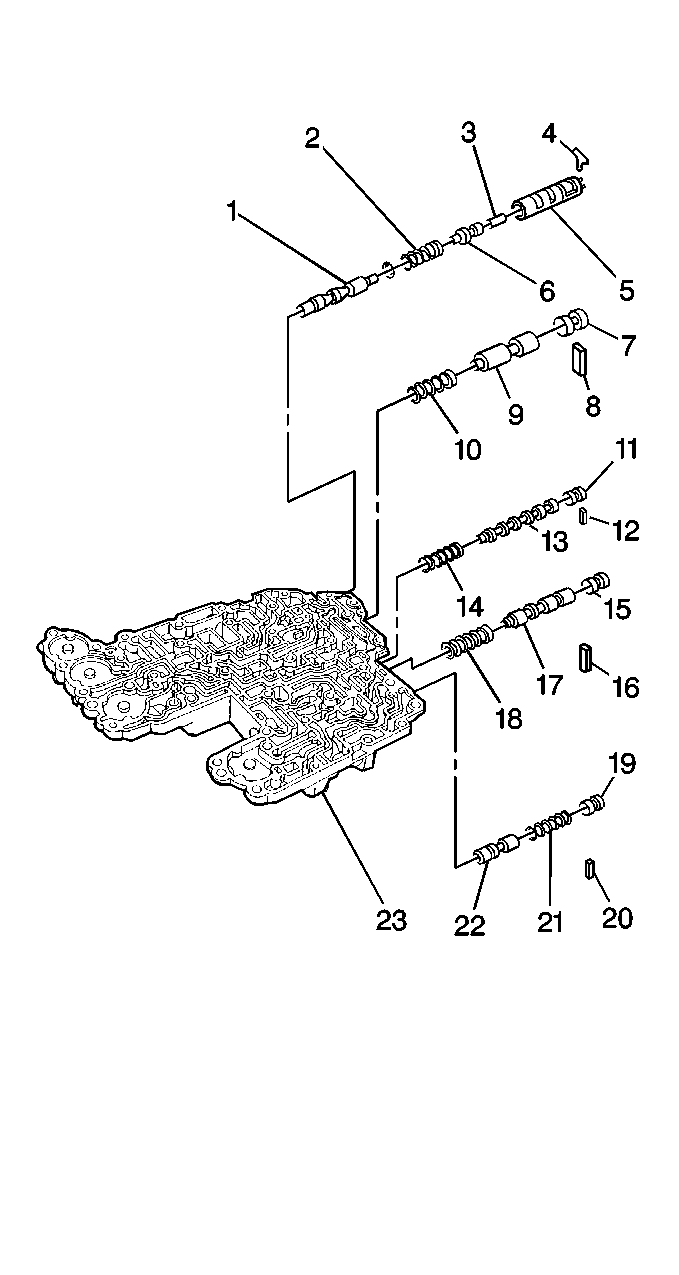
- Remove the following components from the lower valve body (23):
| • | The reverse control valve plug (19) |
| • | The reverse control valve spring (21) |
| • | The reverse control valve (22) |
- Remove the following components from the lower valve body:
| • | The 1-2 shift valve plug (15) |
| • | The 1-2 shift valve (17) |
| • | The 1-2 shift valve spring (18) |
- Remove the following components from the lower valve body:
| • | The 2-3 shift valve plug (11) |
| • | The 2-3 shift valve (13) |
| • | The 2-3 shift valve spring (14) |
- Remove the following components from the lower valve body:
| • | The cut-back valve plug (7) |
| • | The cut-back valve spring (10) |
- Remove the following components from the lower valve body:
| • | The primary regulator valve plunger sleeve (5) |
| • | The primary regulator valve No. 2 plunger (3) |
| • | The primary regulator valve No. 1 plunger (6) |
| • | The primary regulator valve spring (2) |
| • | The primary regulator valve spring seat |
| • | The primary regulator valve (1) |
- Clean all of the lower valve body components and dry thoroughly.
- Inspect the following components for cracks, scoring or other
damage. Replace as necessary.
| • | The lower valve body valve bores |

- Use the J 26900-6
in order to measure the free length
and the outer coil diameter of all the lower valve body valve springs.
Refer to
Control Valve Lower Body Spring Specifications
.
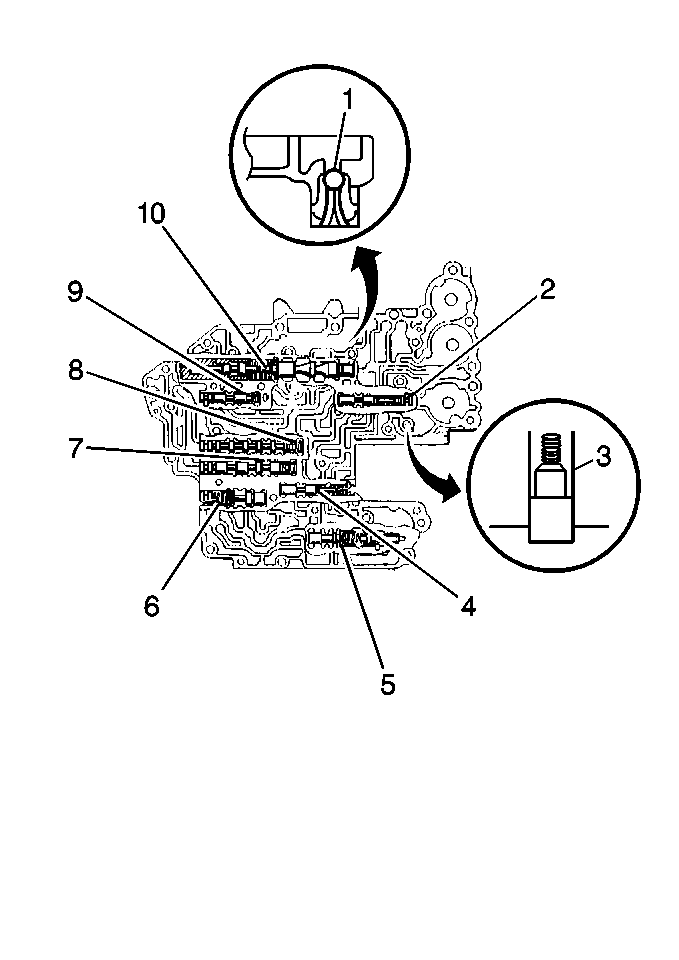
| • | Pressure relief valve spring (1) |
| • | 2nd coast modulator valve spring (2) |
| • | Cooler by-pass valve spring (3) |
| • | Low coast modulator valve spring (4) |
| • | Accumulator control valve spring (5) |
| • | Reverse control valve spring (6) |
| • | 1-2 shift valve spring (7) |
| • | 2-3 shift valve spring (8) |
| • | Cut-back valve spring (9) |
| • | Primary regulator valve spring (10) |
- If the spring free length is not as specified
Control Valve Lower Body Spring Specifications
, replace as necessary.

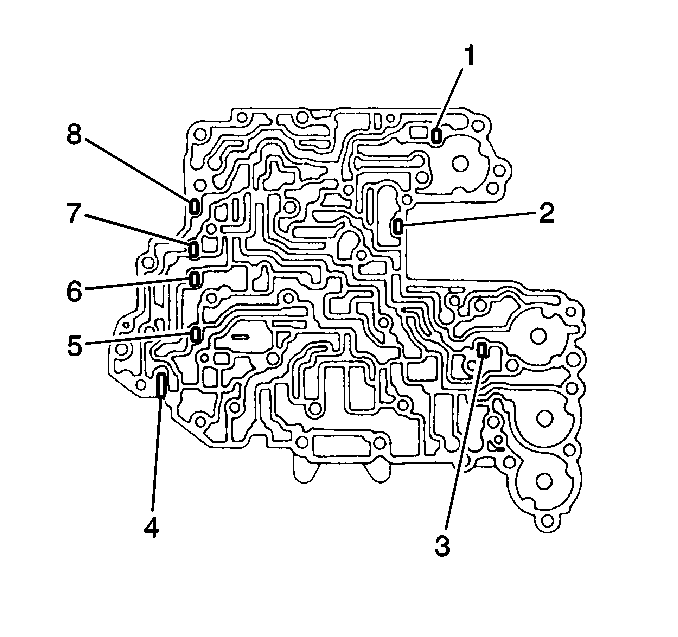
- Refer to
Control Valve Lower Body Key Specifications
.
| • | Accumulator control valve (1) |
| • | Low coast modulator valve (2) |
| • | 2nd coast modulator valve (3) |
| • | Primary regulator valve (4) |
| • | Reverse control valve (8) |


