Front Seat Lumbar Support Replacement AL2
Removal Procedure
Caution: When you are performing service on or near the SIR components or the SIR wiring, you must disable the SIR system. Refer to Disabling the SIR System. Failure to follow the correct procedure could cause air bag deployment, personal injury, or unnecessary SIR system repairs.
- Disable the SIR system. Refer to [ADD LINK]in SIR.
- Remove the seat back trim cover. Refer to [ADD LINK].
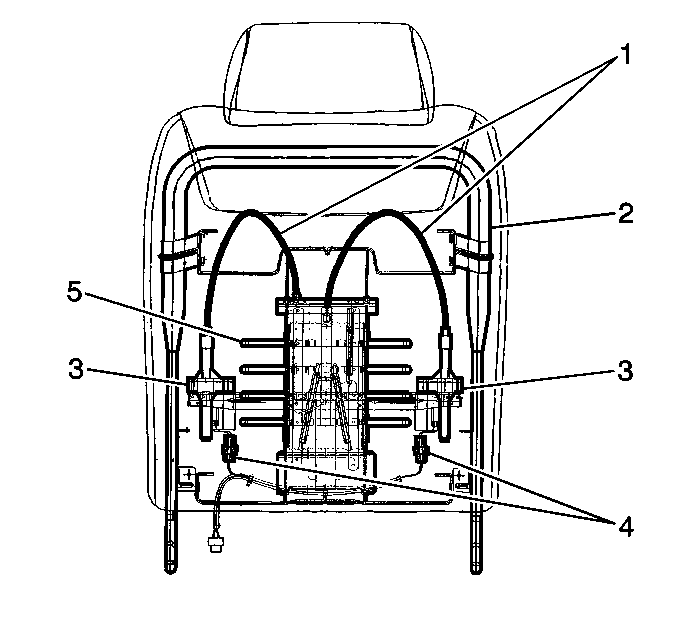
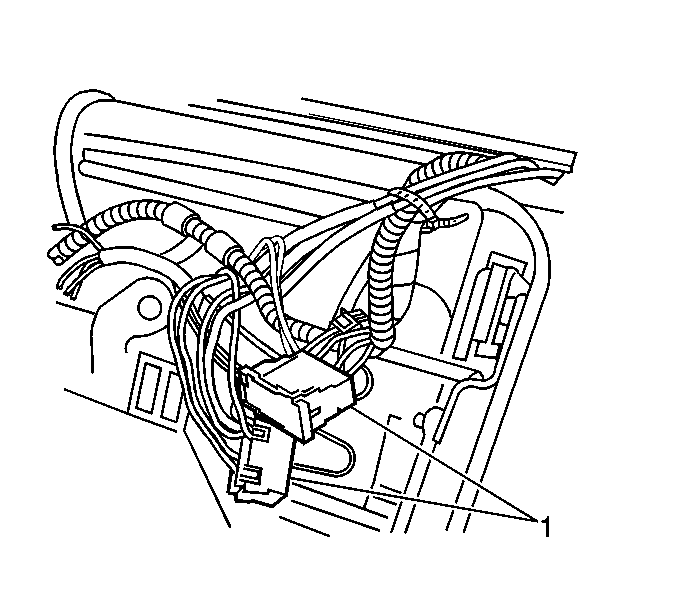
- Disconnect the power lumbar assembly electrical connectors (4).
- Disconnect the heated seat connectors.
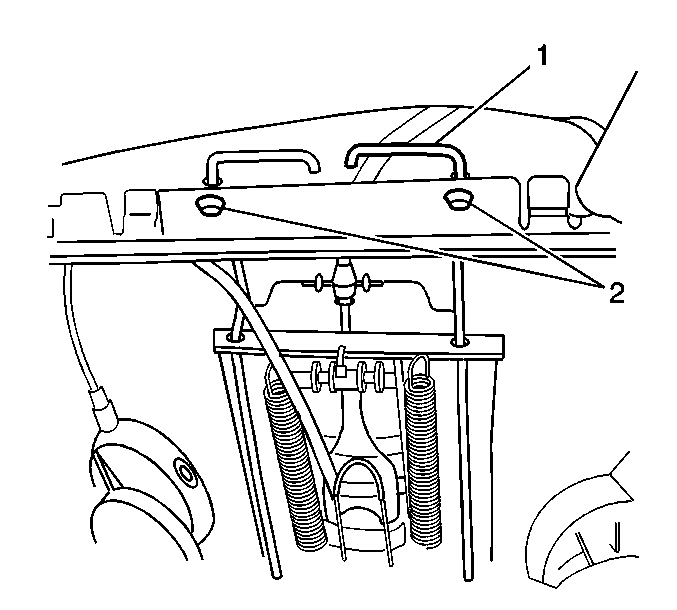
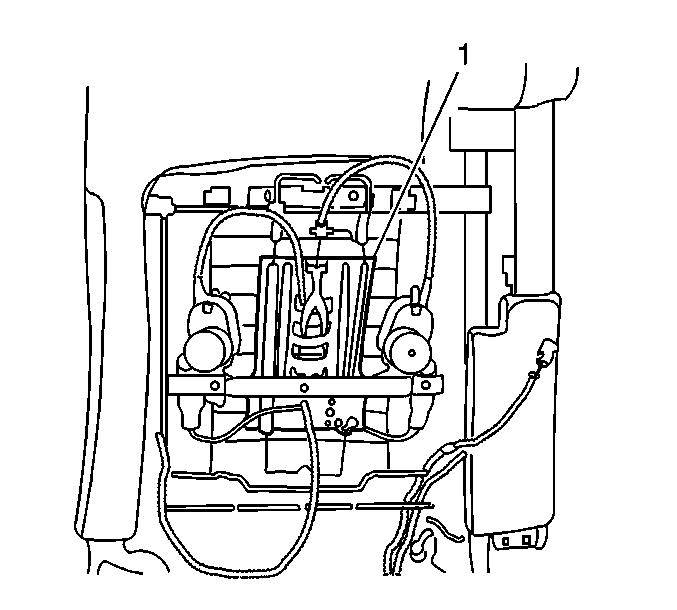
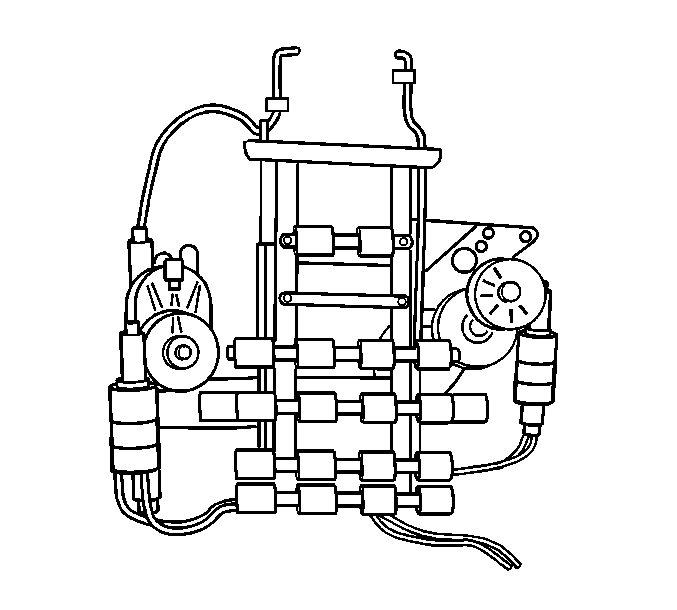
- Remove the upper retainer clips (2) securing the power lumbar assembly (1) to the seat back frame.
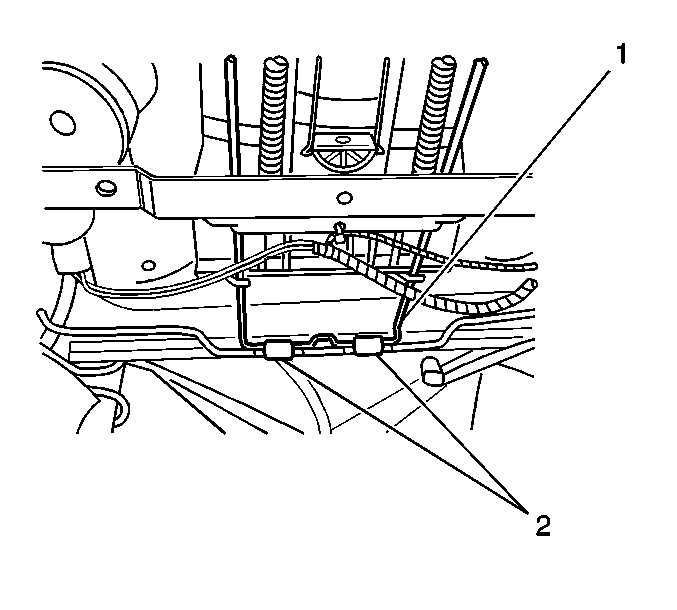
- Remove the lower retainer clips (2) securing the power lumbar assembly (1) to the seat back frame.
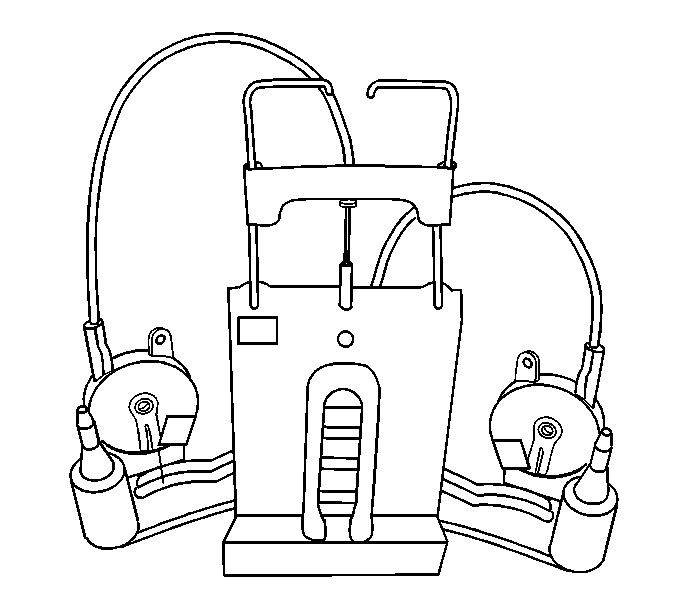
- Remove the power lumbar assembly from the seat back frame.
Important: Note the location and position of the power lumbar and heated seat wiring for proper installation location.
Installation Procedure
- Install the power lumbar assembly (1) to the seat back frame.
- Install the lower retainer clips (2) securing the power lumbar assembly (1) to the seat back frame.
- Install the upper retainer clips (2) securing the power lumbar assembly (1) to the seat back frame.
- Route the power lumbar and heated seat electrical connectors through the seat cushion frame.
- Connect the electrical connectors.
- Install the seat back trim cover. Refer to [ADD LINK].
- Verify the operation of the power lumbar support.
- Enable SIR system. Refer to [ADD LINK] in SIR.
Front Seat Lumbar Support Replacement AM3
Removal Procedure
Caution: When you are performing service on or near the SIR components or the SIR wiring, you must disable the SIR system. Refer to Disabling the SIR System. Failure to follow the correct procedure could cause air bag deployment, personal injury, or unnecessary SIR system repairs.
- Disable the SIR system. Refer to [ADD LINK].
- Remove the seat back trim. Refer to [ADD LINK].
- Disconnect the massaging lumbar (1) and the heated seat electrical connectors (1).
- Remove the lower retaining clips (2) securing the massaging lumbar assembly (1) to the seat back frame.
- Remove the upper retaining clips (2) securing the massaging lumbar assembly (1) to the seat back frame.
- Remove the massaging lumbar assembly from the seat back frame.
in SIR.
Important: Note the location and the position of the power lumbar (1) and heated seat wiring for proper installation location.
Installation Procedure
- Install the massaging lumbar assembly to the seat back frame.
- Install the lower retaining clips (2) securing the massaging lumbar (1) to the seat back frame.
- Install the upper retaining clips (2) securing the massaging lumbar (1) to the seat back frame.
- Route the massaging lumbar and heated seat electrical connectors (1) through the seat cushion frame.
- Connect the electrical connectors (1).
- Install the seat back trim cover. Refer to [ADD LINK] .
- Ensure the massaging lumbar operates properly.
- Enable SIR system. Refer to [ADD LINK] in SIR.
