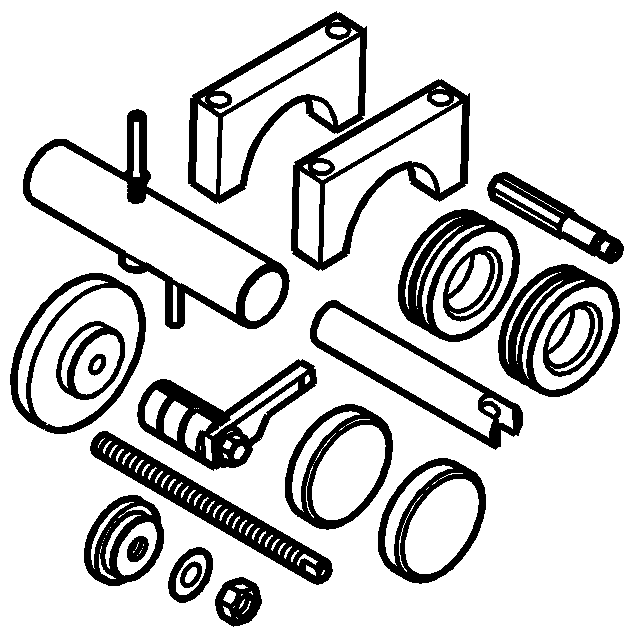
Tools Required
| • | J 44855 Side Bearing Installer |
| • | J 44856 Pinion Depth Shim Selector |
| • | J 44868 Housing Spreader |
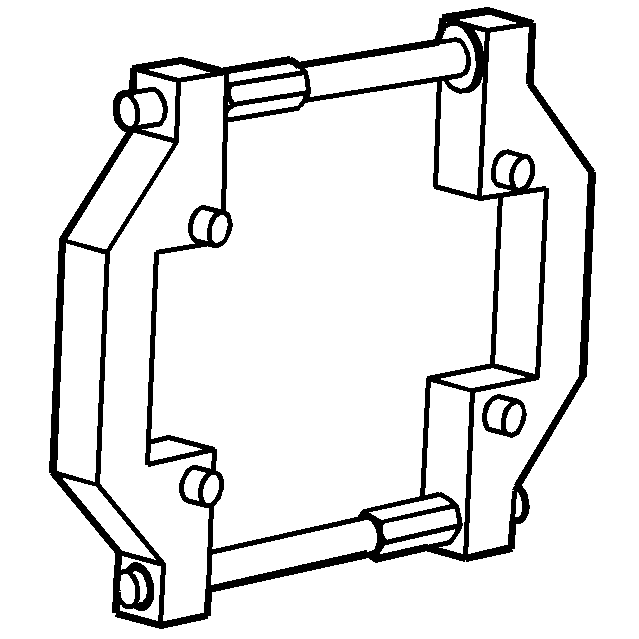
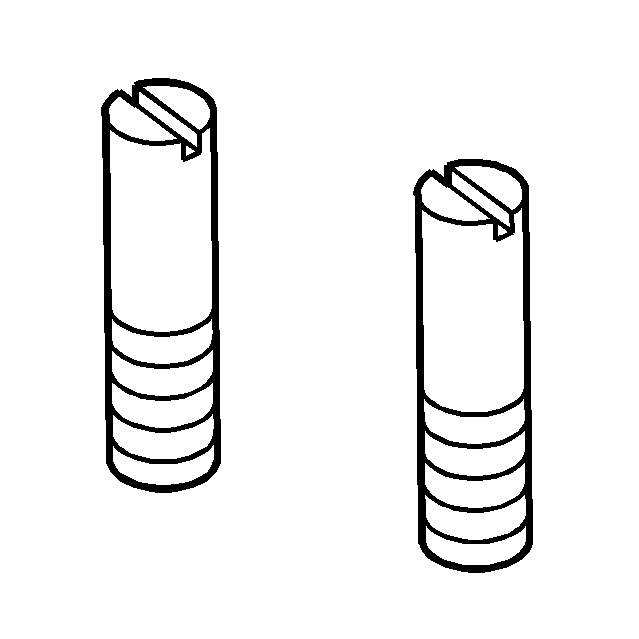
| • | J 45923 Alignment Pins |
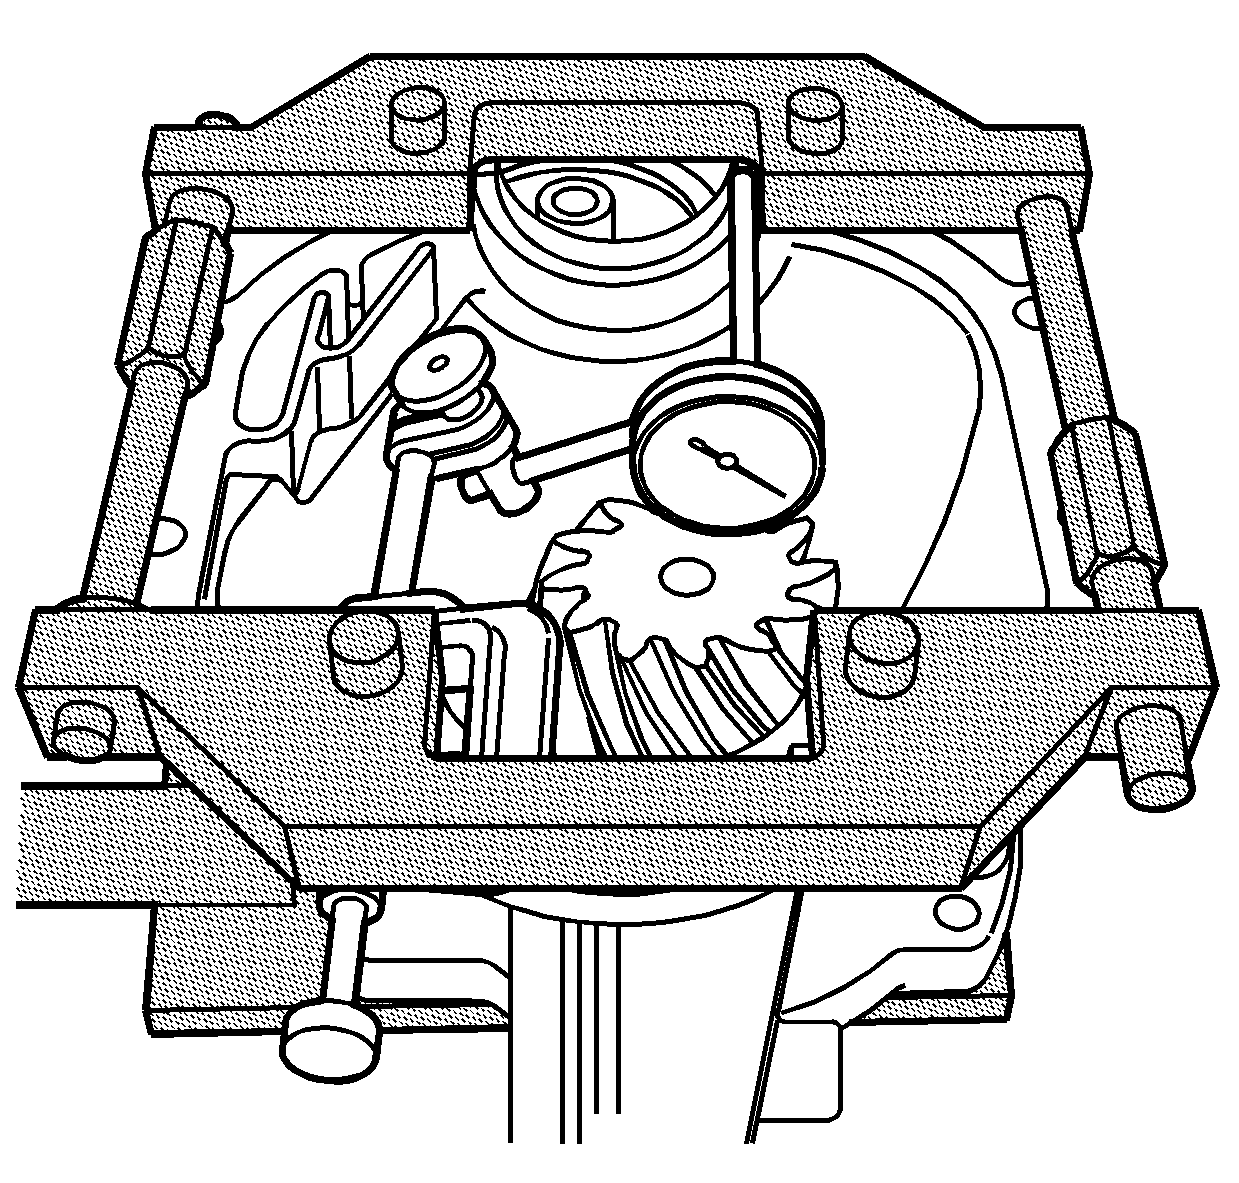
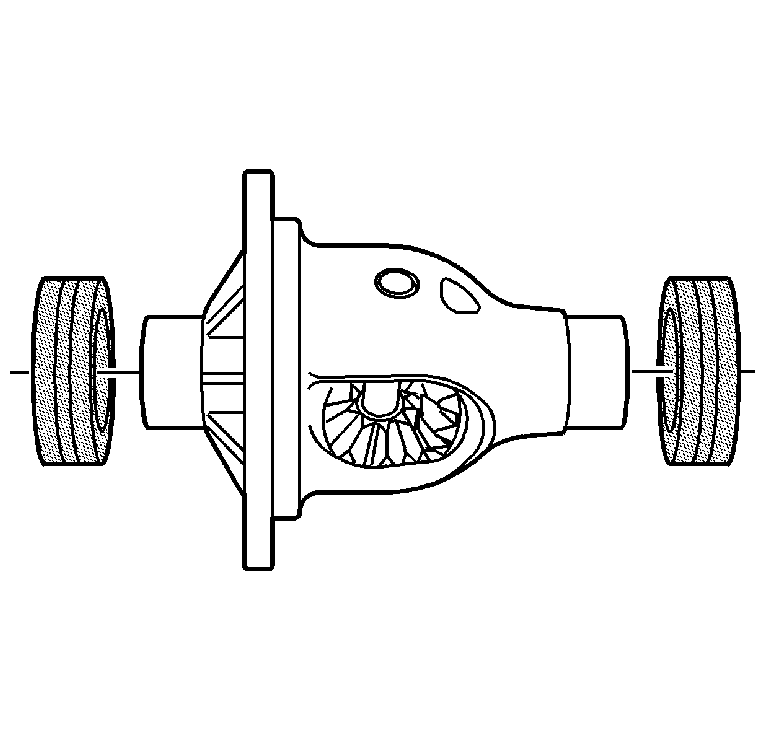
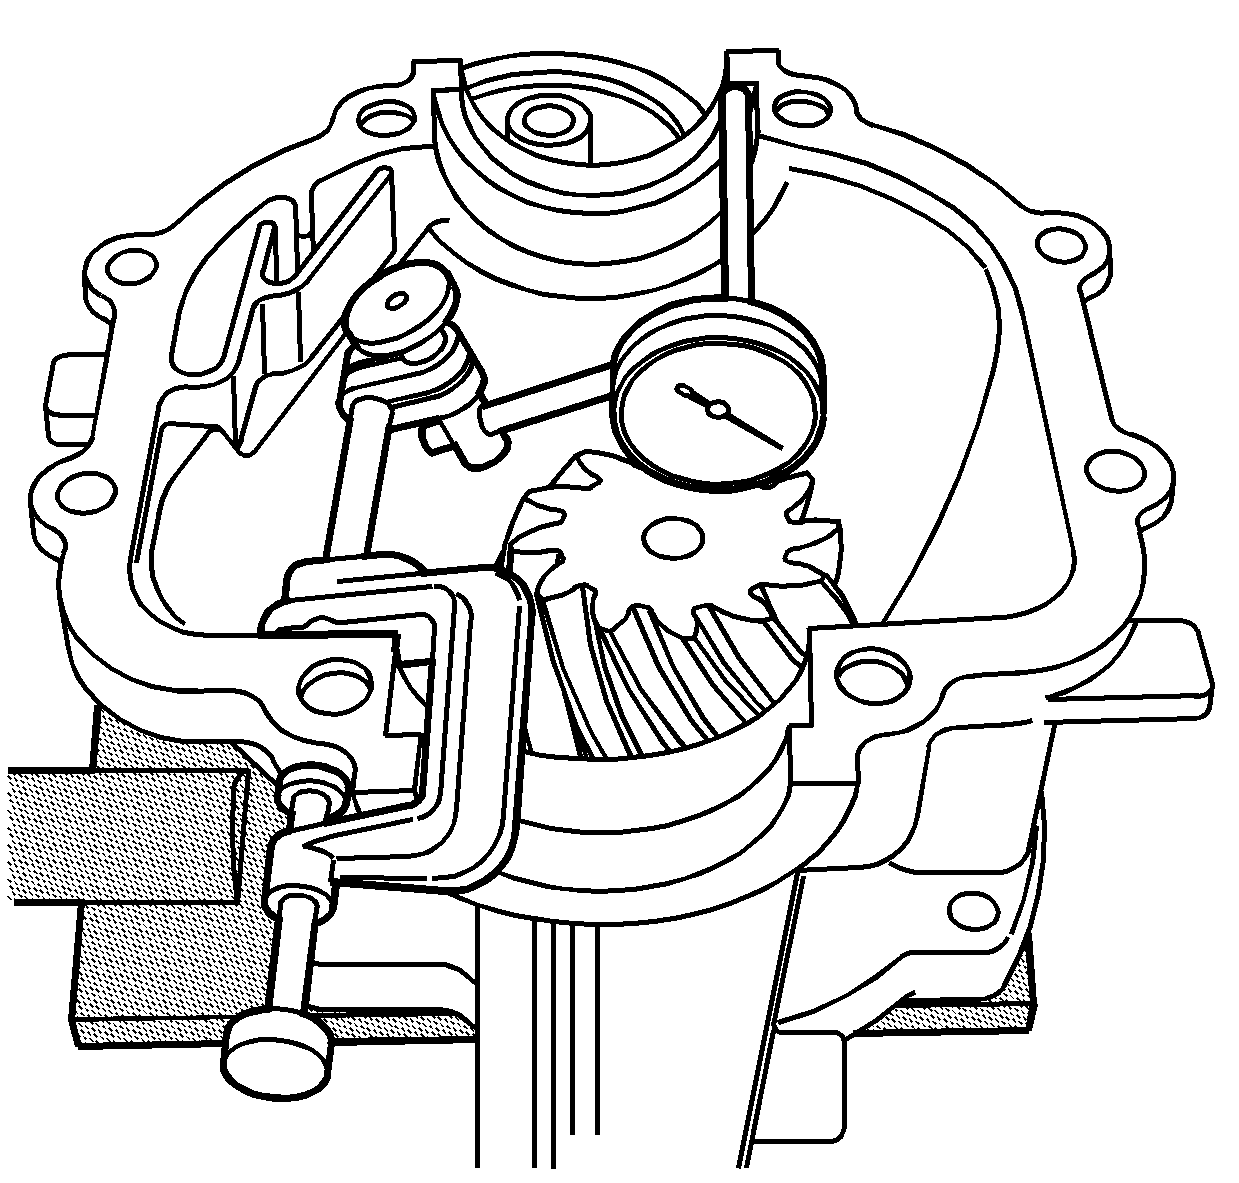
- Install the J 44856 on the differential carrier.
- Rotate the housing so the carrier side is up.
- Install the differential carrier and master bearings in the bores of the housing, slide the carrier back and forth to seat the master bearings.
- Install the J 44856-6 into the M10 bolt hole.
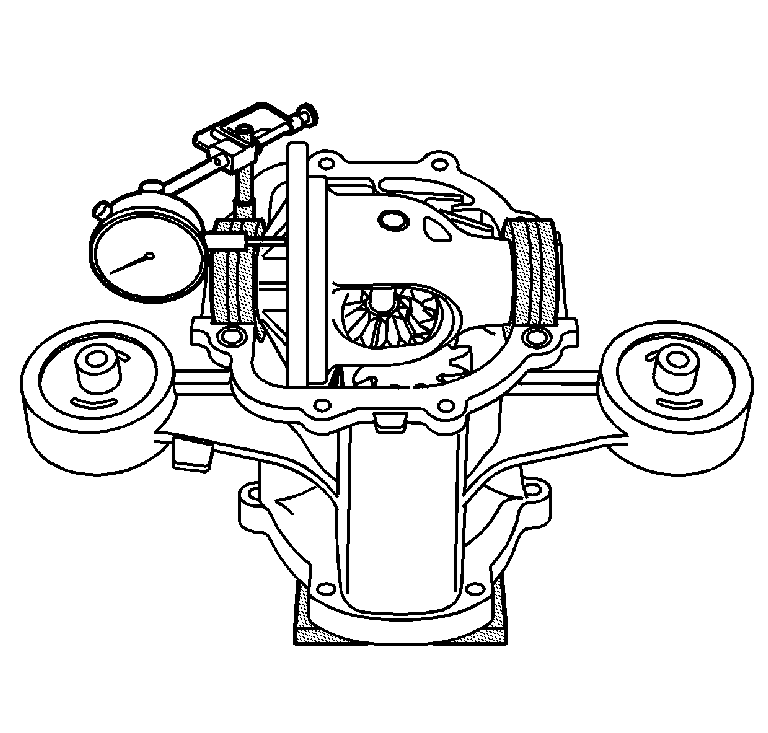
- Install the dial indicator on the J 44856-6.
- Slide the carrier away from the dial indicator until it hits the master bearing and zero it.
- Slide the carrier to the dial indicator and record this measurement as dimension A.
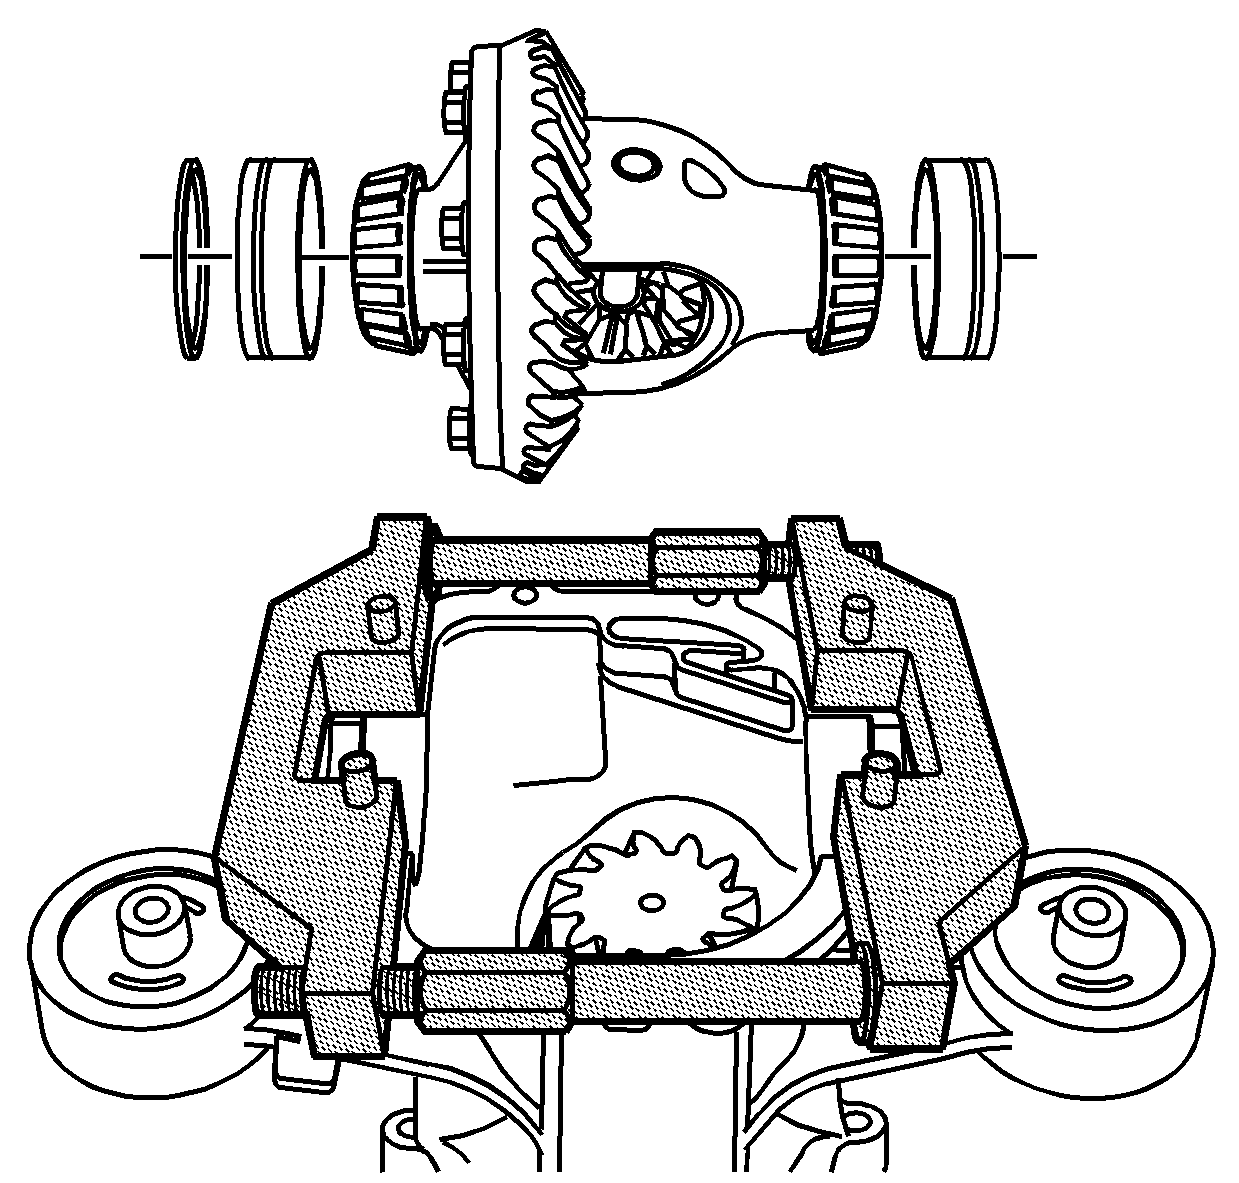
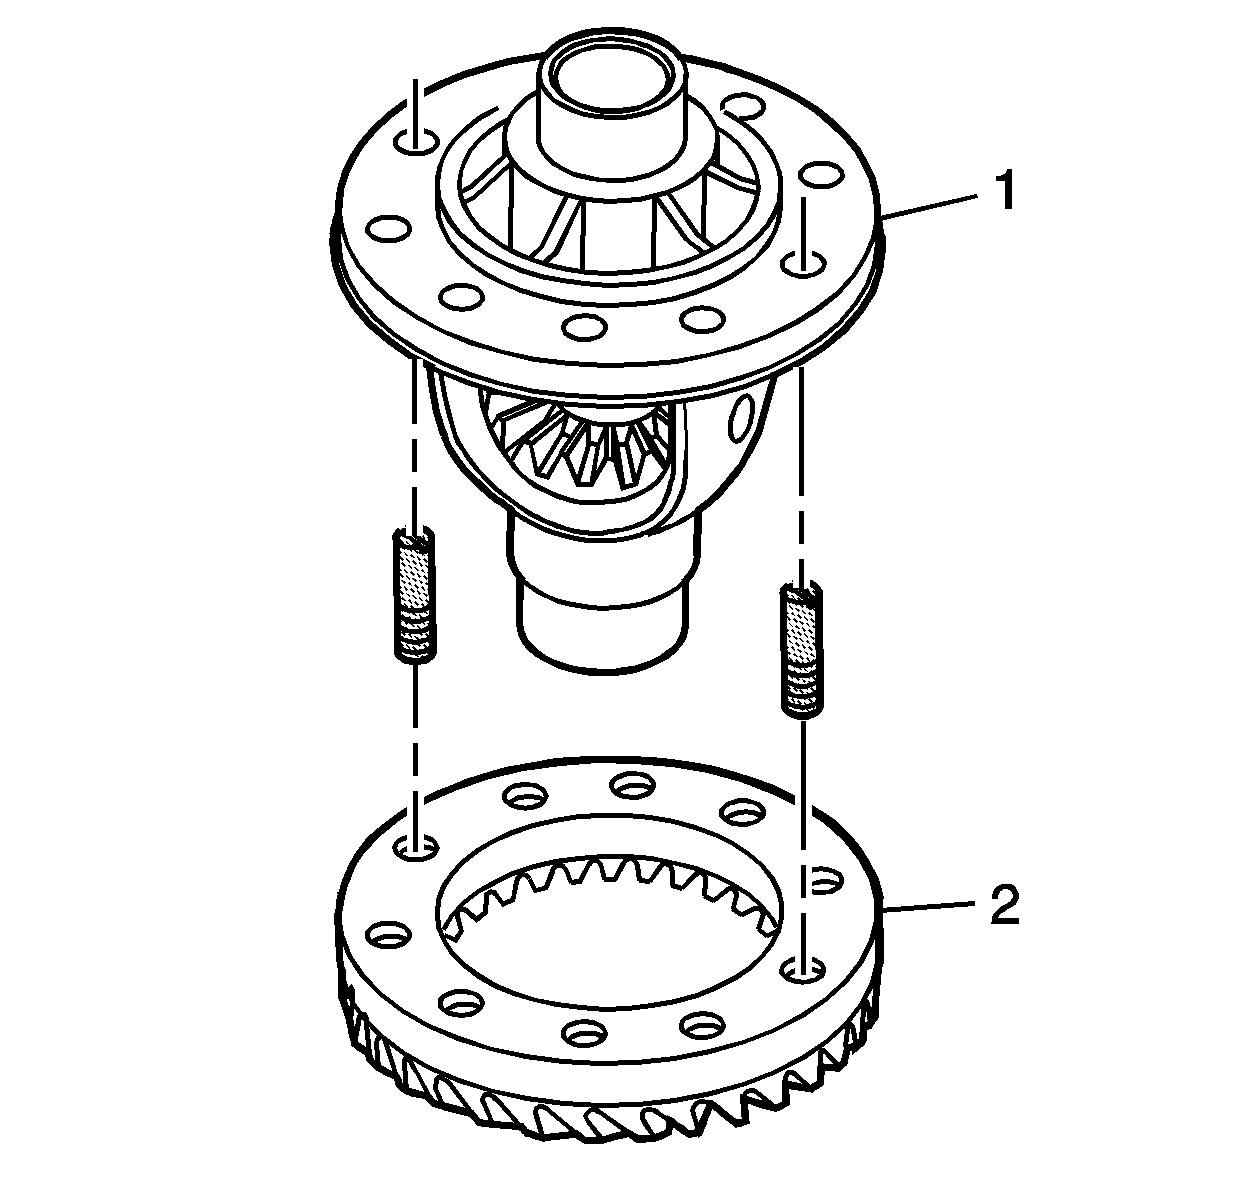
- Install J 45923 into the ring gear (2). Place the differential case (1) over the J 45923 .
- Place the differential case and ring gear assembly into a press.
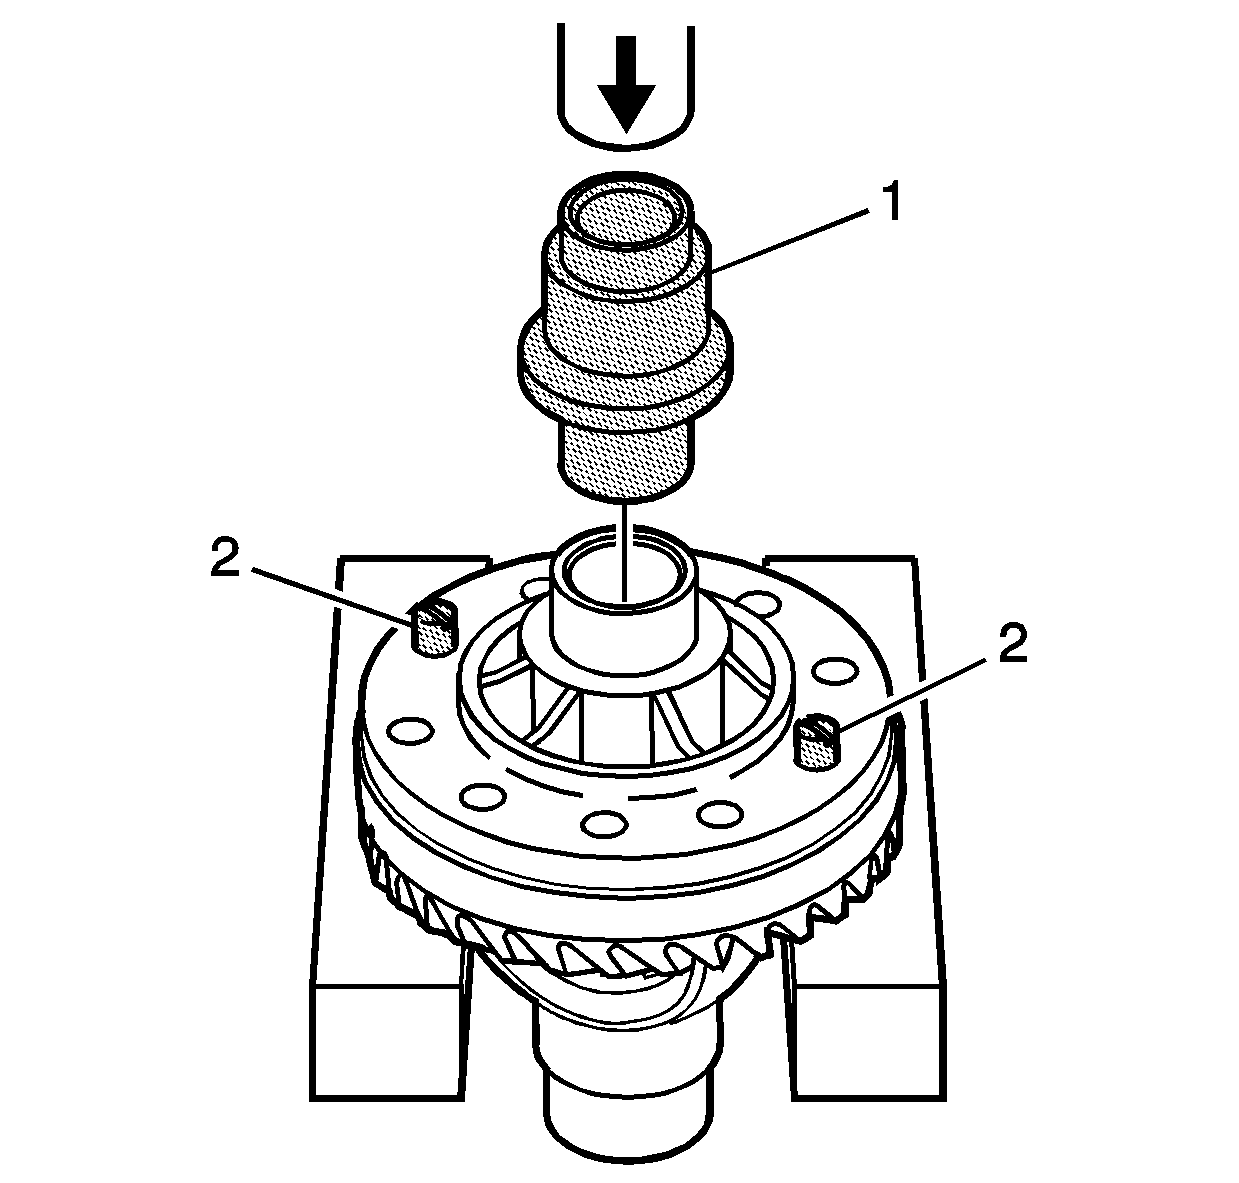
- Use J 44855 (1) to press the ring gear onto the differential case.
- Remove the J 45923 .
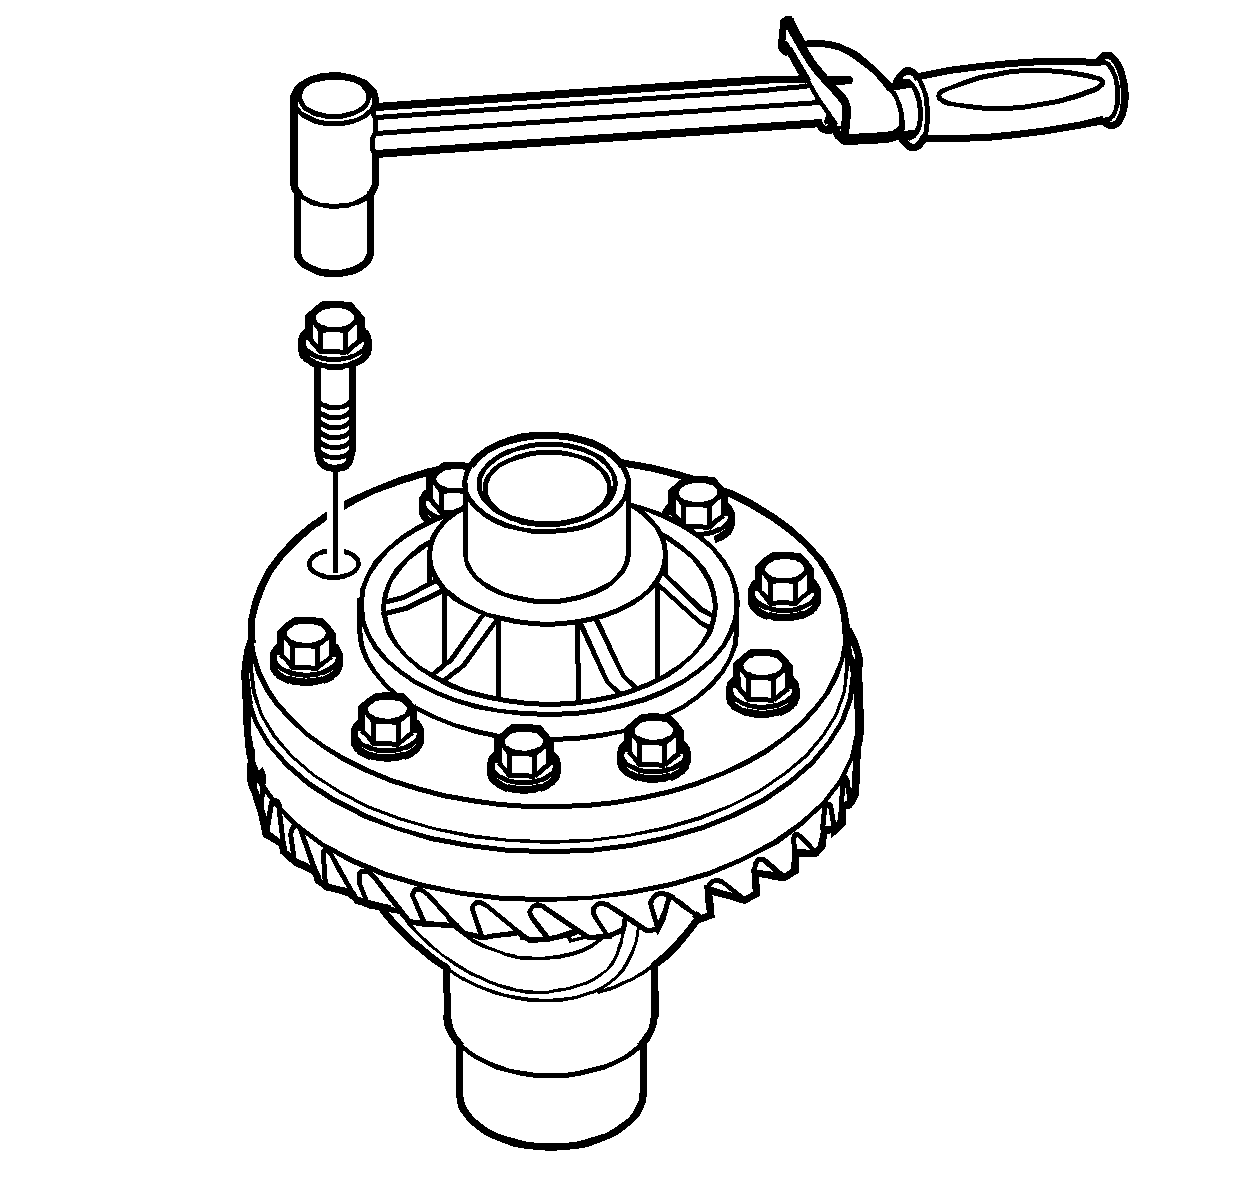
- Install NEW ring gear bolts.
- Install the dial indicator on the J 44856-6.
- Slide carrier away from the dial indicator. Ensure ring gear teeth contact to pinion gear teeth is at zero lash. Zero out indicator.
- Slide carrier away from the pinion gear. Record this measurement as dimension (B).
- The (B) dimension is the shim for the bearing on the gear side.
- Subtract dimension (B) from (A) this equals measurement (C) right side shim. Add 0.30 mm (0.012 in) to the measurement for bearing preload to obtain the right side shim.
- Use the J 44855 (1). Into the bearing (2) place the differential carrier (3) in a press and install the bearing until it seats.
- Turn the carrier over, using the same process, install the right side bearing until it seats.
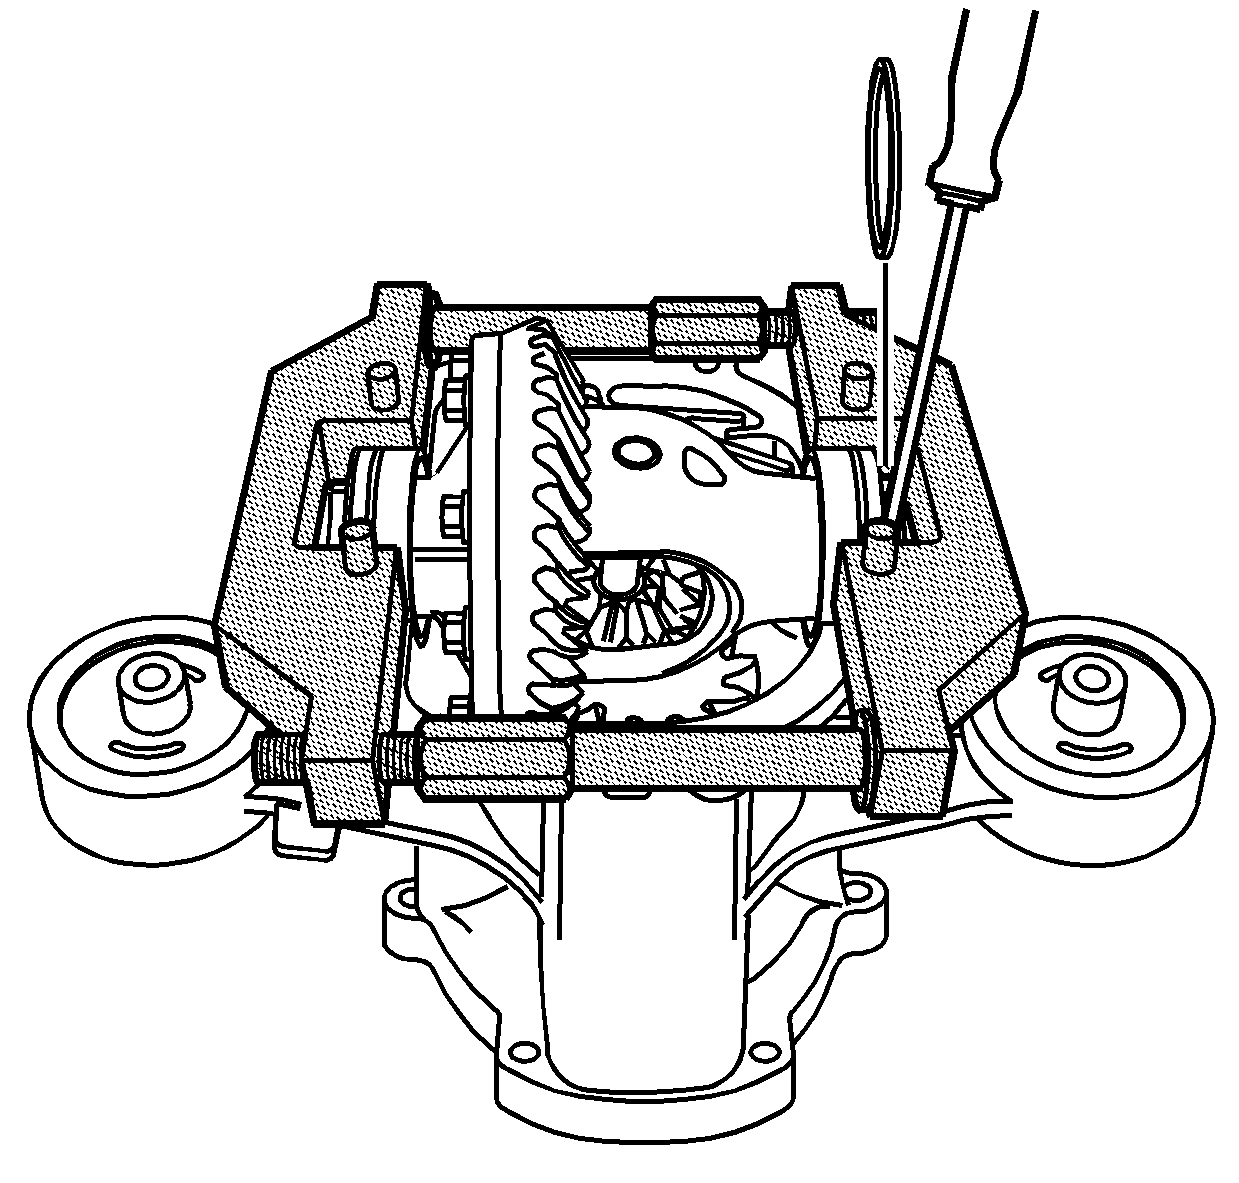
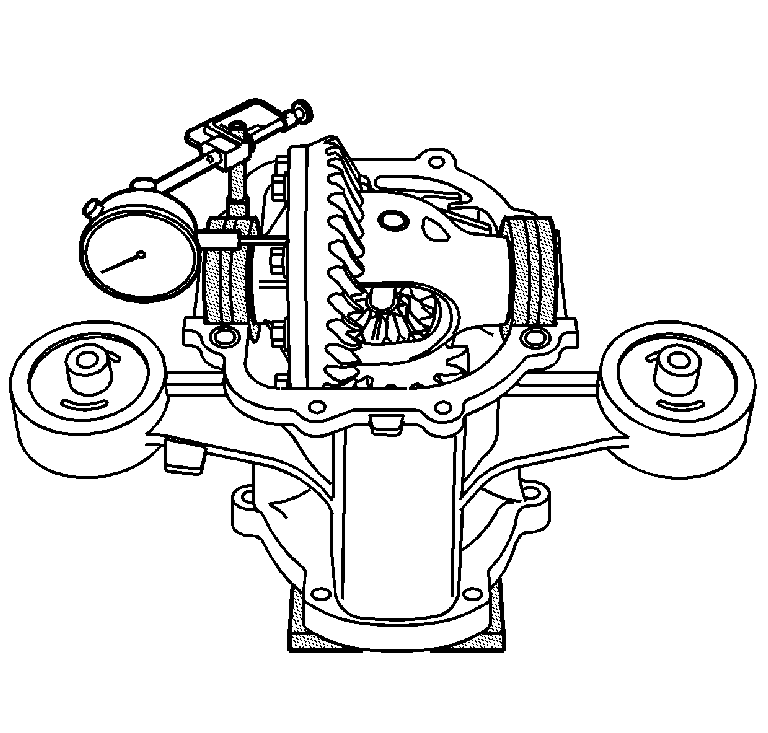
- Install a dial indicator in the differential bore. Measure at the top of the bearing bore. Preload the dial indicator and zero it out so that the maximum spread can be read.
- The maximum housing spread is 0.30-0.40 mm (0.012-0.016 in).
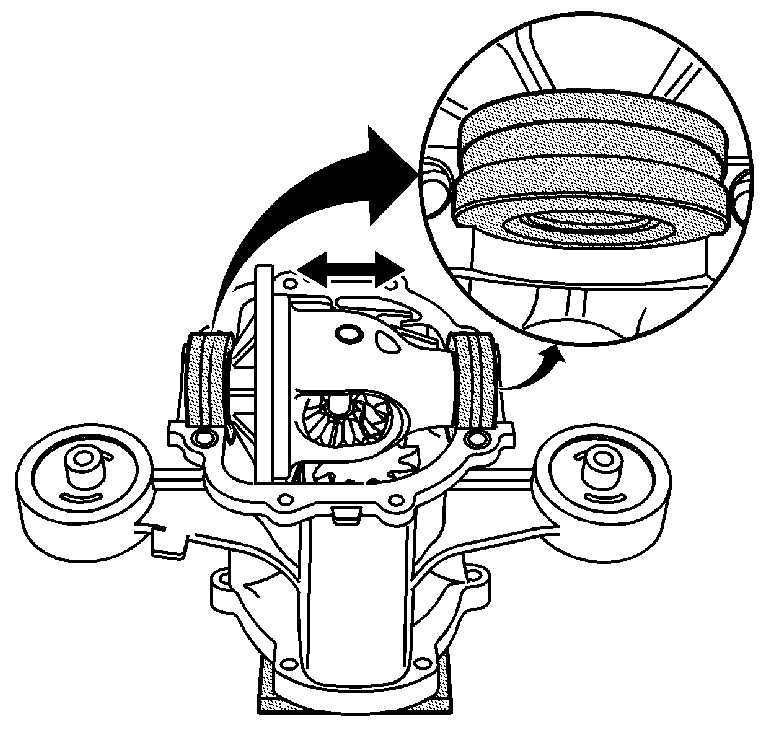
- Install the J 44868 with the big dowels in the M10 bolt holes.
- Spread the housing by turning the forcing screws, watch the dial indicator reading DO NOT over spread the housing.
- After the housing is spread, remove the dial indicator from under the J 44868 .
- Install the differential carrier assembly into the housing with 2 bearing cups and 1 of the side shims.
- Use a screw driver to slide the races into the bores and place the other side shim into place.
- Remove the J 44868 .
Important: The ring gear must be removed to perform this measurement.
Important: Master bearings J 44856-5 must seat properly in the bearing bores. Improper seating could cause a wrong measurement.
Notice: Use the correct fastener in the correct location. Replacement fasteners must be the correct part number for that application. Fasteners requiring replacement or fasteners requiring the use of thread locking compound or sealant are identified in the service procedure. Do not use paints, lubricants, or corrosion inhibitors on fasteners or fastener joint surfaces unless specified. These coatings affect fastener torque and joint clamping force and may damage the fastener. Use the correct tightening sequence and specifications when installing fasteners in order to avoid damage to parts and systems.
Important: Install NEW bolts during ring gear assembly. The bolts will have a new lock patch on the threads.
Tighten
Tighten the ring gear bolts in a criss-cross pattern to 54 N·m
(40 lb ft).
Important:
• The ring gear must be installed to record this measurement. • Master bearings J 44856-5 must seat properly in the bearing
bores. Improper seating could cause a wrong measurement.
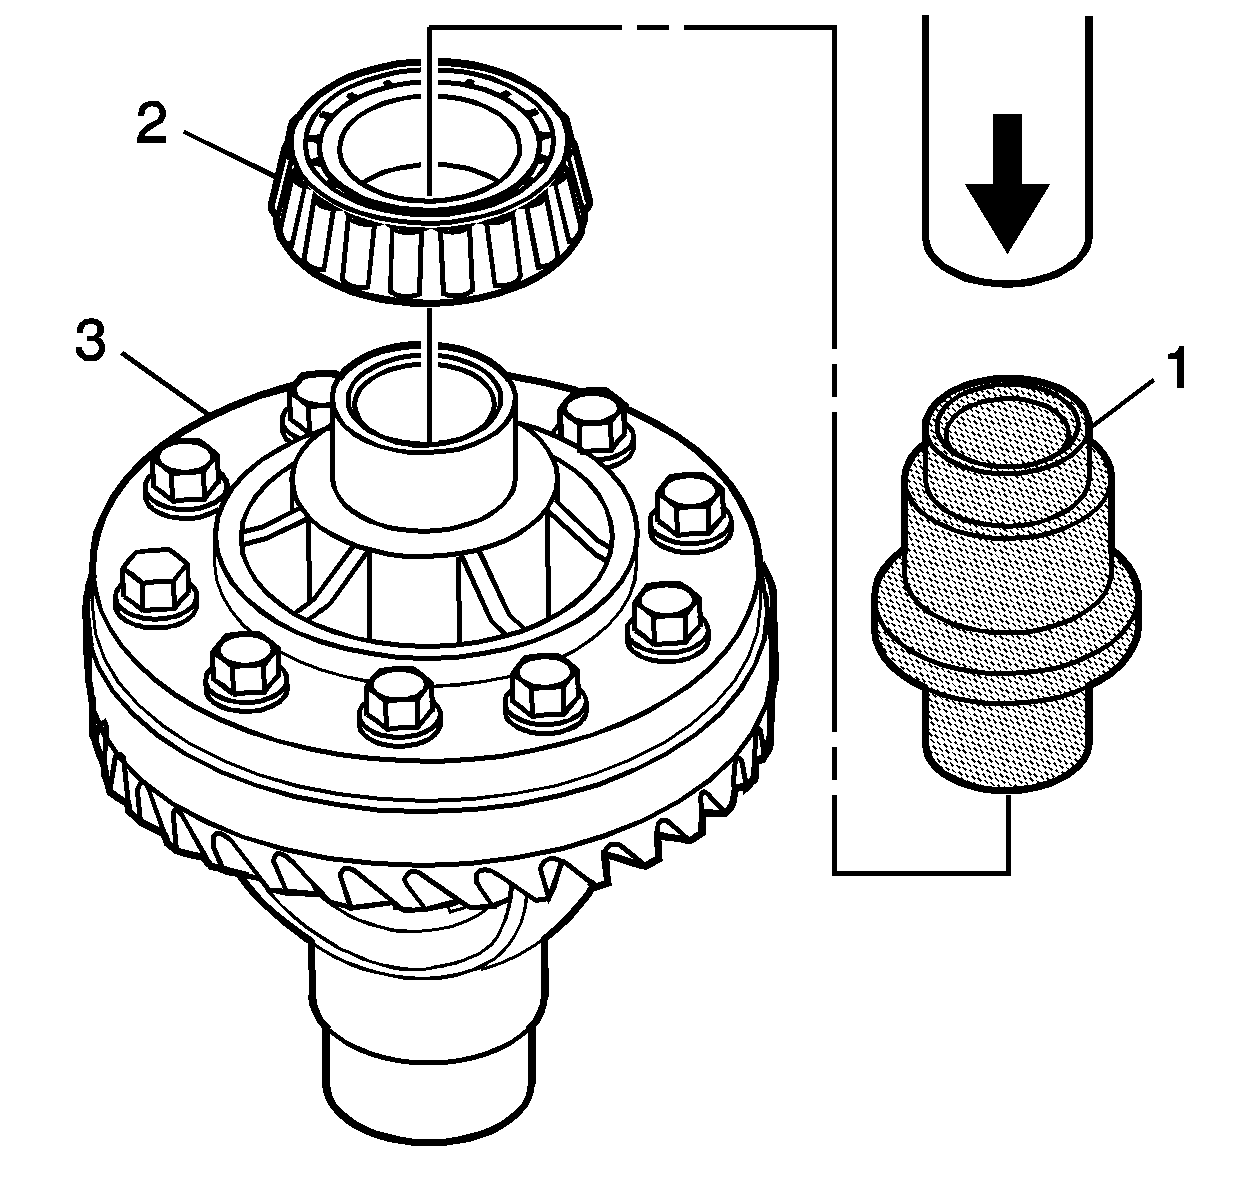
Important: The differential bearings and the bearing races are matched sets. Replace BOTH the bearing and the races when either part requires placement.
Notice: Do not overspread the component. Spread the component only enough to allow the component to fit. Overspreading may damage the component.