Tools Required
| • | J 44872 Pinion Shaft Seal Installer |
| • | J 44873 Shoulder Bolts |
| • | J 44882 Pinion Press Support Bar |
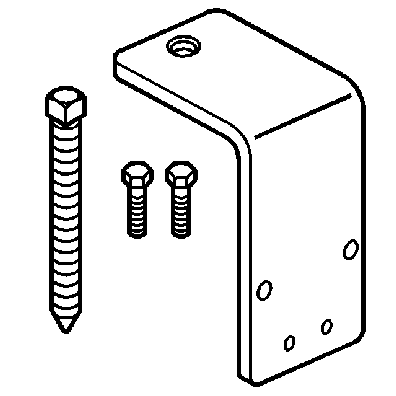
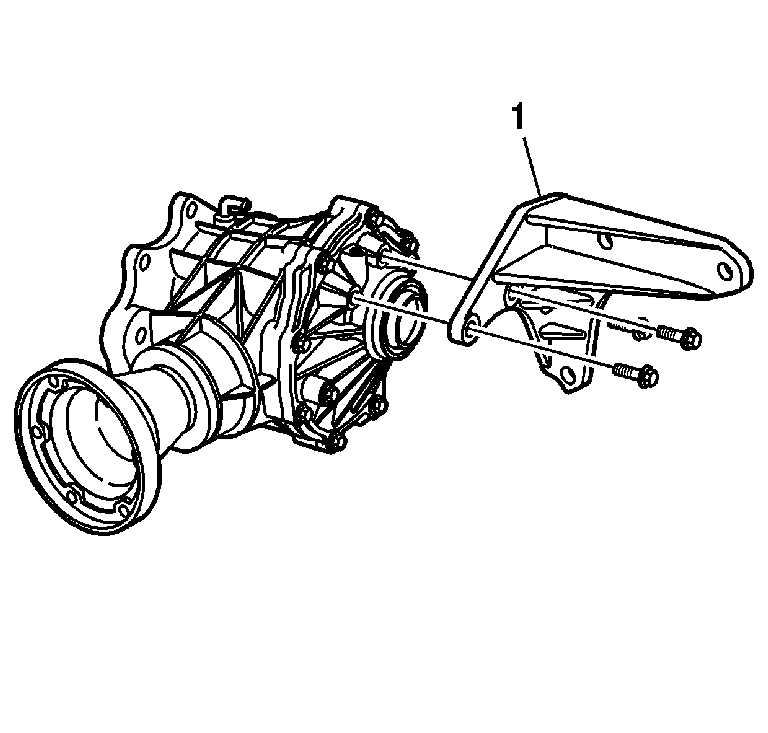
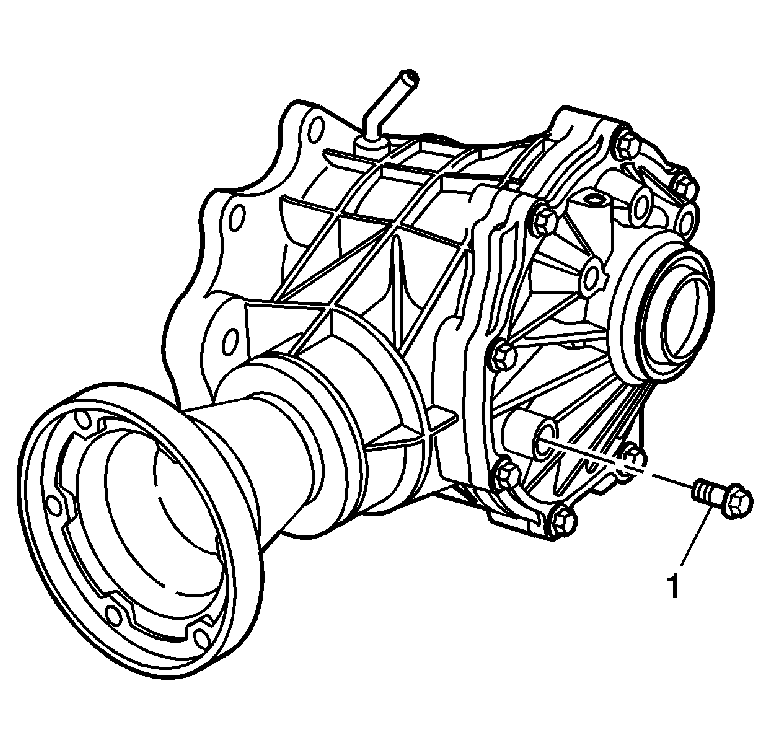
- Remove the 3 bolts from the bracket (1).
- Remove the bracket (1).
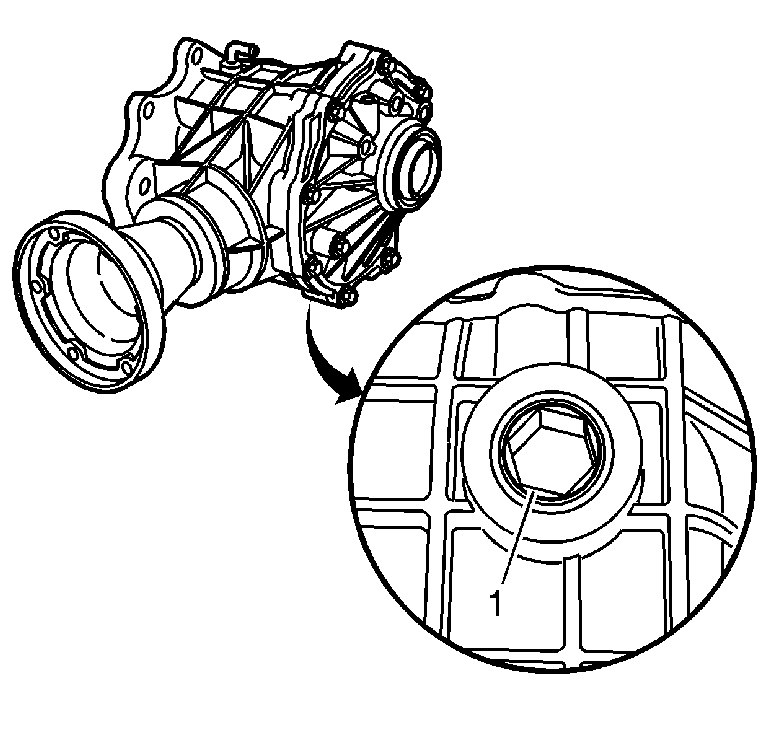
- Remove the drain plug (1).
- Remove the fill plug (1) and drain the fluid.
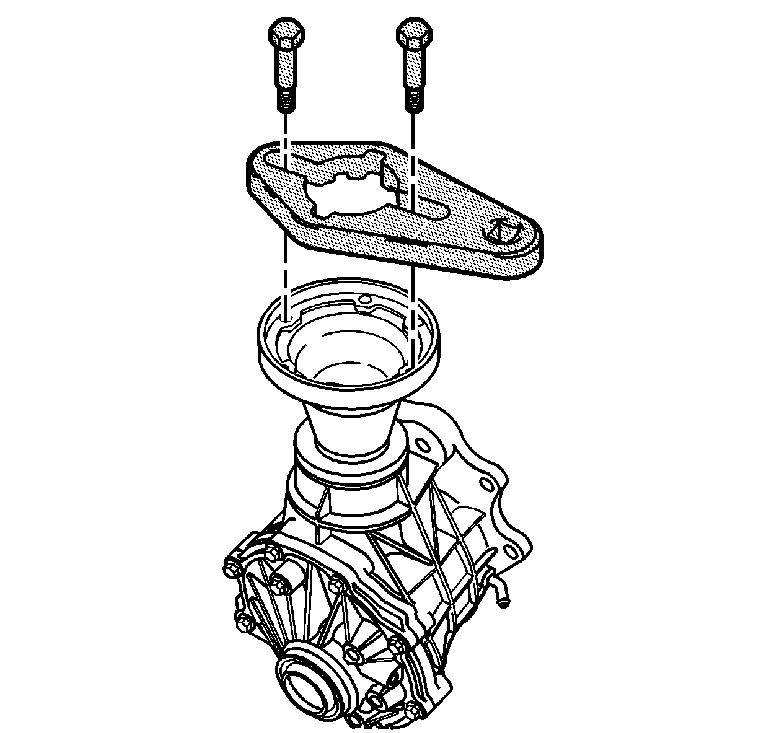
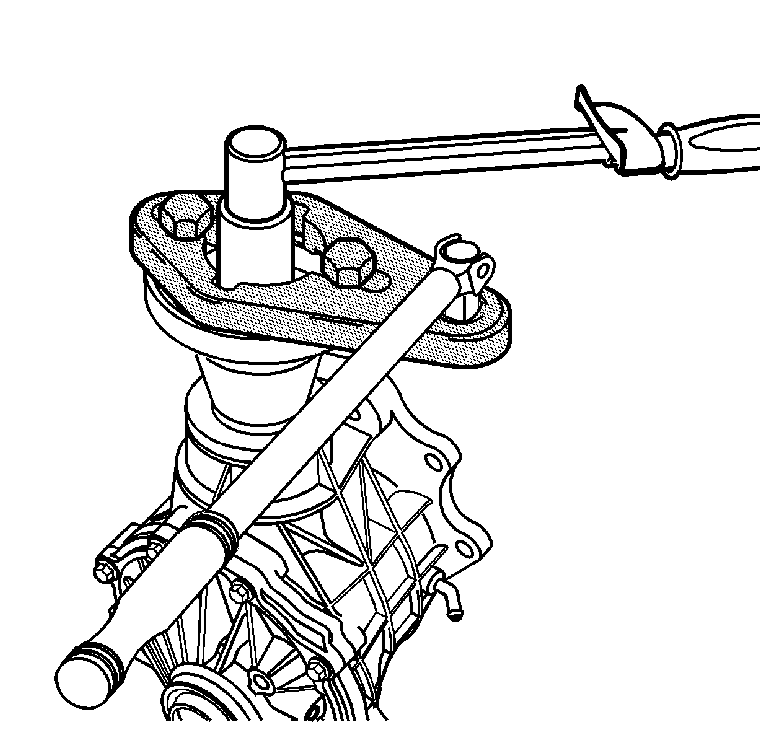
- Install J 44873 and the two attaching bolts to the pinion flange.
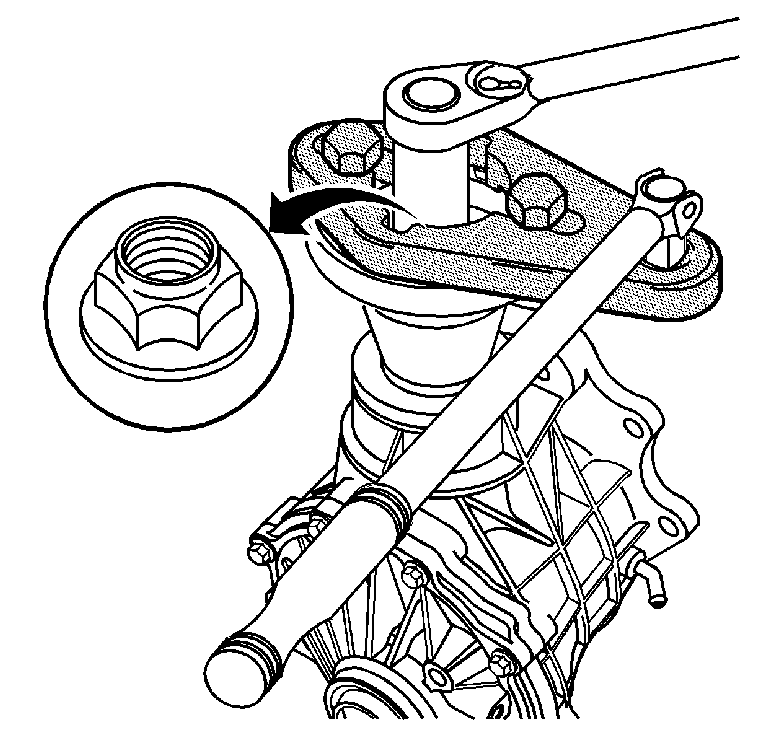
- Using a breaker bar and a ratchet with a 27 mm socket, remove the pinion nut.
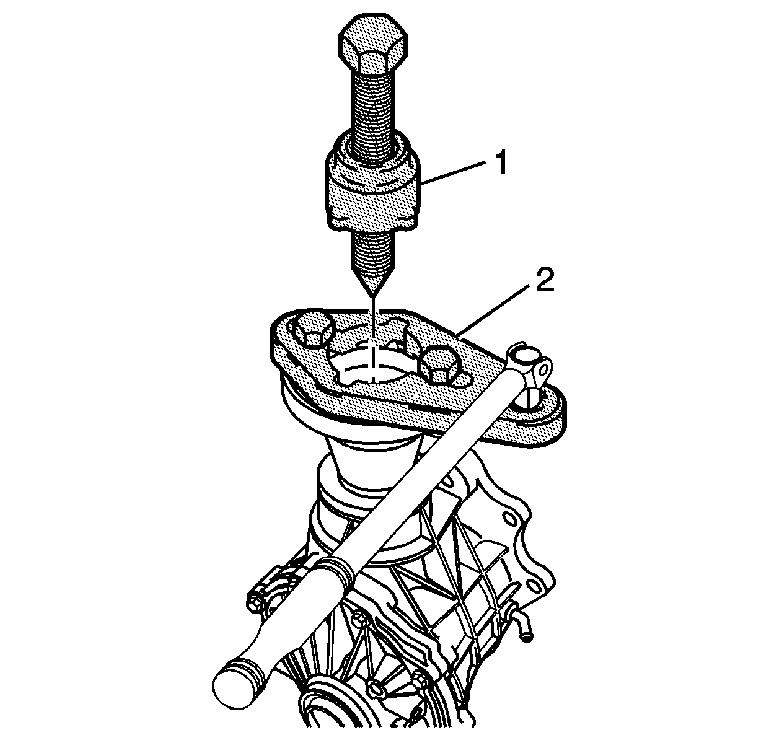
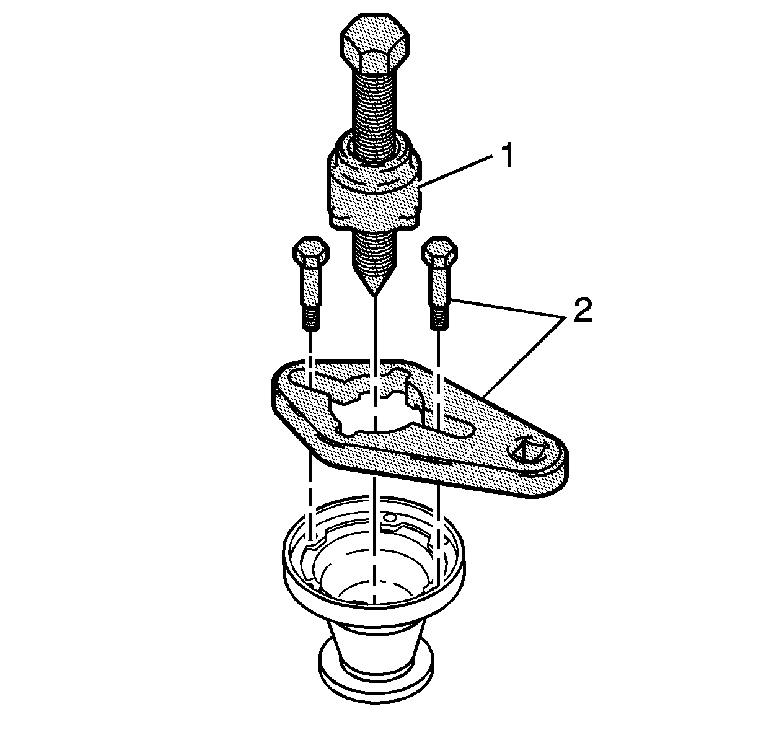
- Insert J 8614-2 (1) through the slots in J 44873 (2).
- Turn the blue collar until it locks into the grooves on the under side of the J 44873 .
- Tighten the forcing screw to remove the pinion flange.
- Remove the J 44873 (2), the two attaching bolts, and J 8614-2 (1) from the pinion flange.
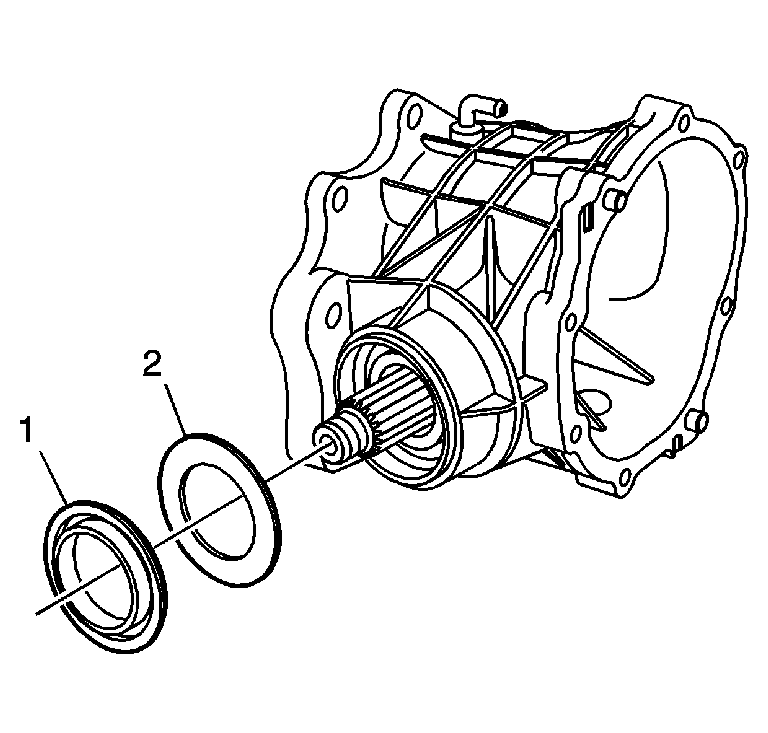
- Remove the oil seal (1) and slinger washer (2) from the housing.
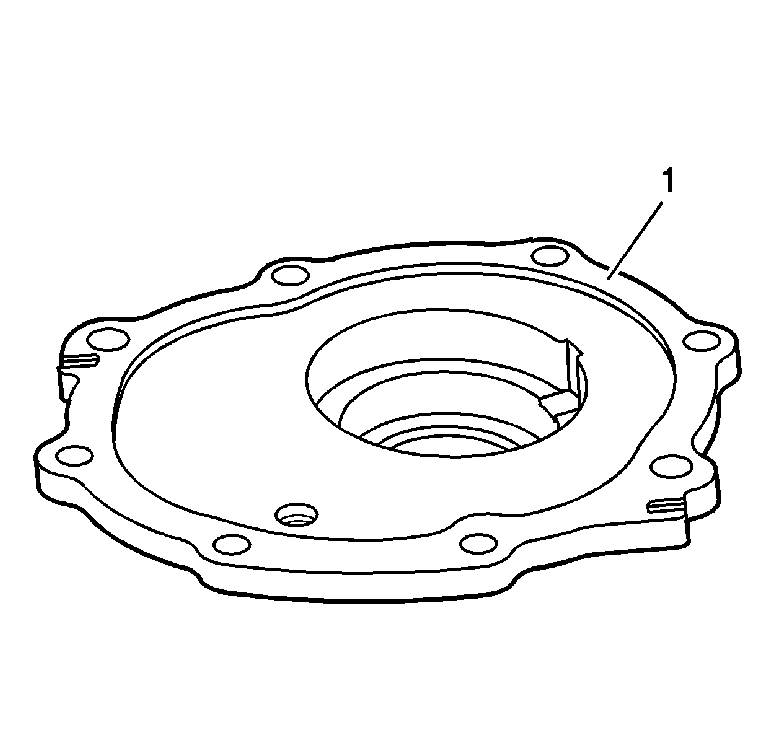
- Remove all bolts (2) from the side cover (1).
- Use pry point relief slots to remove the cover.
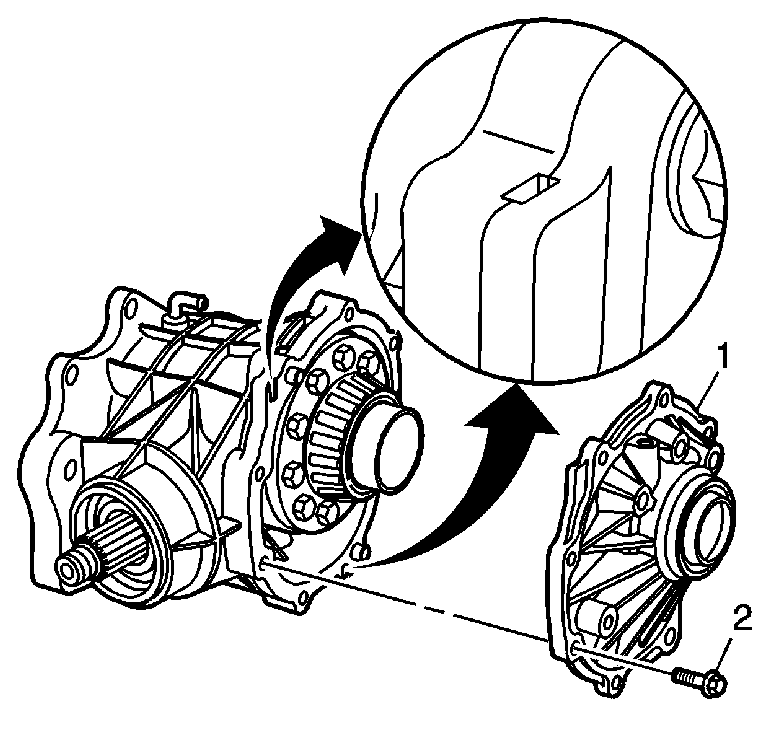
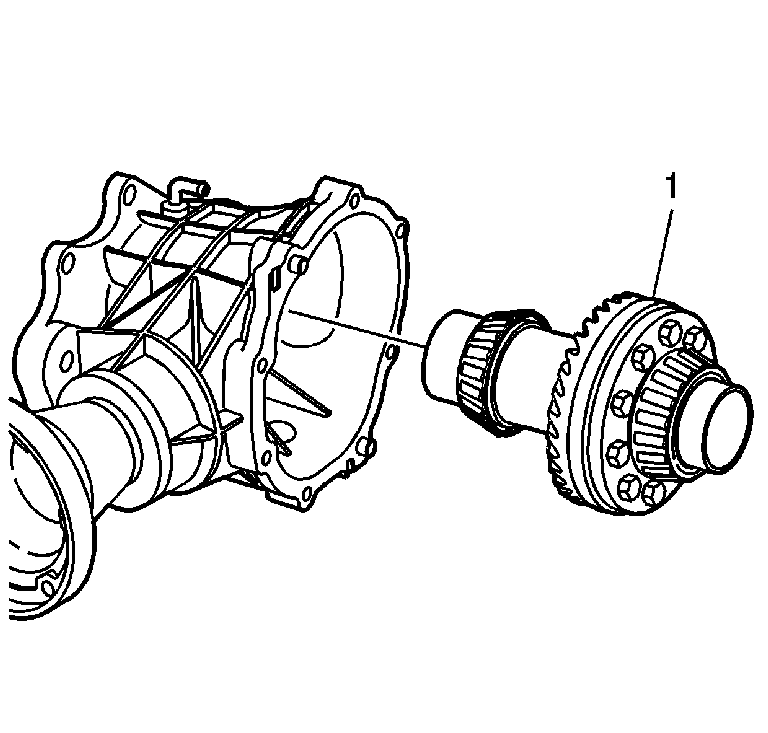
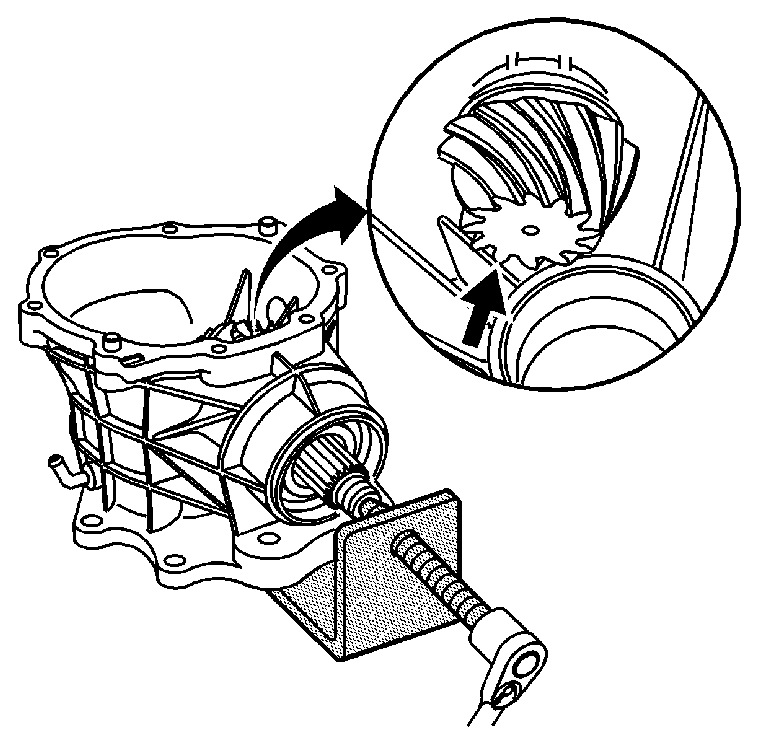
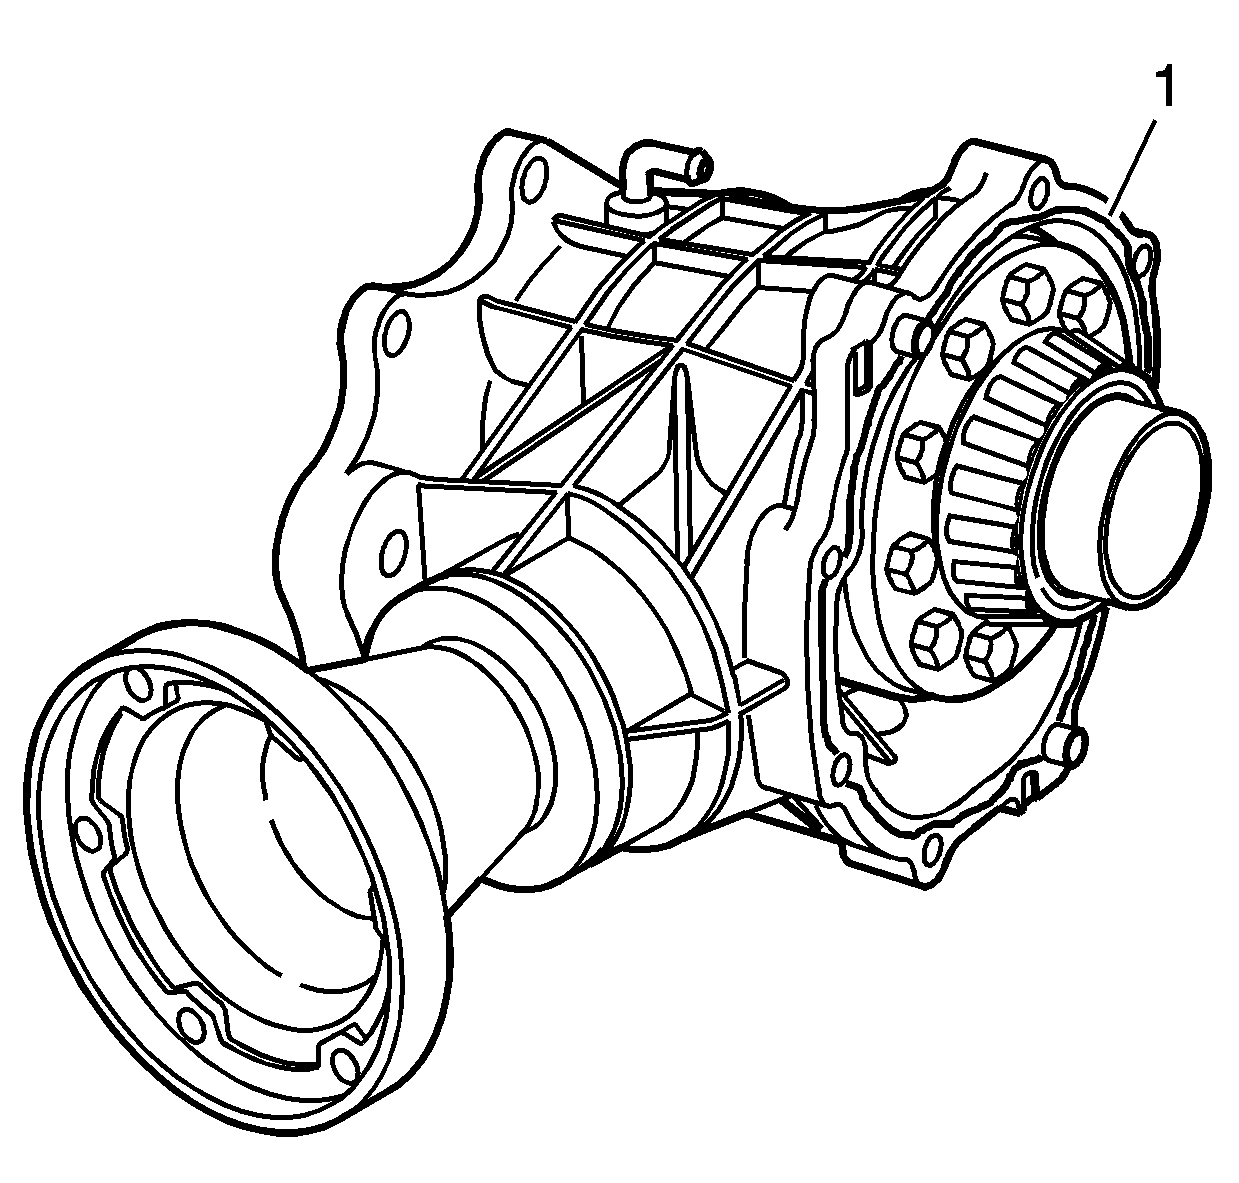
- Remove the carrier assembly (1) from the housing.
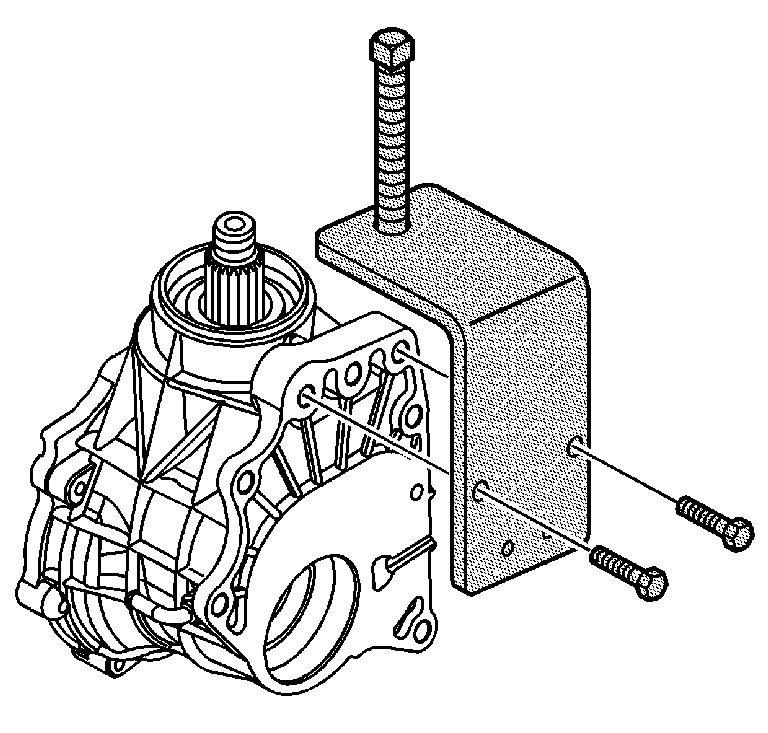
- Using the bolts supplied, attach J 44882 to the carrier housing.
- Tighten the forcing screw in order to push out the pinion gear. The gear will spin when it is being pushed out. When the gear stops spinning, stop pushing. The gear teeth will contact the housing.
- Remove the J 44882 .
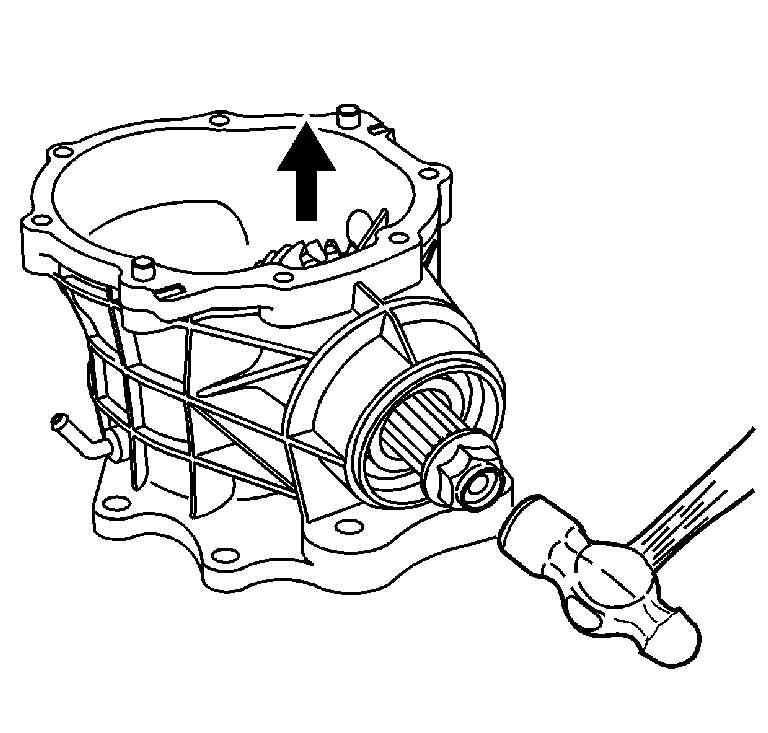
- Install the old pinion nut on the threads of the pinion shaft. Hold the shaft so the gear head faces up, and drive out the pinion shaft, so that it does not contact the housing.
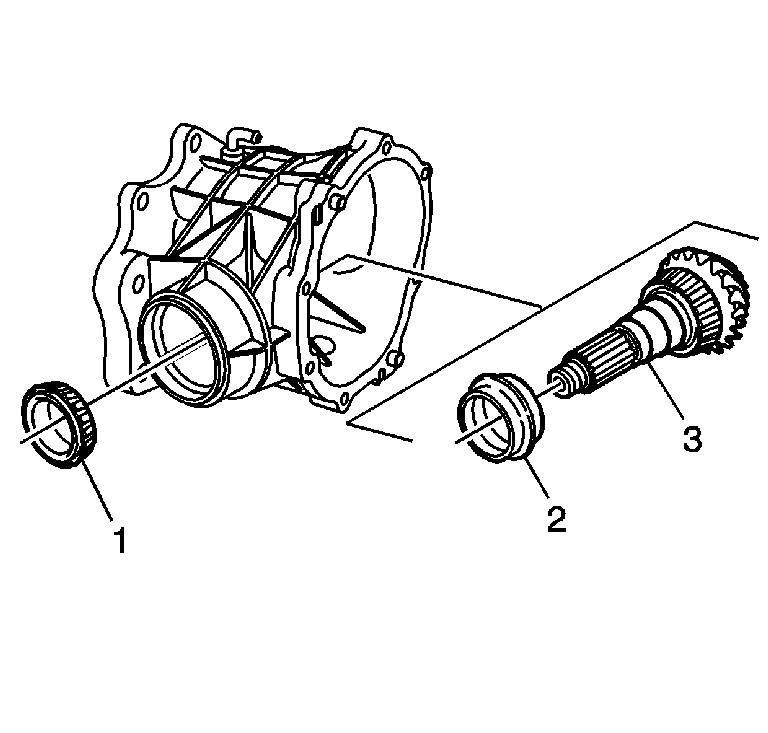
- Remove the bearing (1), collapsible spacer (2), and pinion shaft (3) from the housing.
- Install the NEW collapsible spacer (2) onto the pinion shaft (3).
- Install the pinion shaft (3) into the housing.
- Install the bearing (1) onto the pinion shaft.
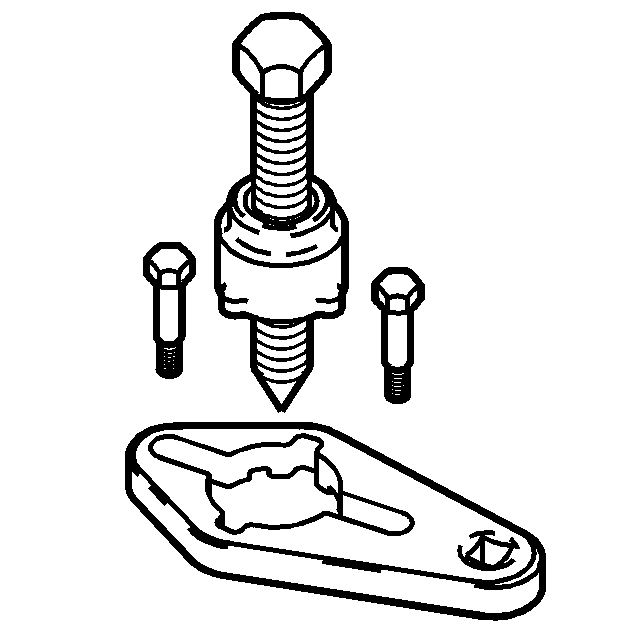
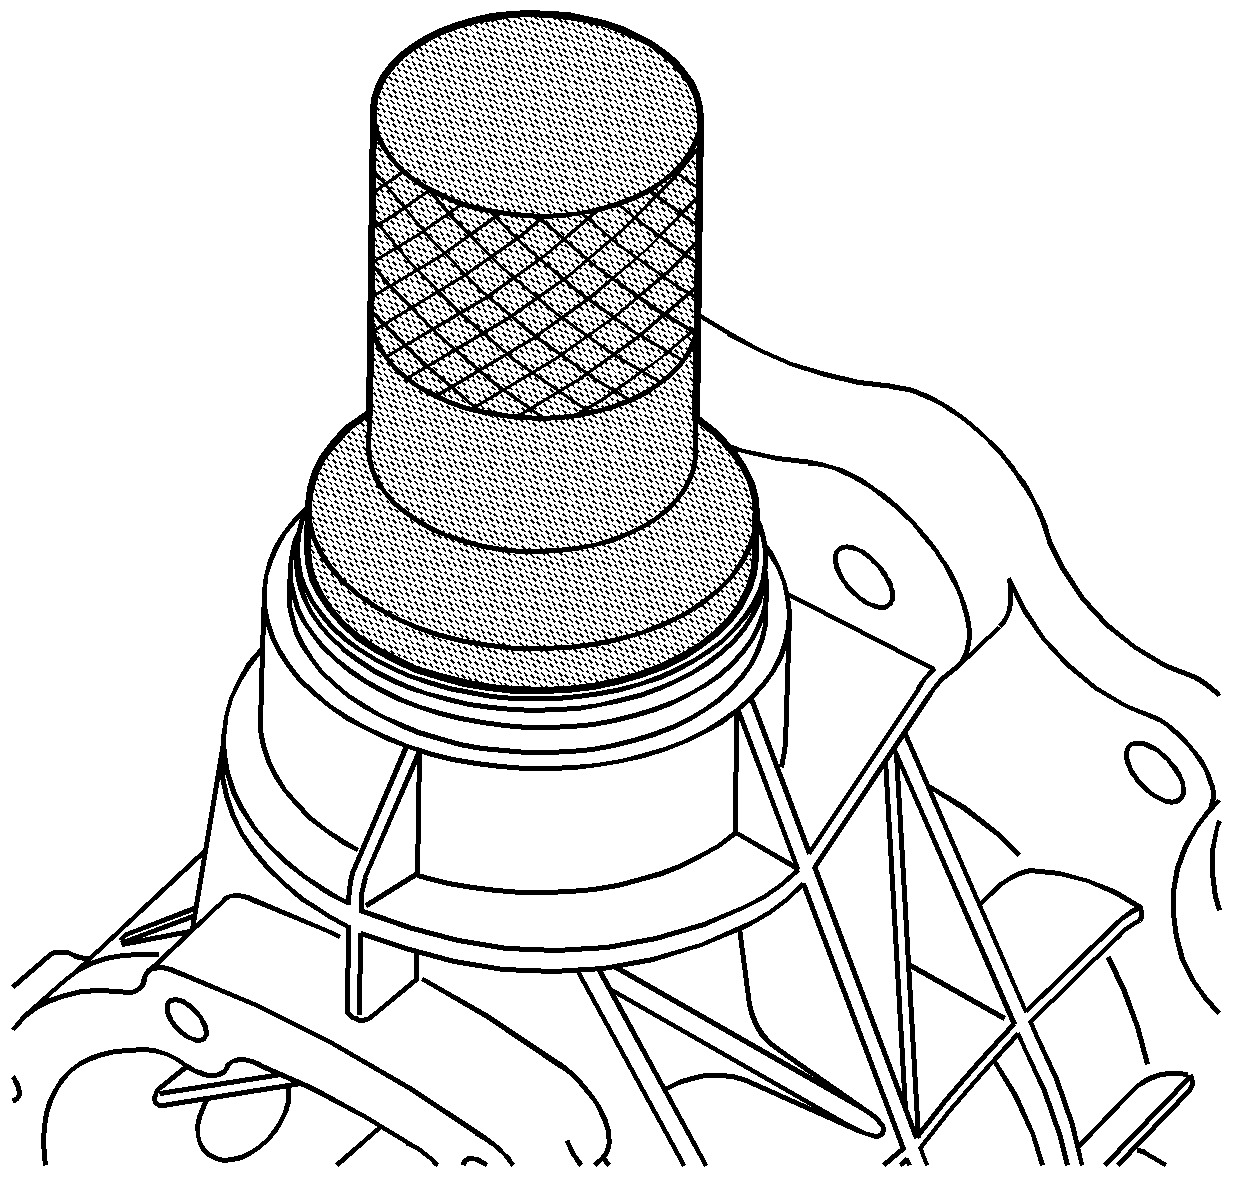
- Install the slinger washer (2) and the NEW pinion seal (1) to the housing.
- Using the J 44872 , install the NEW pinion seal.
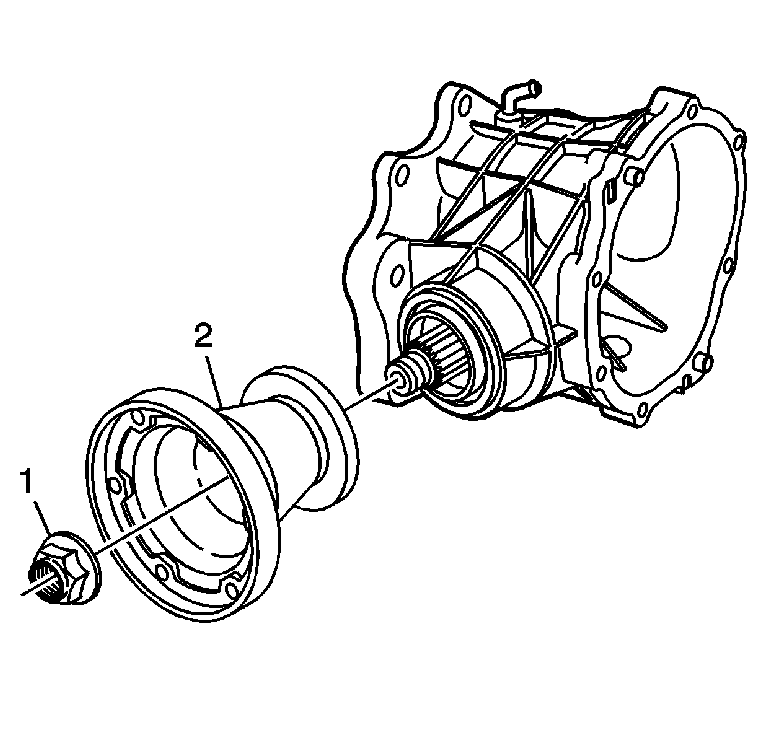
- Using a NEW pinion nut (1), install the pinion flange (2) to the pinion shaft.
- Install J 44873 and the two bolts supplied in order to hold the pinion flange while tightening the nut.
- Tighten the pinion flange nut until it is snug.
- Tighten the nut slowly in order to crush the collapsible spacer.
- Clean the carrier assembly housing sealing surface (1) with solvent and scrape it clean with a razor blade.
- Clean the cover sealing surface (1) with solvent and scrape it clean with a razor blade.
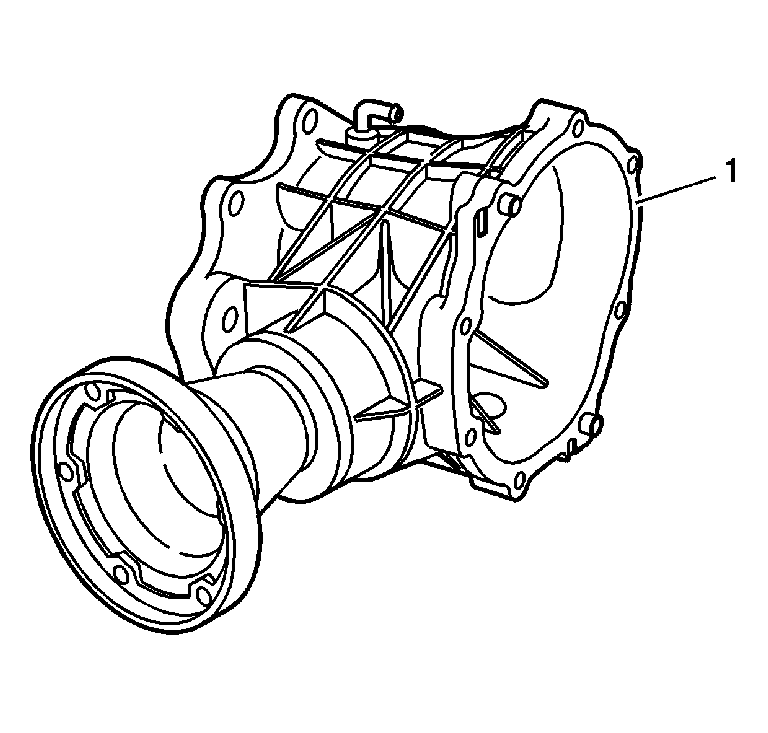
- Install the carrier assembly (1) to the housing.
- Apply a 2-3 mm (0.08-0.12 in) amount of sealer GM P/N United States 1052942, GM P/N Canada 10953466, or equivalent to the housing (1).
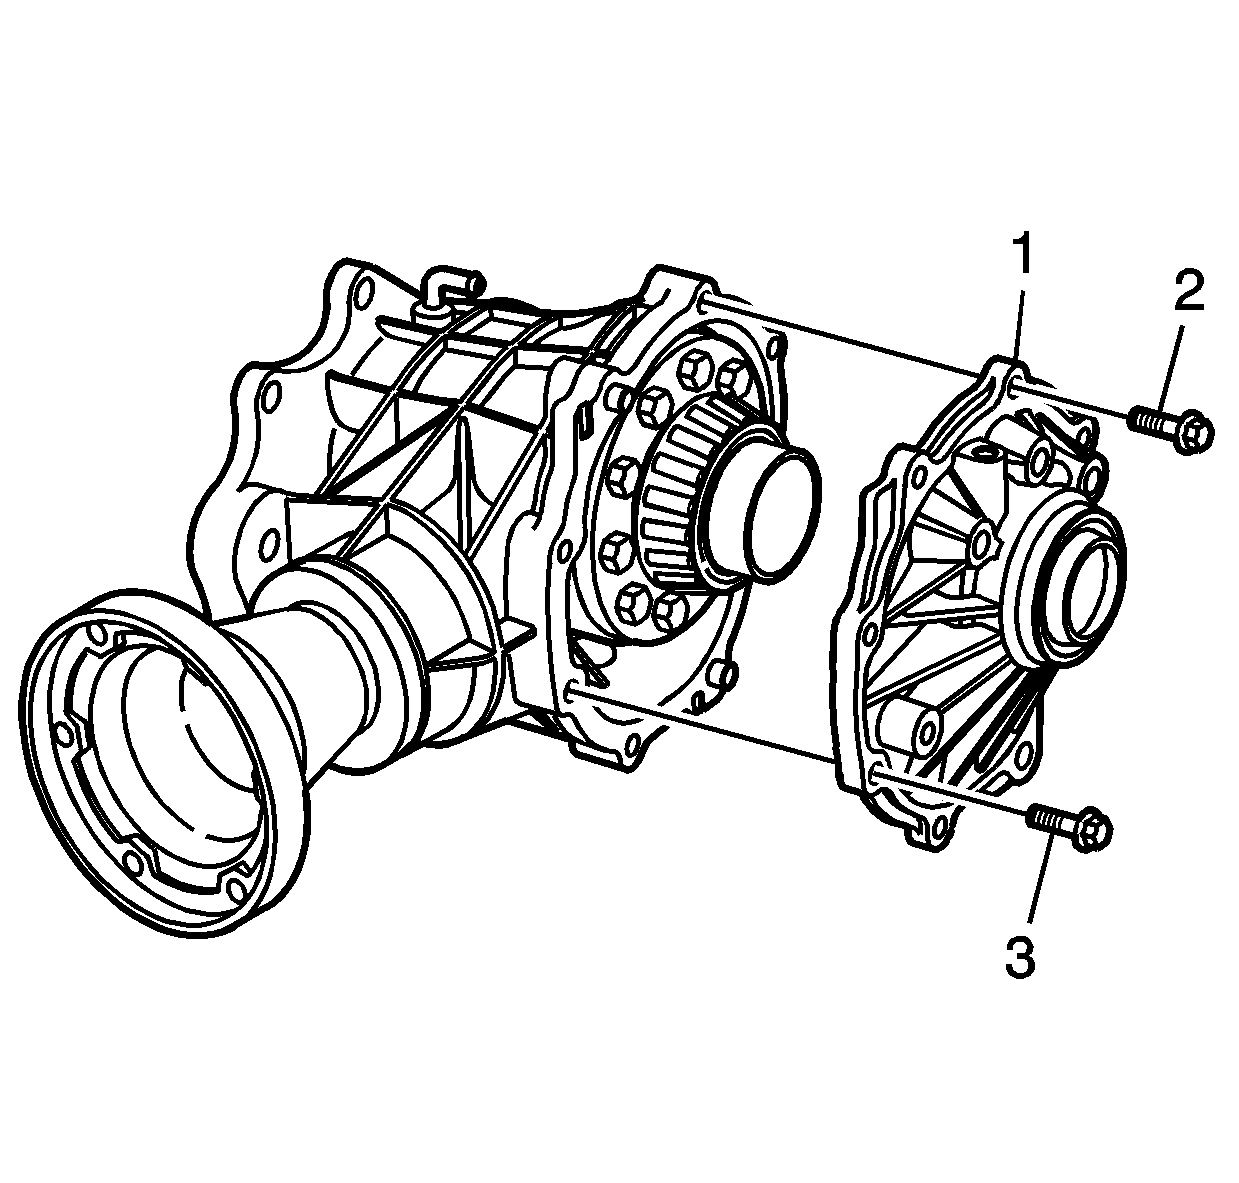
- Install the side cover (1) and bolts (2 and 3) to the housing.
- Fill the transfer case with fluid, after it is installed in the vehicle, to the bottom of the fill plug hole, or 500 ml (17 oz).
Important: Use high pressure grease on the screw threads.

Notice: Do not use air tools. The use of an air tool will damage the J44882.
Important: Use high pressure grease on the threads of the forcing screw.
Important: Clean the seal bores. Inspect for nicks caused by seal removal.
Important: Use a NEW pinion nut.
Notice: Use the correct fastener in the correct location. Replacement fasteners must be the correct part number for that application. Fasteners requiring replacement or fasteners requiring the use of thread locking compound or sealant are identified in the service procedure. Do not use paints, lubricants, or corrosion inhibitors on fasteners or fastener joint surfaces unless specified. These coatings affect fastener torque and joint clamping force and may damage the fastener. Use the correct tightening sequence and specifications when installing fasteners in order to avoid damage to parts and systems.
Tighten
Tighten the nut to 9-1.5 N·m (8-14 lb in).
Important: Grease the seal lips in order to protect the seal and to ease in assembly.
Important: Do not apply excess sealer. Excess sealer could cause premature failure.
Important:
• Grease the seal lips in order to protect the seal and to ease in assembly. • Apply Thread Locker GM P/N United States 12345382,
GM P/N Canada 10953489 to the threads of the bolts.
There is not a specific tightening sequence, but the bolts with dowel pins should be tightened first, and alternate the others from side to side.
Tighten
Tighten the side cover bolts to 34 N·m (25 lb ft).
