Tools Required
J 45878 Combustible Gas Detector
Removal Procedure
- Relieve the CNG fuel system pressure. Refer to Fuel Pressure Relief .
- Remove the battery, air cleaner outlet duct and the air cleaner assembly. Refer to Air Cleaner Assembly Replacement in the Engine Controls section of the J Platform Service Manual.
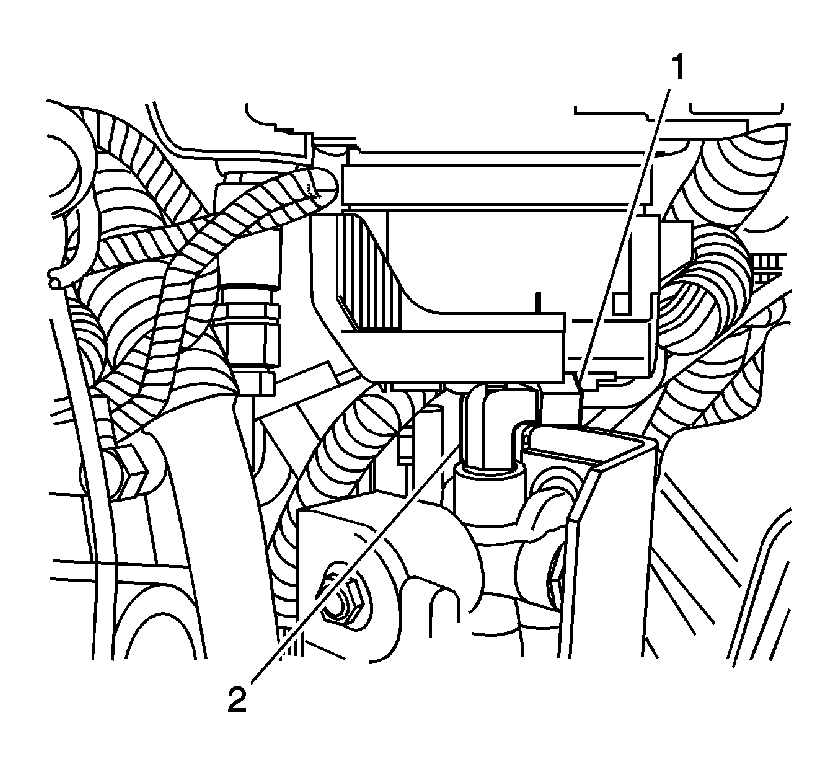
- Disconnect the fuel line (1) from the LPL fuel inlet elbow (2).
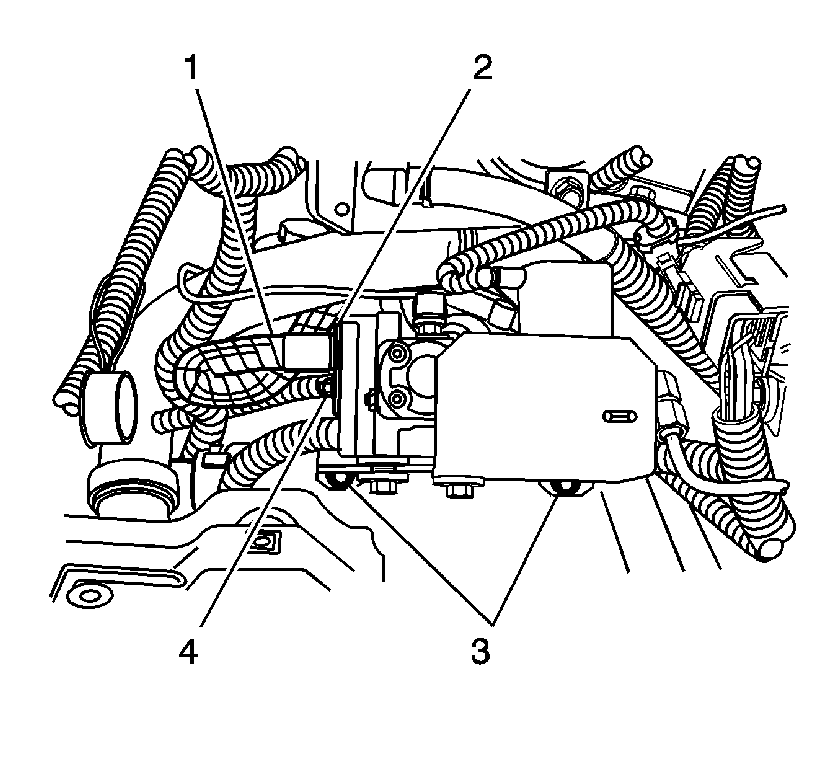
- Remove the fuel rail feed hose hold-down nut (4) and retainer (3).
- Remove the fuel feed hose from the LPR with a twisting motion.
- Disconnect the LPL electrical connector.
- Remove the LPR/LPL mounting bracket nuts (3).
- Remove the LPR/LPL assembly from the vehicle.
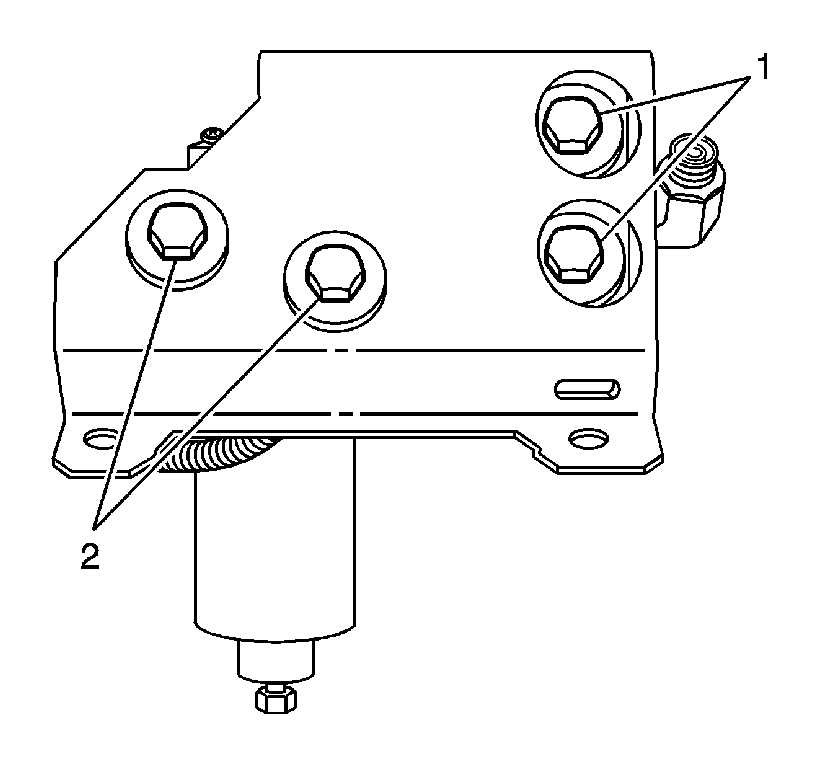
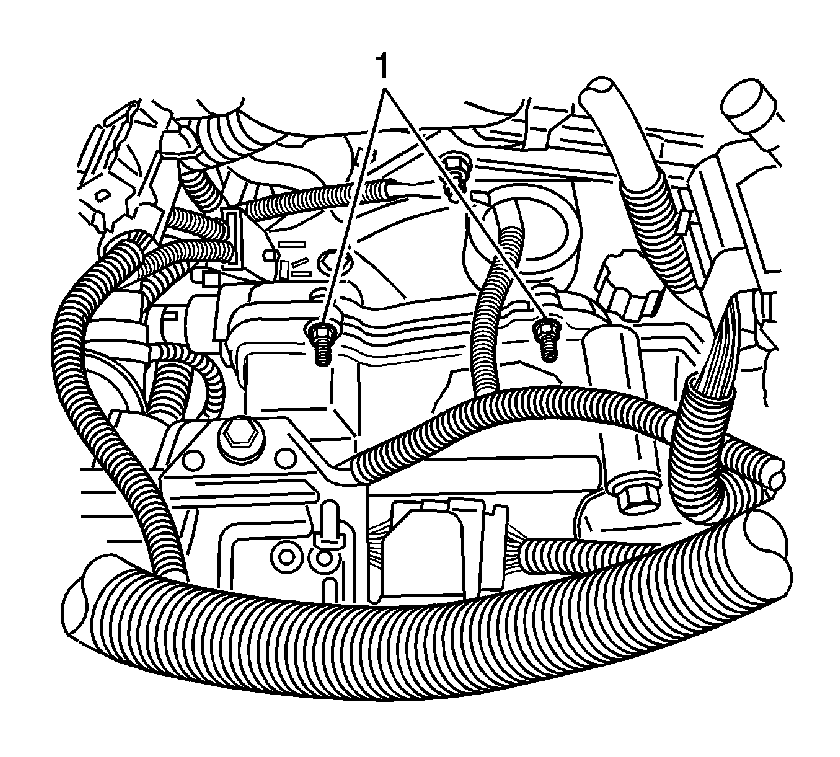
- Remove the LPR (2) and LPL (1) mounting bolts.
- Remove the LPR/LPL assembly from the mounting bracket.
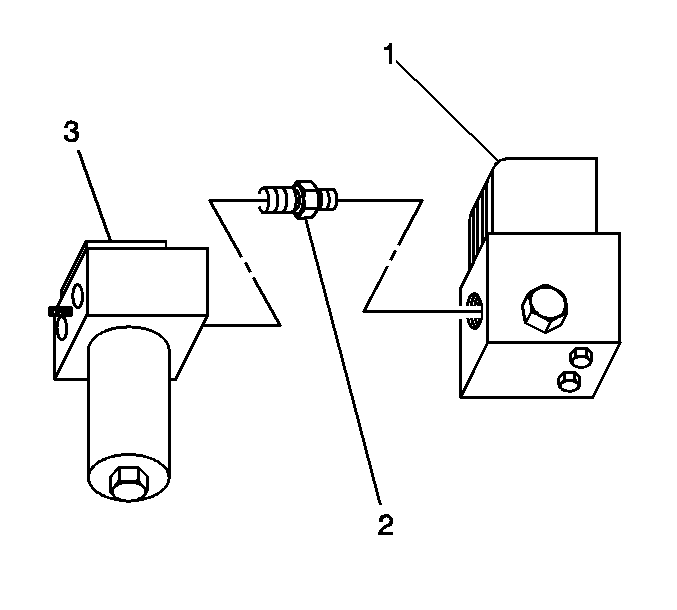
- While holding the union (2) with a wrench, rotate the LPL (1) in order to seperate the components.
Installation Procedure
- While holding the union (2) with a wrench, rotate the LPL (1) as necessary in order to attach the components.
- Loosely install the LPR mounting bolts (2) through the mounting bracket and into the LPR.
- Loosely install the LPL mounting bolts (1) through the mounting bracket and into the LPR.
- Place the LPR/LPL mounting bracket onto the transmission housing studs (1).
- Install the LPR/LPL mounting nuts (3) onto the mounting studs.
- Install the fuel feed hose (1) at the regulator using a new O-ring. Lubricate the O-ring with petroleum jelly or the equivalent.
- Install the fuel hose retainer (3) and the hold-down nut (4).
- Install the fuel line (1) to the LPL fuel inlet elbow (2) using a new O-ring face seal. Lubricate the O-ring face seal with petroleum jelly or the equivalent.
- Connect the LPL connector.
- Install the battery, air cleaner outlet duct and the air cleaner assembly. Refer to Air Cleaner Assembly Replacement in the Engine Controls section of the J Platform Service Manual.
- Start the engine. Inspect for CNG fuel leaks at each serviced fitting using the J 45878 .

Important: Prior to installing the LPL coat the threads of the union with pipe thread sealant containing Teflon. Do not use Teflon tape.
Tighten
Tighten the LPL 1 to 3 turns from hand tight as necessary in order to properly align and seal the LPL and LPR to the union.

Notice: Use the correct fastener in the correct location. Replacement fasteners must be the correct part number for that application. Fasteners requiring replacement or fasteners requiring the use of thread locking compound or sealant are identified in the service procedure. Do not use paints, lubricants, or corrosion inhibitors on fasteners or fastener joint surfaces unless specified. These coatings affect fastener torque and joint clamping force and may damage the fastener. Use the correct tightening sequence and specifications when installing fasteners in order to avoid damage to parts and systems.
Tighten
Tighten the mounting bolts to 12 N·m (108 lb in).

Tighten
Tighten the nuts to 28 N·m (20 lb ft).
Tighten
Tighten the nut to 12 N·m (9 lb ft).

Tighten
Tighten the fuel line fitting to 24 N·m (18 lb ft).
