For 1990-2009 cars only
Tools Required
| • | J 22919 Differential Side Bearing Race Installer |
| • | J 24433 Pinion Cone and Side Bearing Installer |
| • | J 25070 Heat Gun |
| • | J 42168-9 Shim Measuring Tool |
| • | J 42168-16 Right Side Cover Spacers |
| • | J 44719 Carrier Bearing Cup Installer |
| • | J 45019 Flange and Pinion Cage Remover |
| • | J 42264 Shim Kit |
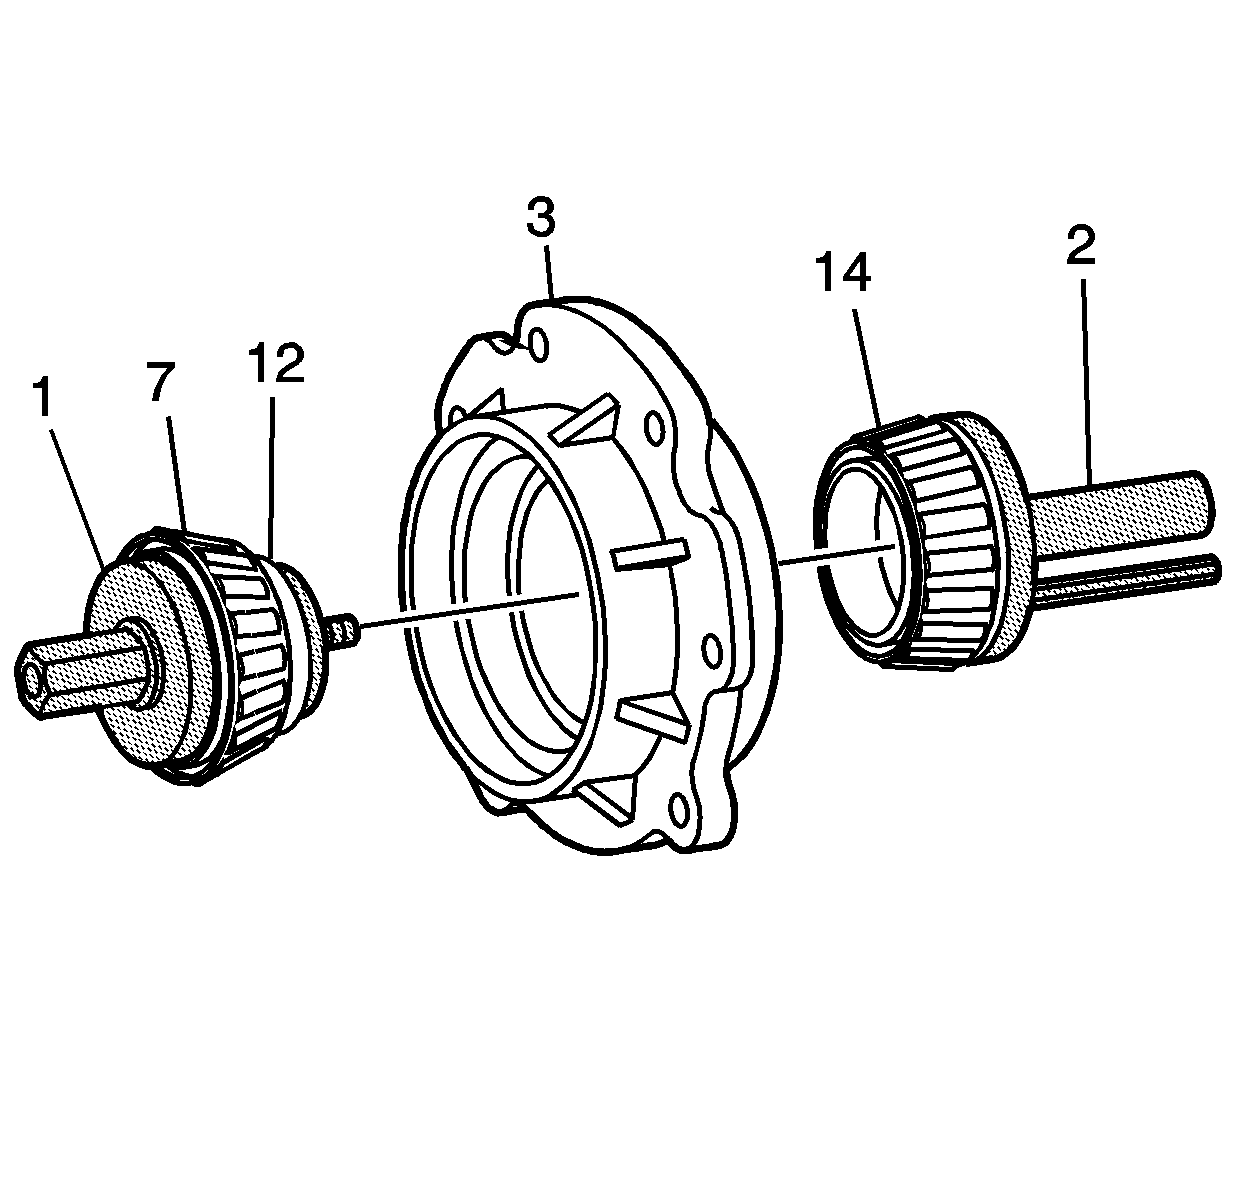
- Install pinion tail bearing (7) then the pinion bearing spacer (12) on the J 42264-6 (1).
- Install the head bearing (14) on J 42264-2 (2).
- Install them into the pinion bearing housing (3) as shown.
- Snug the bolt. This will apply the proper bearing preload determined by the custom ground spacer that is provided with the bearing kit.
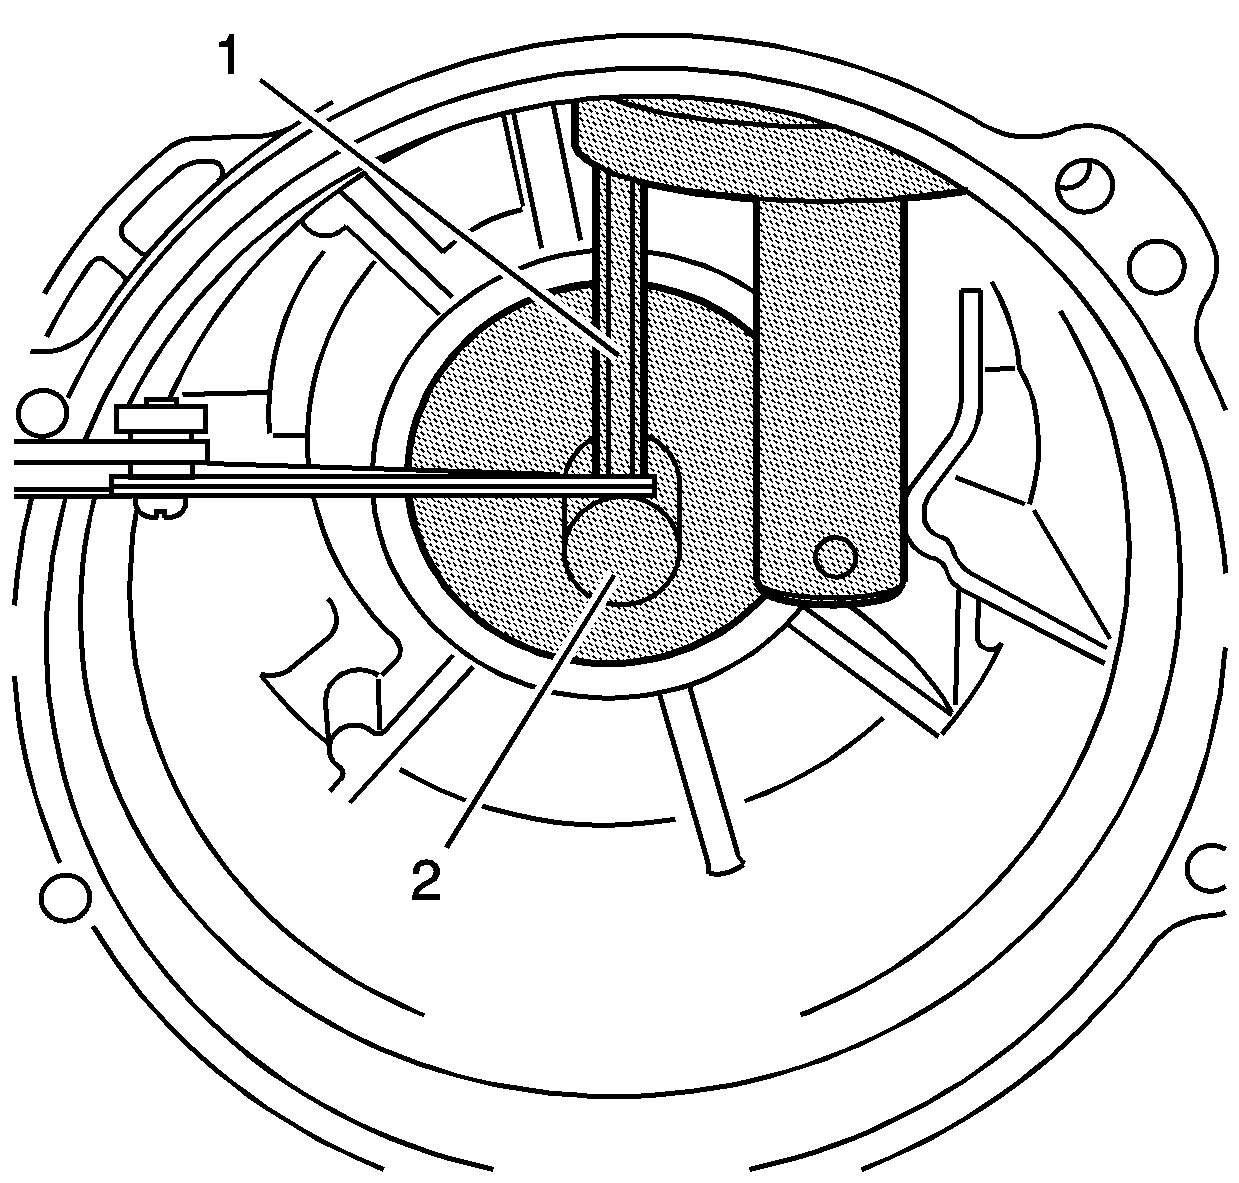
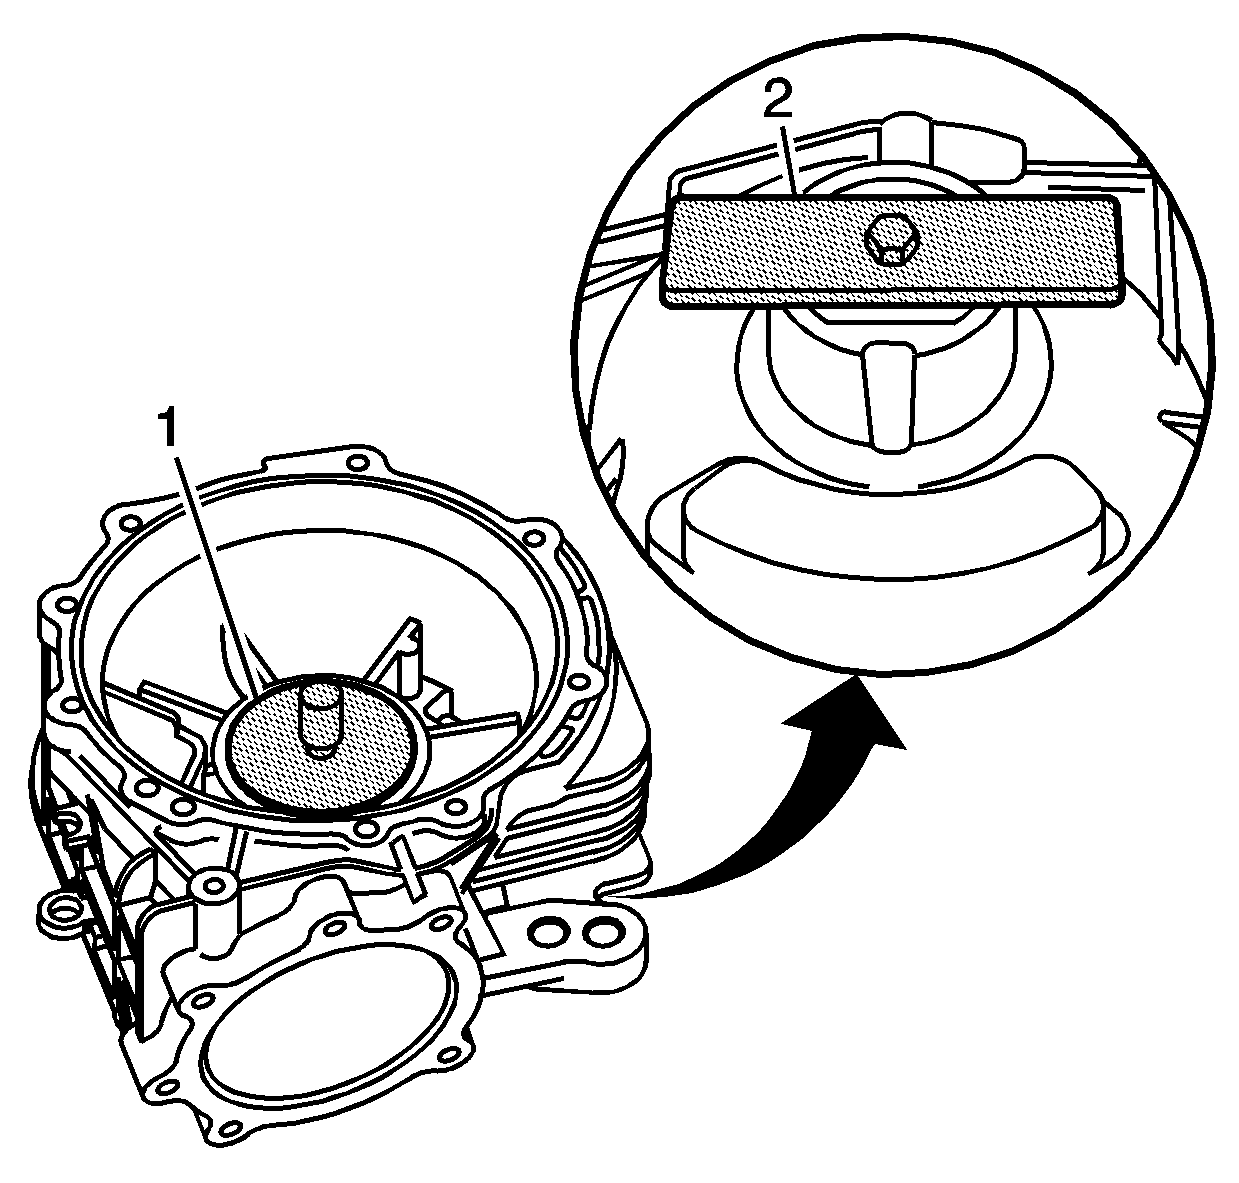
- Install the J 42264-3 (1) into the differential carrier as shown.
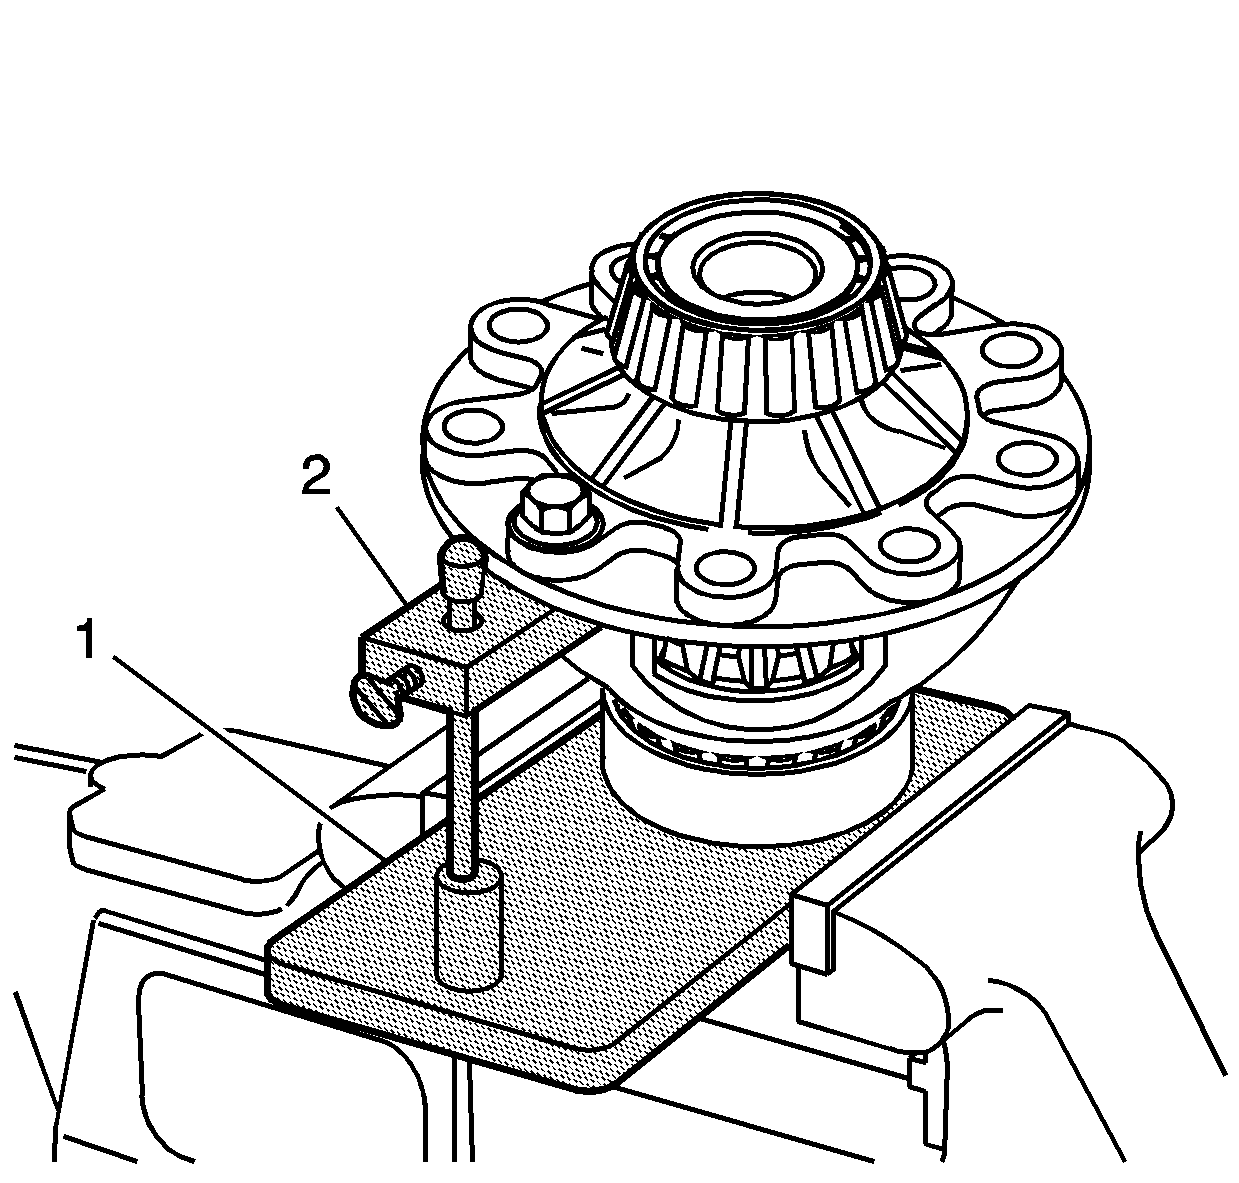
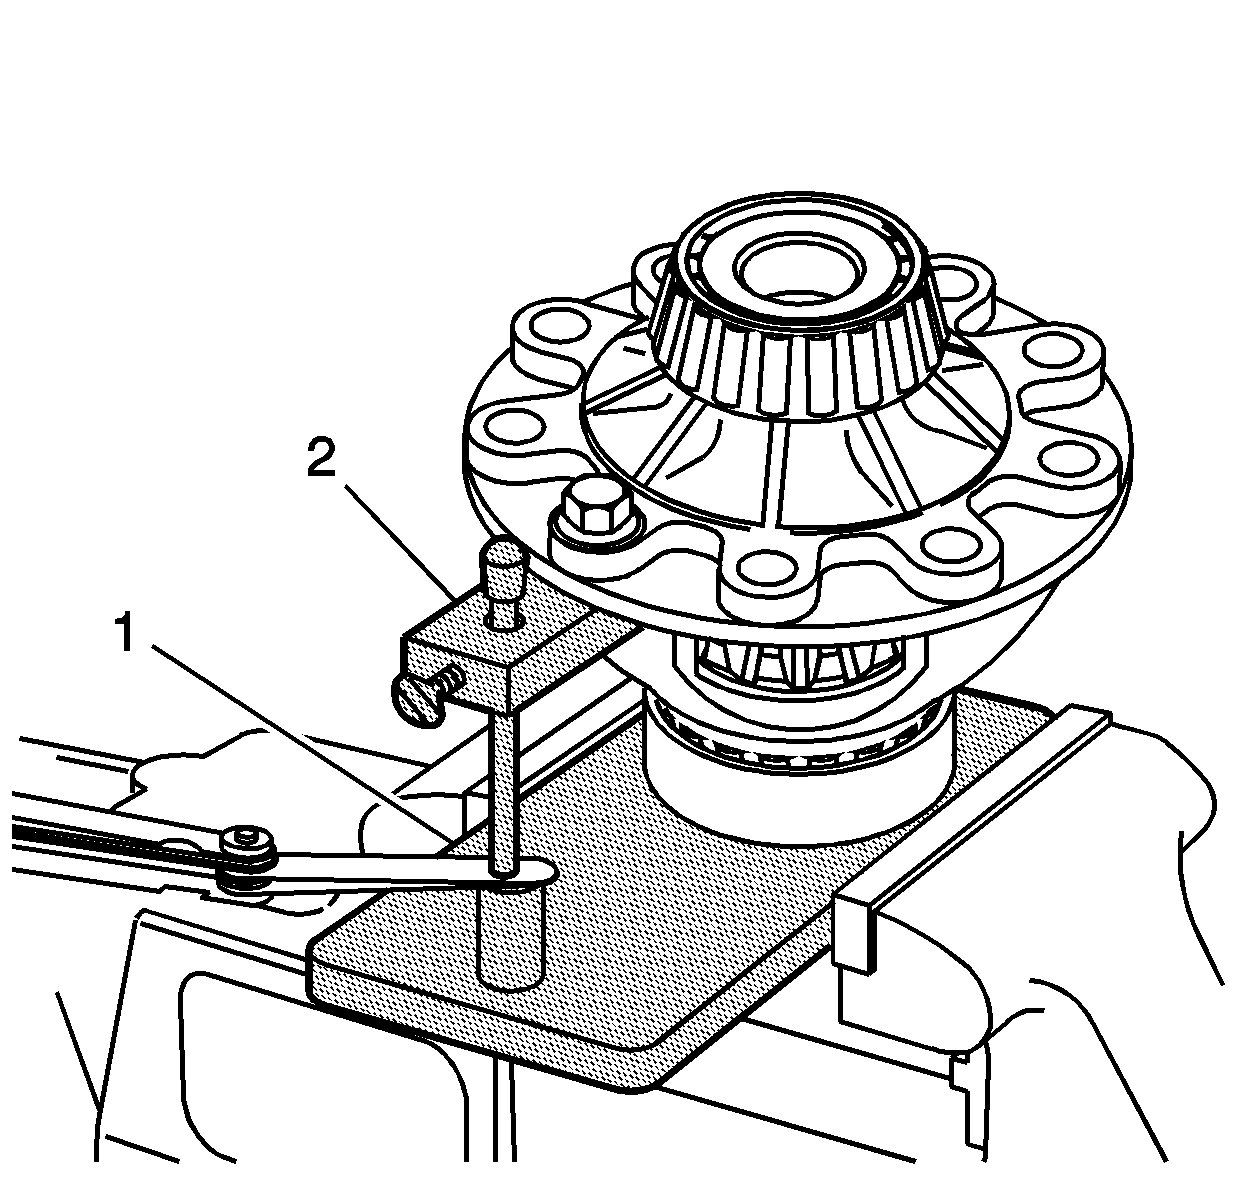
- Turn the carrier over and attach the holding strap J 42168-9 and thumb screw (2). Snug the thumb screw.
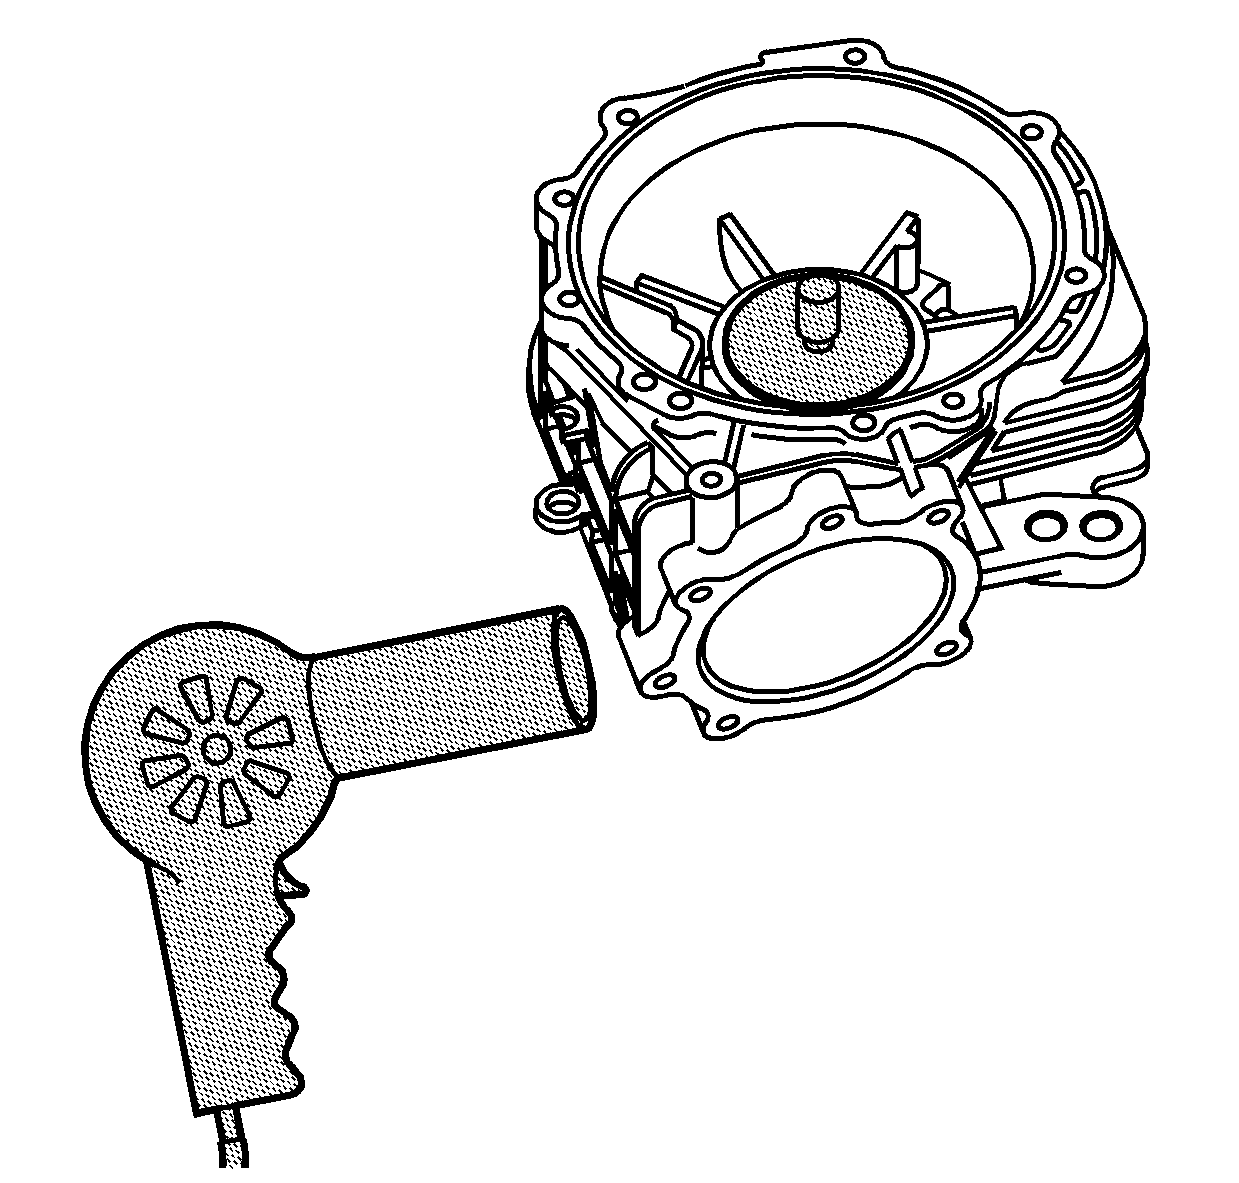
- Using J 25070 , heat the carrier in the pinion bearing housing area as shown.
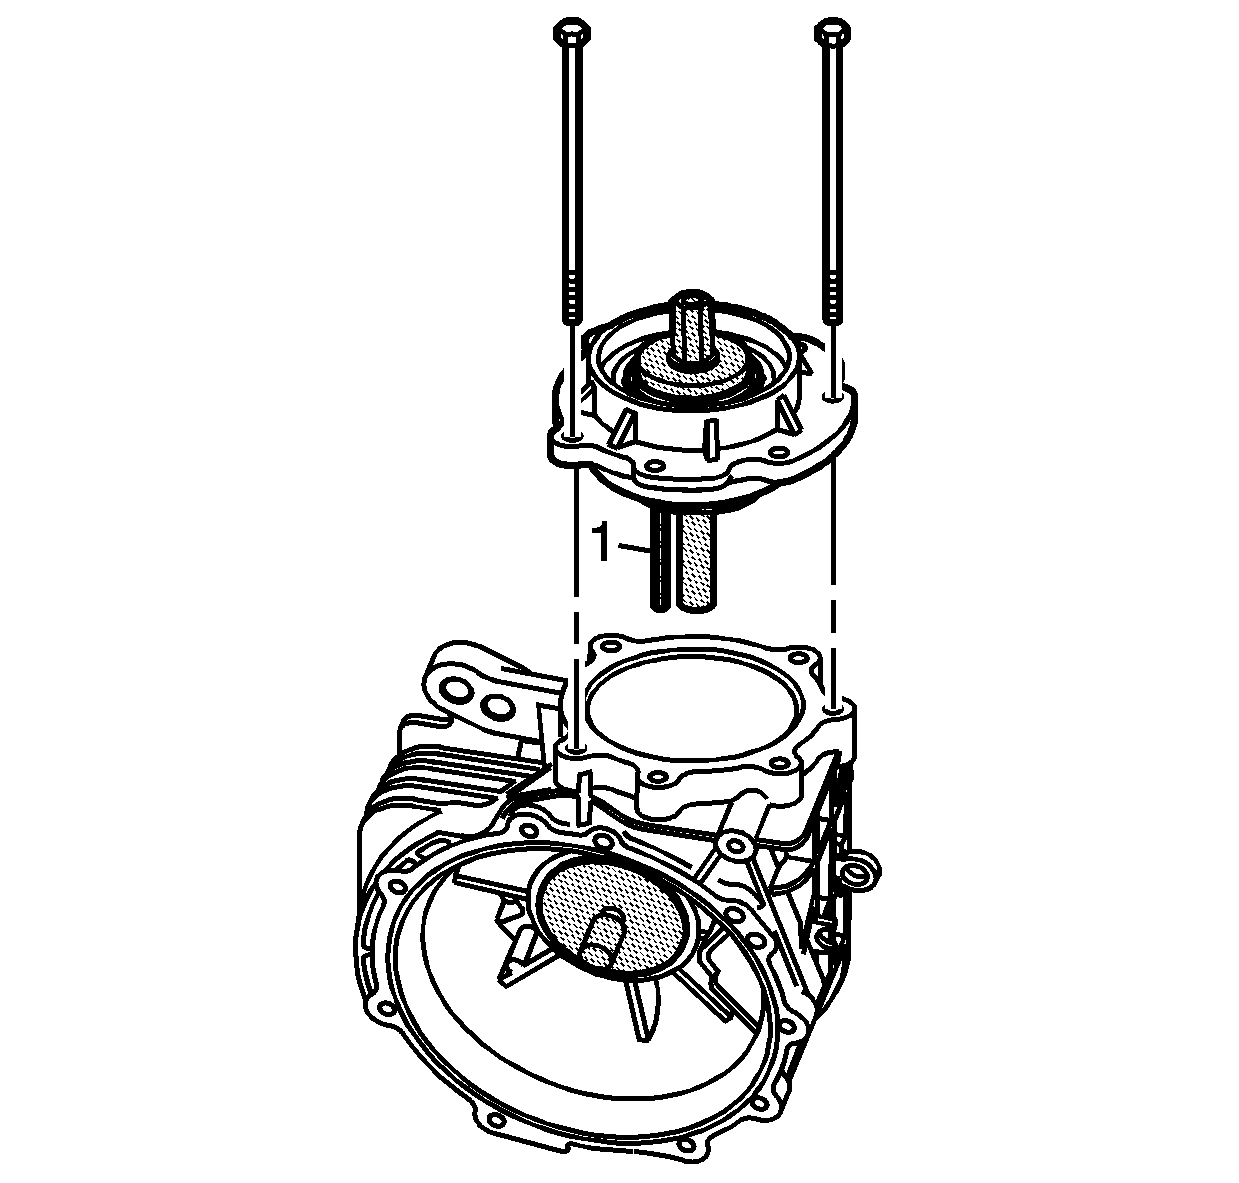
- Using 2 long bolts from J 45019 as guides, align the bolt holes of the pinion housing and the carrier. Snug the bolts.
- Apply a light coat of gear lube to the carrier bore and pinion housing in order to ease assembly.
- Push the pinion housing into the bore of the carrier.
- Install the pinion housing bolts and tighten in a criss-cross pattern.
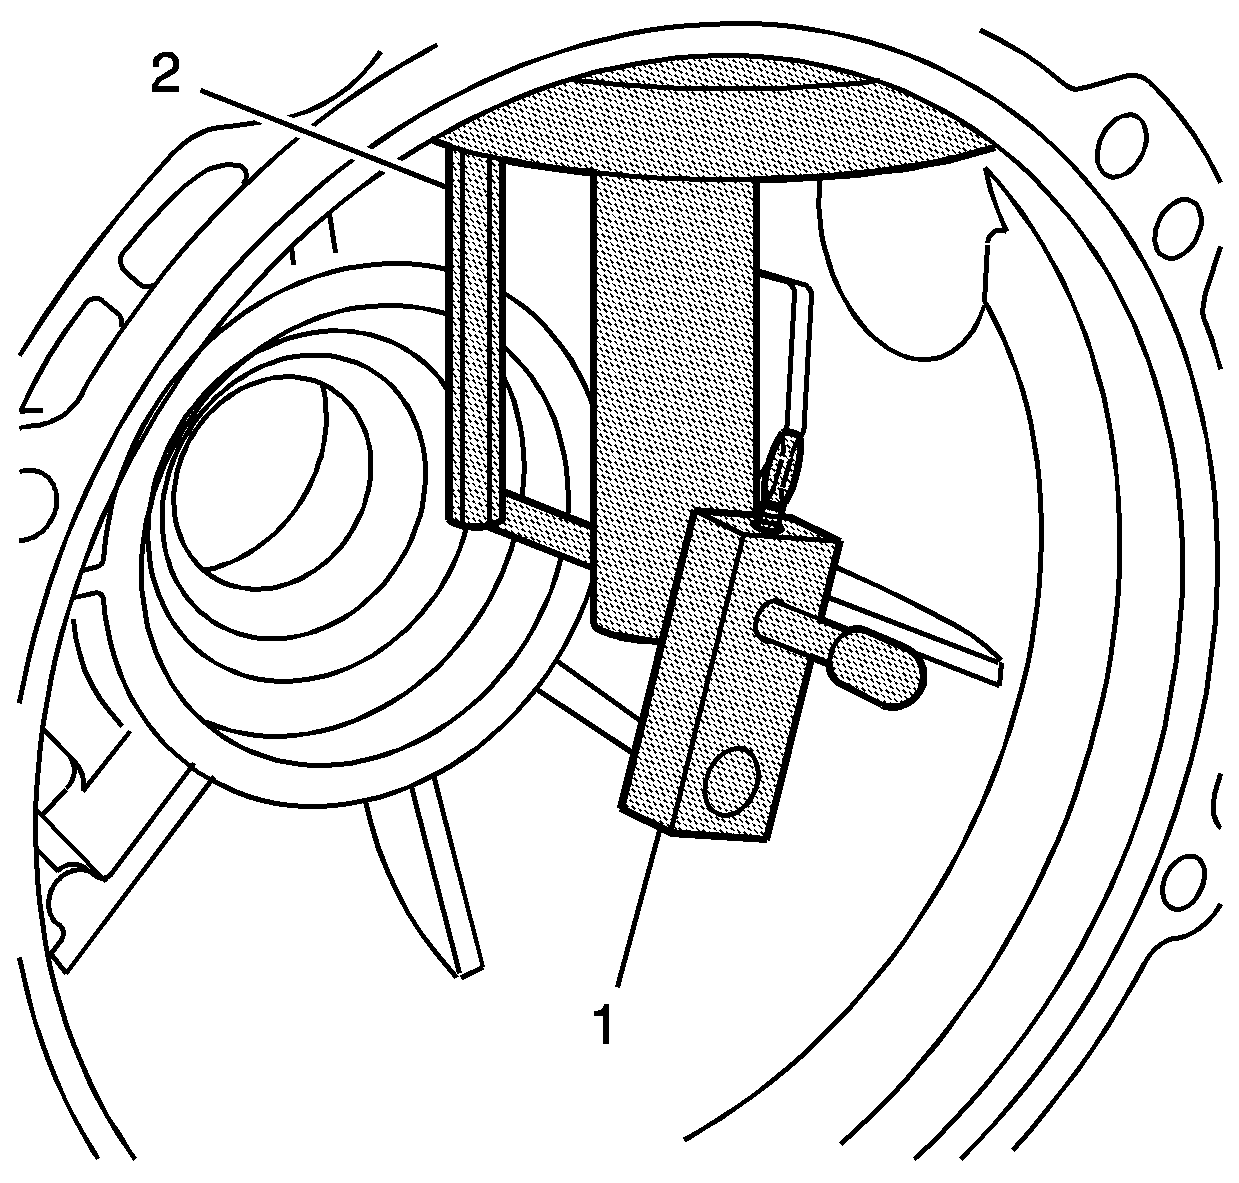
- Measure the distance between the hex rod on the J 42264-2 (1) and the post on the J 42264-3 (2). Record this measurement.
- Subtract this measurement from 5 mm (0.196 in). This is the amount of pinion shims needed for the pinion housing.
- Remove J 42264-3 and J 42168-9 strap.
- Use the J 42264 (1) drop rod. Loosen the thumb screw and drop the rod through the hole on J 42264-2 (2).
- Ensure the rod bottoms out in the bearing cup bore. Snug the thumb screw in order to record the distance.
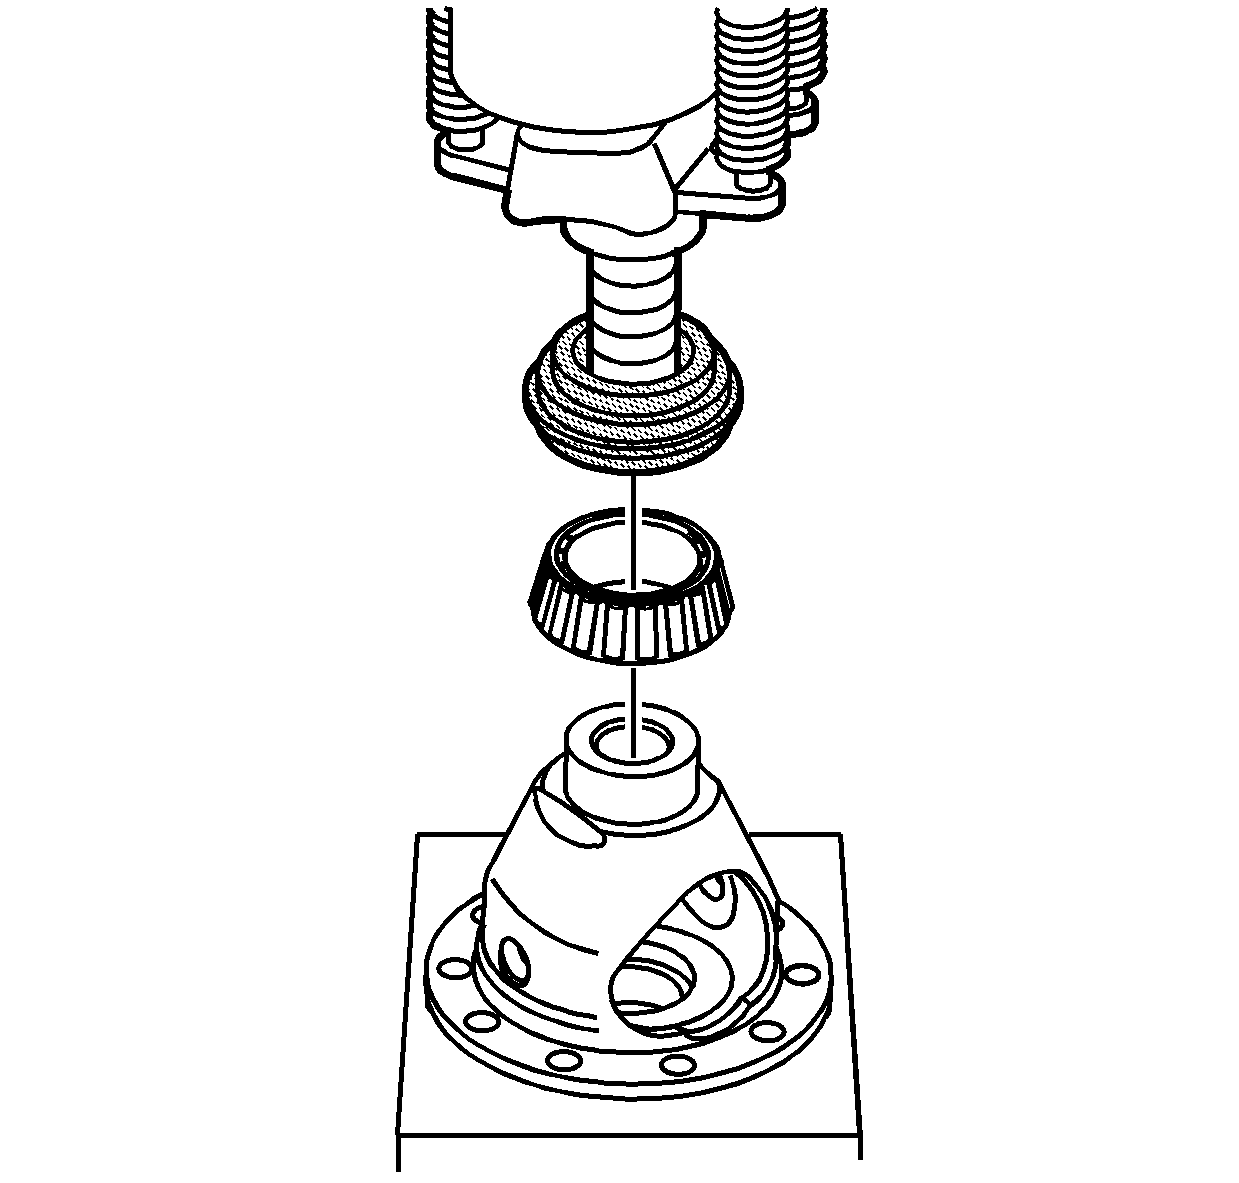
- Install the differential case side bearings using a press and J 22919 . Install the left side bearing until the bearing seats.
- Turn the differential case over and install the right side bearing.
- Place the J 42264-4 in a vise. Place the differential assembly with the bearing cup on J 42264-4 as shown.
- Spin the differential several times to seat the bearing and cup.
- Use an old ring gear bolt. Attach the J 42264-5 (2) to the differential assembly as shown.
- Ensure that the drop rod aligns with the post of J 42264-4 (1).
- Measure the gap (1) between the rod and the post on J 42264-4 (2). Record the measurement.
- Spin the differential case and ensure that the measurement stayed the same.
- Subtract the measured distance from 5 mm (0.197 in). This is the gear side shim. Record this distance.
- It may be necessary to heat the carrier in order to remove the pinion bearing housing.
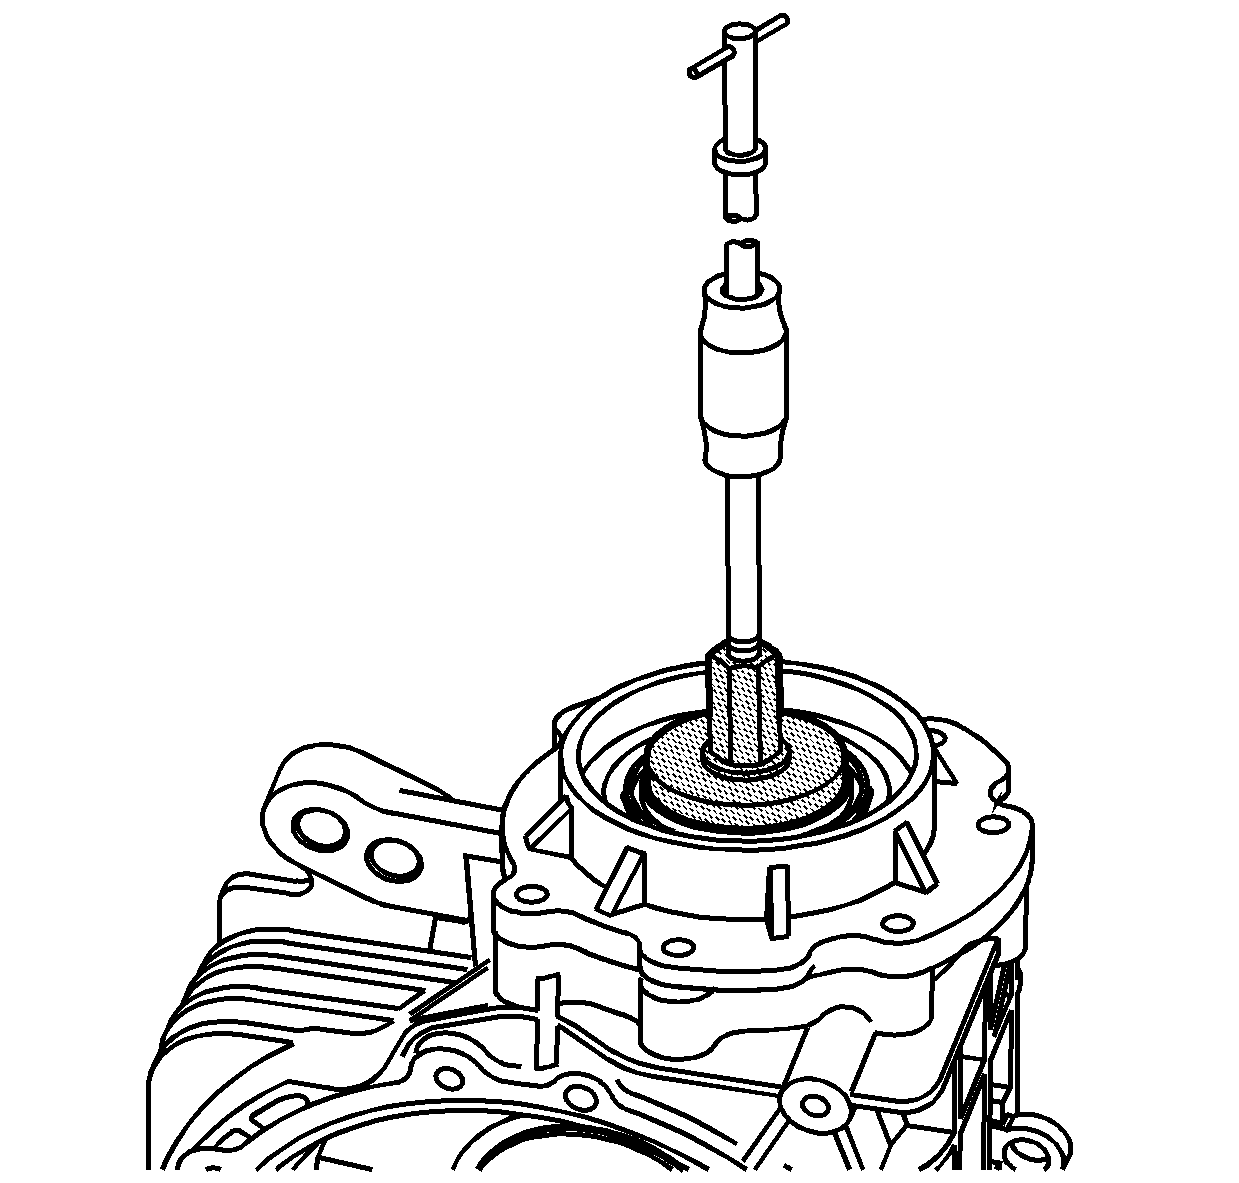
- Screw the slide hammer into the bolt that holds the shimming tools in the pinion housing.
- Pull the housing from the carrier.
- Remove all of the shimming tools.
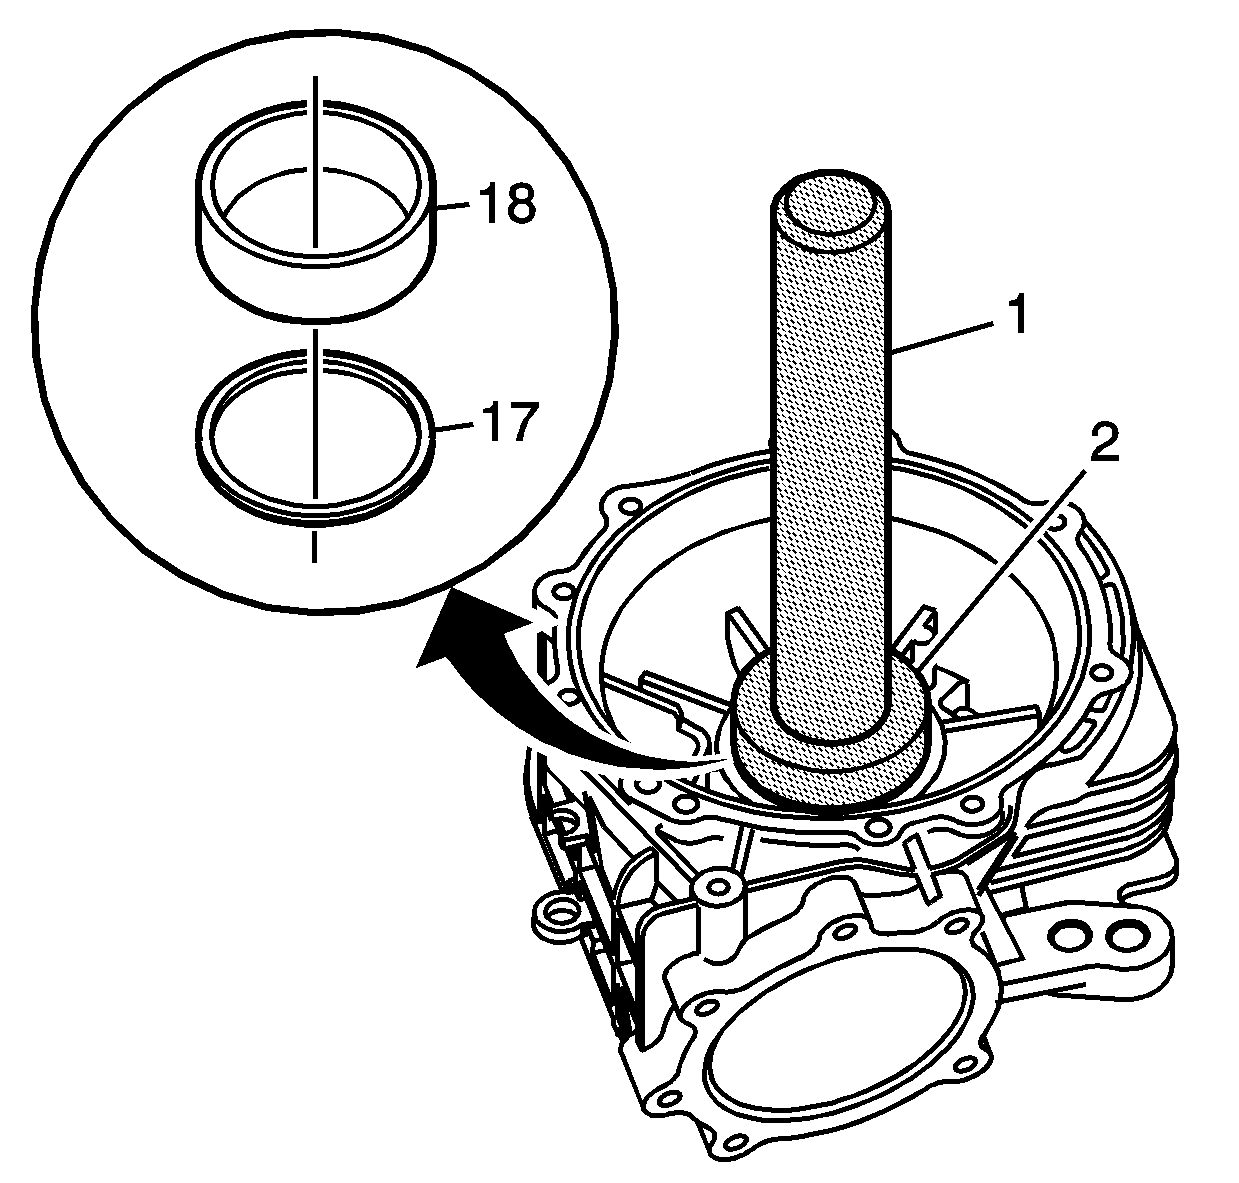
- Install the shims (17) measured for the differential carrier side bearing cup (18).
- Lightly lubricate the cup with gear lube.
- Using J 24433 (1) and J 44719 (2), install the bearing cup until it seats.
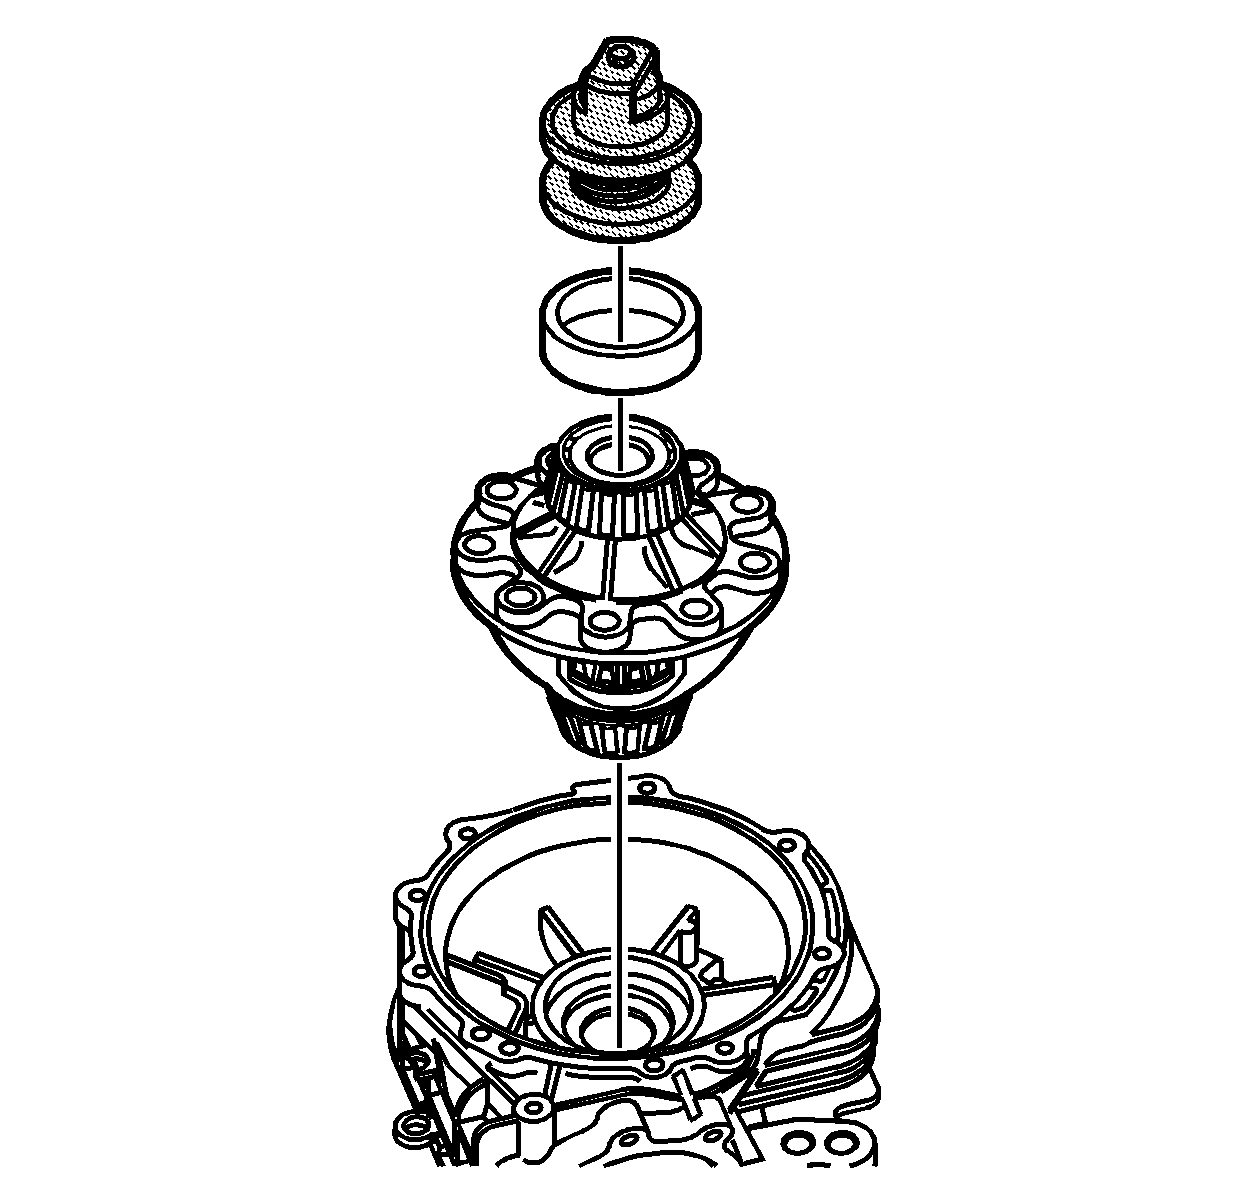
- Install the differential assembly into the differential carrier.
- Install the bearing cup and J 42264-1 on top of the cup as shown.
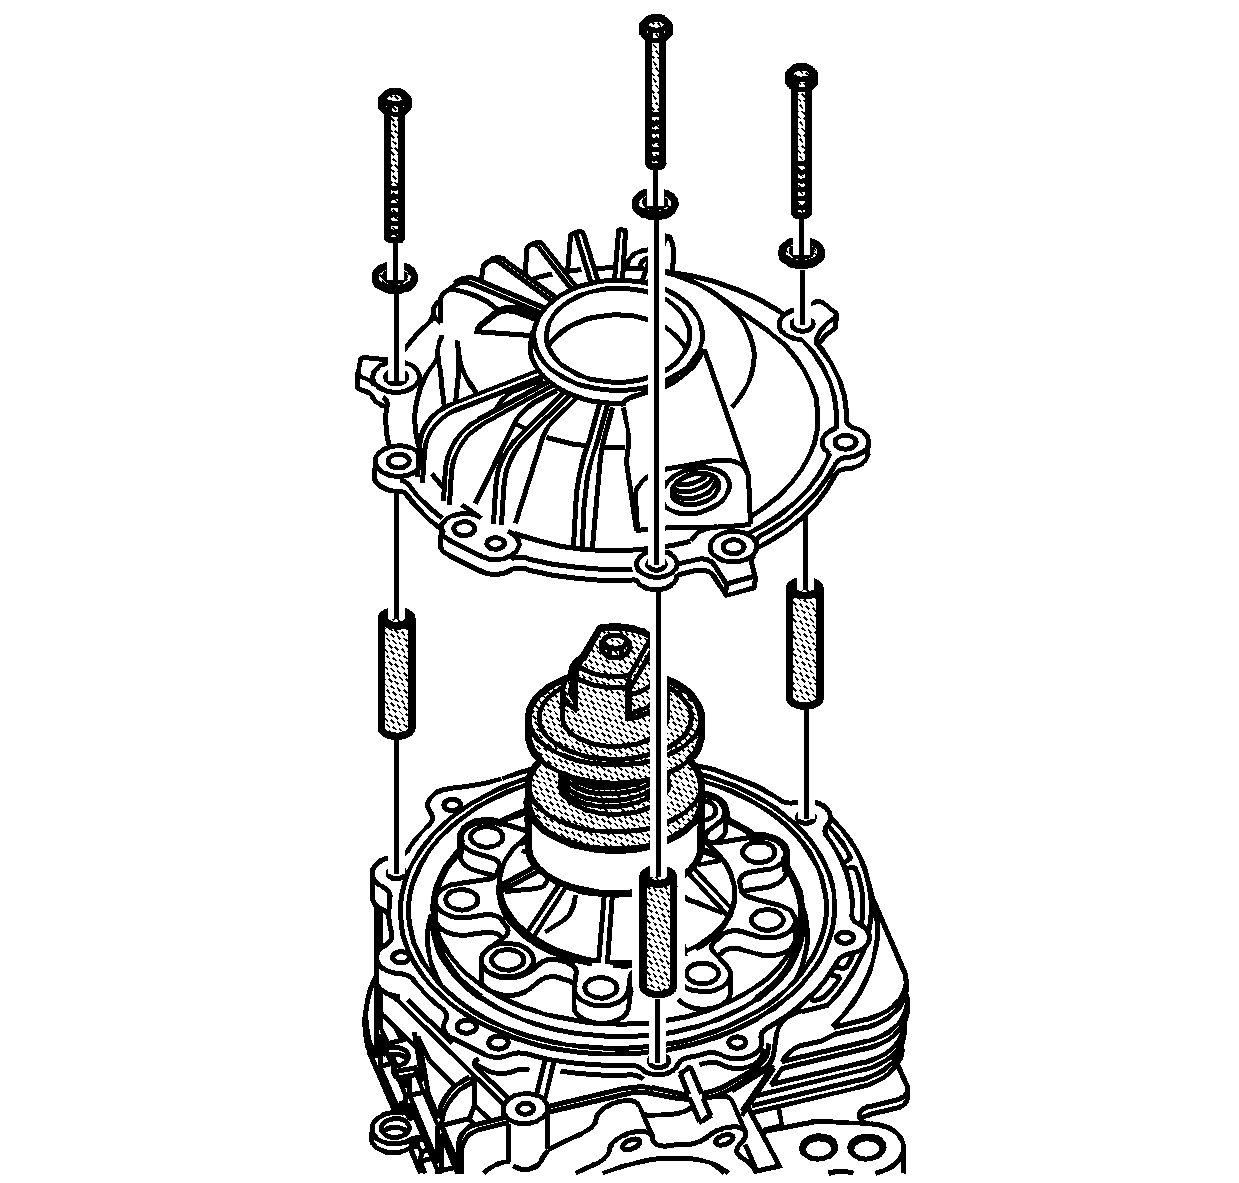
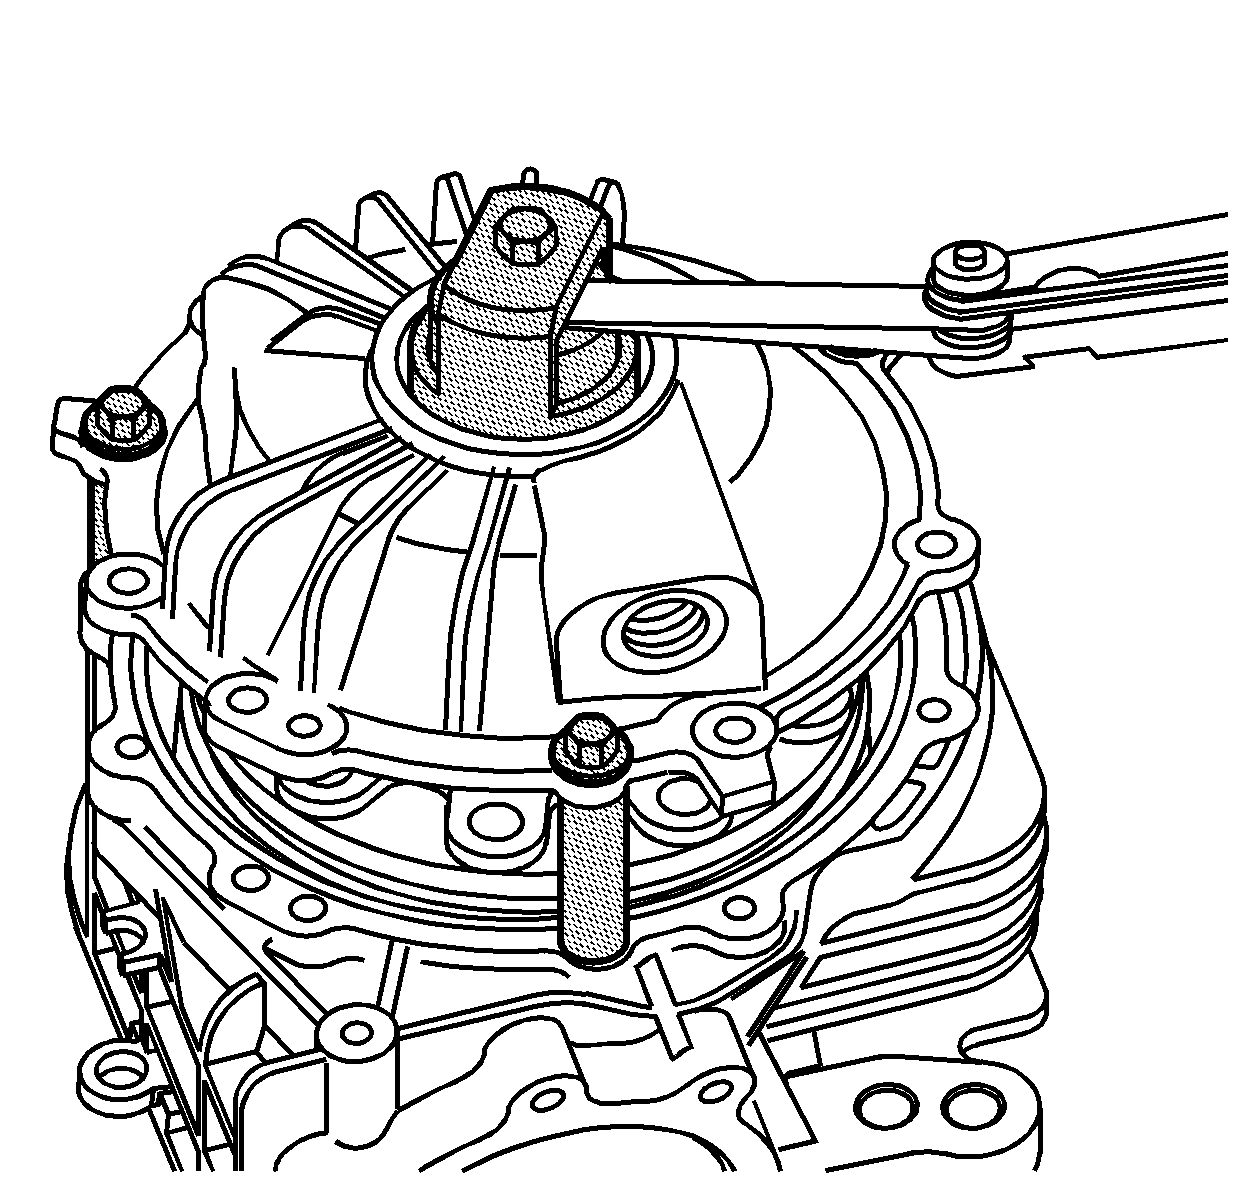
- Using J 42168-16 3 bolts, spacers and washers from kit J 42264, install as shown and snug the bolts.
- Measure the gap as shown, this is the cover shim thickness.
- Remove the tools.
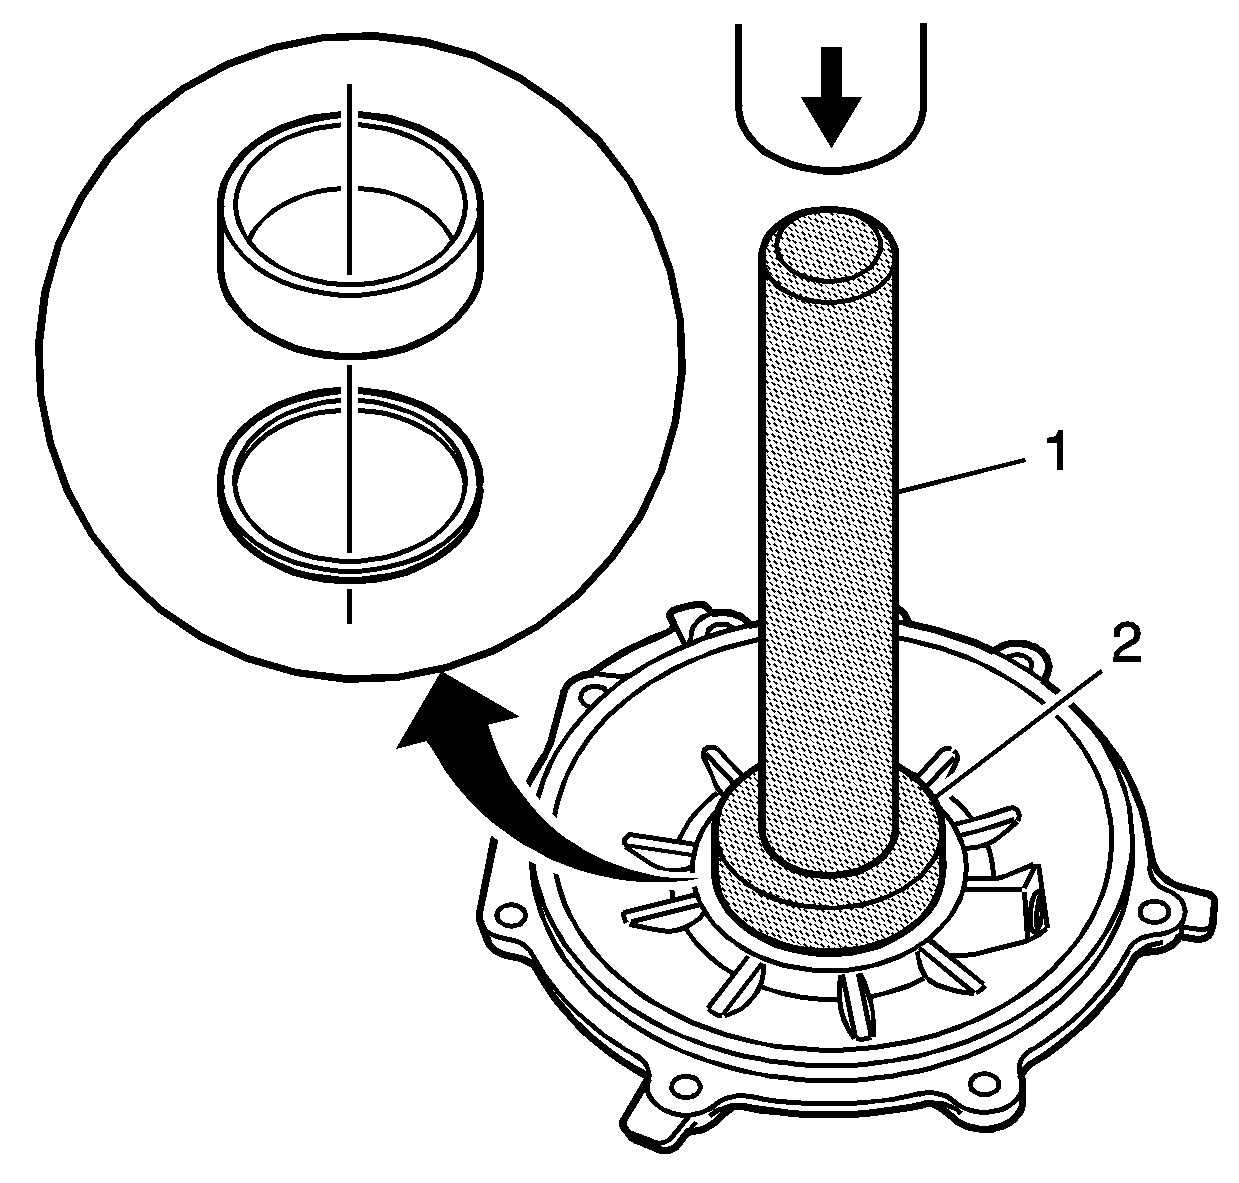
- Using J 24433 (1) and J 44719 (2), install the measured shims in the cup bore.
- Lightly coat the cup with gear lube.
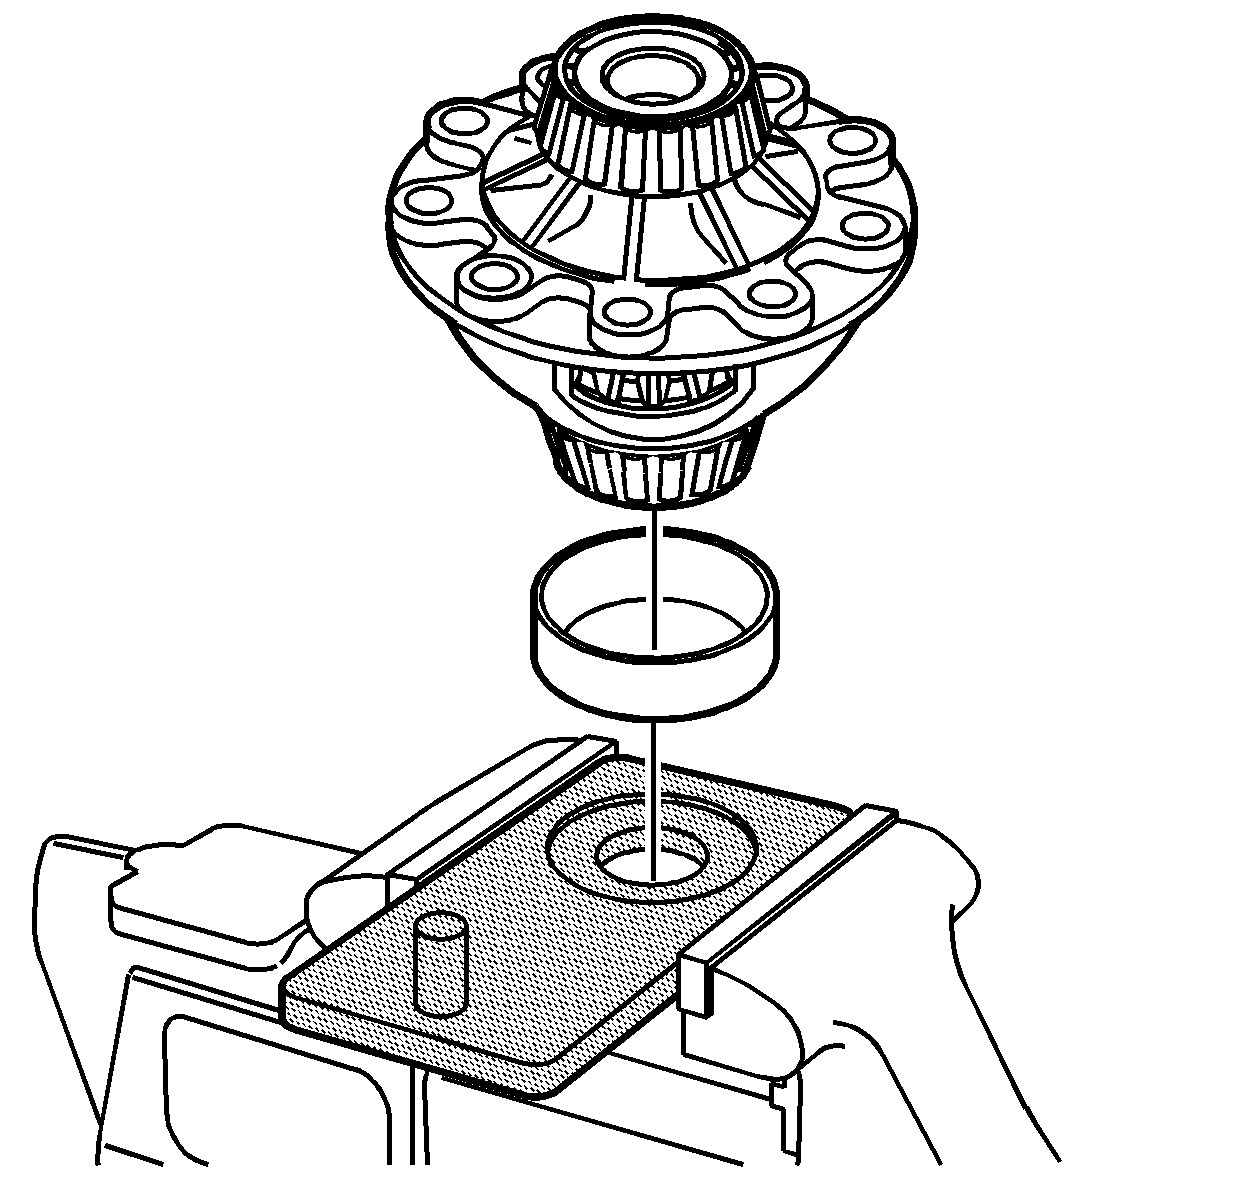
- Press the cup into the bore until it seats.
Important: When installing the pinion bearing housing into the carrier, ensure that the gage rod (1) does not hit the ribbing inside the carrier. Ensure that there are no nicks or burrs on the pinion housing surfaces or in the carrier bore.
Notice: Refer to Fastener Notice in the Preface section.
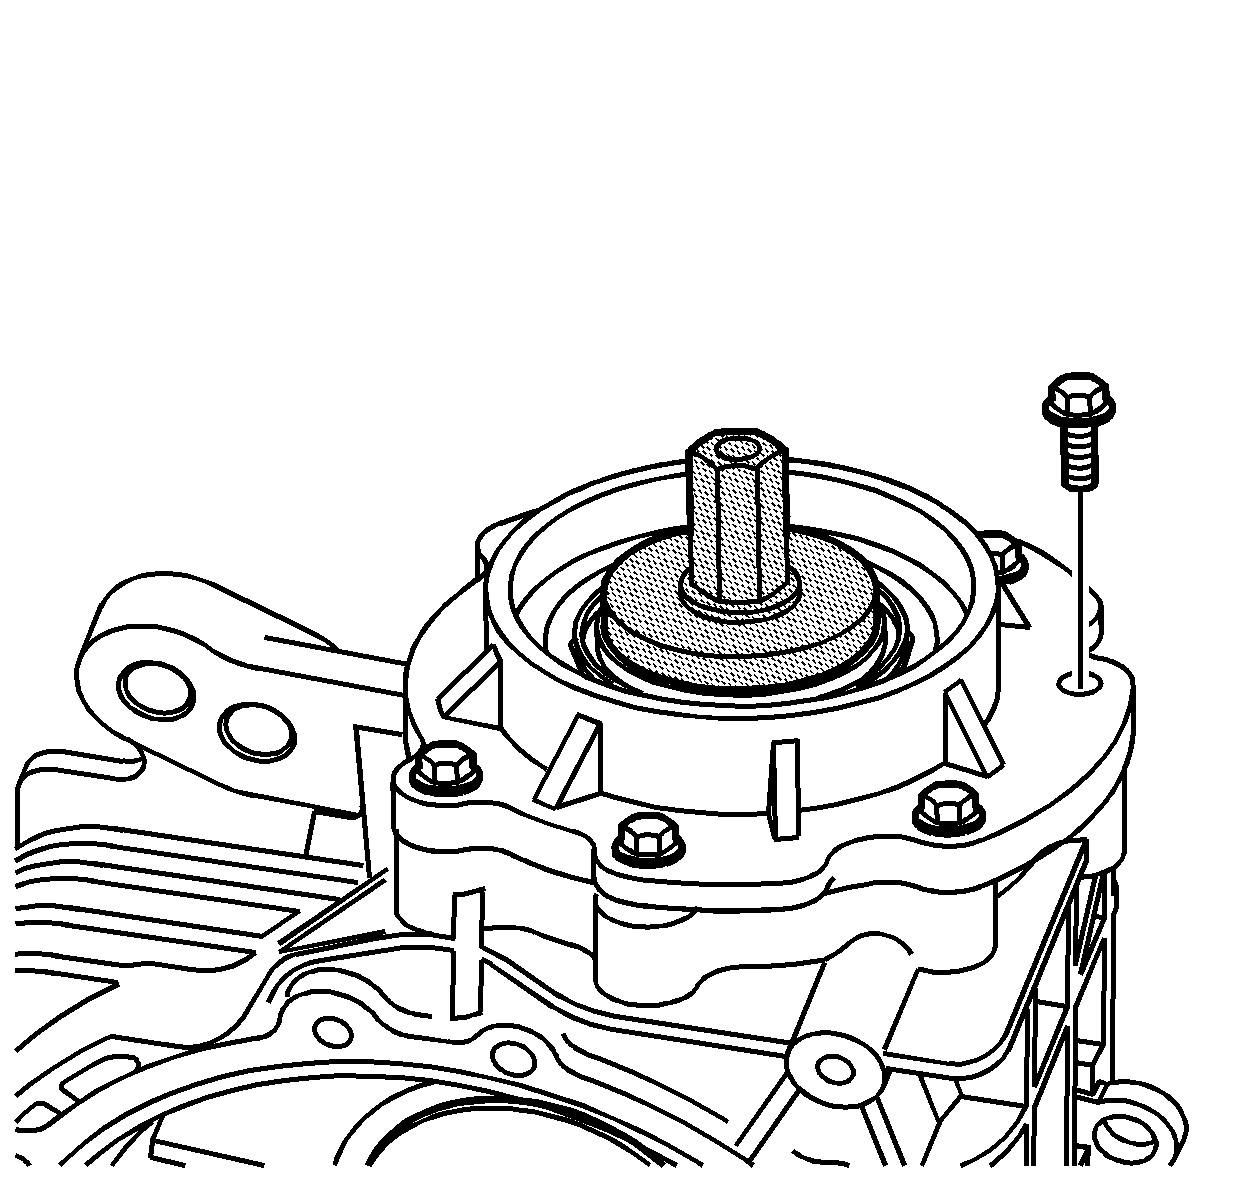
Important: If the bolts are not tightened, a shim measurement could be incorrect.
Tighten
Tighten the pinion housing bolts to 29 N·m (21 lb ft).
