Tools Required
| • | J 8092 Universal Driver Handle |
| • | J 24433 Pinion Cone and Side Bearing Installer |
| • | J 25070 Heat Gun |
| • | J 29873 Injector Nozzle Socket 30 mm |
| • | J 45012 Pinion Flange Holder |
| • | J 45017 Output Shaft Seal Installer |
| • | J 45019 Flange and Pinion Cage Remover |
| • | J 46262 Pinion Sealer |
| • | J 46265 Stub Shaft Seal Installer |
- Install the axle side gears (107) and washers (106) into the differential carrier (104).
- Install the washers (108) on the pinion gears (109).
- Install the pinion gears into the differential carrier (104) across from each other.
- Use the differential shaft (103) to align the gears.
- Rotate aligned gears slowly until holes in the differential case (104) and the pinion gears (109) align with each other. Install the differential shaft (103).
- Install the bolts that have the heads removed guide into the gear bolt holes.
- Using a press and J 24433 , press the ring gear (105) on the differential.
- Remove the guide pins.
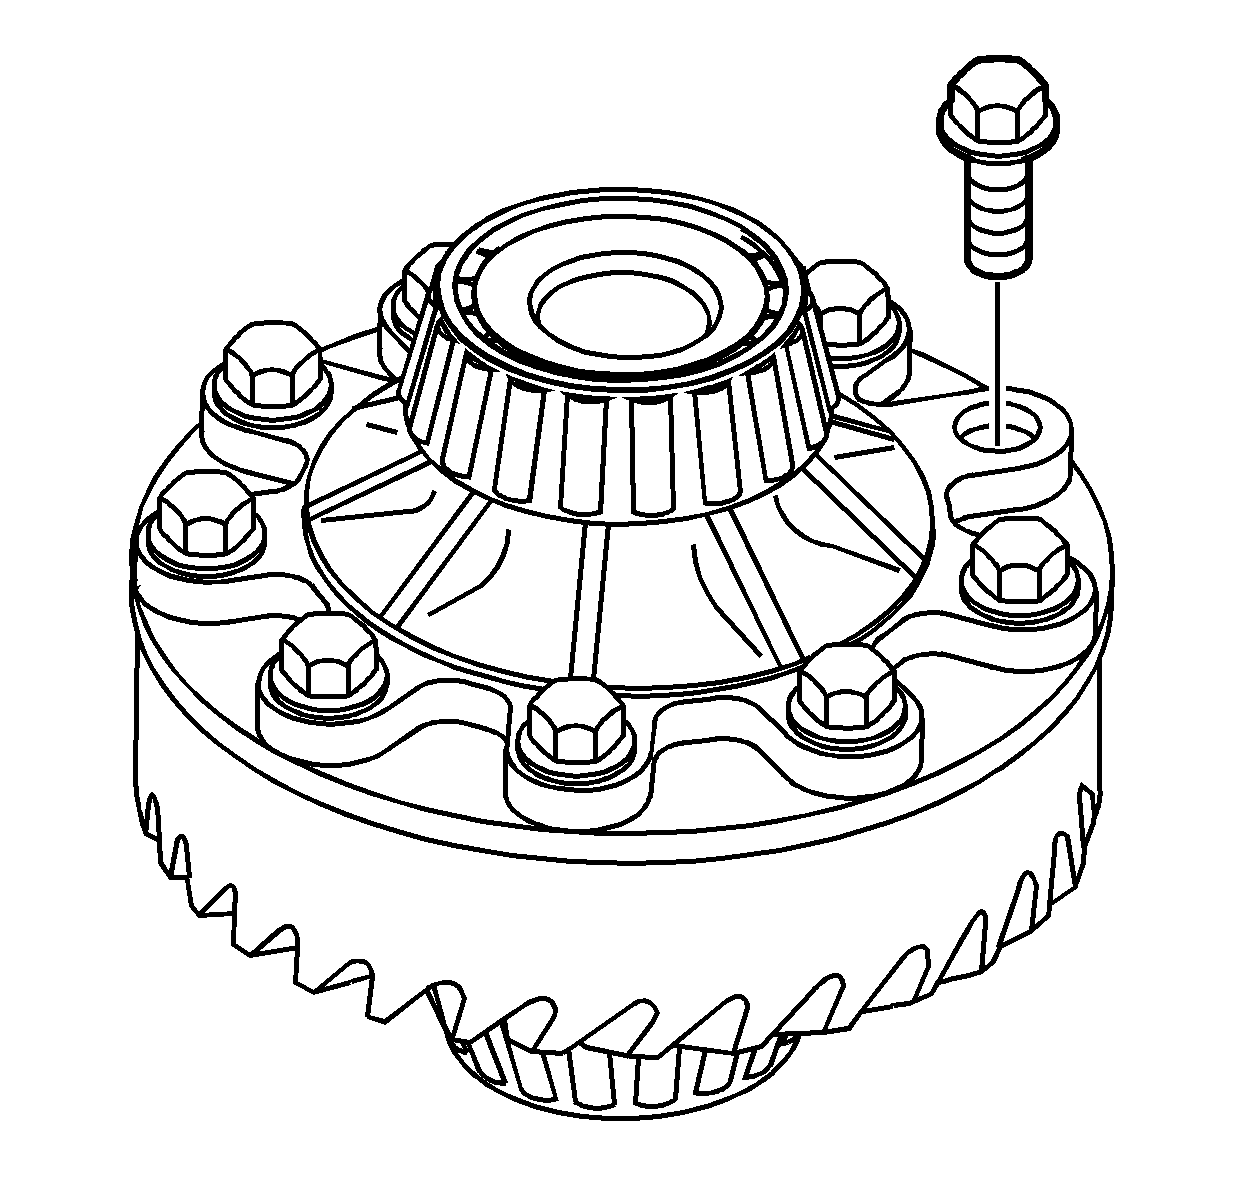
- Install NEW ring gear bolts.
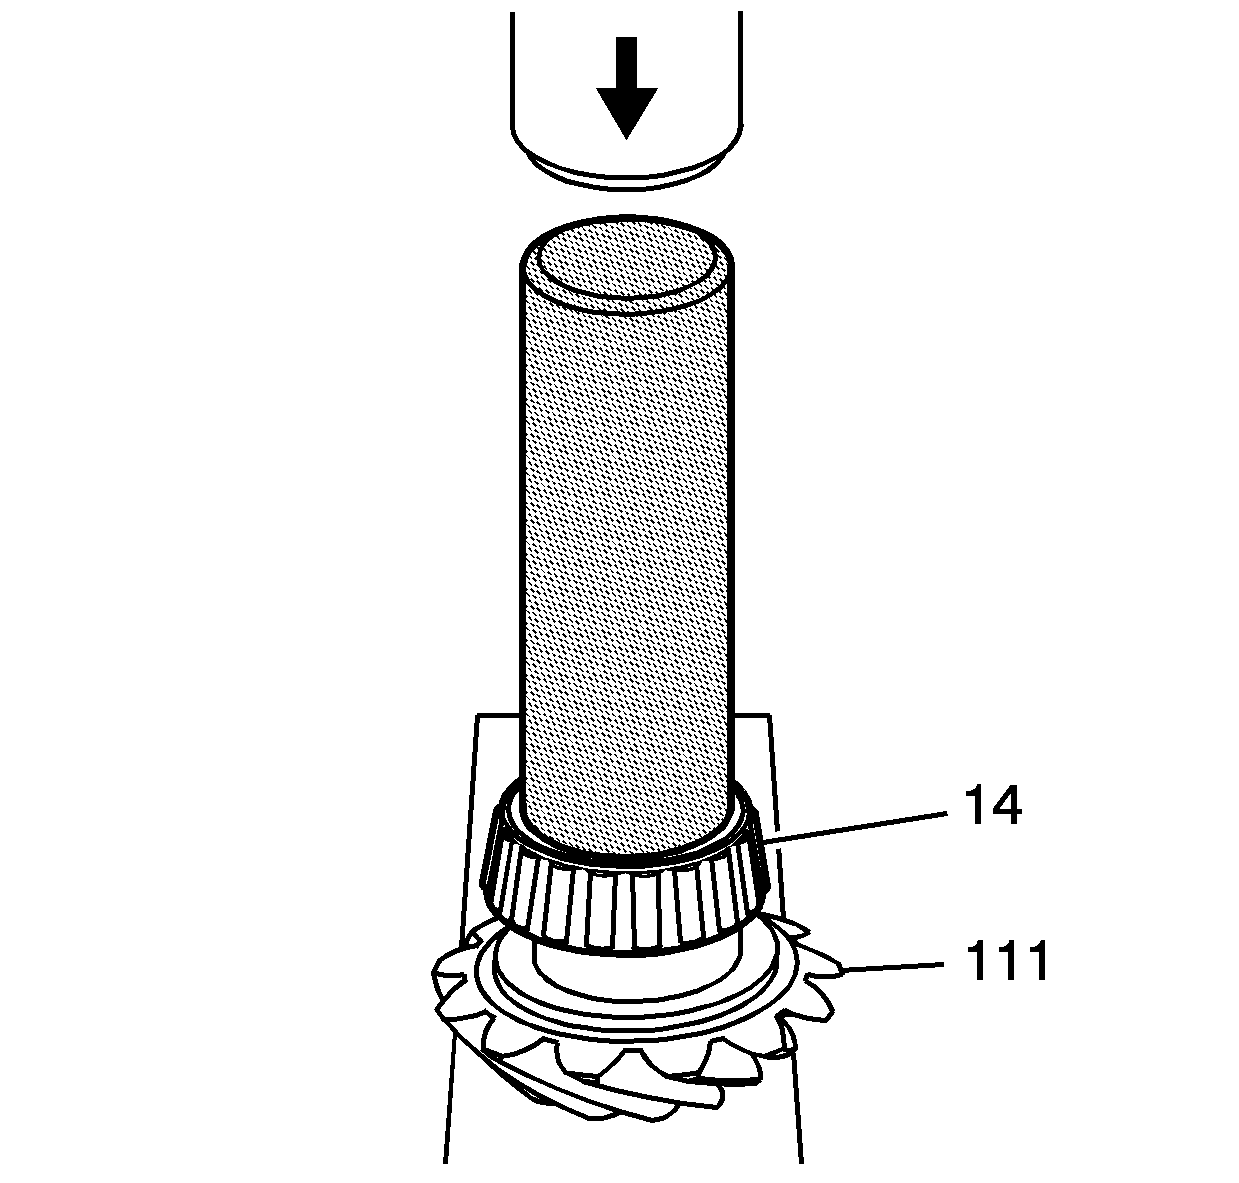
- Install the pinion head bearing (14) onto the drive pinion gear (111) using J 24433 and a hydraulic press.
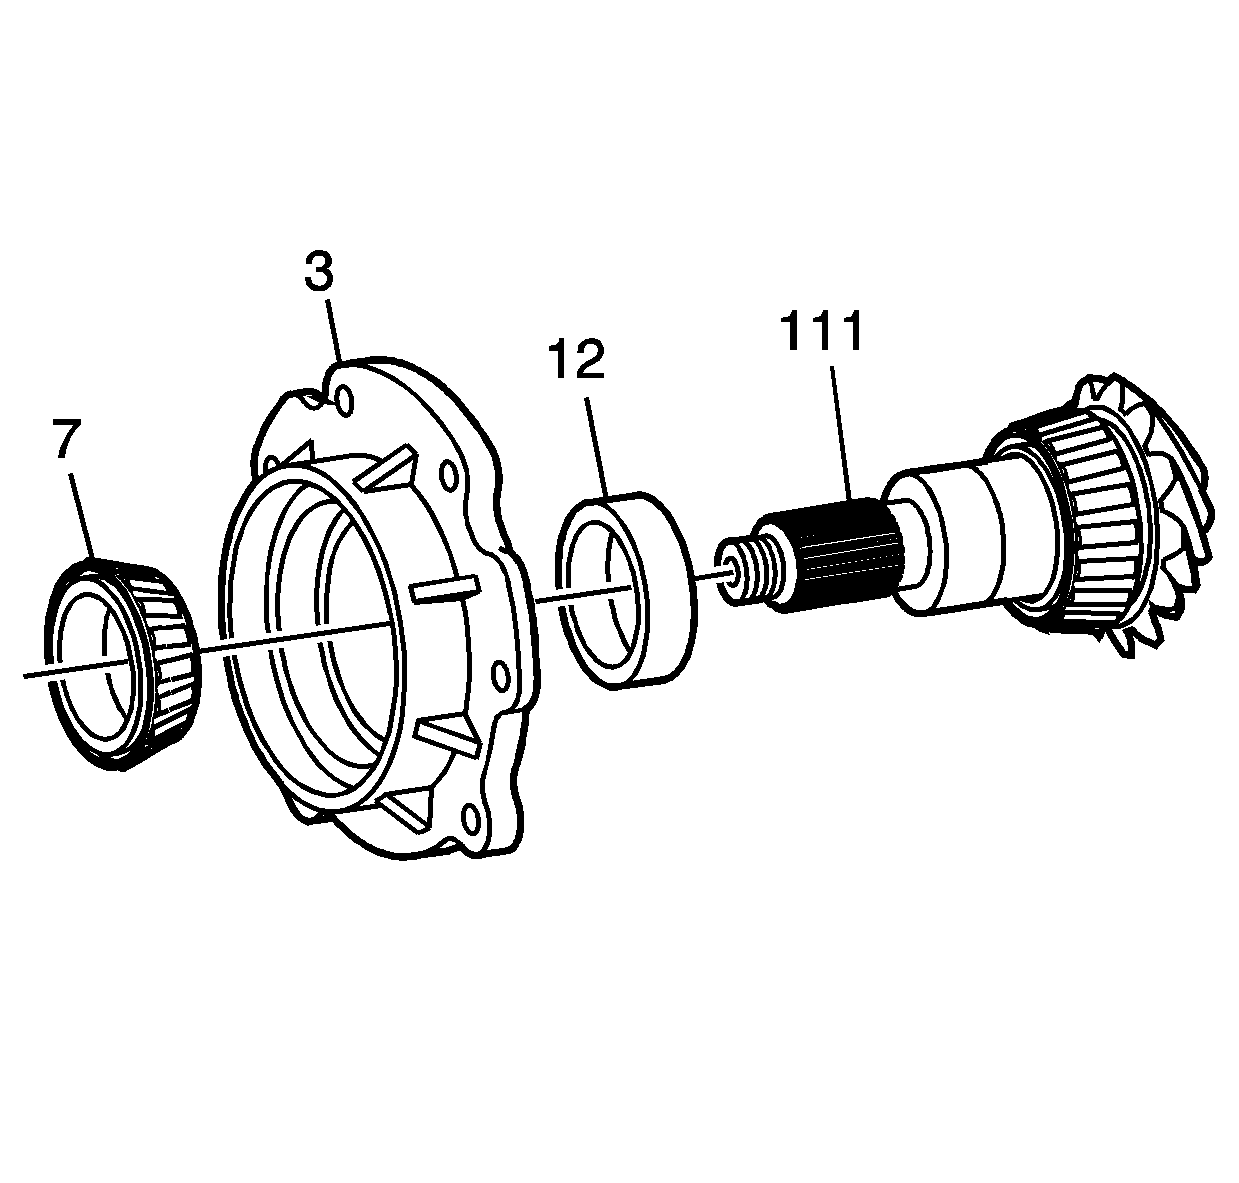
- Assemble the drive pinion shaft (111) and pinion bearing spacer (12) through the pinion bearing housing (3) with the tail bearing (7) over the pinion shaft.
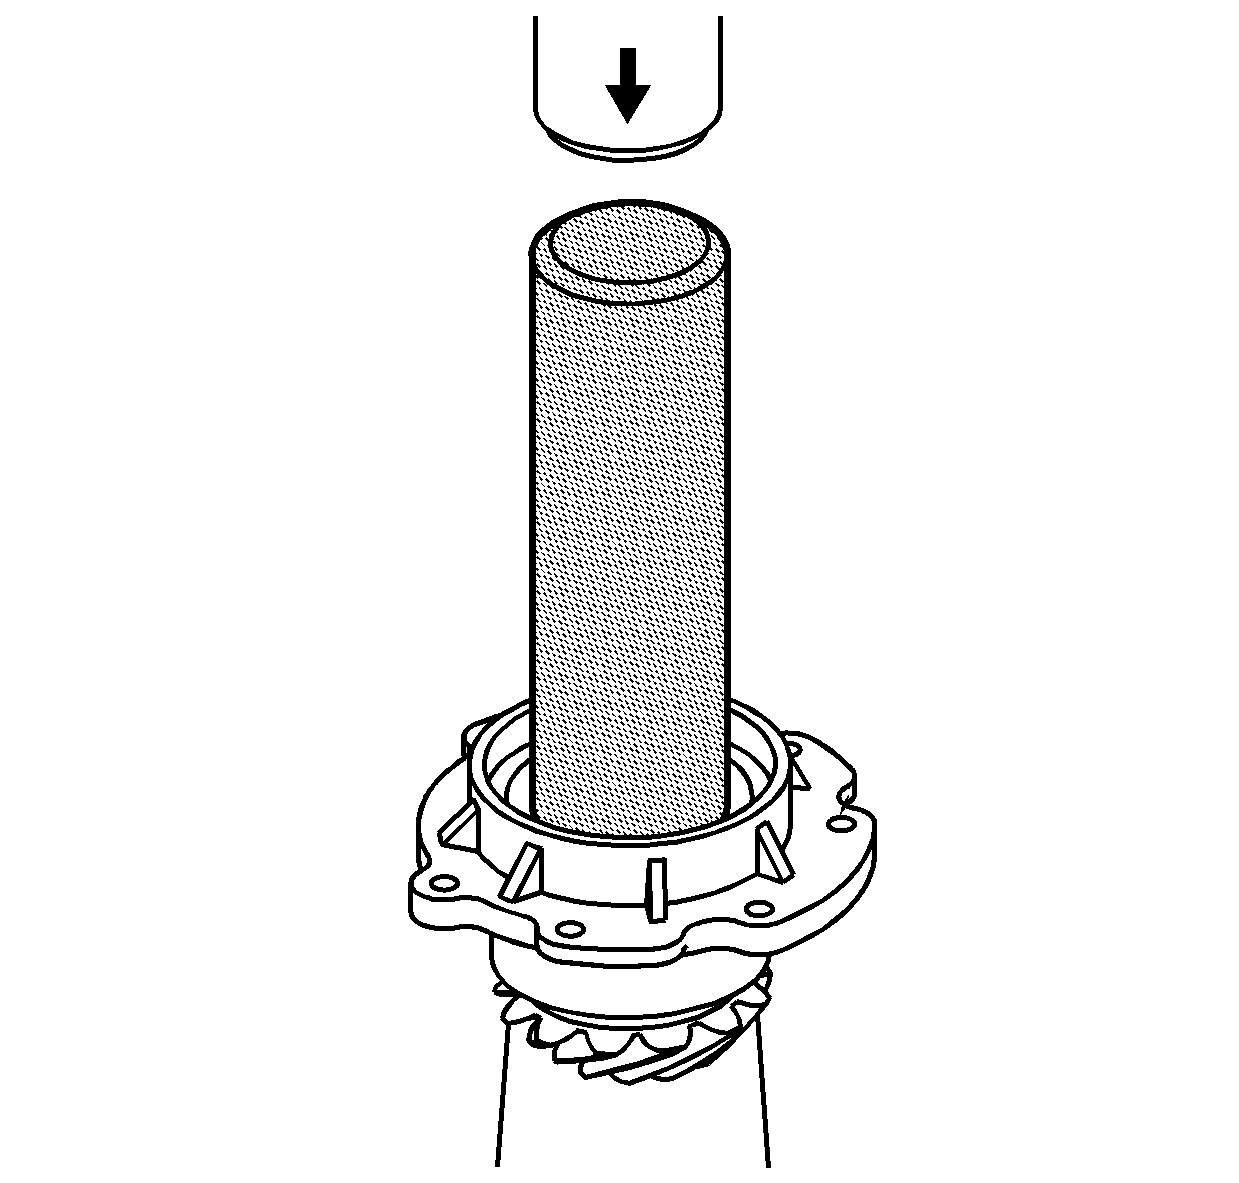
- Press the bearing onto the pinion shaft using J 24433 and a hydraulic press.
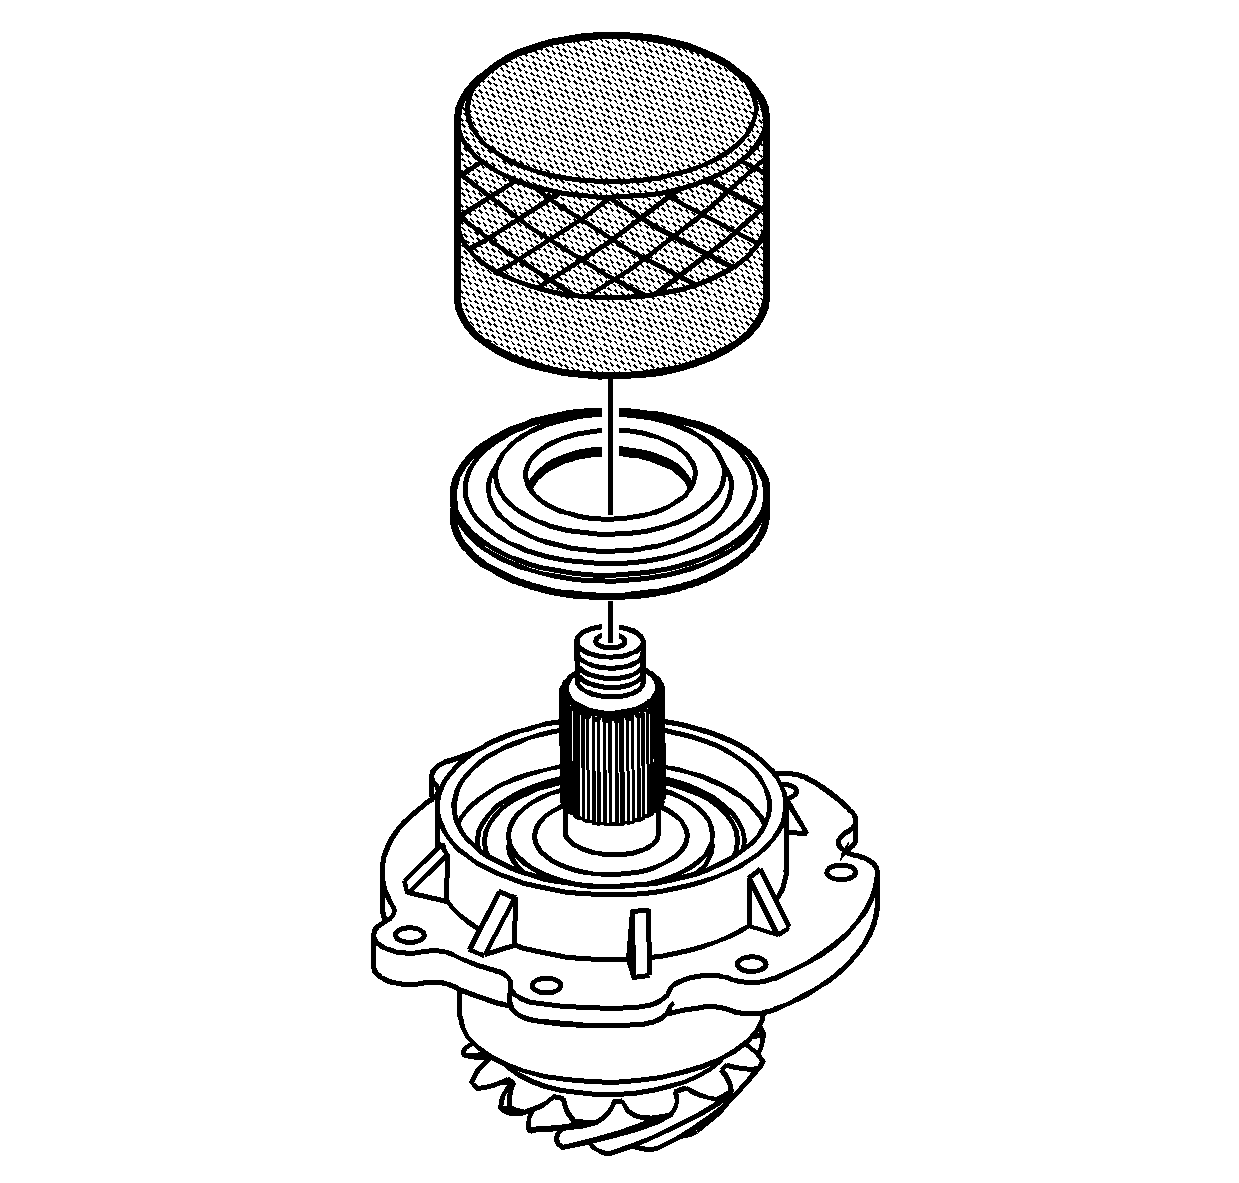
- Using J 46262 , install a NEW pinion seal.
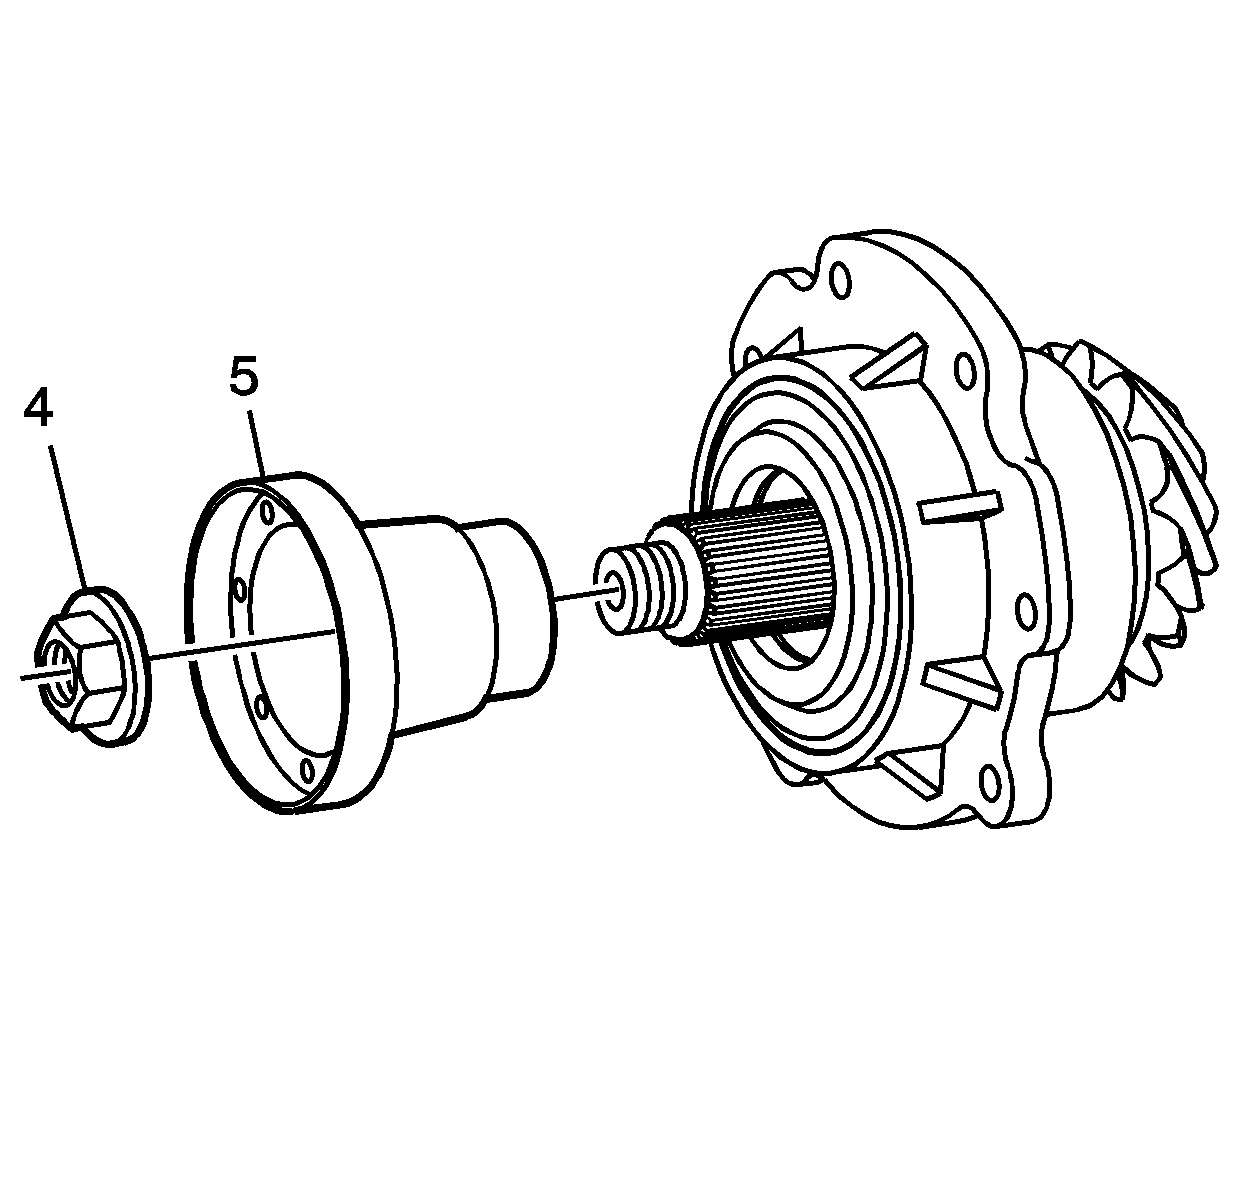
- Install the pinion flange (5) onto the shaft.
- Install a NEW pinion nut (4).
- Install J 45012 (2) in order to hold the flange with a breaker bar. Tighten the pinion flange nut with a torque wrench and J 29873 (1).
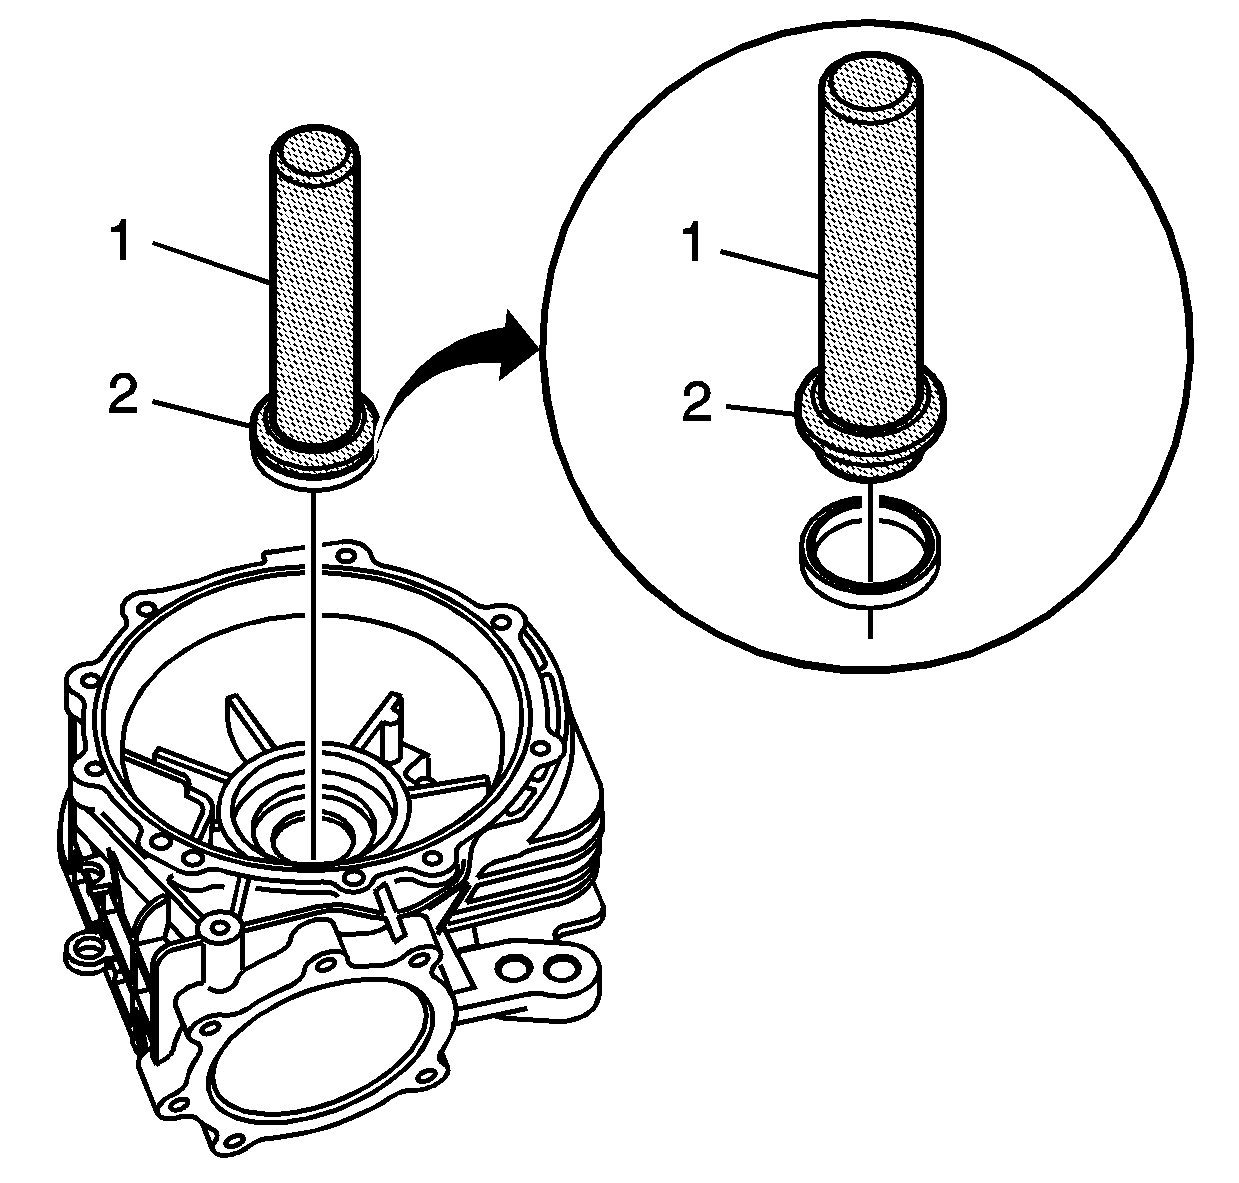
- Using J 46265 (2) and J 8092 (1), install the stub shaft seal.
- Install the selected shims (9) on the pinion housing (3).
- Install the O-ring (11) in the groove on the pinion housing.
- Apply a light coat of gear lube to the bearing housing to ease installation.
- Apply a light coat of gear lube into the pinion housing bore of the carrier.
- Using J 25070 , heat the carrier.
- Using the long bolts from J 45019 as guides, align the housing bolt holes to the carrier bolt holes.
- Snug the bolts.
- Push the housing evenly into the bore.
- Remove the long bolts.
- Install the pinion housing bolts.
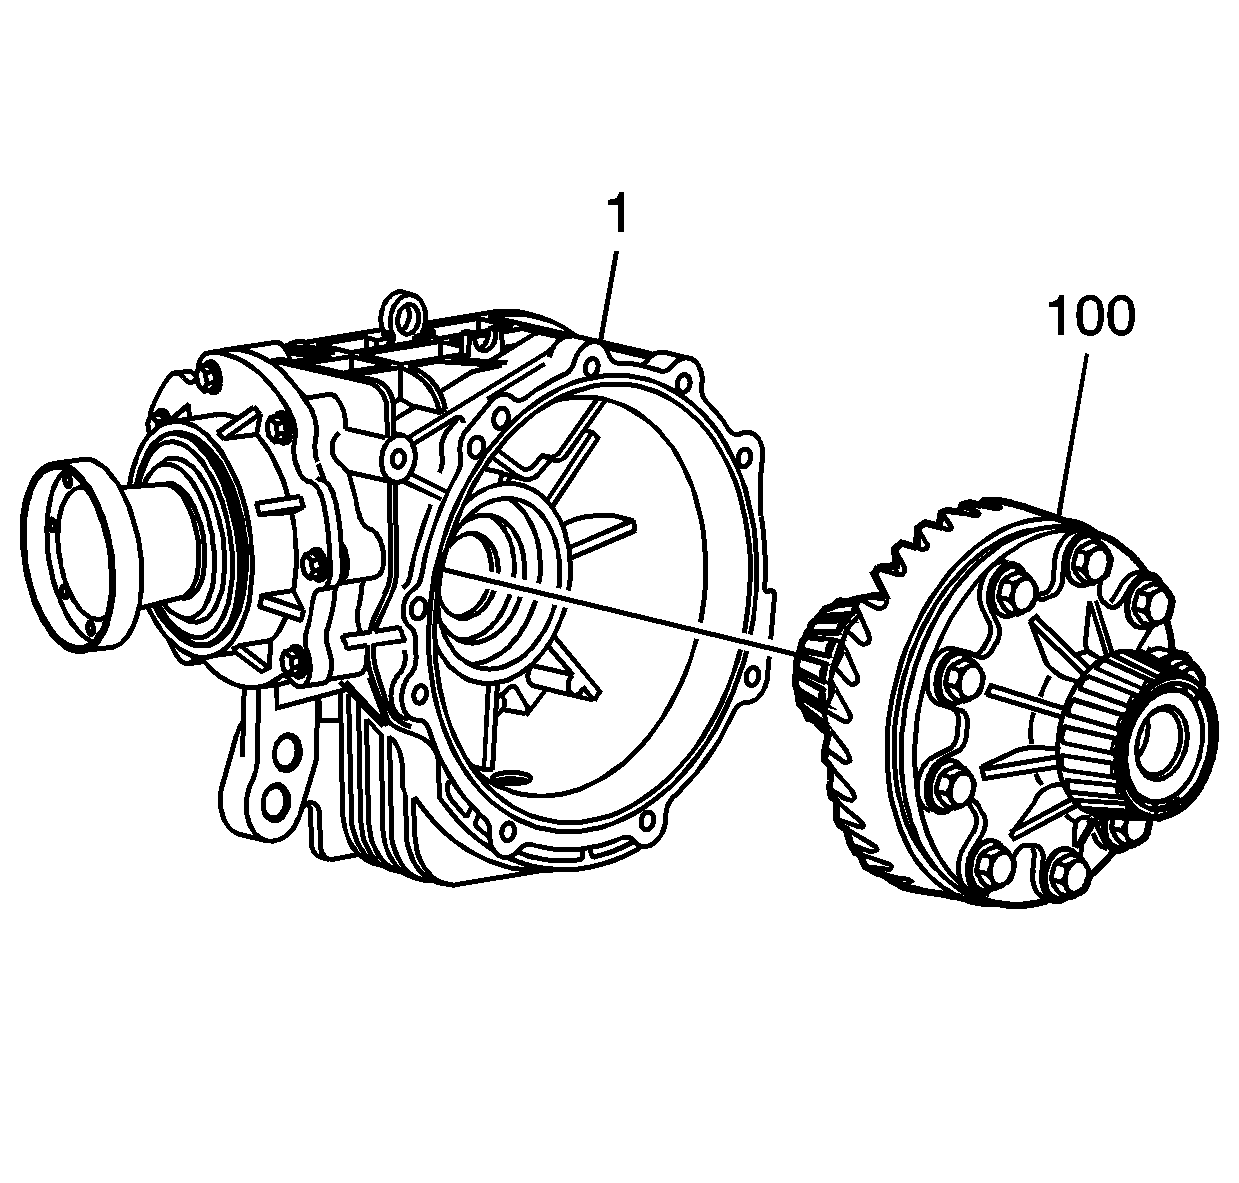
- Install the differential assembly (100) into the differential carrier (1).
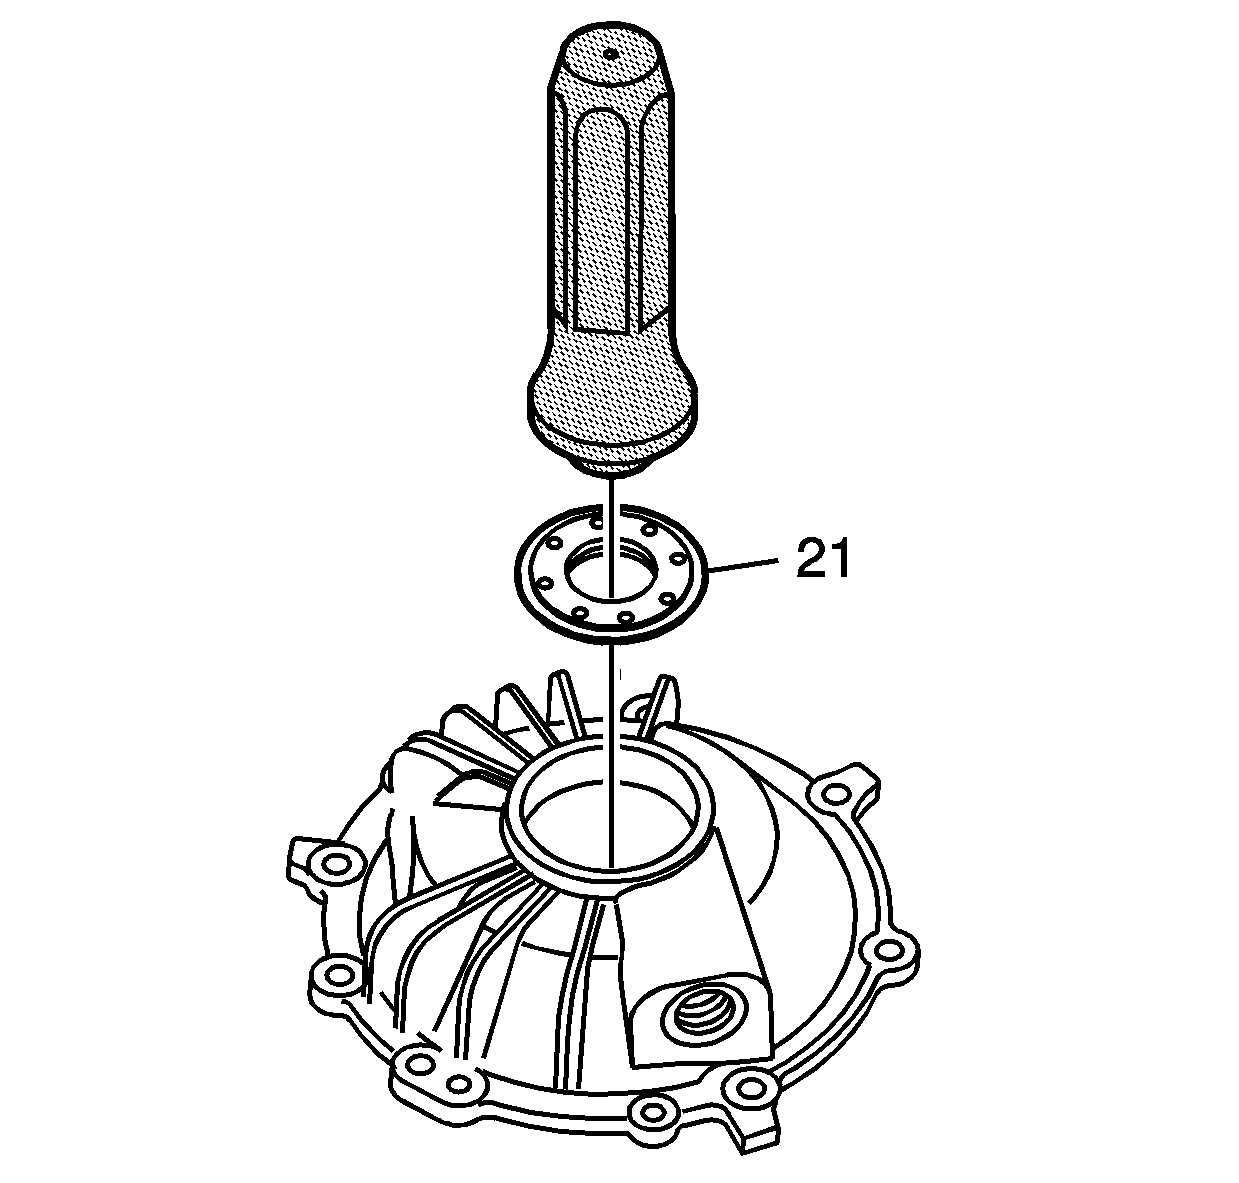
- Lightly lube the outside diameter of the oil seal with axle lube.
- Use J 45017 to install the oil seal (21).
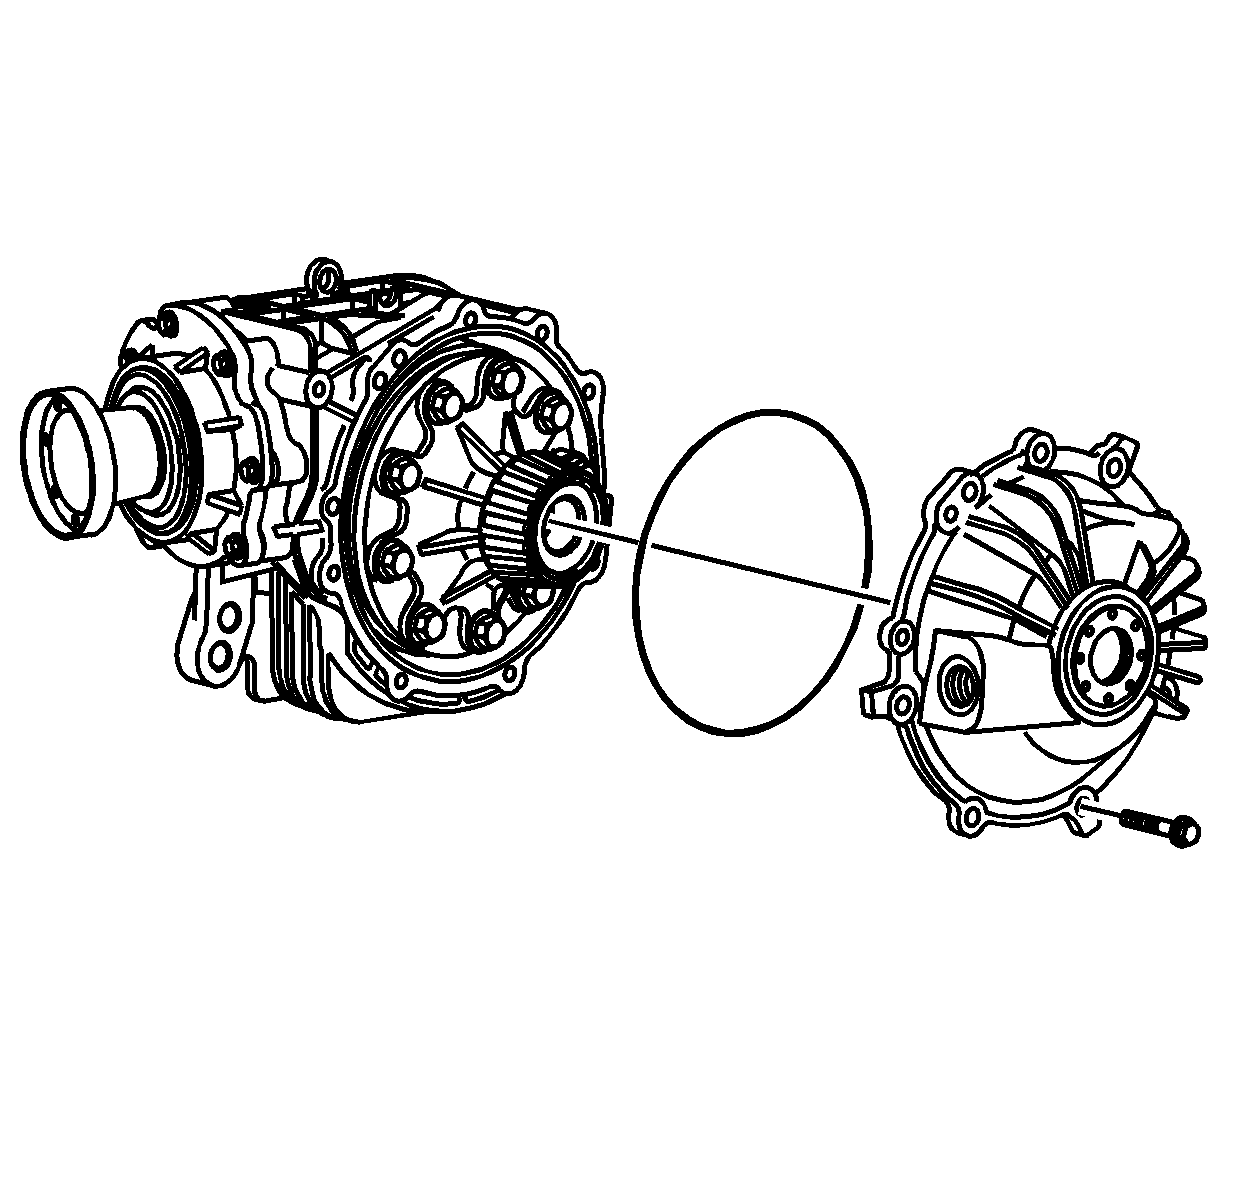
- Install the carrier cover O-ring into the groove.
- Apply a light coat of gear lube to the O-ring area.
- Align the bolt holes and push cover onto the differential carrier evenly.
- Start the cover bolts in the holes by hand.
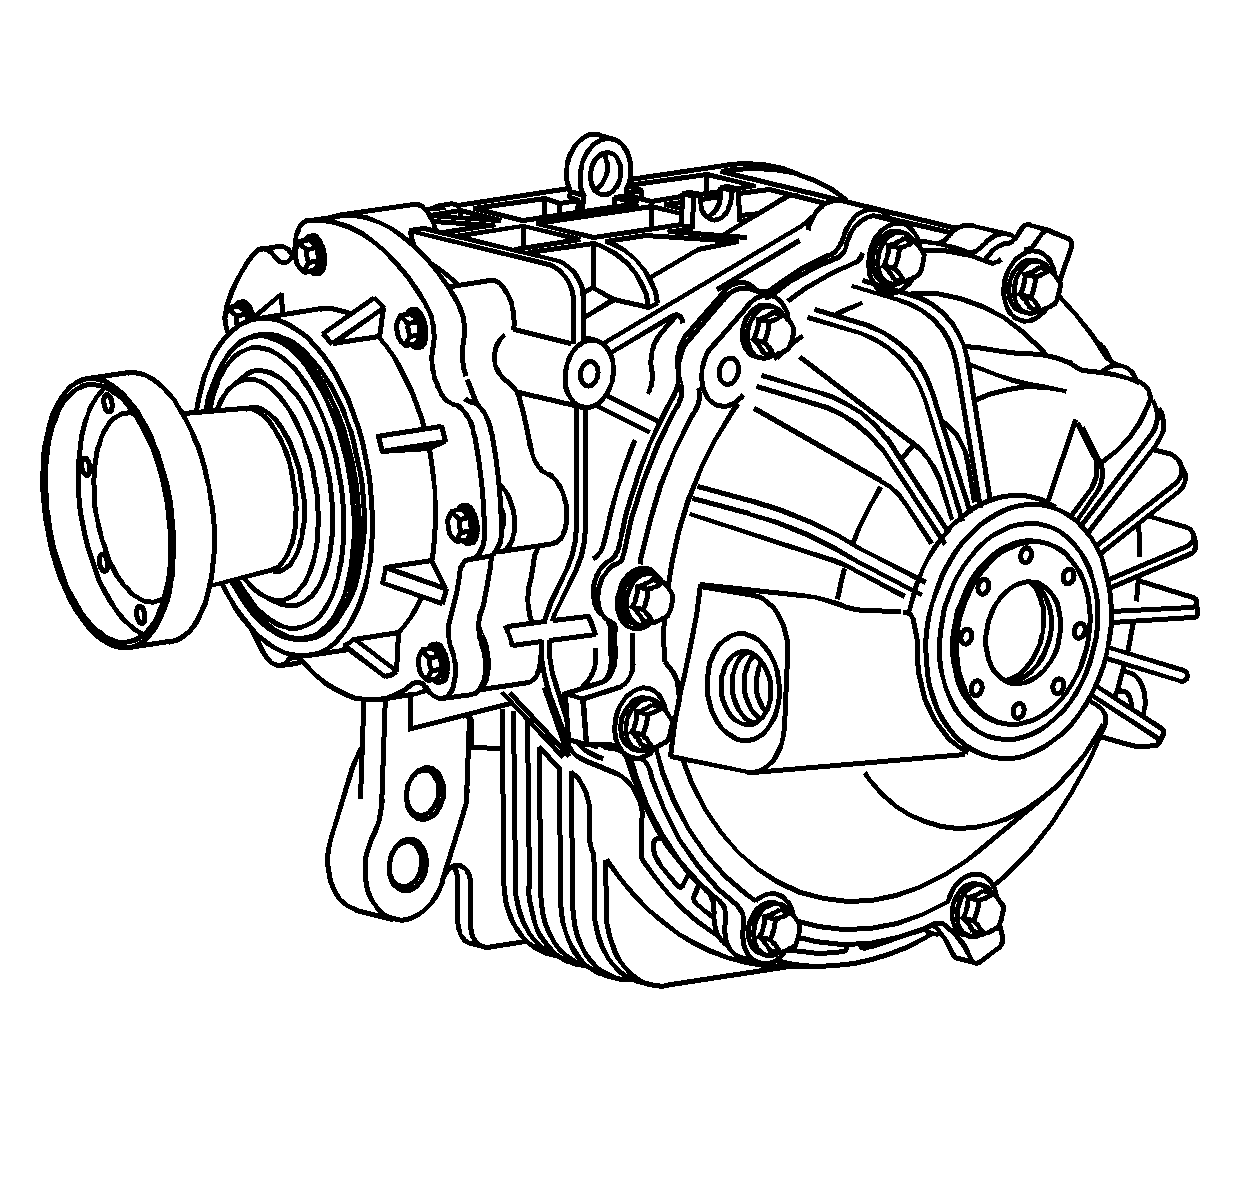
- Install the cover bolts.
- Install the drain plug.
- After the axle and half shaft is installed in the vehicle, fill the axle with differential lube GL 75W90 GM P/N 12378261 (Canadian P/N 10953455) or equivalent. Fill to the bottom of the fill plug threads.
- Install the fill plug (23).
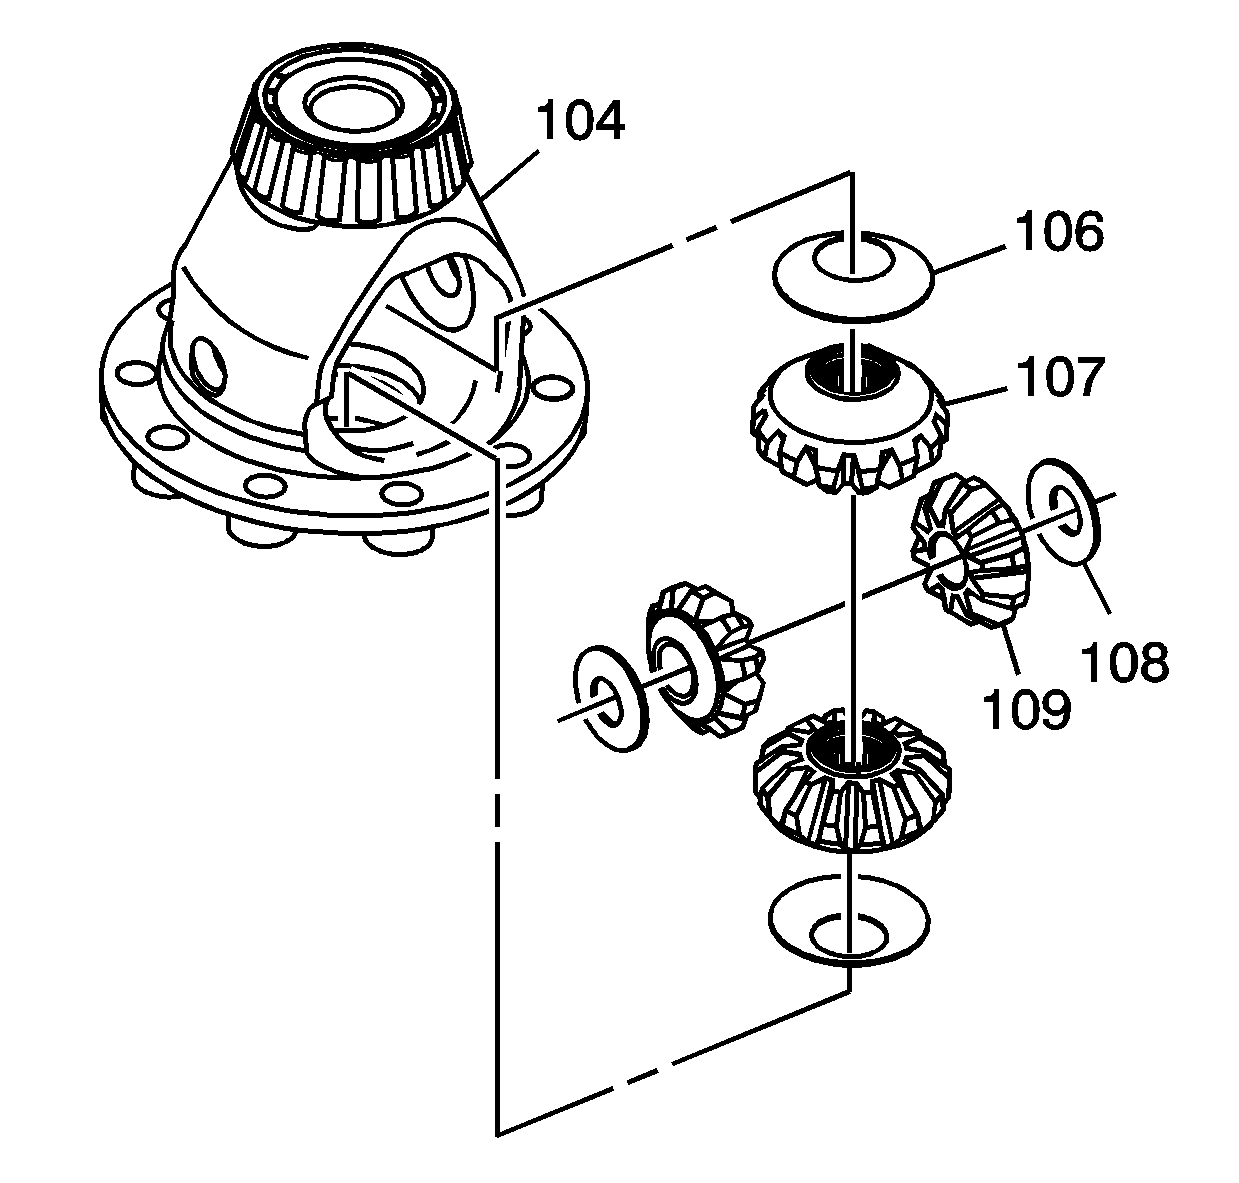
Important: Use bearing grease in order to hold the gear and washer in place.
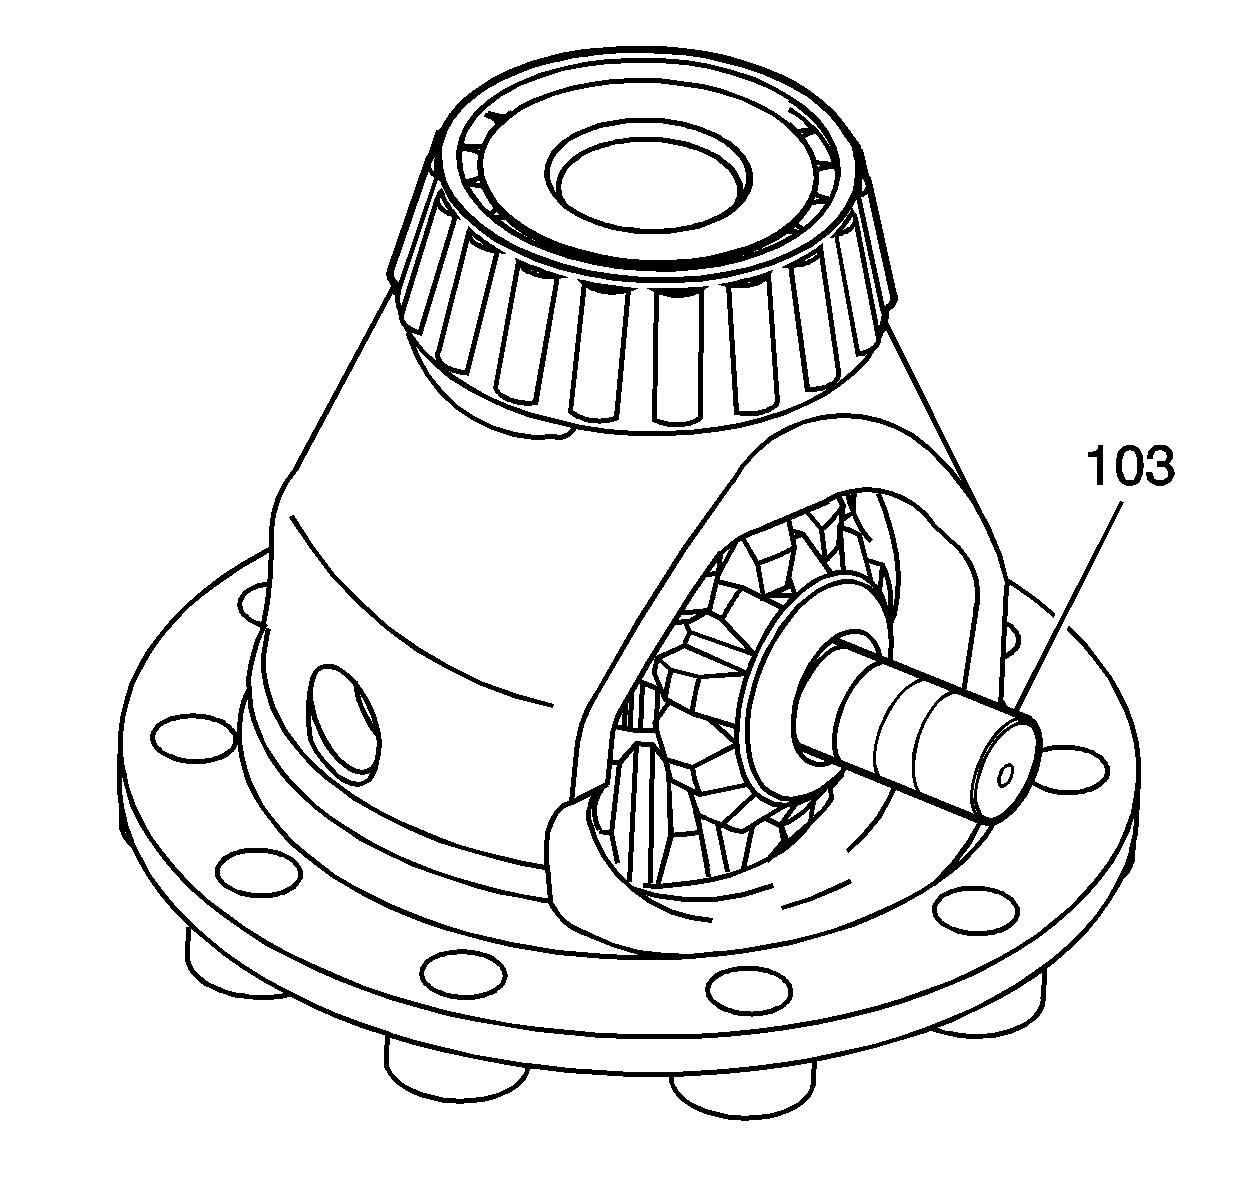
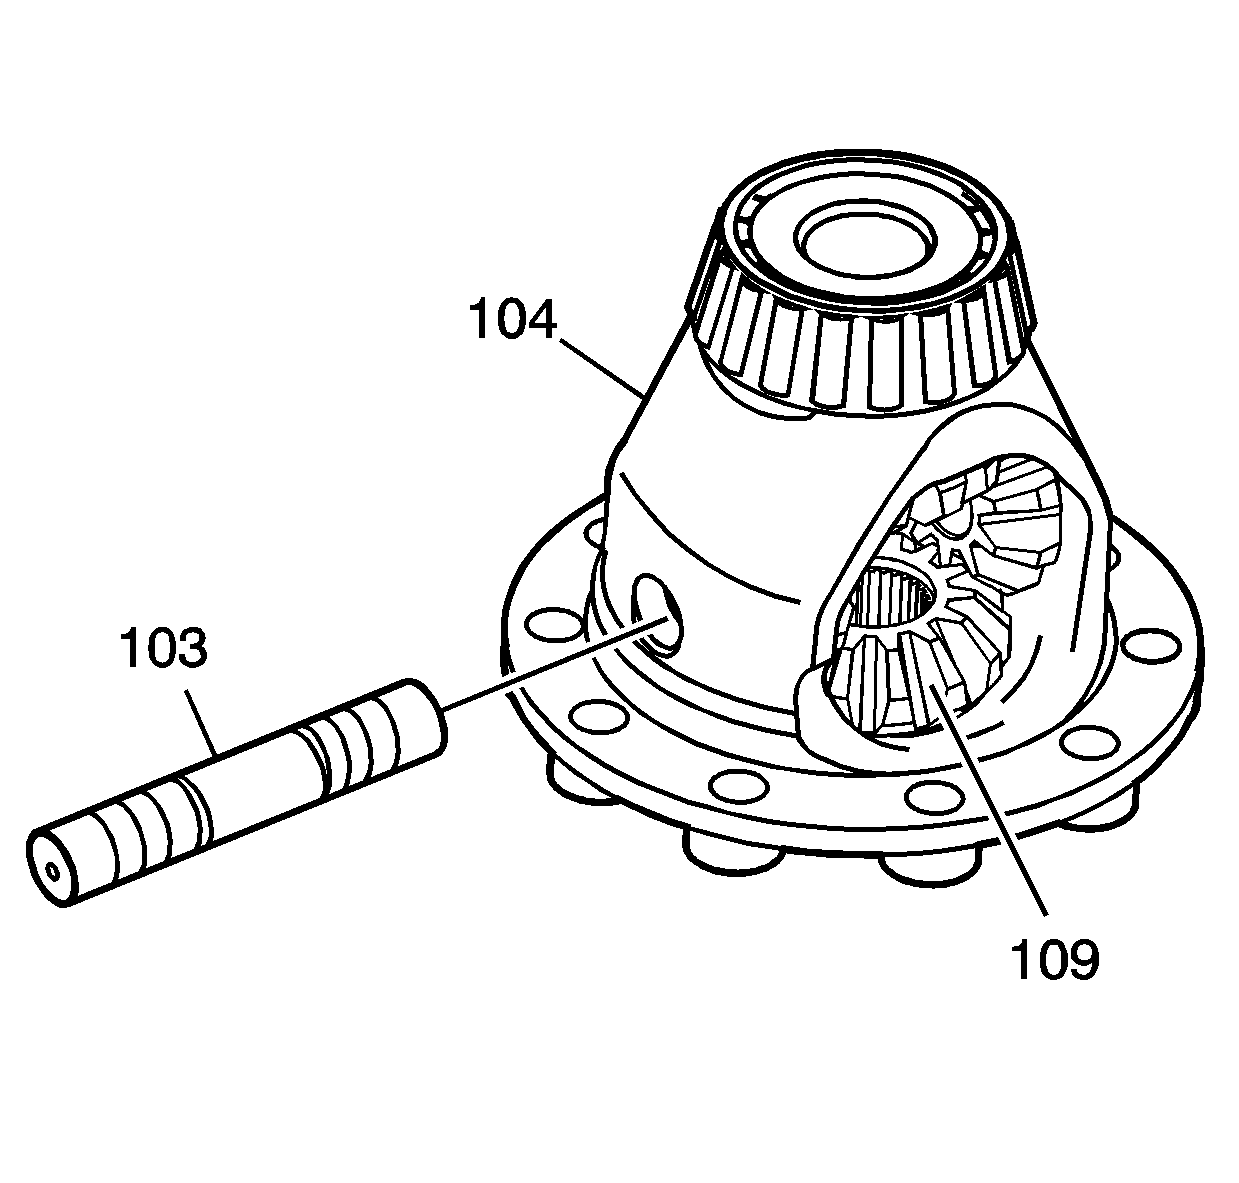
Notice: Refer to Fastener Notice in the Preface section.
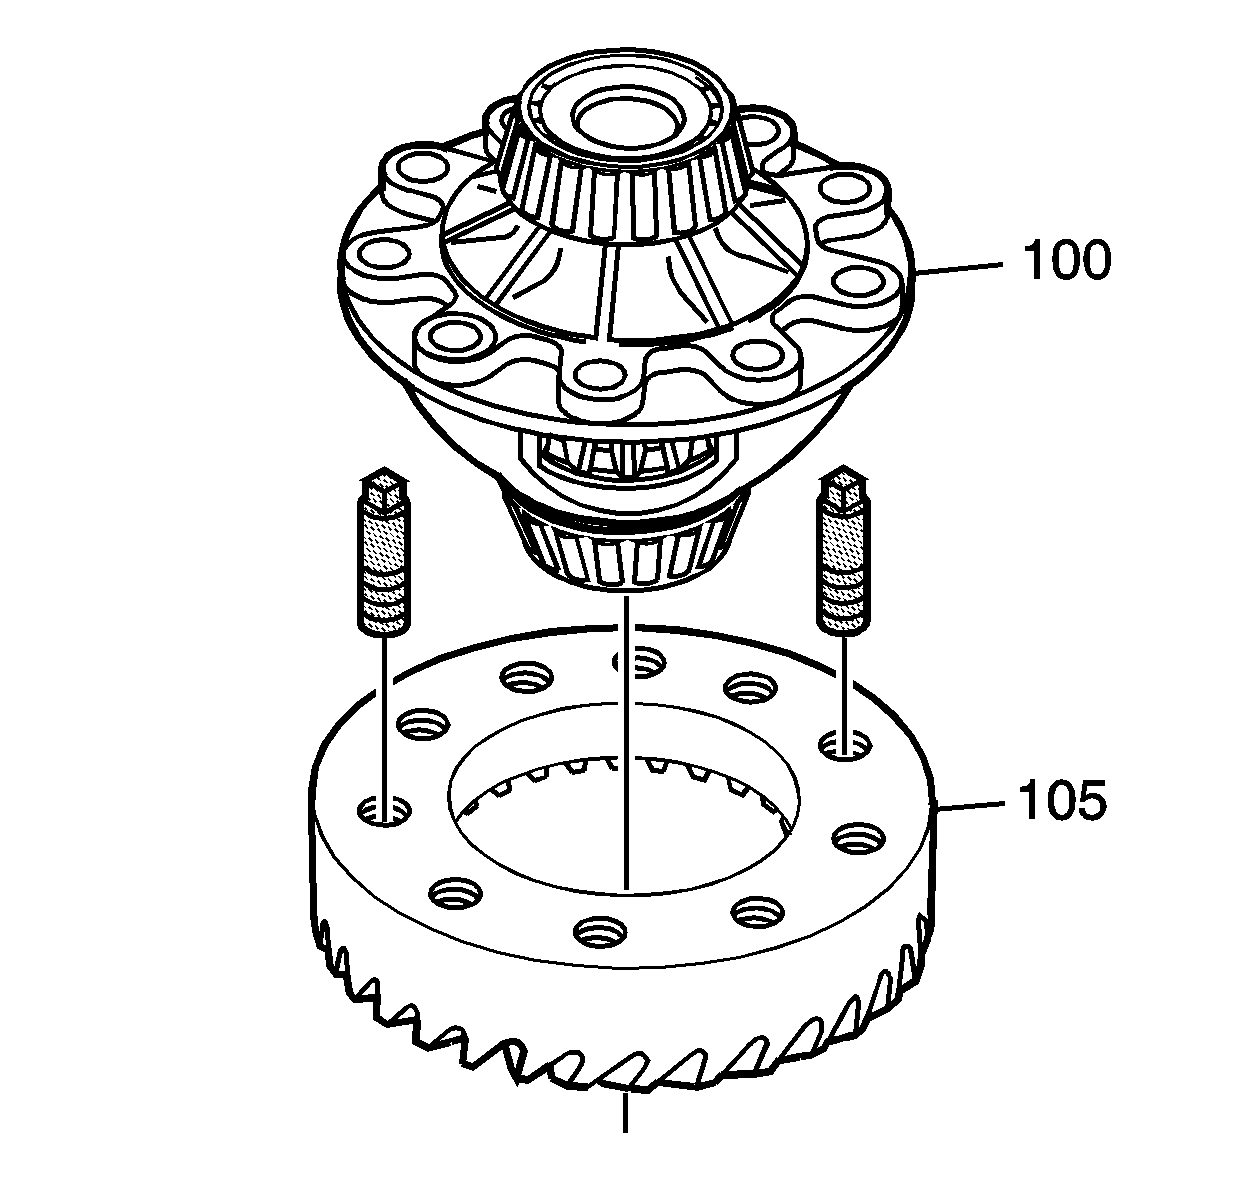
Notice: Do not over-press the gear on the differential. Gear teeth damage could occur. The press bed must be clean and free of nicks or burrs that could damage the gear teeth.
Tighten
Tighten the ring gear bolts to 67 N·m (49 lb ft)
in a criss-cross pattern.
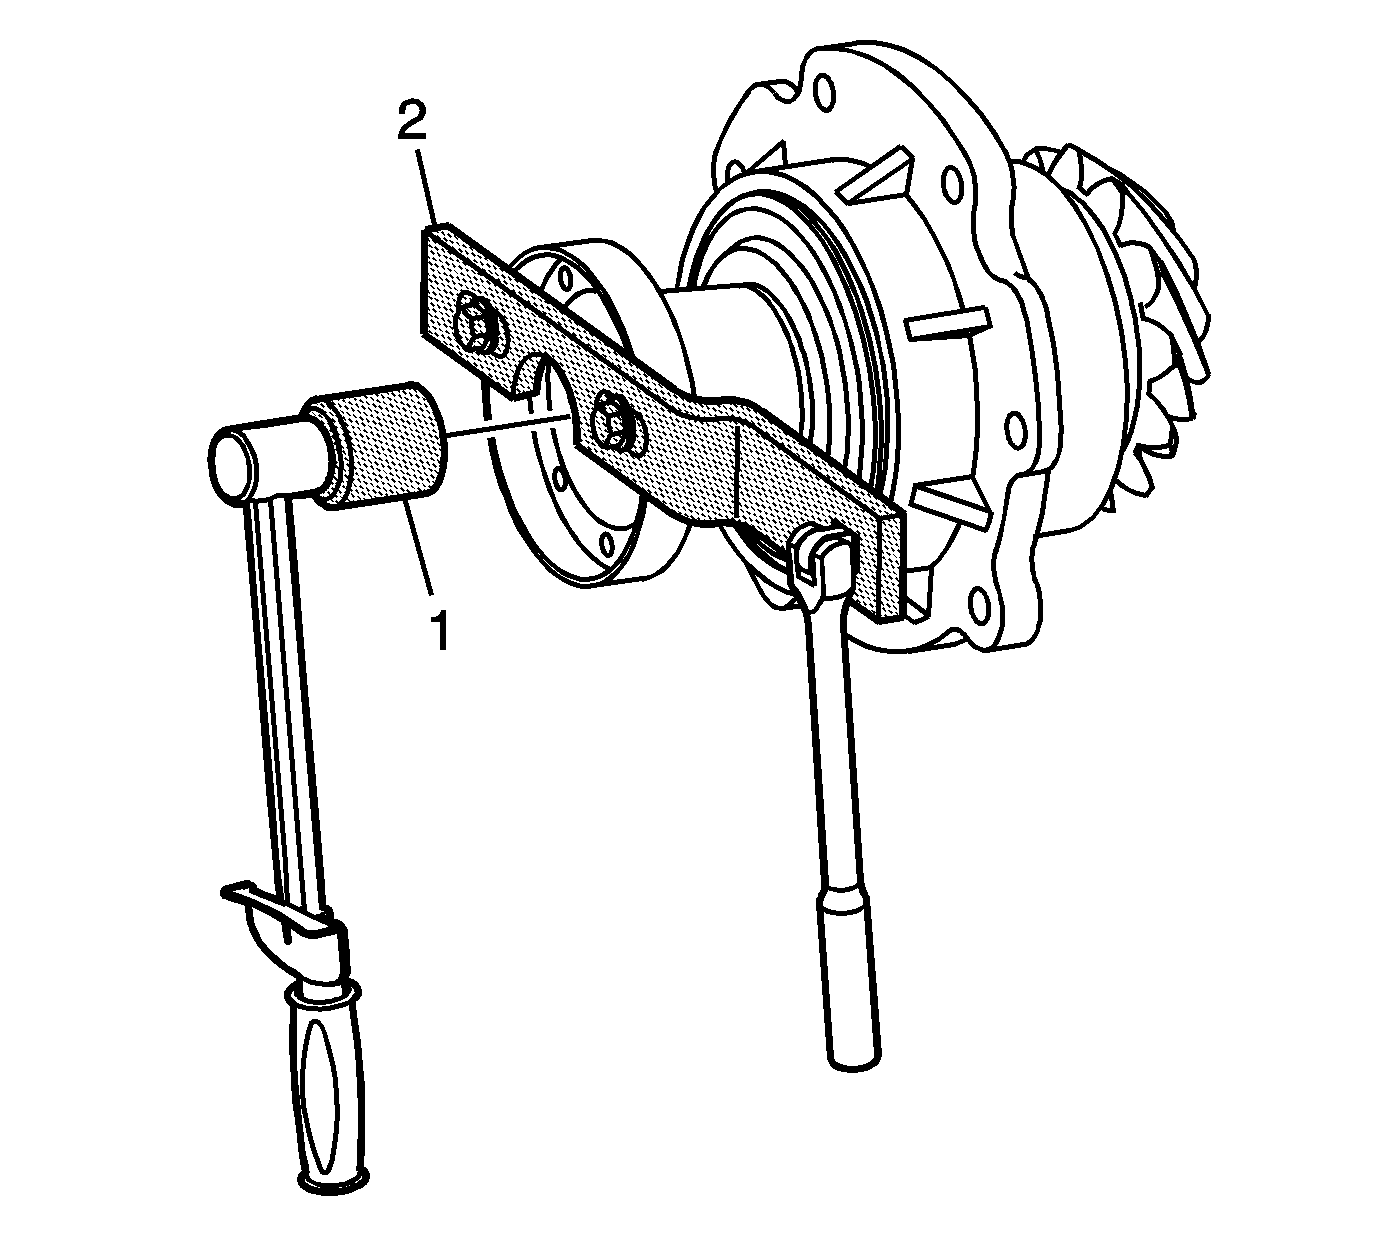
Tighten
Tighten the pinion flange nut to 241 N·m (178 lb ft).
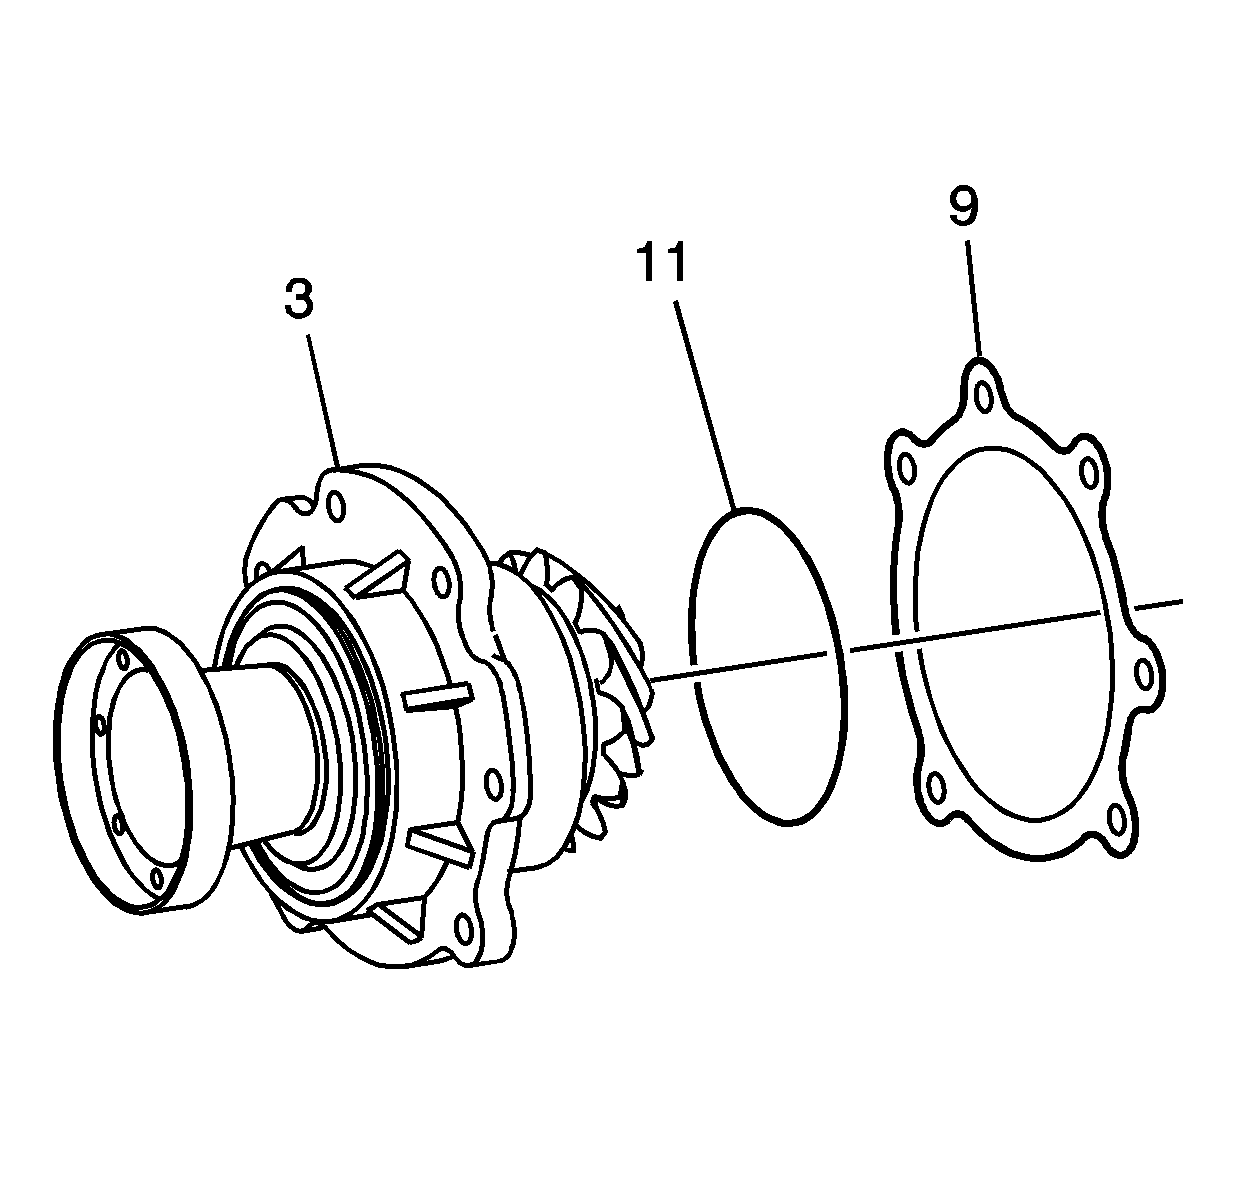
Important: Inspect the bearing housing for nicks and burrs. Remove if necessary.
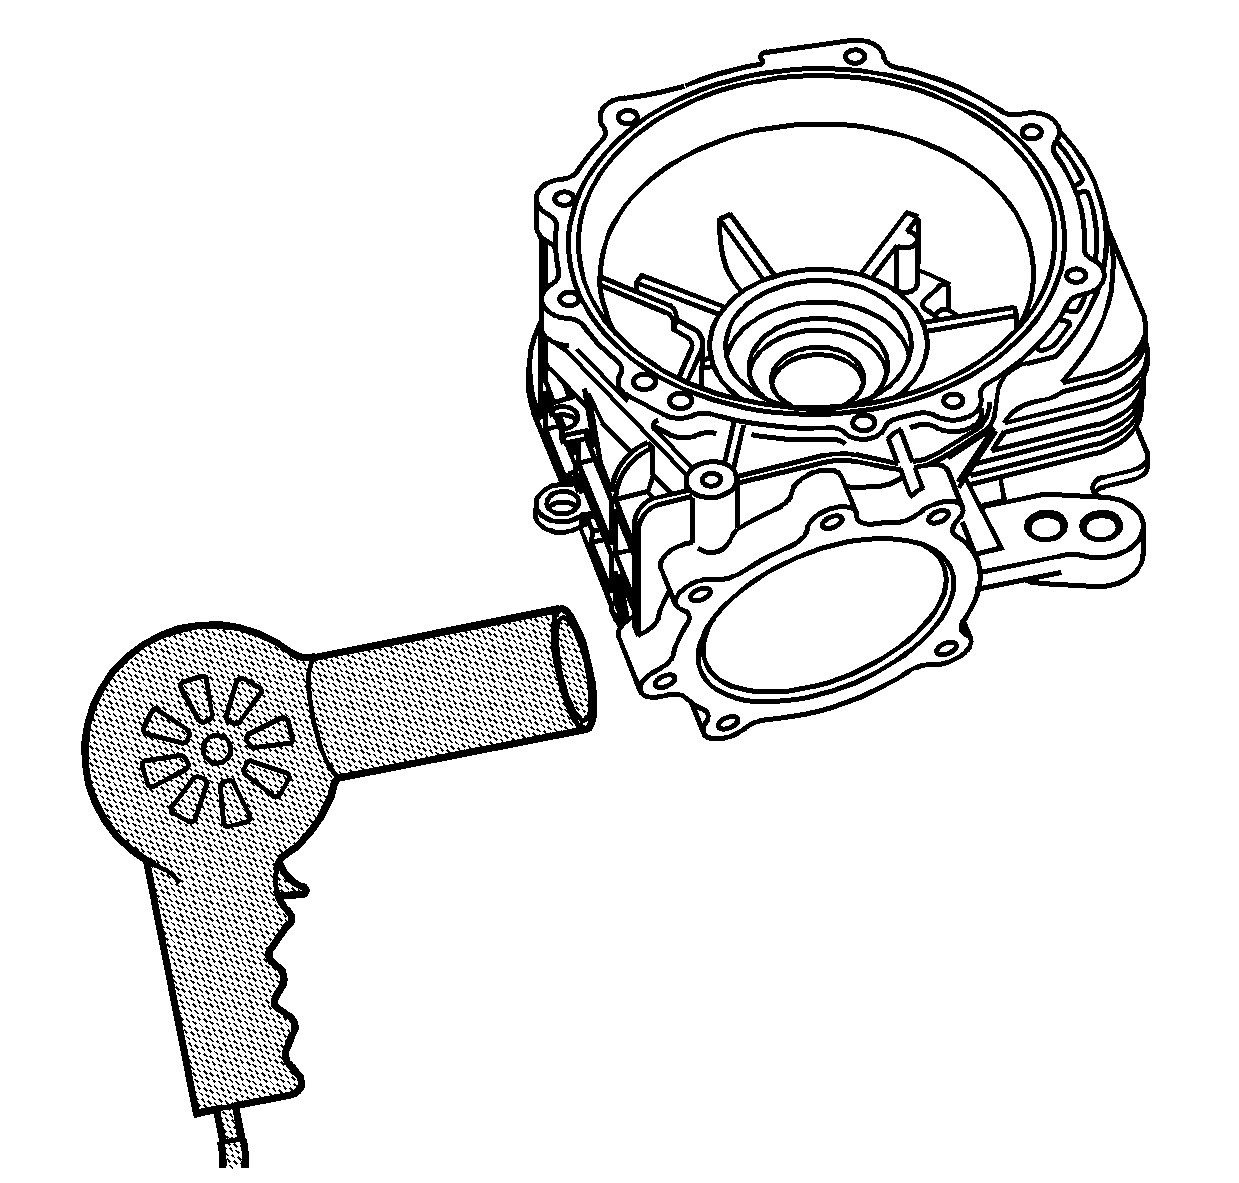
Important: Inspect the carrier pinion housing bore for nicks or burrs. Remove if necessary.
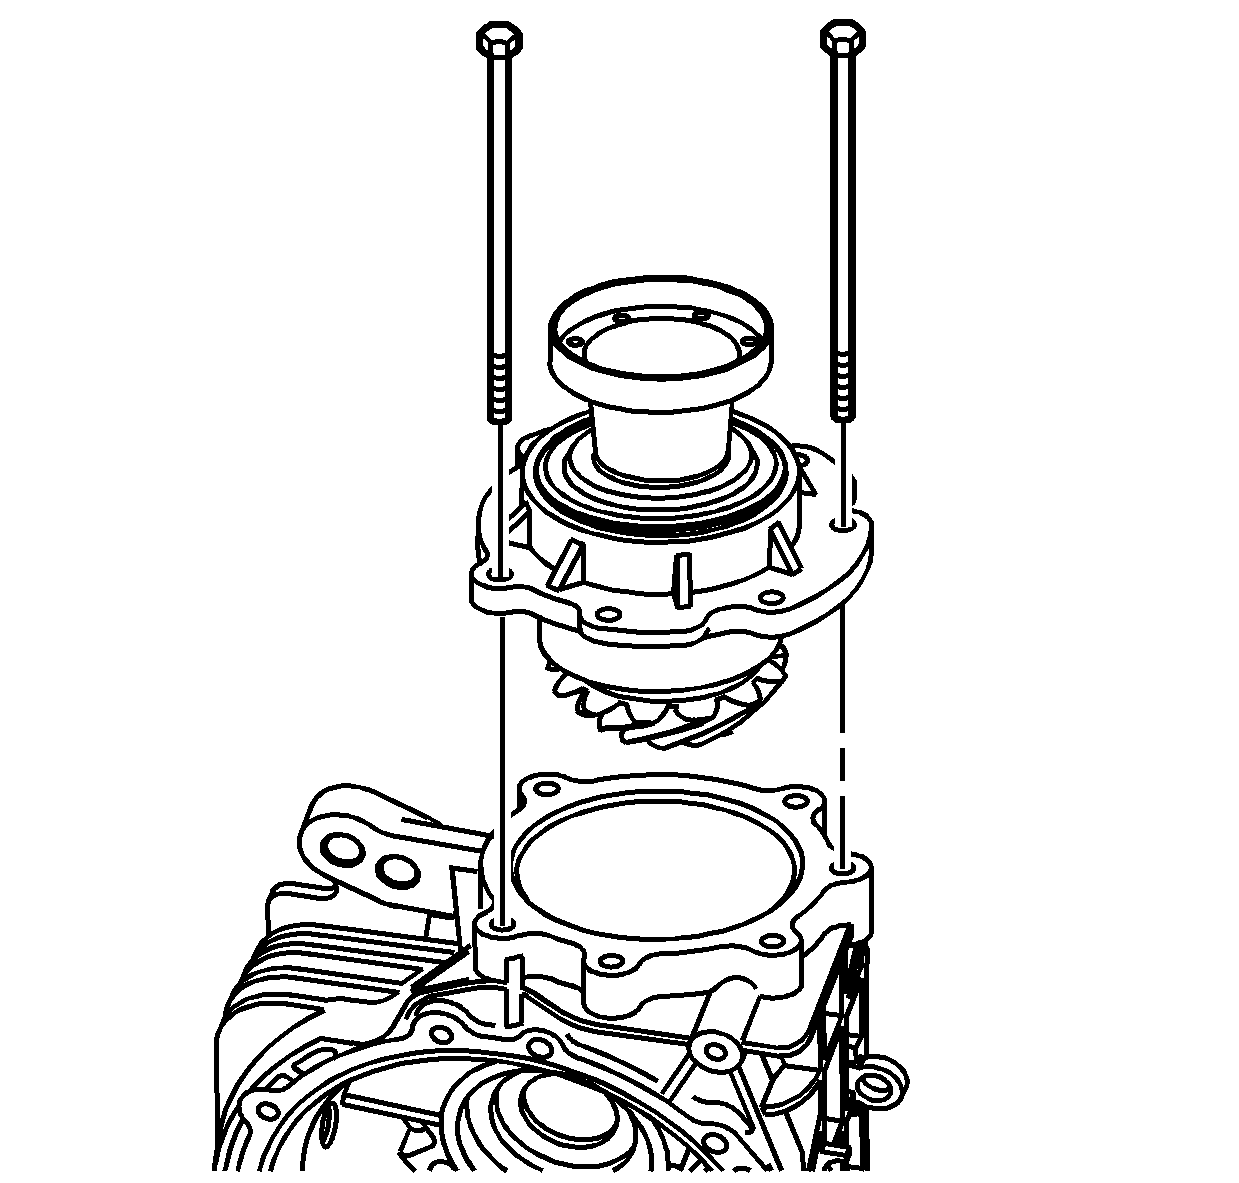
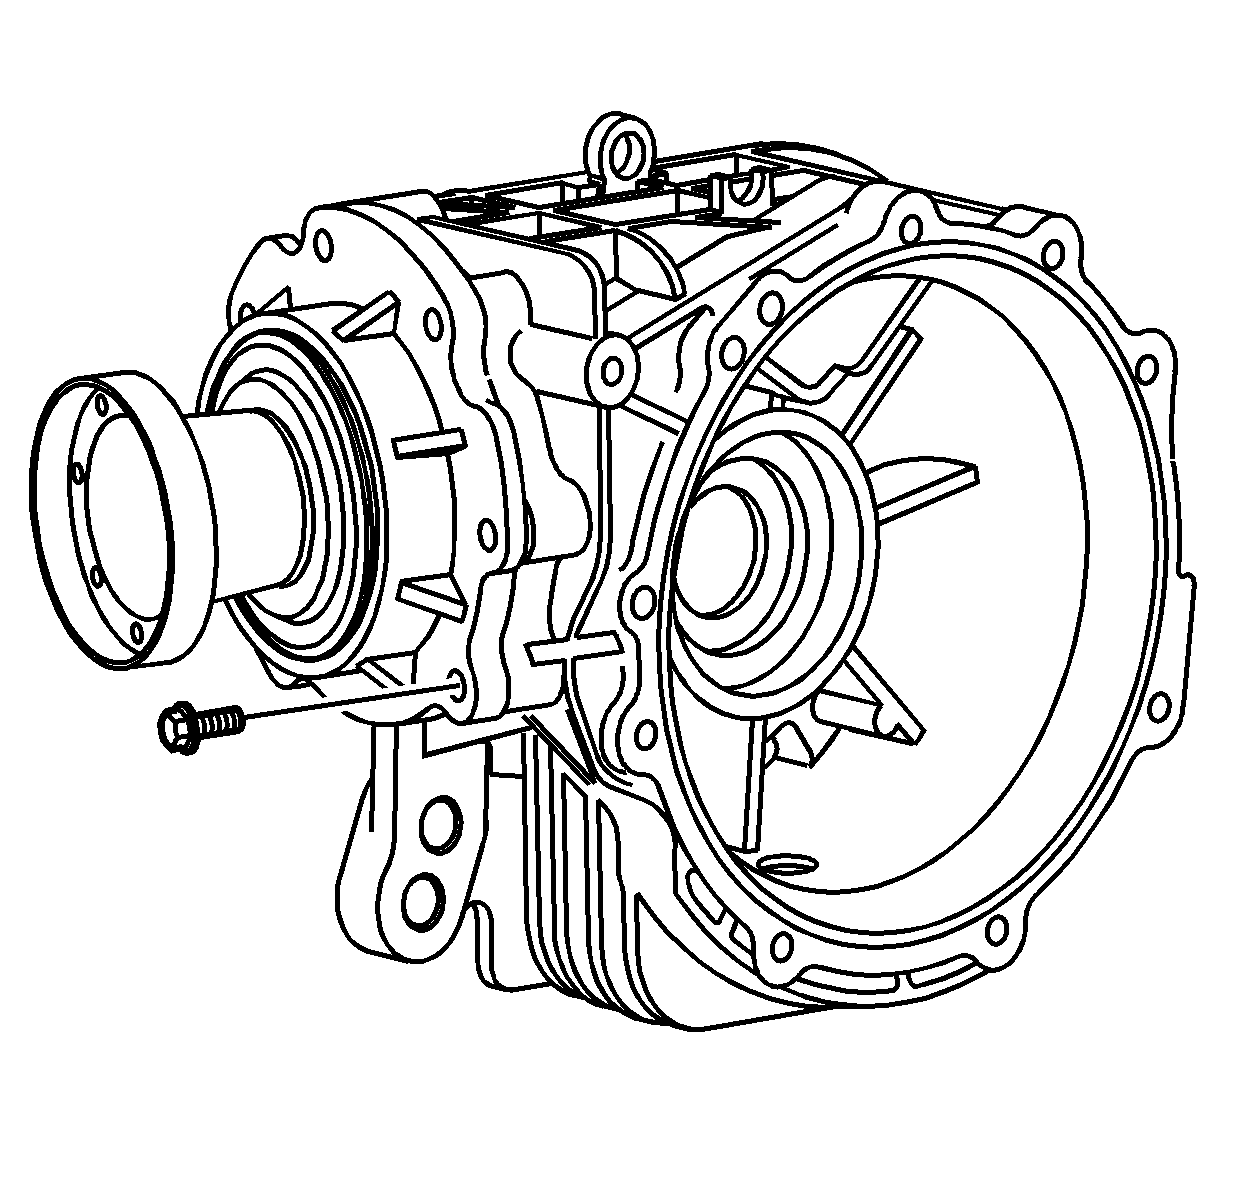
Tighten
Tighten the bolts to 29 N·m (21 lb ft).
Tighten
Tighten the cover bolts to 29 N·m (21 lb ft)
in a criss-cross pattern.
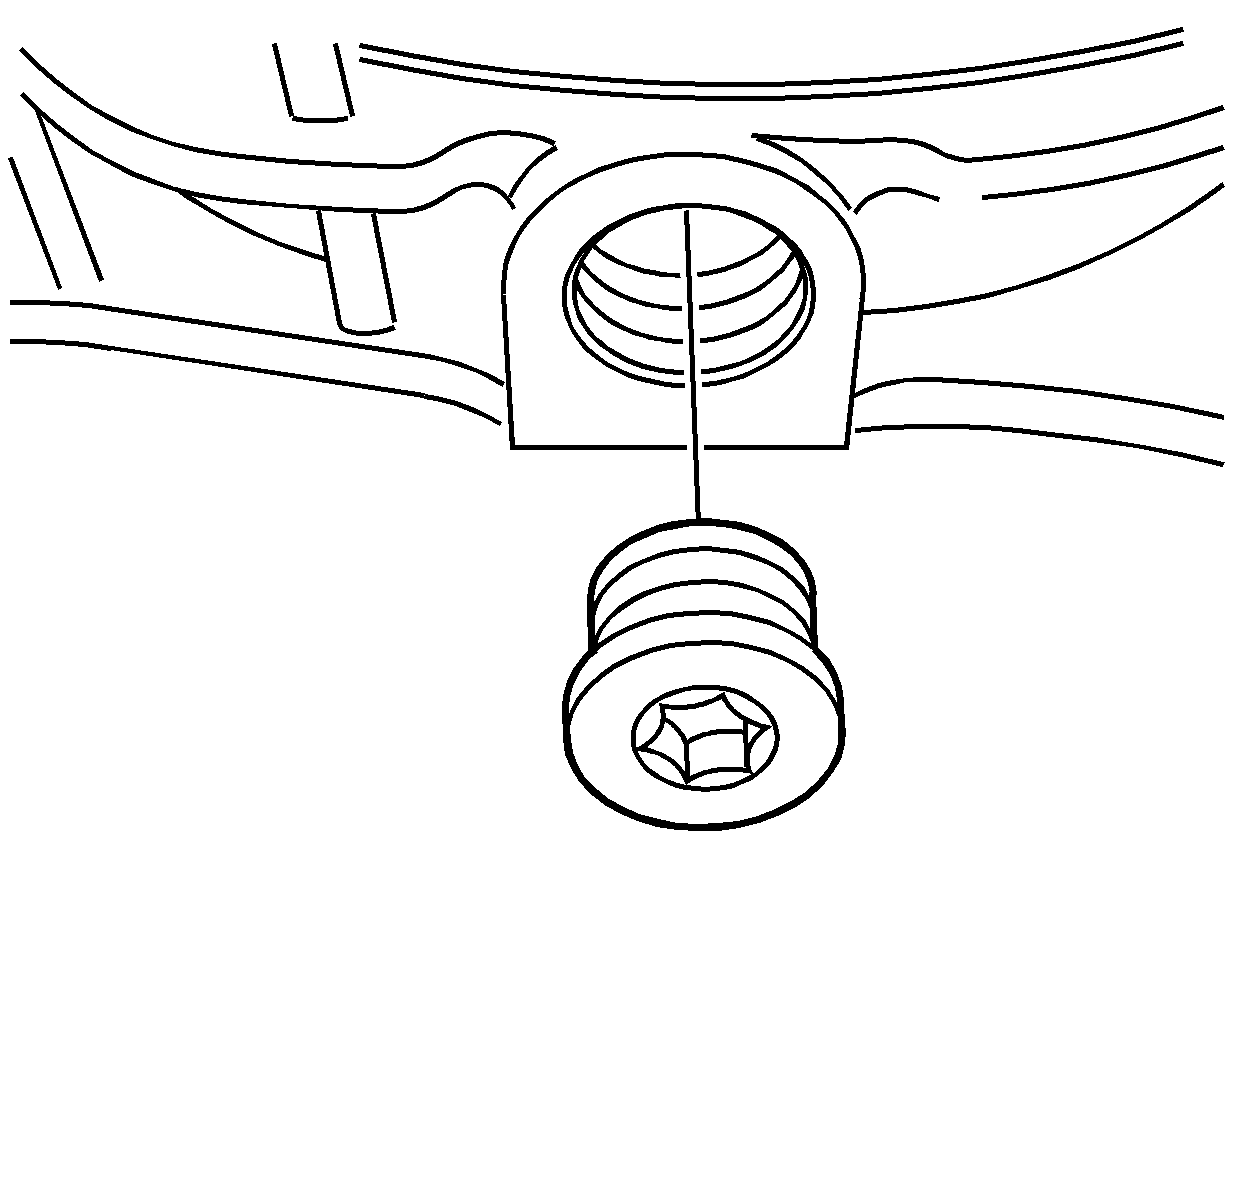
Tighten
Tighten the drain plug to 39 N·m (29 lb ft).
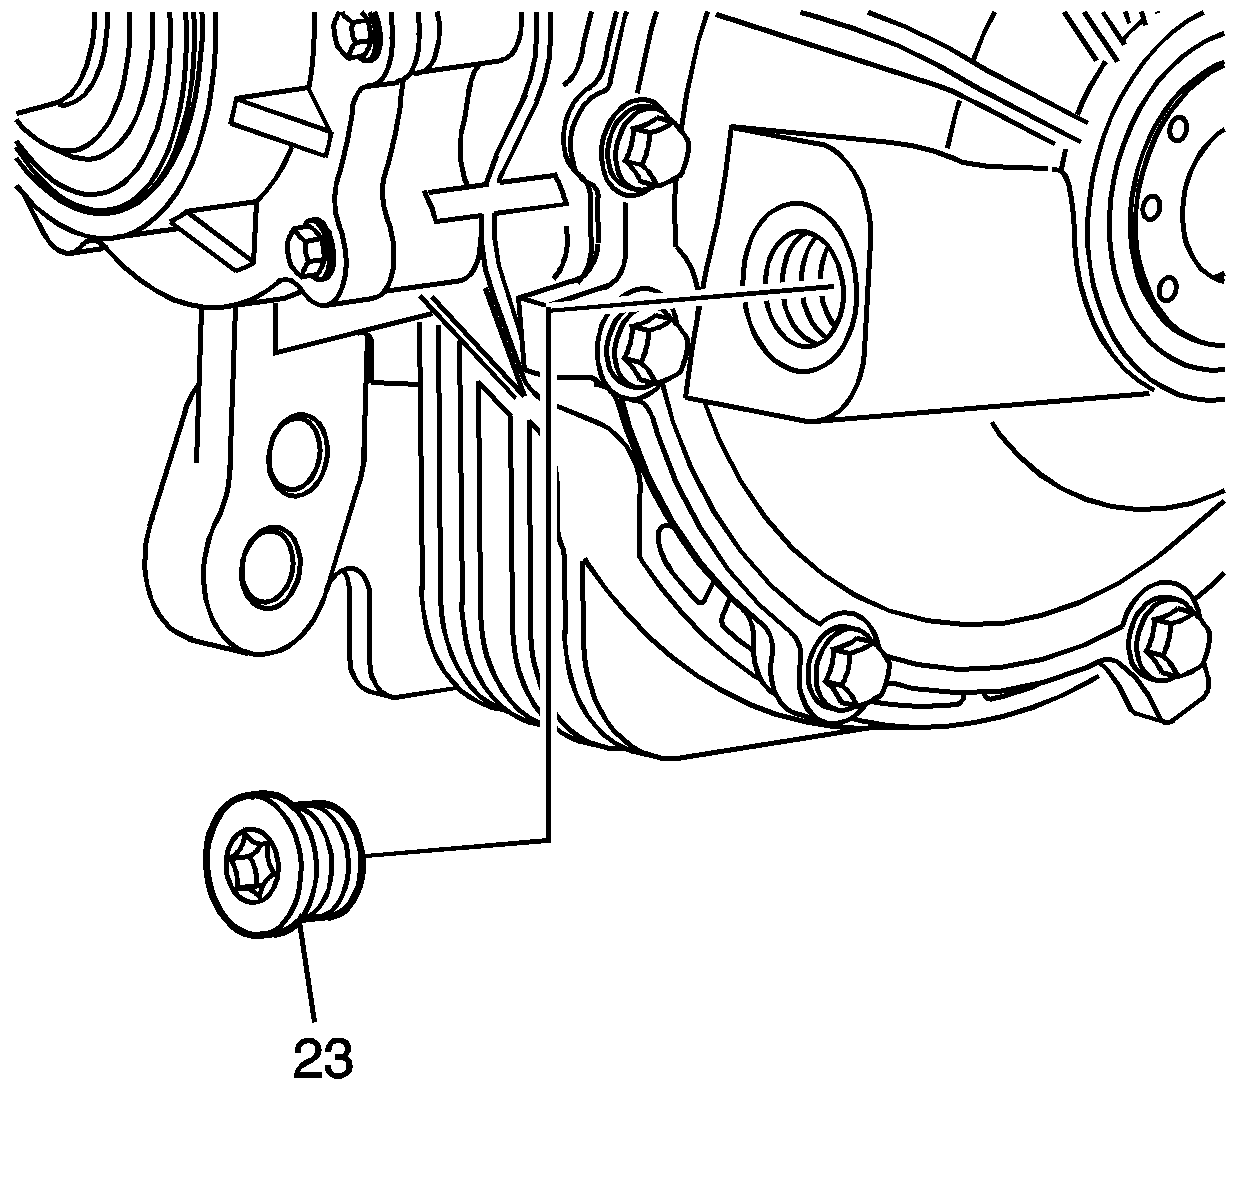
Tighten
Tighten the fill plug to 39 N·m (29 lb ft).
