For 1990-2009 cars only
Camshaft Position Sensor Replacement with Electronic Ignition
Removal Procedure
Important: Clean the area around the camshaft position (CMP) sensor before removal in order to prevent debris from entering the engine.
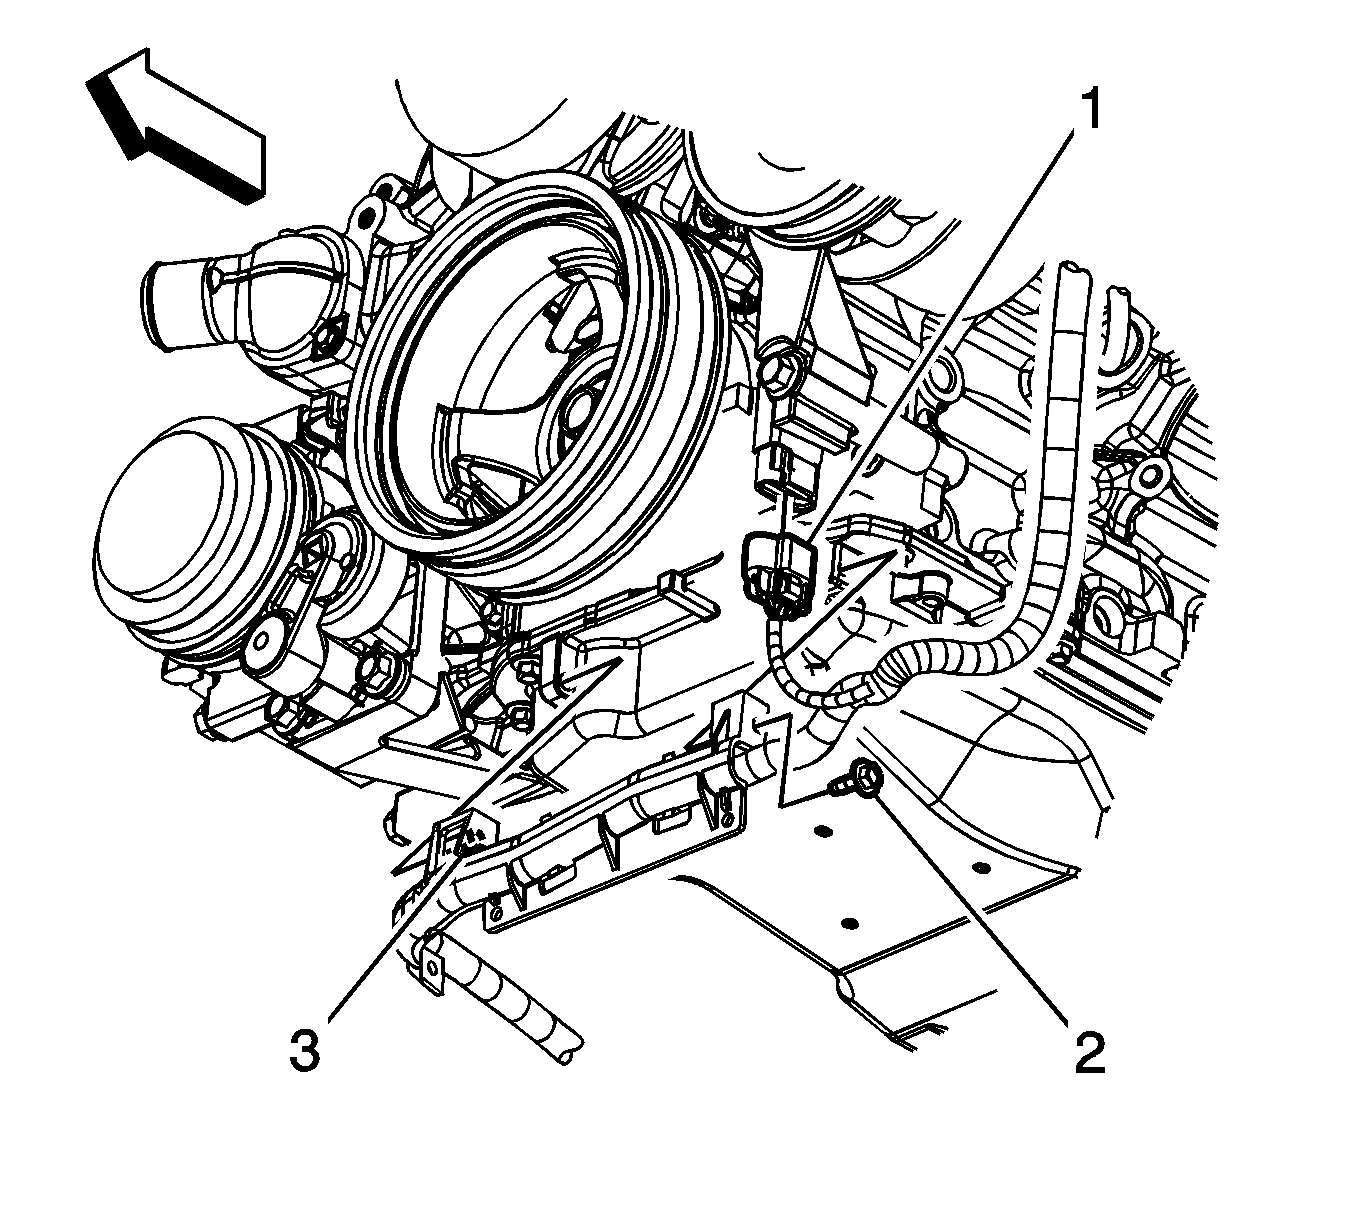
- Disconnect the engine wiring harness electrical connector (1) from the CMP sensor wire harness.
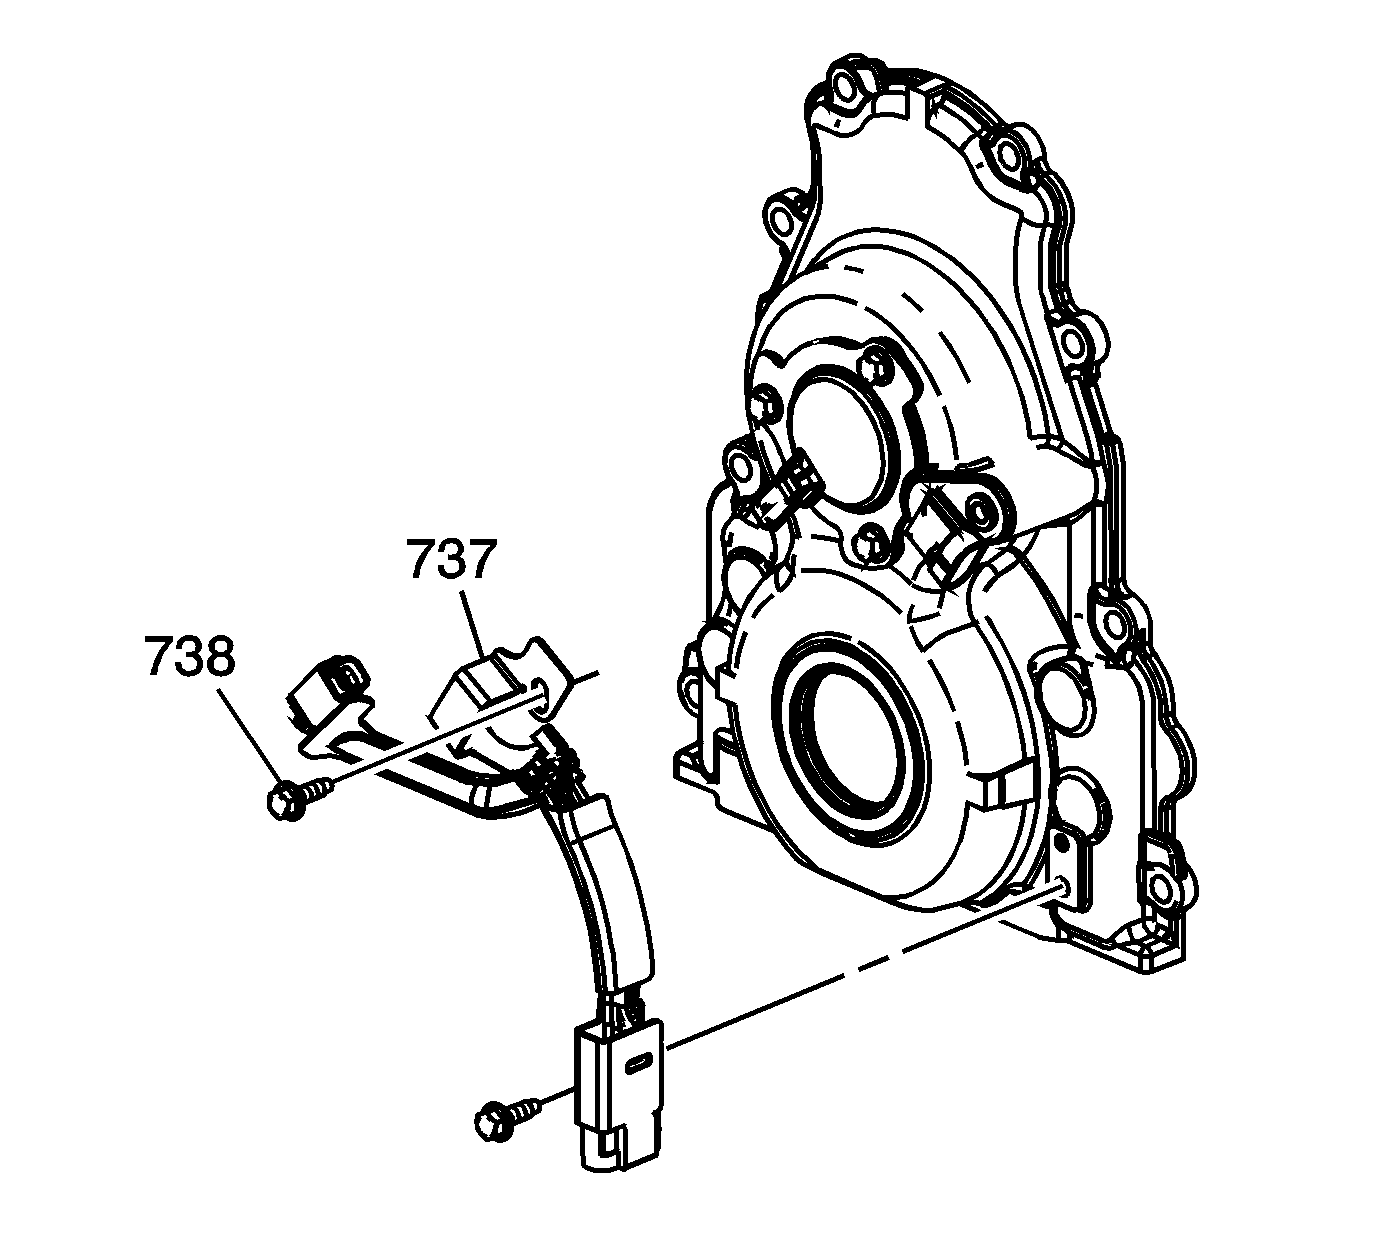
- Remove the 2 CMP sensor wire harness bolts (738).
- Loosen the top CMP sensor wire harness bolt using a box wrench through the harmonic balancer opening. Loosen the bolt 2 turns.
- Disconnect the CMP sensor wire harness electrical connectors from the CMP sensor and the CMP actuator magnet.
- Remove the CMP sensor wire harness (737).
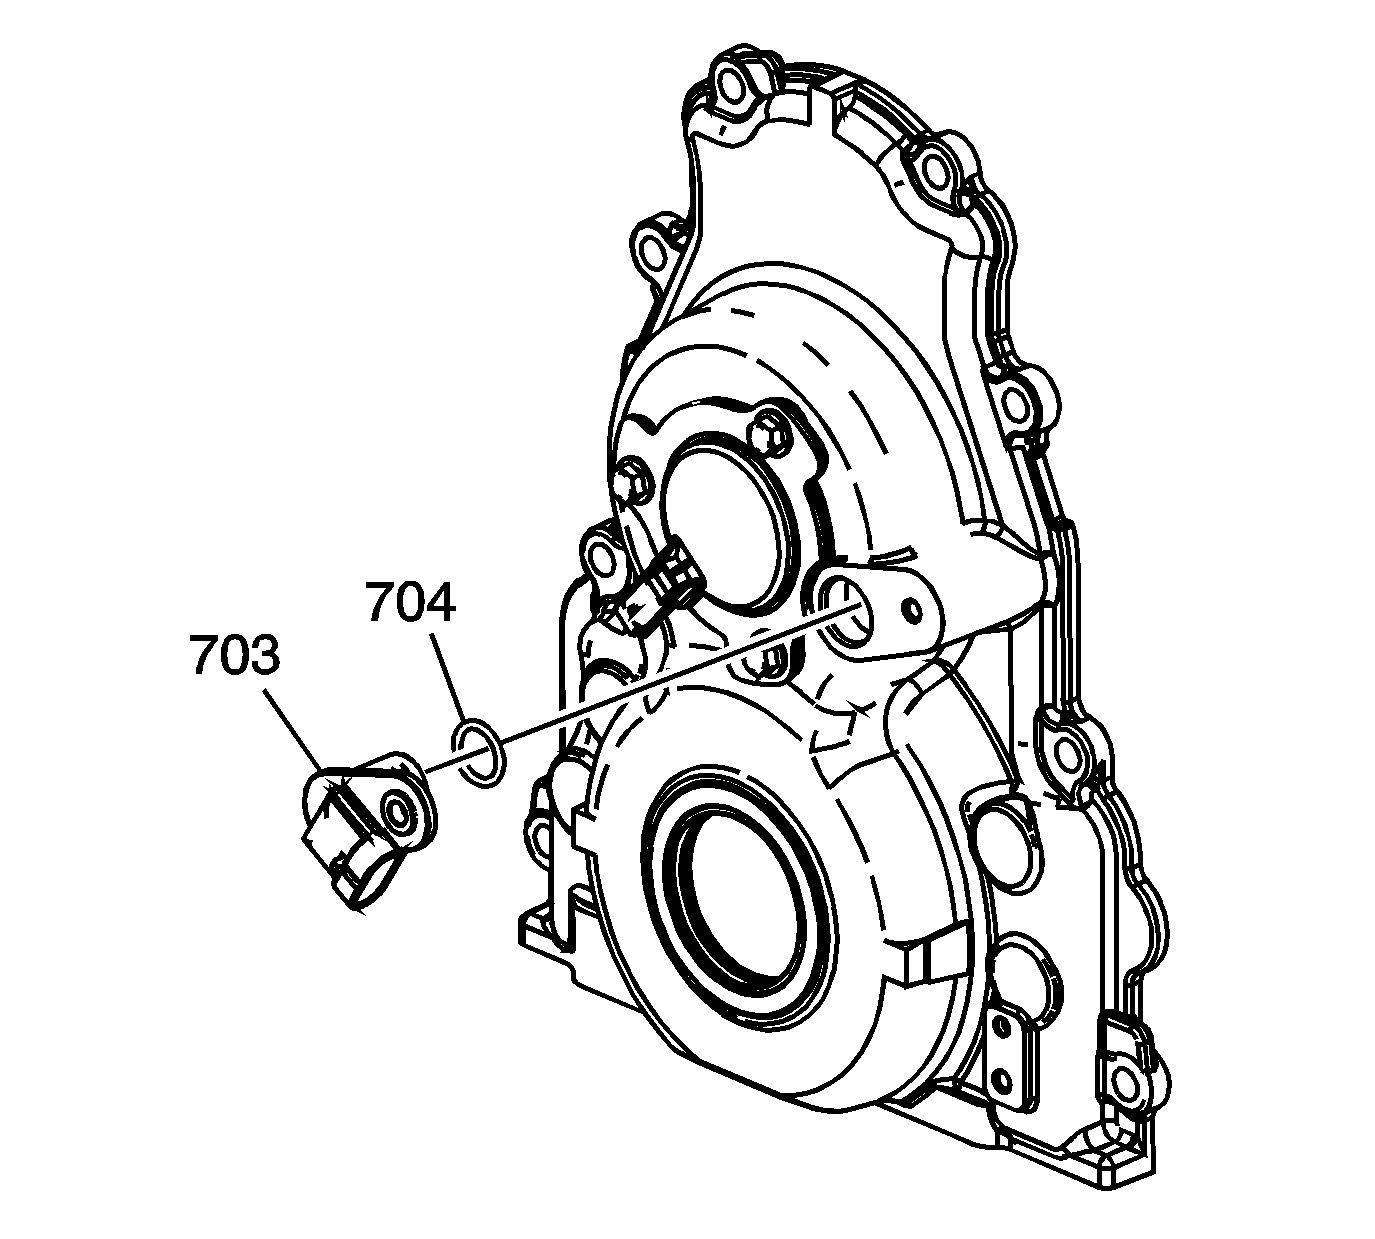
- Remove the CMP sensor (703) and O-ring seal (704).


Important: The crankshaft harmonic balancer has been removed for illustration purposes only. Do not remove the balancer.

Installation Procedure
- Inspect the CMP O-ring seal for cuts or damage. If the seal is not cut or damaged, it may be used again.
- Lubricate the O-ring seal with clean engine oil.
- Install the O-ring seal (704) onto the sensor.
- Instal the CMP sensor (703) to the front cover.
- Install the CMP sensor wire harness (737).
- Connect the CMP sensor wire harness electrical connectors to the CMP sensor and the CMP actuator magnet.
- Install the 2 CMP sensor wire harness bolts (738).
- Finger tighten the top CMP sensor wire harness bolt. Using a box wrench through an opening in the harmonic balancer, tighten the bolt an additional 1/4 turn (90 degrees).
- Connect the engine wiring harness electrical connector (1) to the CMP sensor wire harness.


Notice: Refer to Fastener Notice in the Preface section.
Tighten
Tighten the bolts to 12 N·m (106 lb in).

