Removal Procedure
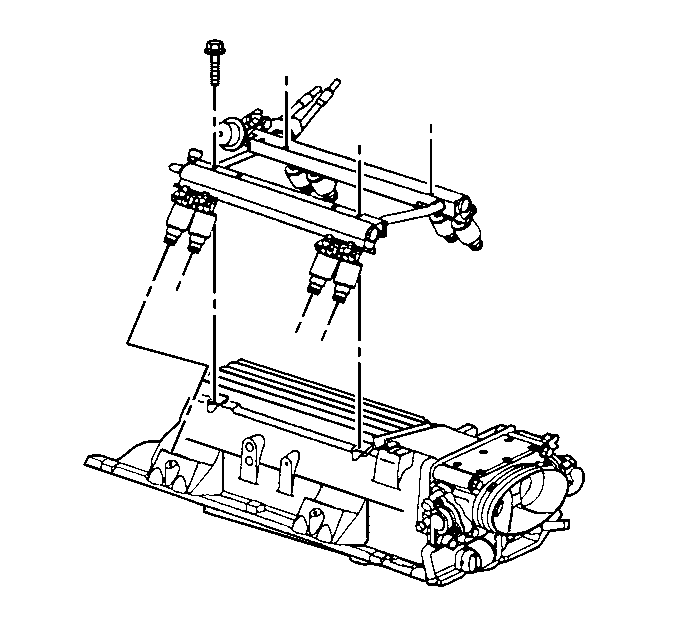
- Remove the fuel rail assembly. Refer to Fuel Injection Fuel Rail Assembly Replacement.
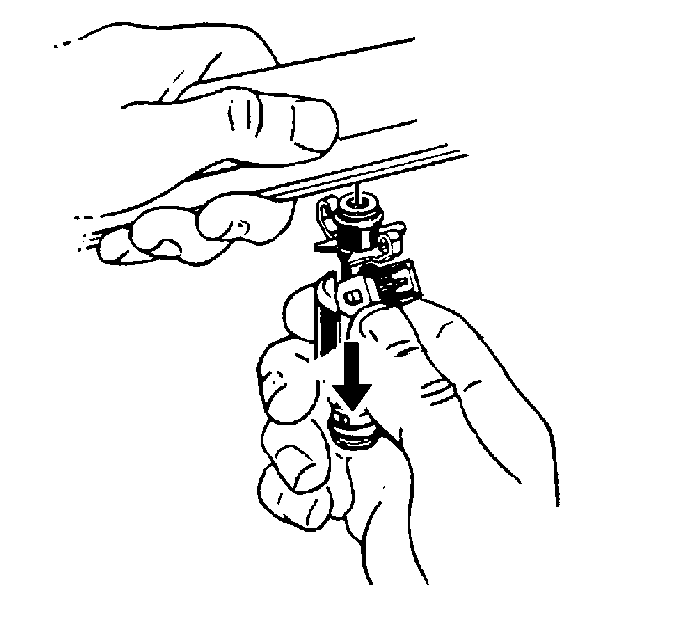
- Spread the injector retainer clip to release the injector from the fuel rail.
- Remove the fuel injector.
- Discard the injector retainer clip.
- Remove the injector O-ring seals from both ends of the injector. Discard the O-ring seals. Save the O-ring backup for use in reinstallation.
Important:
• Use care in removing the fuel injectors to prevent damage to the electrical connector pins on the injector and to prevent damage to the nozzle. Service the fuel injector as a complete assembly only. The fuel injector is an electrical component. Do
Not immerse the fuel injector in any type of cleaner. • The engine oil may be contaminated with fuel if the fuel injectors are leaking.
Installation Procedure

Important:
• When ordering new fuel injectors, be sure to order the correct injector for the application being serviced. • The fuel injector lower O-ring uses a nylon collar, called the O-ring backup, to properly position the O-ring on the injector. Always reinstall the O-ring backup, or the sealing O-ring may move on the injector when installing the fuel rail and result
in a possible vacuum leak.
The fuel injector assembly (1) is stamped with a part number identification (2) and a build date code (3). The build date code consists of the month (4) 1-9 (Jan-Sept) O, N, D, (Oct, Nov, Dec); day (5); and year (6).
- Lubricate the new injector O-ring seals with clean engine oil.
- Install the new injector O-ring seals on the injector.
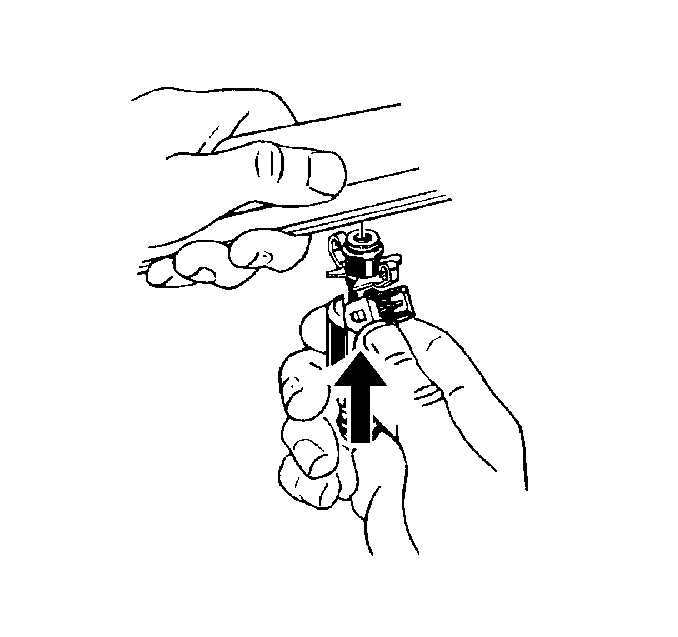
- Install a new retainer clip on the injector. Position the clip on the right side of the injector electrical connector.
- Push the fuel injector into the fuel rail injector socket with the electrical connector facing outward. The retainer clip locks on to a flange on the fuel rail.
- Install the fuel rail assembly. Refer to Fuel Injection Fuel Rail Assembly Replacement.
- Connect the negative battery cable.
- Inspect for leaks by performing the following:
| 7.1. | Ignition ON for 2 seconds. |
| 7.2. | Ignition OFF for 10 seconds. |
| 7.3. | Ignition ON, inspect for fuel leaks. |
