Tools Required
| • | J 7872 Magnetic Base Indicator Set |
Removal Procedure
- Remove the manual transaxle assembly from the vehicle. Refer to
Transaxle Assembly
in Manual Transmission.
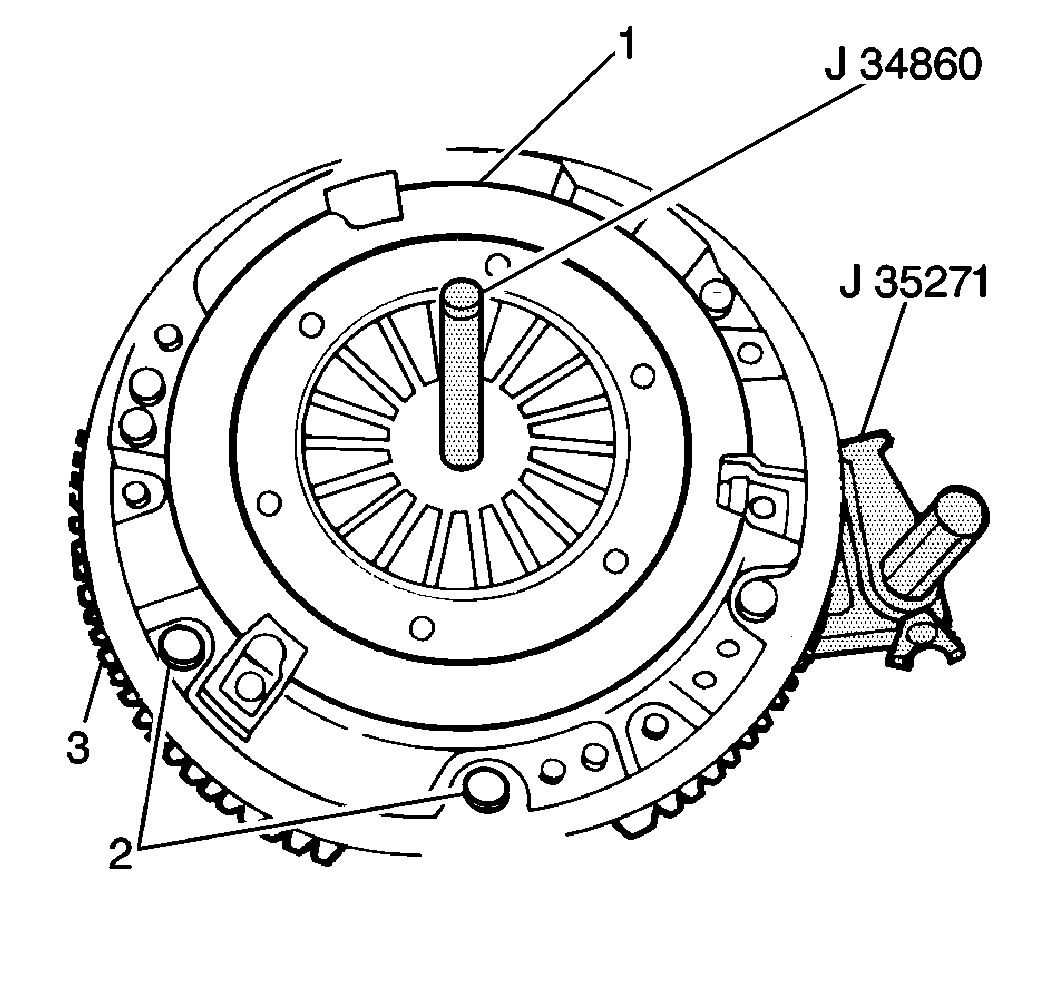
- Install J 35271
in order to hold the flywheel (3) stationary.
- Install J 34860
in order to support the clutch disc during removal.
- Slowly and evenly loosen the 6 cover bolts (2) from the clutch pressure plate until the clutch pressure plate spring tension is completely released.
- Remove the 6 clutch pressure plate cover bolts and remove the pressure plate from the flywheel.
Important: Do not use solvents, mineral spirits or other cleaning agents containing alcohol on the clutch disc (1). Solvents on the clutch disc causes slipping and premature clutch wear.
- Remove the clutch disc and J 34860
from the flywheel.
- Remove J 35271
from the flywheel.
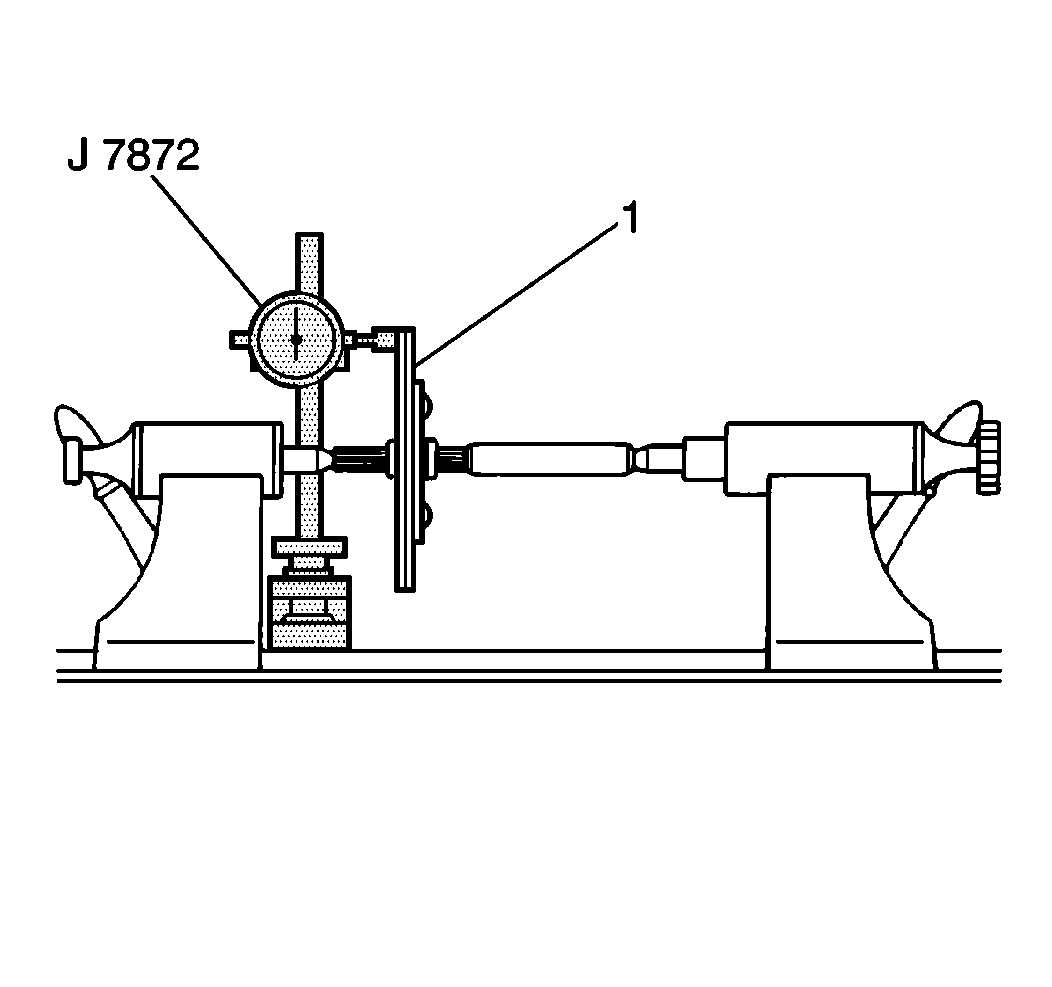
- Use J 7872
in order to measure the flywheel.
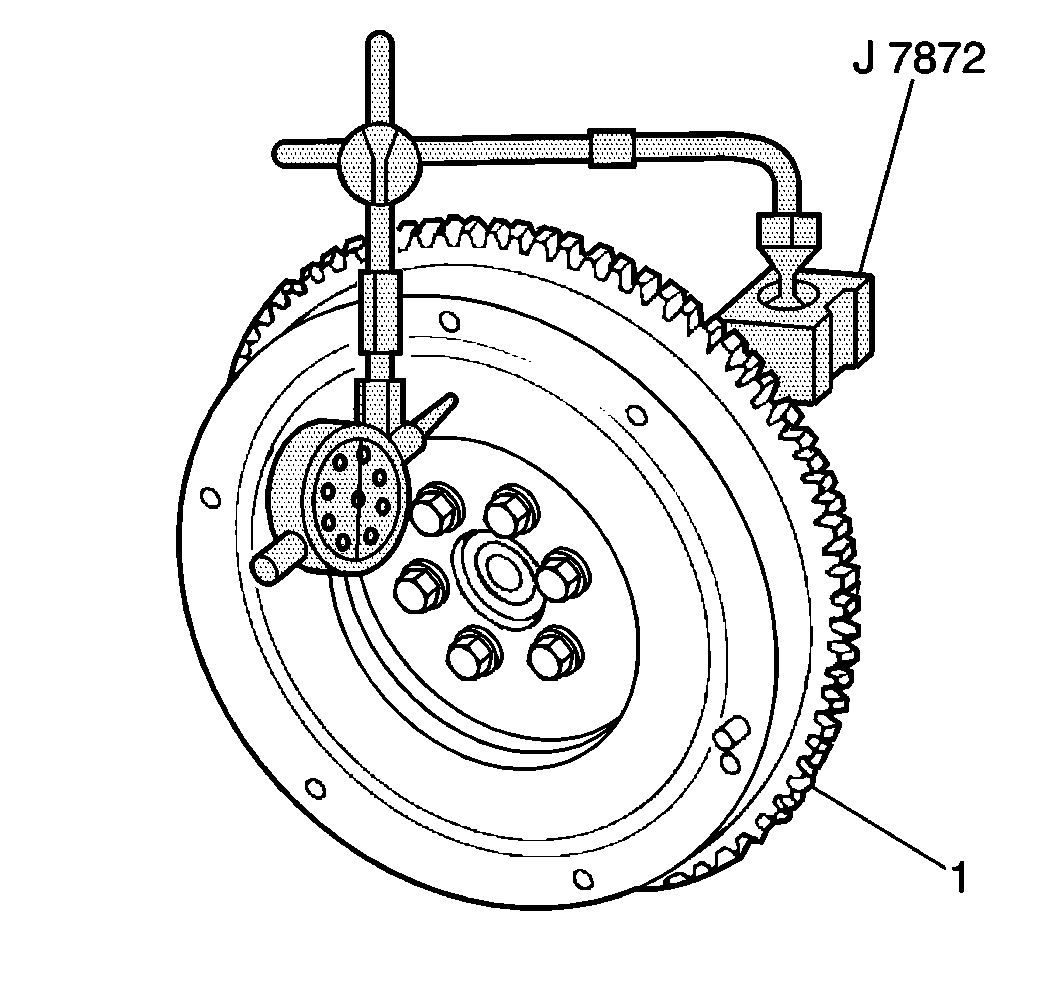
Important: Index the flywheel (1) in relation to the crankshaft with a china marker before removal in order to verify correct installation. Poor engine and/or transaxle balance results if the flywheel is installed in a position
other than the position from which the flywheel was removed.
- Use J 7872
in order to measure the flywheel for runout by slowly turning the flywheel (1) using a flywheel wrench. Resurface or replace the flywheel if the flywheel runout exceeds 0.1 mm (0.004 in).
- If the flywheel needs resurfacing, remove the flywheel bolts and the flywheel from the crankshaft. Observe the flywheel position on the crankshaft.
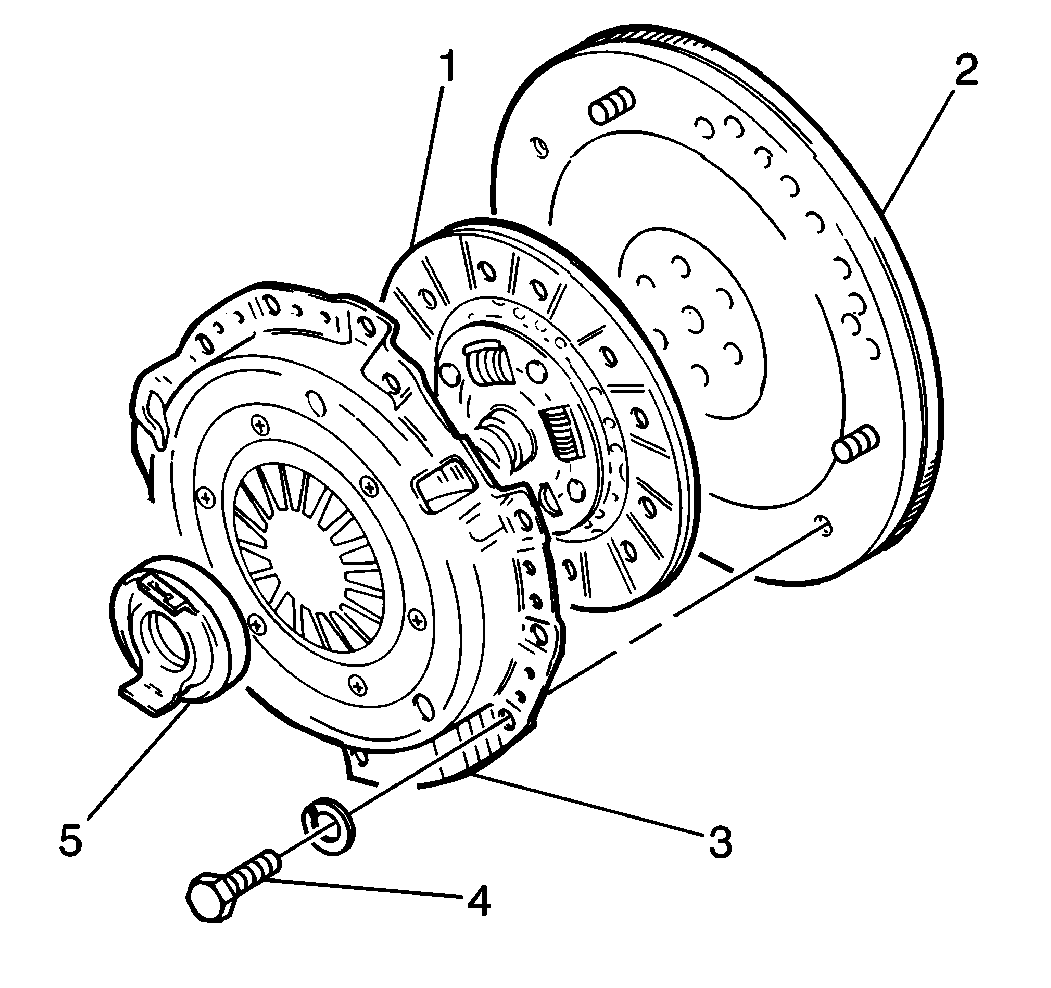
- Clean the flywheel (2) and the clutch pressure plate-to-clutch disc (1,3) mating surfaces of oil, grease, and metallic particles.
- Clean the clutch disc (1) using a clean dry cloth.
- Inspect the flywheel (2) and the clutch pressure plate (3) for the following conditions:
| • | Bent or broken pressure plate spring levers |
| • | Weak or damaged diaphragm spring |
Notice: If any of the following conditions exist, do not attempt to disassemble
or repair the clutch pressure plate. If the flywheel or the clutch pressure
plate appears excessively worn, replace the flywheel and/or clutch pressure
plate as necessary.
- Inspect the clutch pilot bearing for smooth rotation. Replace the clutch pilot bearing if the clutch pilot bearing does not spin freely. Refer to
Clutch Pilot Bearing Replacement
.
- Inspect the clutch disc for the following conditions:
| • | Damaged or weak torsional springs |
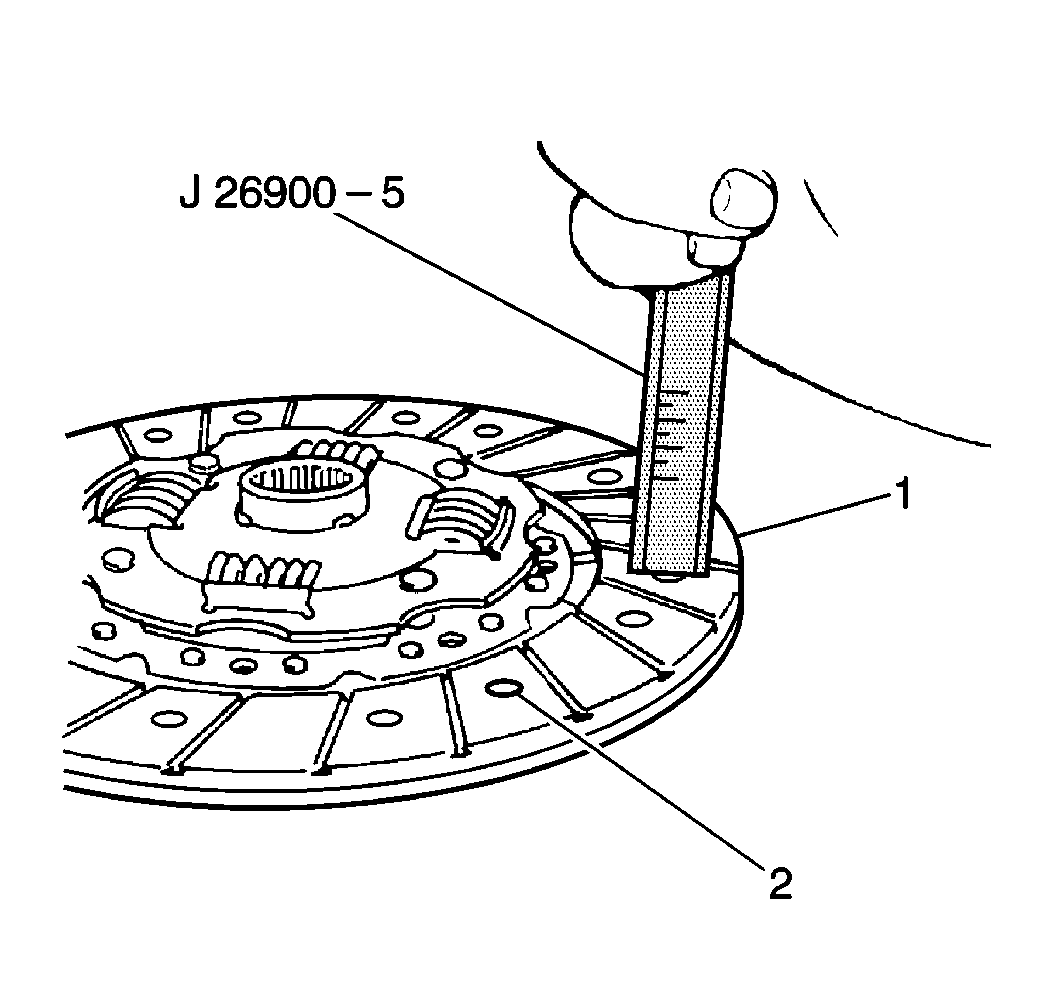
- Use J 26900-5
in order to measure the clutch disc (1) wear. Measure the depth of each rivet head depression (2).
Measurement
| • | 1.2 mm (0.05 in) for the 1.0 liter engine |
| • | 1.5 mm (0.06 in) for the 1.3 liter engine |
- Replace the clutch disc if the clutch rivet depth is less than 0.5 mm (0.02 in).
- Use J 7872
in order to measure the clutch disc (1) for runout. Place the clutch disc between two horizontal arbors. Slowly turn the clutch disc while measuring runout. Replace the
clutch disc if the clutch disc runout exceeds 0.8 mm (0.031 in).
Installation Procedure
Notice: Use the correct fastener in the correct location. Replacement fasteners
must be the correct part number for that application. Fasteners requiring
replacement or fasteners requiring the use of thread locking compound or sealant
are identified in the service procedure. Do not use paints, lubricants, or
corrosion inhibitors on fasteners or fastener joint surfaces unless specified.
These coatings affect fastener torque and joint clamping force and may damage
the fastener. Use the correct tightening sequence and specifications when
installing fasteners in order to avoid damage to parts and systems.
- If you removed the flywheel for resurfacing or replacement, install the flywheel (1) to the crankshaft in the same position (3) that the flywheel is removed. Secure the flywheel with the six flywheel bolts (2).
Tighten
| • | For the 1.0 liter engine, tighten the flywheel bolts to 61 N·m (45 lb ft). |
| • | For the 1.3 liter engine, tighten the flywheel bolts to 78 N·m (57 lb ft). |
- Use J 35271
in order to hold the flywheel stationary.
- Install the clutch disc to the flywheel with the torsion springs offset toward the transaxle. Use J 34860
in order to center the clutch disk and hold the clutch disc in place on the flywheel.
- Install the clutch pressure plate to the flywheel. Secure the flywheel with 6 clutch pressure plate cover bolts.
Tighten
Tighten the clutch pressure plate cover bolts to 23 N·m (17 lb ft).
- Remove the J 35271
and the J 34860
.
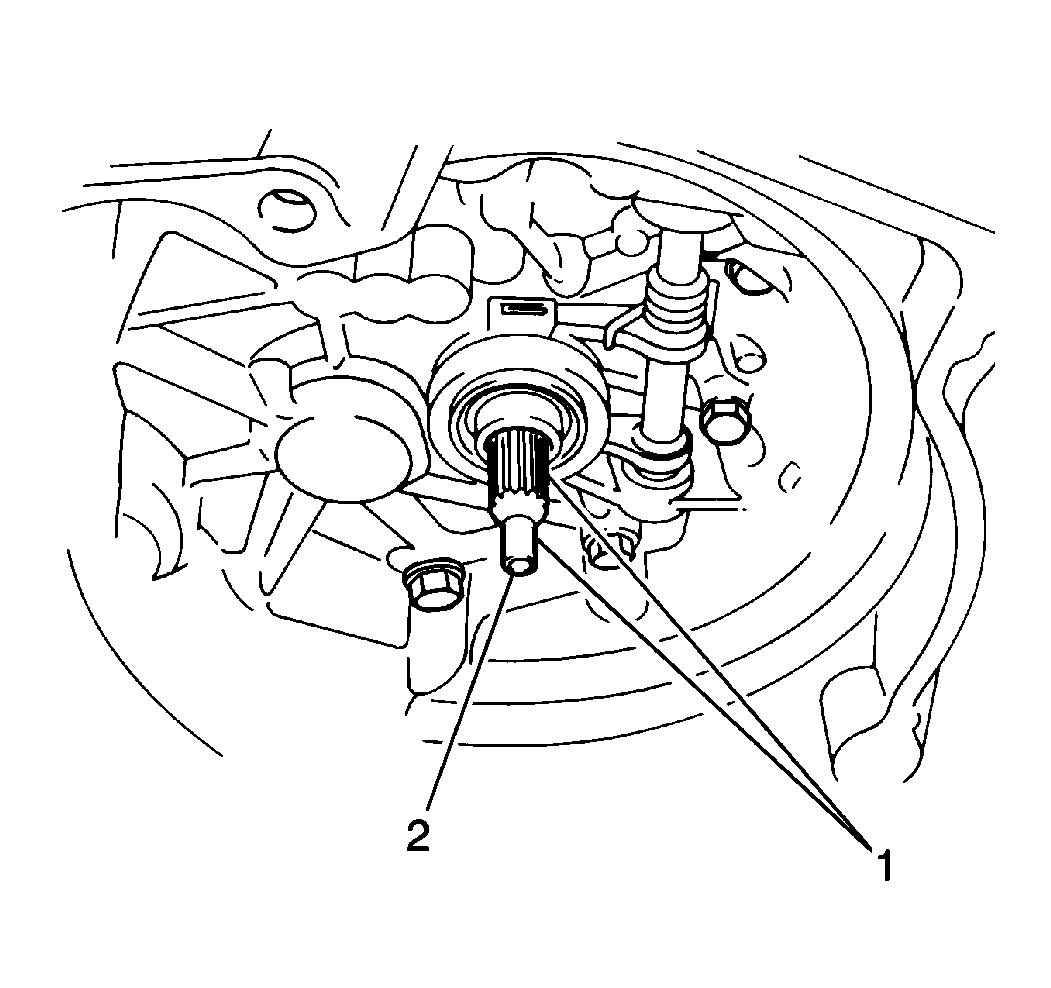
- Lubricate the transaxle input shaft (2) splines and the clutch release bearing with a thin coat of wheel bearing grease GM P/N 1051344 or the equivalent.
- Lubricate the clutch pilot bearing (1) with a thin coat of the wheel bearing grease GM P/N 1051344 or the equivalent.
- Install the manual transaxle assembly into the vehicle. Refer to
Transaxle Assembly
in Manual Transmission.
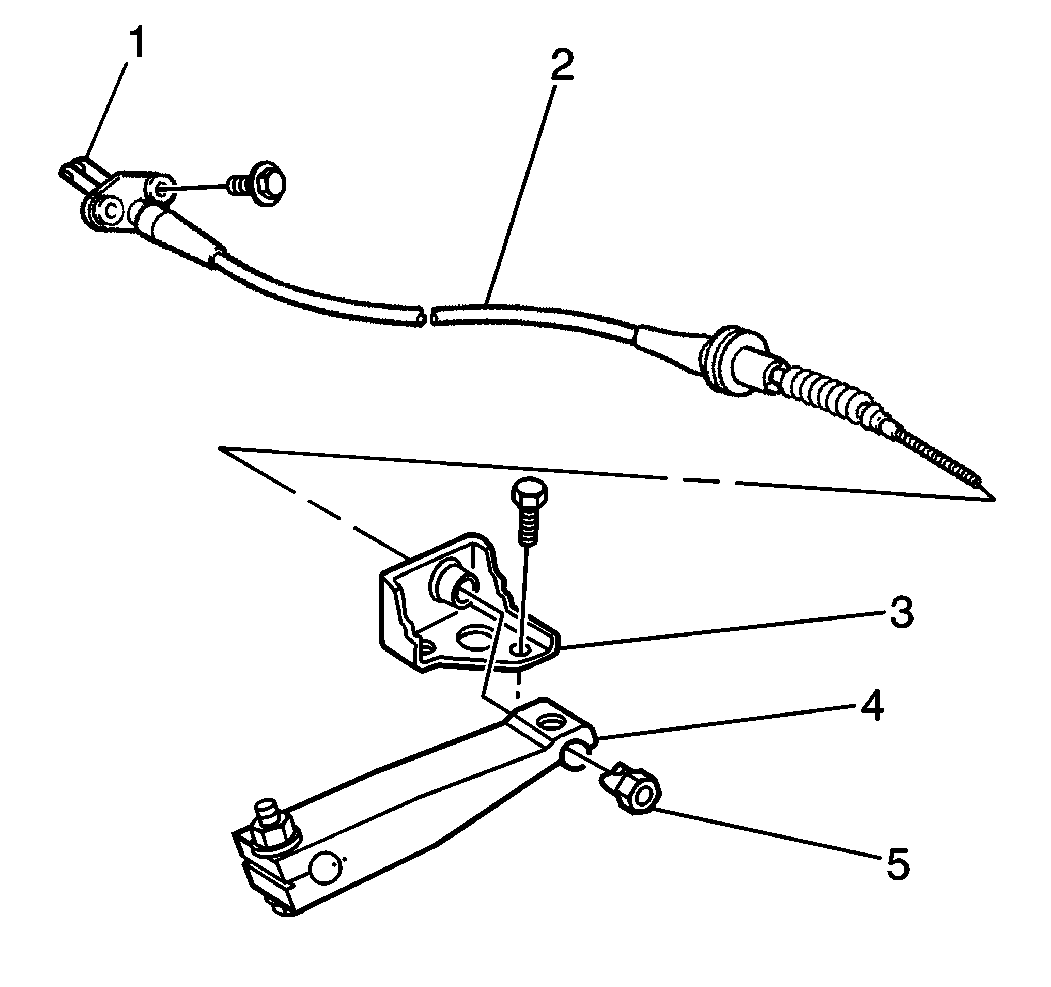
- Adjust the clutch pedal free travel. Tighten or loosen the clutch cable adjustment nut (5) until the clutch pedal free travel is within specifications. Refer to
Clutch Pedal Free Travel Adjustment
.
