For 1990-2009 cars only
Tools Required
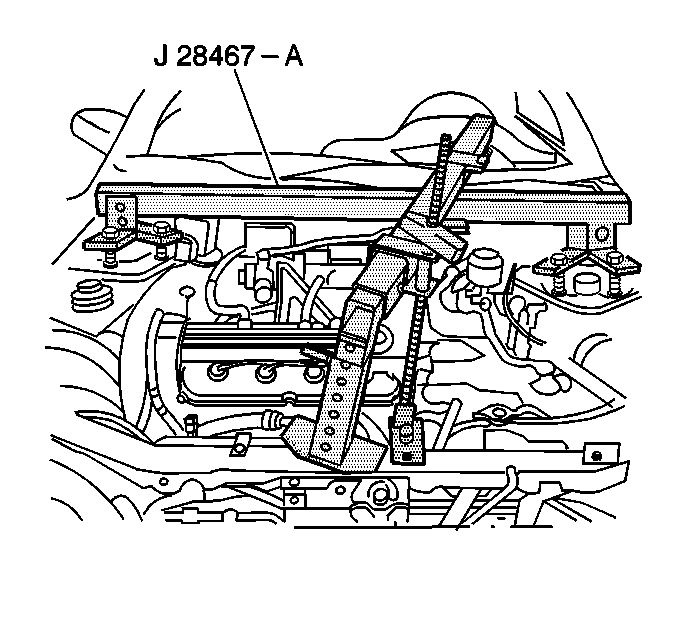
| • | J 28467-A Universal Support Fixture |
| • | J 28467-90 Engine Support Fixture Adapters |
| • | J 28712 Drive Axle Shaft Boot Protectors |
- Disconnect the negative battery cable.
- Disconnect the backup lamp switch electrical connector.
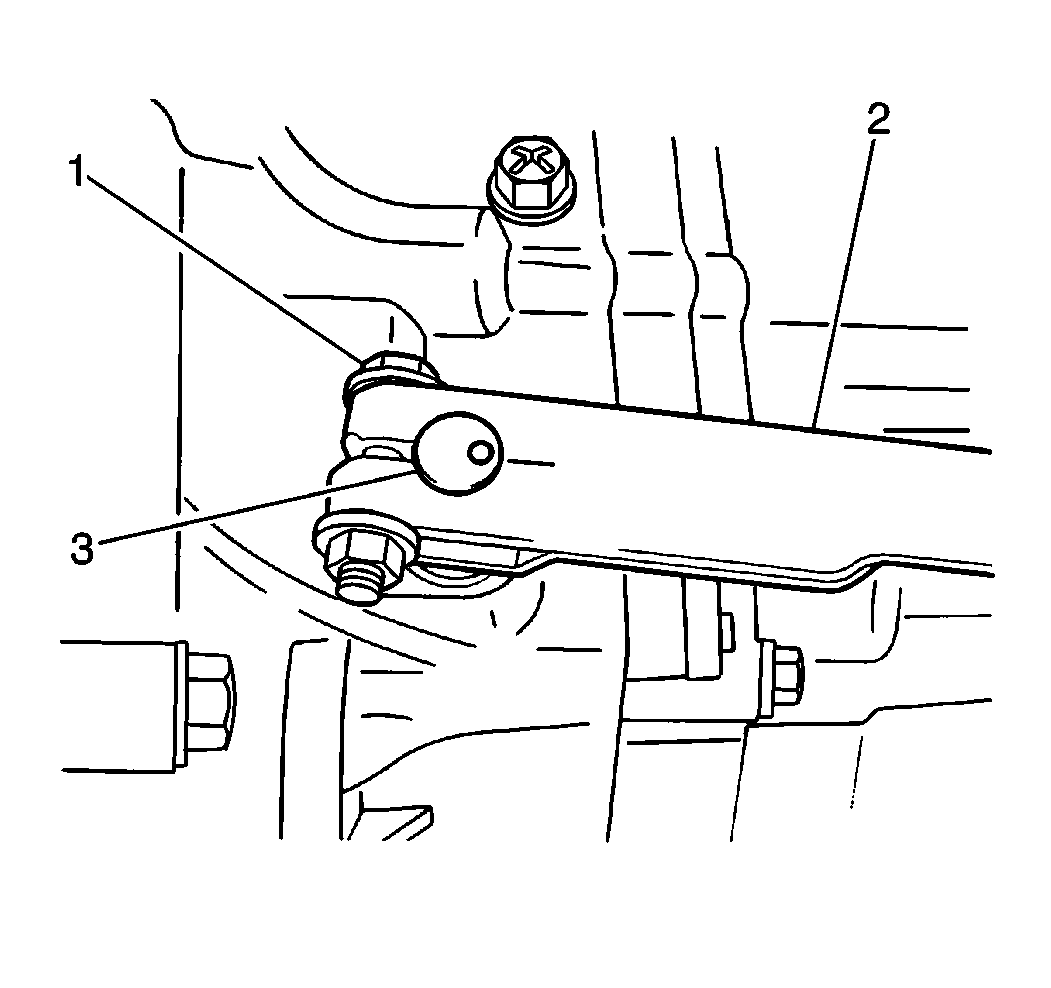
- Loosen the clutch release lever bolt and nut (1).
- Remove the clutch release lever (2) from the clutch release shaft (3).
- Remove the 2 clutch cable bracket bolts (1) from the clutch cable bracket (2).
- Remove the following components from the transaxle:
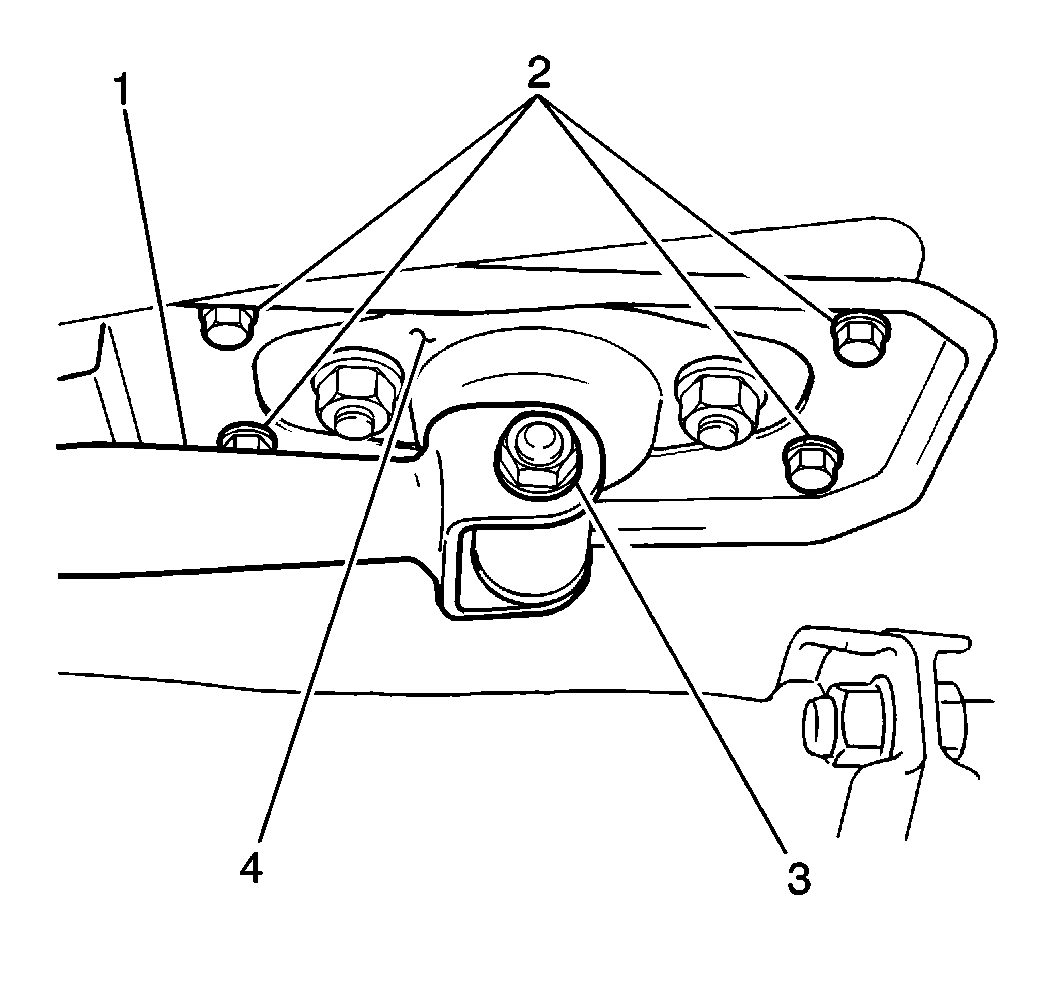
- Remove 2 bolts (2) from the gearshift guide case (1).
- Remove the harness from the bracket.
- Remove the following components from the speedometer driven gear case:
- Use the J 28467-A with the J 28467-90 in order to support the engine.
- Raise and suitably support the vehicle. Refer to Lifting and Jacking the Vehicle in General Information.
- Place a drain pan, or other suitable container, under the transaxle.
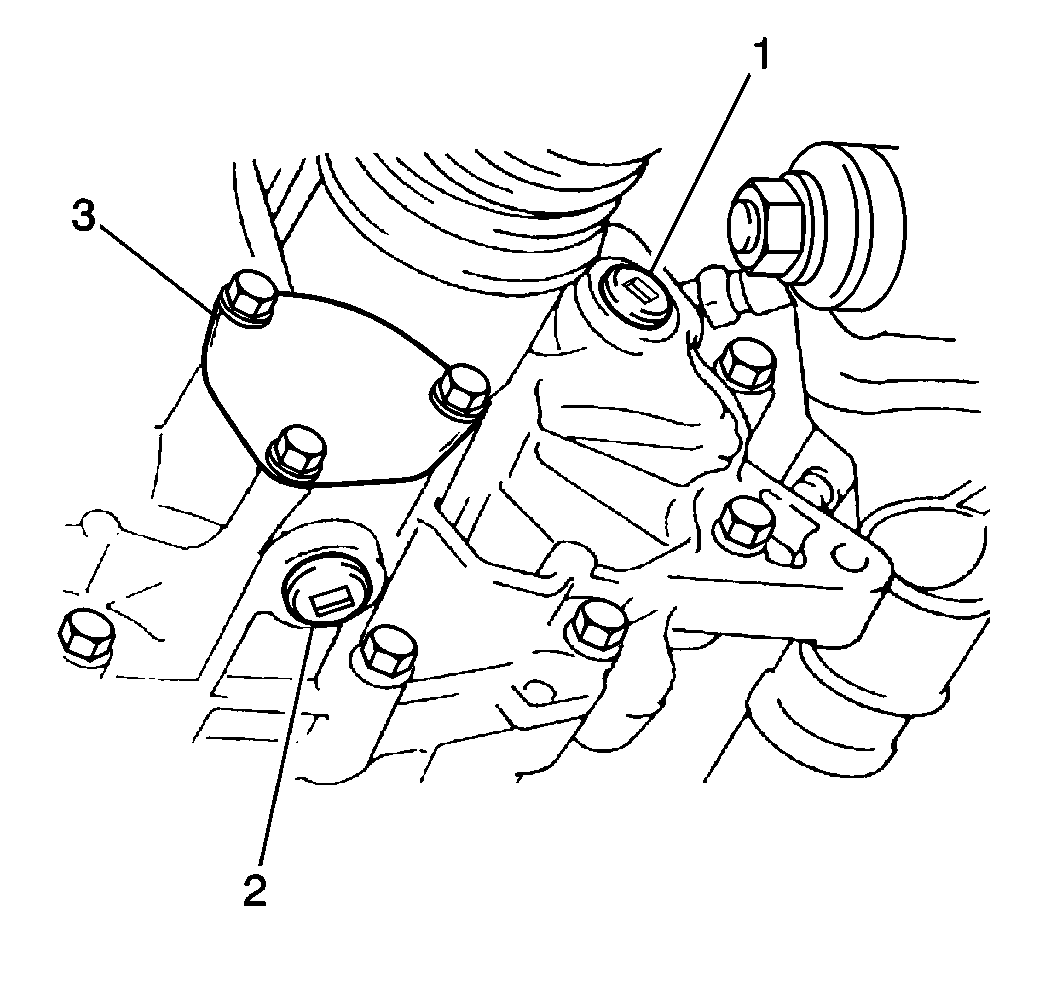
- Remove the transaxle oil level/filler plug (1) from the transaxle.
- Use a 10-mm hex head socket or wrench in order to remove the transaxle drain plug (2).
- Drain the transaxle oil.
- Remove the drain pan from under the transaxle.
- Support the transaxle with a suitable hydraulic jack.
- Install J 28712 on the differential-side joints and on the wheel-side joints of both drive axles.
- Remove both drive axles. Refer to Wheel Drive Shaft Replacement in Driveline/Axle.
- Remove the 2 flywheel cover bolts from the transaxle.
- Remove the flywheel cover.
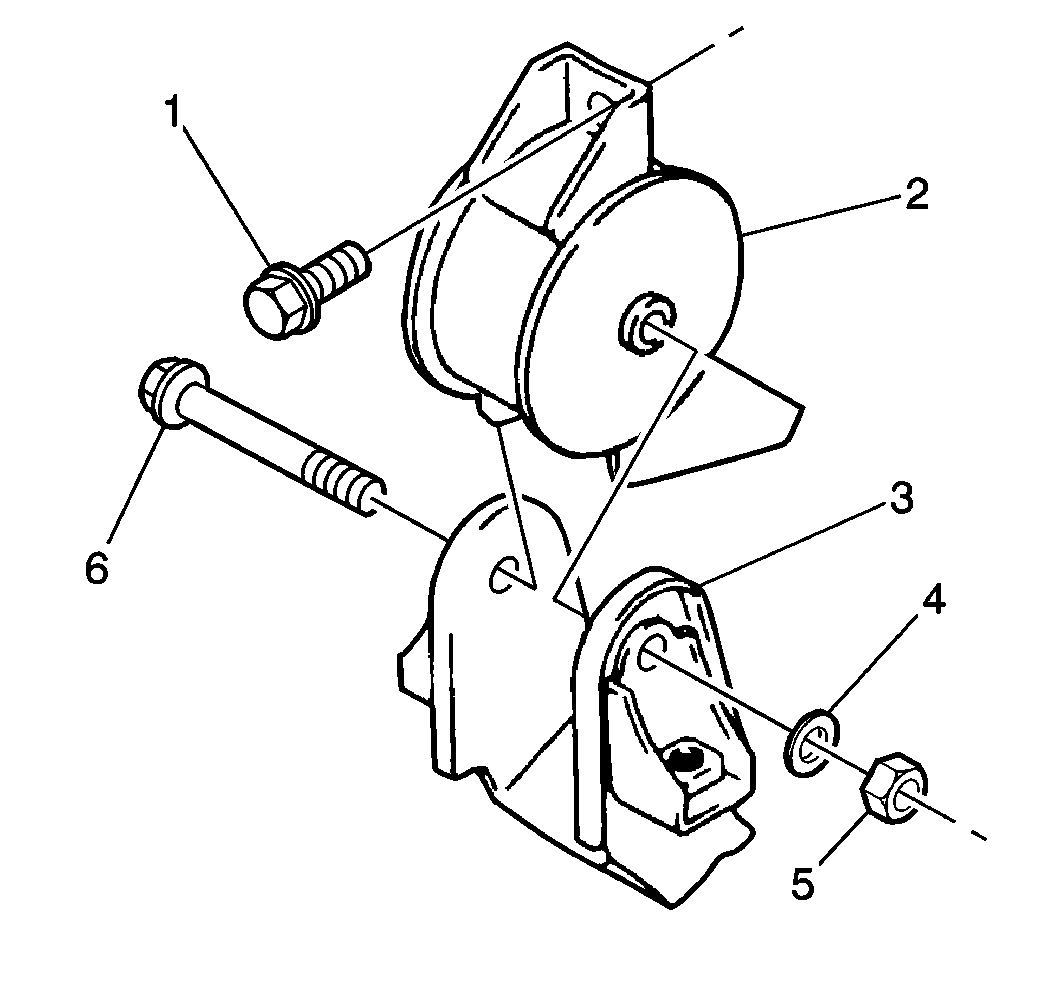
- Remove the control joint shaft through-bolt and nut (4) at the transaxle gear shift shaft (5).
- Separate the following components from the transaxle:
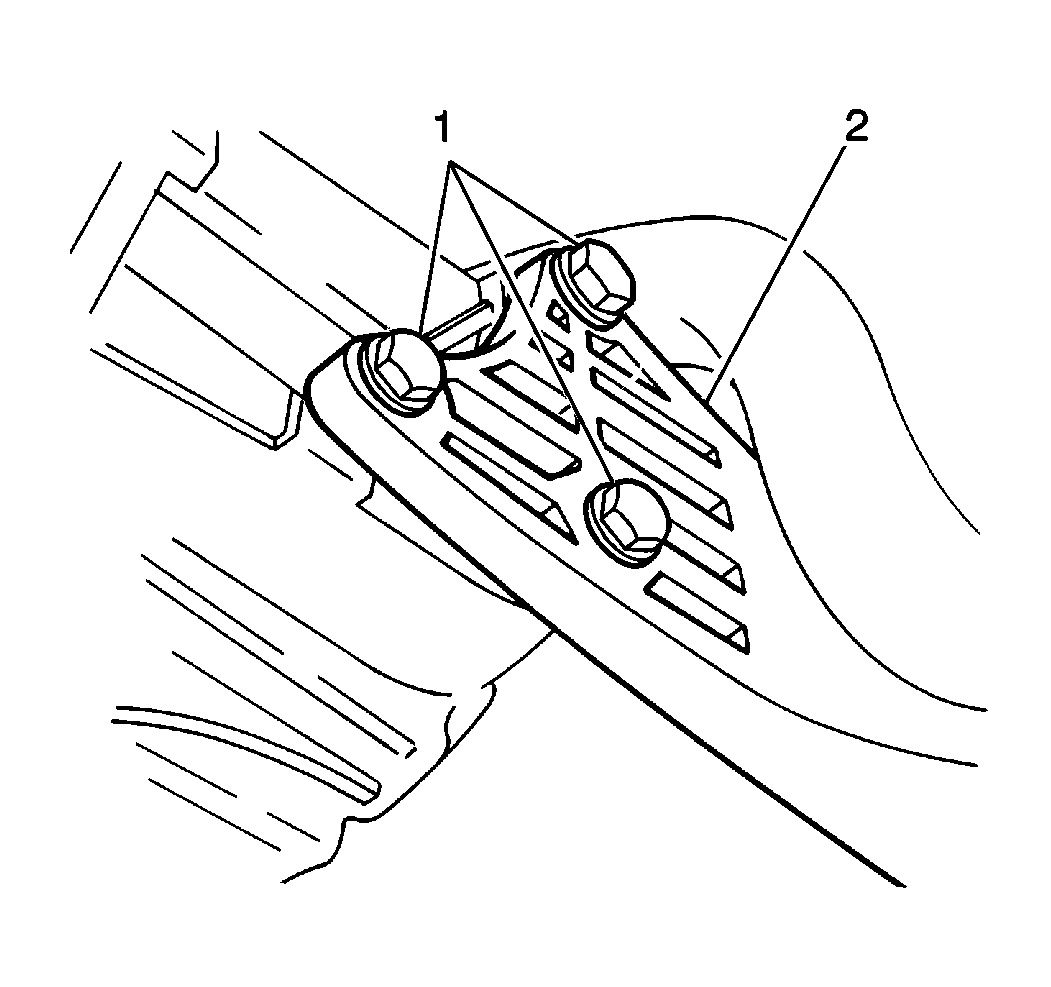
- Remove the 4 gearshift control lever guide plate bolts (2) and separate the extension rod (1) from the gearshift control lever guide plate (4).
- Remove 1 nut and 2 washers at the extension rod mounting stud (3).
- Separate the extension rod from the transaxle.
- Remove the rear transaxle mount through-bolt (6) and the nut (5) from the rear transaxle mount (2).
- Remove the coolant pipe from the side cover and position aside if (1.3 liter).
- Remove the 3 bolts (1) from the left transaxle mounting bracket (2).
- Remove the 2 lower right case-to-engine block mounting nut and stud.
- Carefully move the transaxle away from the engine toward the left side of the engine compartment until the input shaft is clear of the clutch pressure plate cover.
- Inspect carefully for obstructions, then slowly lower the transaxle jack. Remove the transaxle from the engine.
Caution: Unless directed otherwise, the ignition and start switch must be in the OFF or LOCK position, and all electrical loads must be OFF before servicing any electrical component. Disconnect the negative battery cable to prevent an electrical spark should a tool or equipment come in contact with an exposed electrical terminal. Failure to follow these precautions may result in personal injury and/or damage to the vehicle or its components.
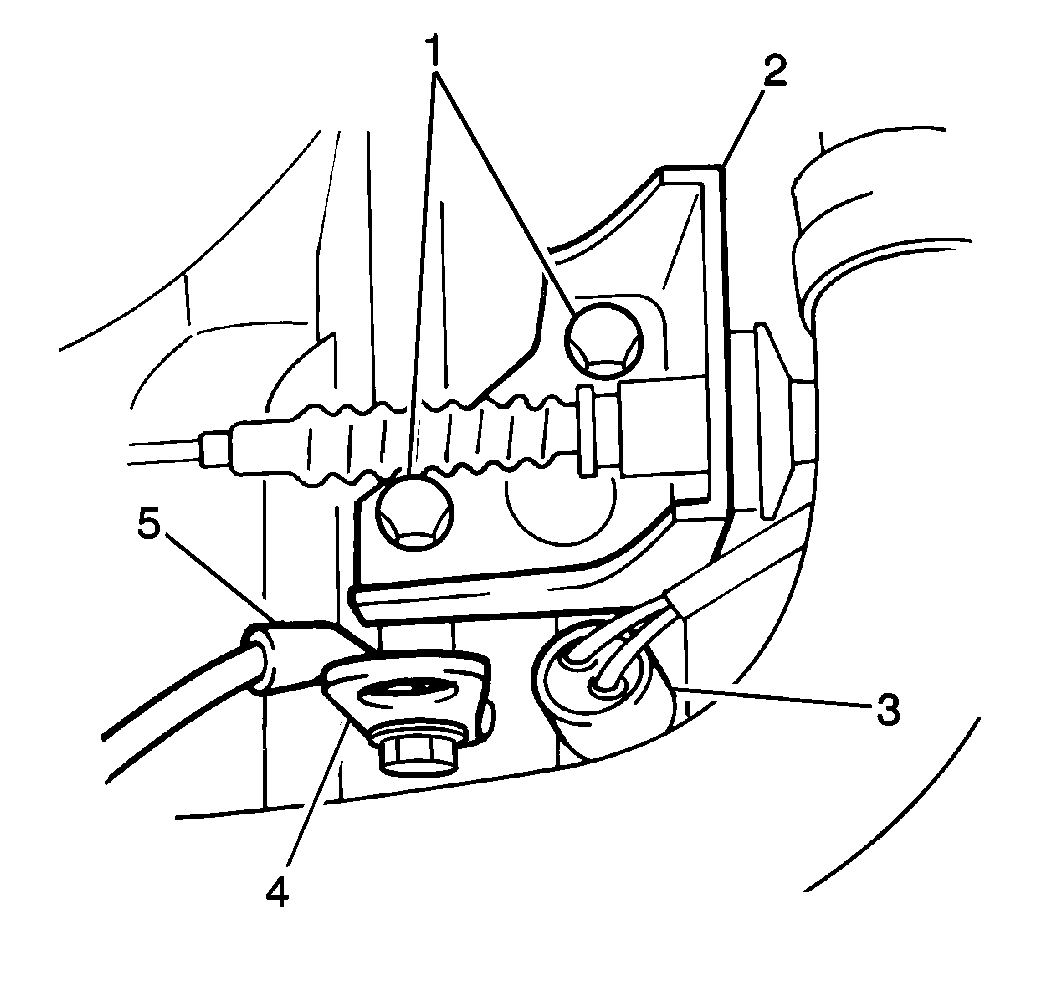
Set aside the clutch cable and the clutch cable bracket.
| • | The transaxle hanger bolt |
| • | The transaxle hanger (4) |
| • | The negative battery cable (5) |
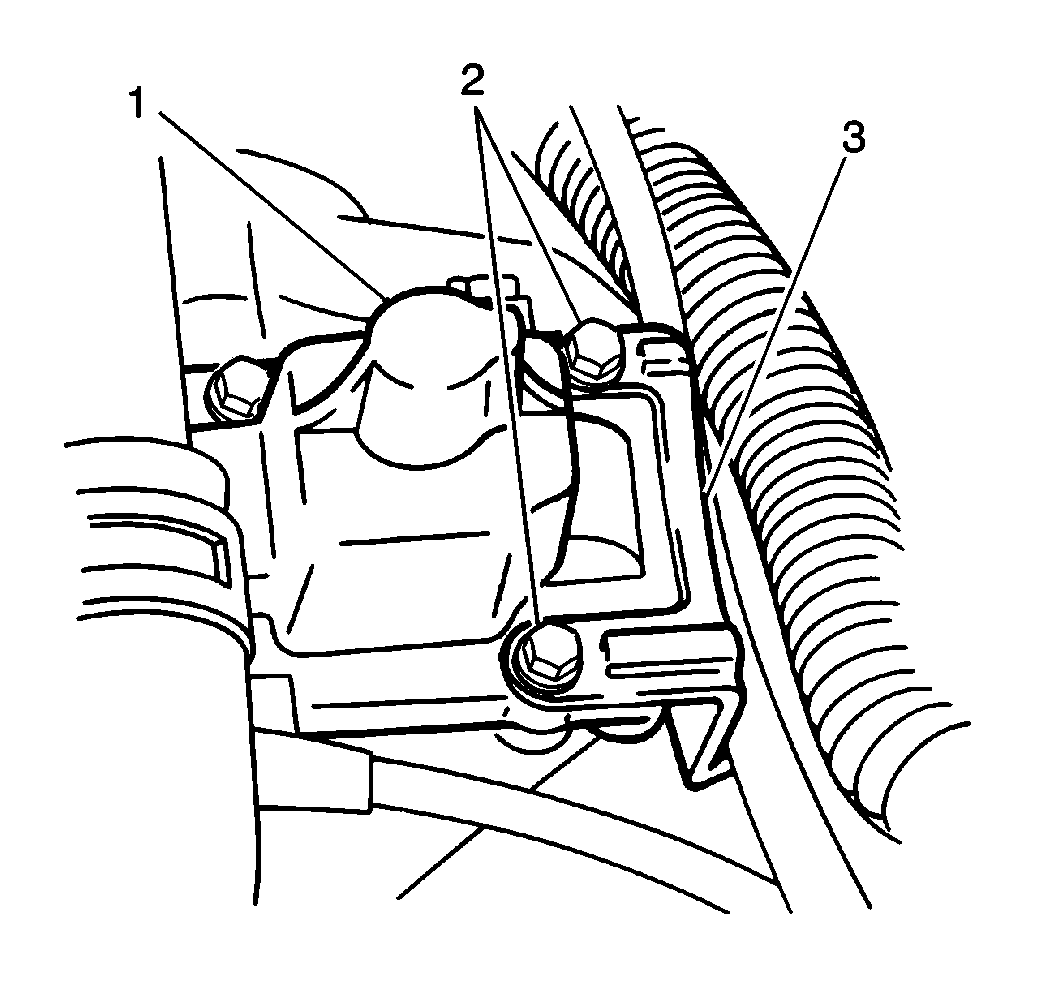
Set aside the engine wiring harness and the engine wiring harness bracket (3).
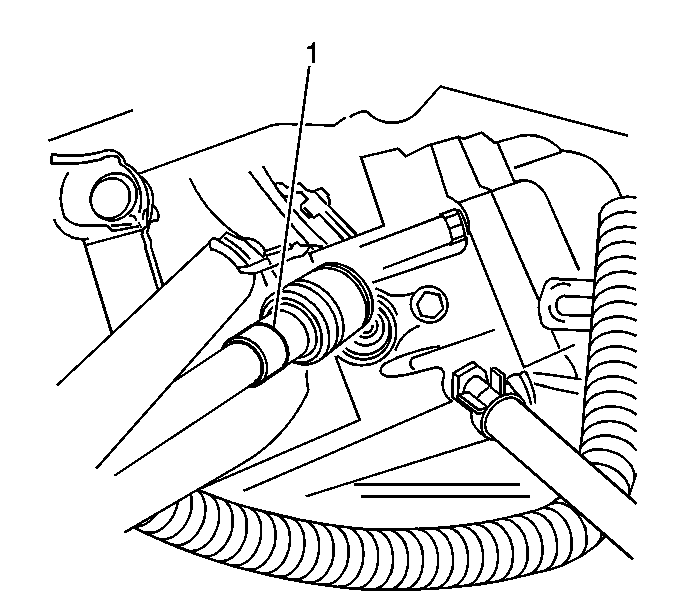
| • | The speedometer cable retaining clip |
| • | The speedometer cable (1). |
| • | Disconnect the starter motor electrical connections from the starter motor. Refer to Starter Motor Replacement in Engine Electrical. |
| • | Disconnect the 2 starter motor retaining bolts. |
| • | Remove the starter motor from the transaxle. |
| • | Remove the 2 upper right case-to-engine block mounting bolts (1). |
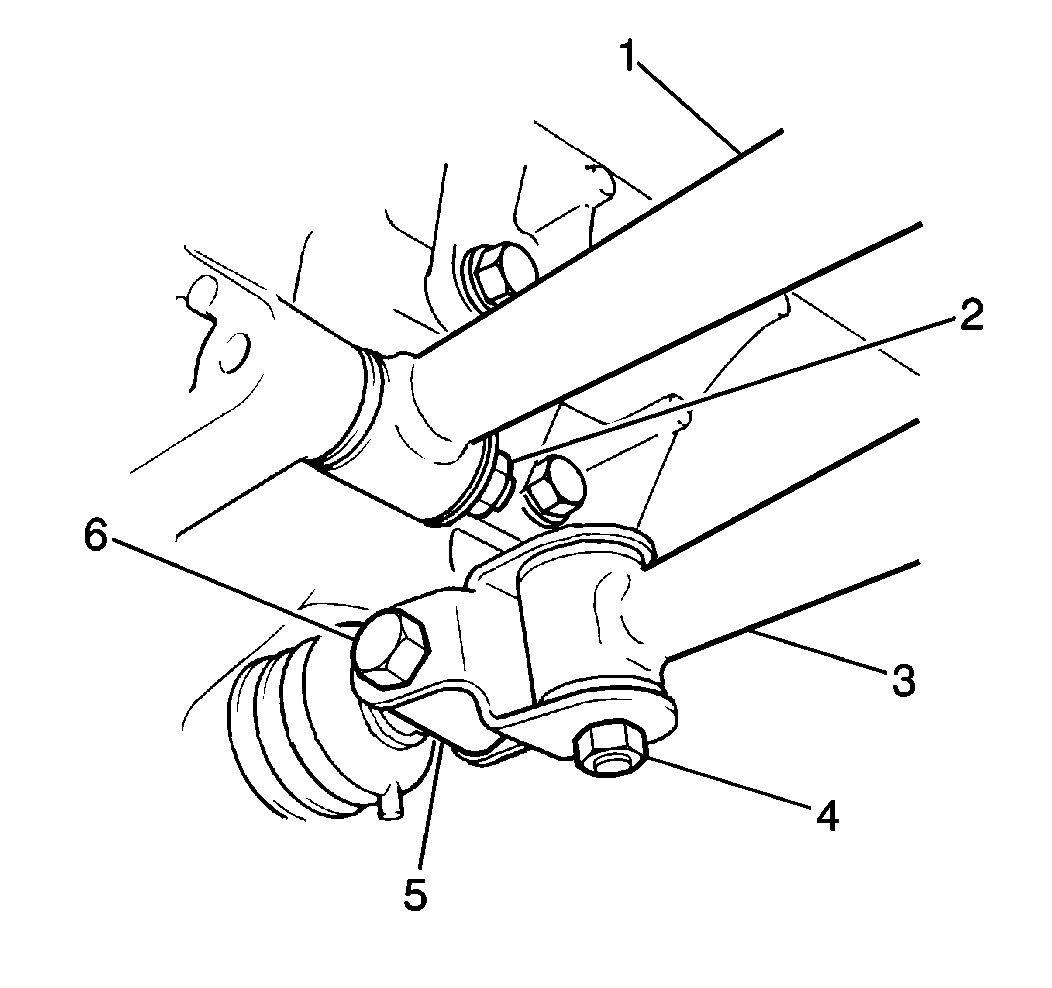
| • | The gearshift control joint (3) |
| • | The gearshift control shaft (6) |
