POOR COLD DRIVEABILITY BELOW ZERO DEGREES

Model and Year 1985 SPECTRUM WITH AUTOMATIC TRANSMISSION
TO: ALL CHEVROLET DEALERS
At temperatures below 0 DEG F (-18 DEG C), some 1985 Spectrums with automatic transmissions may experience delayed transmission engagement times, weak performance on driveaways and unstable idle speeds until normal operating temperatures are attained. New parts for the transmission and carburetor went into production in February and are now available for service.
Delayed transmission engagement times and weak performance on driveaways can be repaired with a new oil pan and strainer with greater capacity and a new vacuum diaphragm. On vehicles built before breakpoint F8428884, order the following parts:
P/N 94413319 Oil Pan - Transaxle P/N 94140737 Gasket - Oil Pan P/N 94413320 Strainer - Oil P/N 94413322 Diaphragm - Vacuum P/N 94140714 Packing - 'O' Ring
Use the following service procedure:
PREPARATION
1. Disconnect the negative battery cable at the terminal.
2. Raise the vehicle.
3. Remove the transaxle drain plug and drain the transaxle fluid.
CHANGING THE STRAINER AND THE OIL PAN
1. Remove the oil pan and the oil gasket.
2. Remove the old strainer.
3. Install the new strainer.
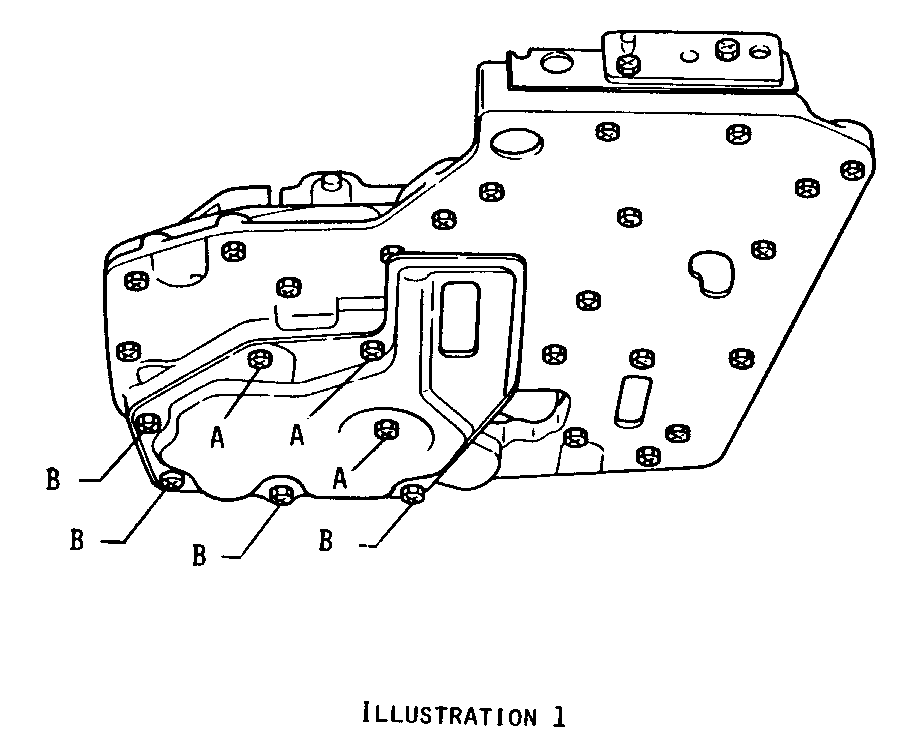
Strainer Tightening Torque (See Illustration 1)
A: 3.5 N.m (2.6 ft. lbs.). B: 10.0 N.m (7.0 ft. lbs.).
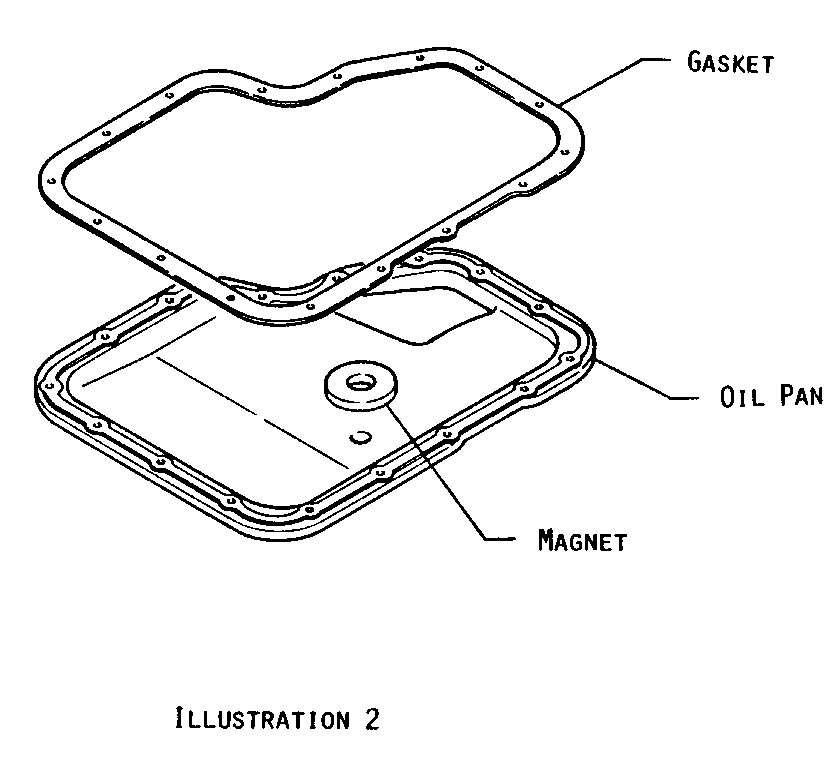
4. Attach the magnet to the inside of the new oil pan.
5. Install the new oil pan with a new gasket (See Illustration 2).
Oil Pan Tightening Torque 7.0 N.m (5.0 ft. lbs.)
CHANGING THE VACUUM DIAPHRAGM
1. Disconnect the electrical connector at the kickdown solenoid.
2. Remove the kickdown solenoid.
3. Disconnect the vacuum hose from the vacuum diaphragm.
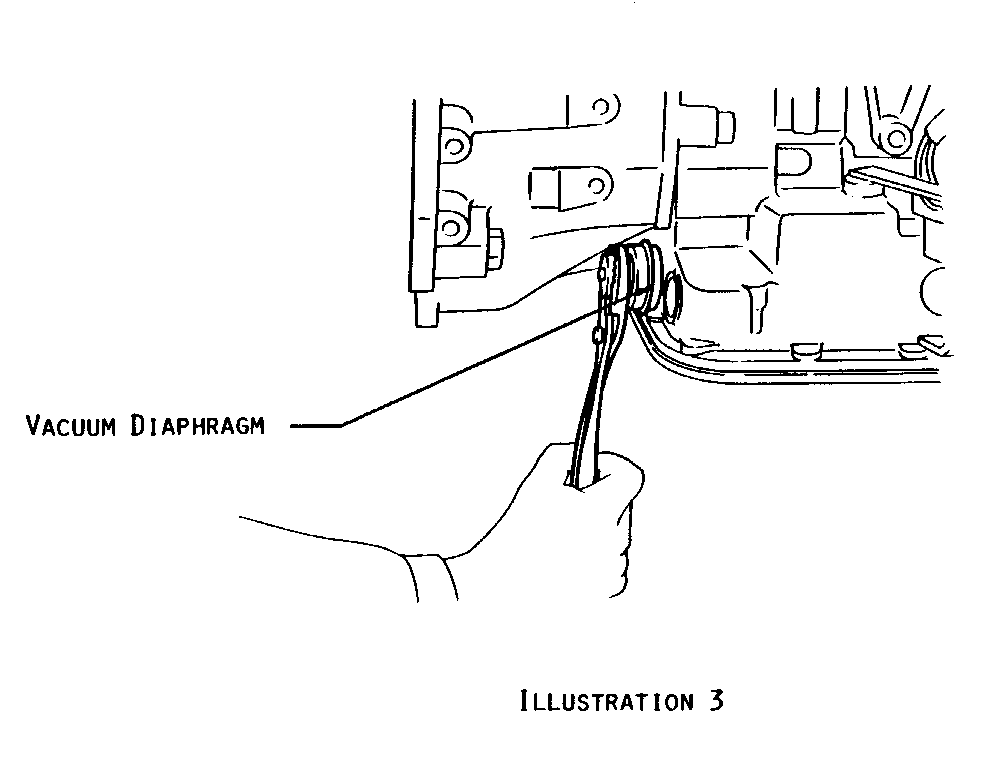
4. Remove the vacuum diaphragm with the diaphragm rod (See Illustration 3).
5. Apply sealant to the threads of the new vacuum diaphragm and the kick-down solenoid.
6. Install the new diaphragm and the old diaphragm rod.
7. Connect the vacuum hose to the vacuum diaphragm.
8. Install the kickdown solenoid.
9. Connect the electrical connector to the kickdown solenoid.
COMPLETING THE OPERATION
1. Reinstall the transaxle drain plug.
2. Lower the vehicle.
3. Refill the transaxle to the proper level through the oil filler tube with DEXRON II Automatic Transmission Fluid. Transaxle Fluid Capacity: 6.0 liters (6.3 quarts)
4. Reconnect the battery.
Labor Operation Number: T1125
Labor Time: .7 hours
Unstable idle speeds may result from a rapid release of the accelerator pedal. This can be repaired by installing a new vacuum diaphragm assembly which adds a dash pot to the Fast Idle Control Device (F.I.C.D.). On vehicles built before breakpoint F8426121 order the following parts:
P/N 94178841 Diaphragm Assembly P/N 94153039 Nut - F.I.C.D. (3 required) P/N 94413387 Label - Emission
Use the following service procedure:
CHANGING THE DIAPHRAGM
1. Disconnect the negative battery cable at the terminal.
2. Remove the air cleaner assembly and place a dust cover over the carburetor intake hole.
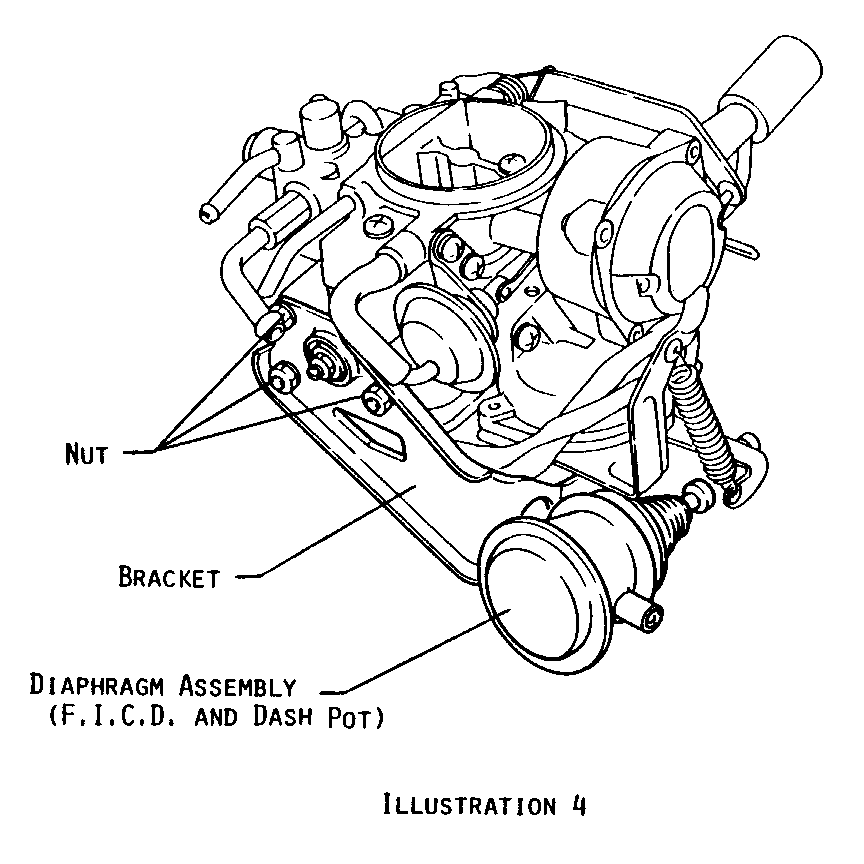
3. Remove the diaphragm assembly with the bracket (See Illustration 4).
NOTICE: A non-air conditioned vehicle will not have a vacuum diaphragm assembly. However, one will now be installed.
4. Follow the removal steps in the reverse order to install the new diaphragm assembly.
Tightening Torque: 5.9 N.m (4.3 ft. lbs.)
IDLE SPEED ADJUSTMENT PROCEDURE
(Preconditions)
The engine should be at normal operating temperature.
The choke should be open.
The air conditioner (if so equipped should be off).
The air cleaner should be installed.
The distributor vacuum line from the carburetor, the canister purge line, the EGR vacuum line, and the ITC valve vacuum line must all be disconnected and plugged.
All electrical switches (lights, rear defogger, heater blower, etc.) should be turned off the eliminate any electrical load.
If the electric cooling fan is operating, wait until it shuts off.
Transmission is in Park.
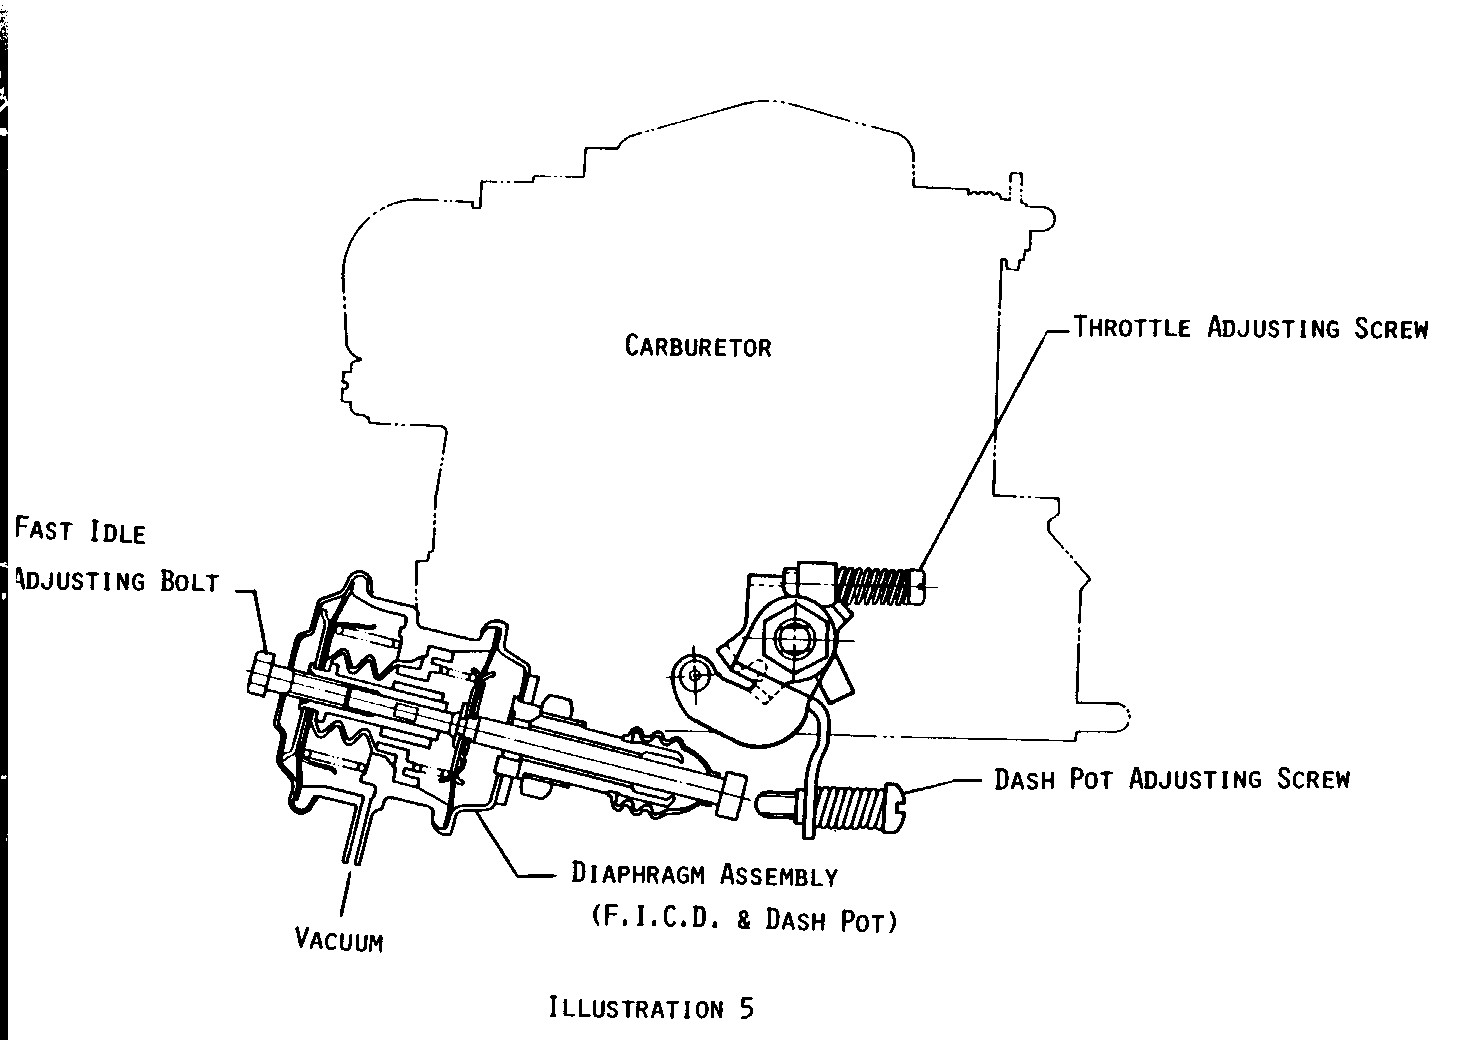
(Adjustments - See Illustration 5)
1. Set the throttle adjusting screw to 1,000 RPM.
2. Manually hold the throttle to maintain 1,900 to 2,100 RPM while turning the dash pot adjusting screw until it touches the end of the dash pot shaft.
3. If the vehicle does not have air conditioning, no further adjustments are necessary. If the vehicle is equipped with air conditioning, turn the A/C to Max COLD and the blower to HIGH position (this will extend the diaphragm to full travel).
4. Turn the fast idle adjusting bolt to 980 RPM.
INSTALLING THE EMISSION LABEL
1. Place the new emission label onto the existing one located at the left front of the engine hood.
Labor Operation Number: J6531
Labor Time: Without A/C .5 hours With A/C .6 hours
General Motors bulletins are intended for use by professional technicians, not a "do-it-yourselfer". They are written to inform those technicians of conditions that may occur on some vehicles, or to provide information that could assist in the proper service of a vehicle. Properly trained technicians have the equipment, tools, safety instructions and know-how to do a job properly and safely. If a condition is described, do not assume that the bulletin applies to your vehicle, or that your vehicle will have that condition. See a General Motors dealer servicing your brand of General Motors vehicle for information on whether your vehicle may benefit from the information.
