SERVICE MANUAL UPDATE SEC. 6E1 DRIVEABILITY & EMISSION

Subject: ECM CALIBRATION PROM REVISED REPLACEMENT PROCEDURE
Model & Year: 1985-89 SPECTRUM WITH 1.5L ENGINE
This bulletin serves to revise the Calibration PROM installation Procedure on 1985 to 1989 Geo Spectrum 1.5L "R" Carline carbureted vehicles. When replacing the Calibration Prom use the following procedure:
SERVICE PROM REPLACEMENT:
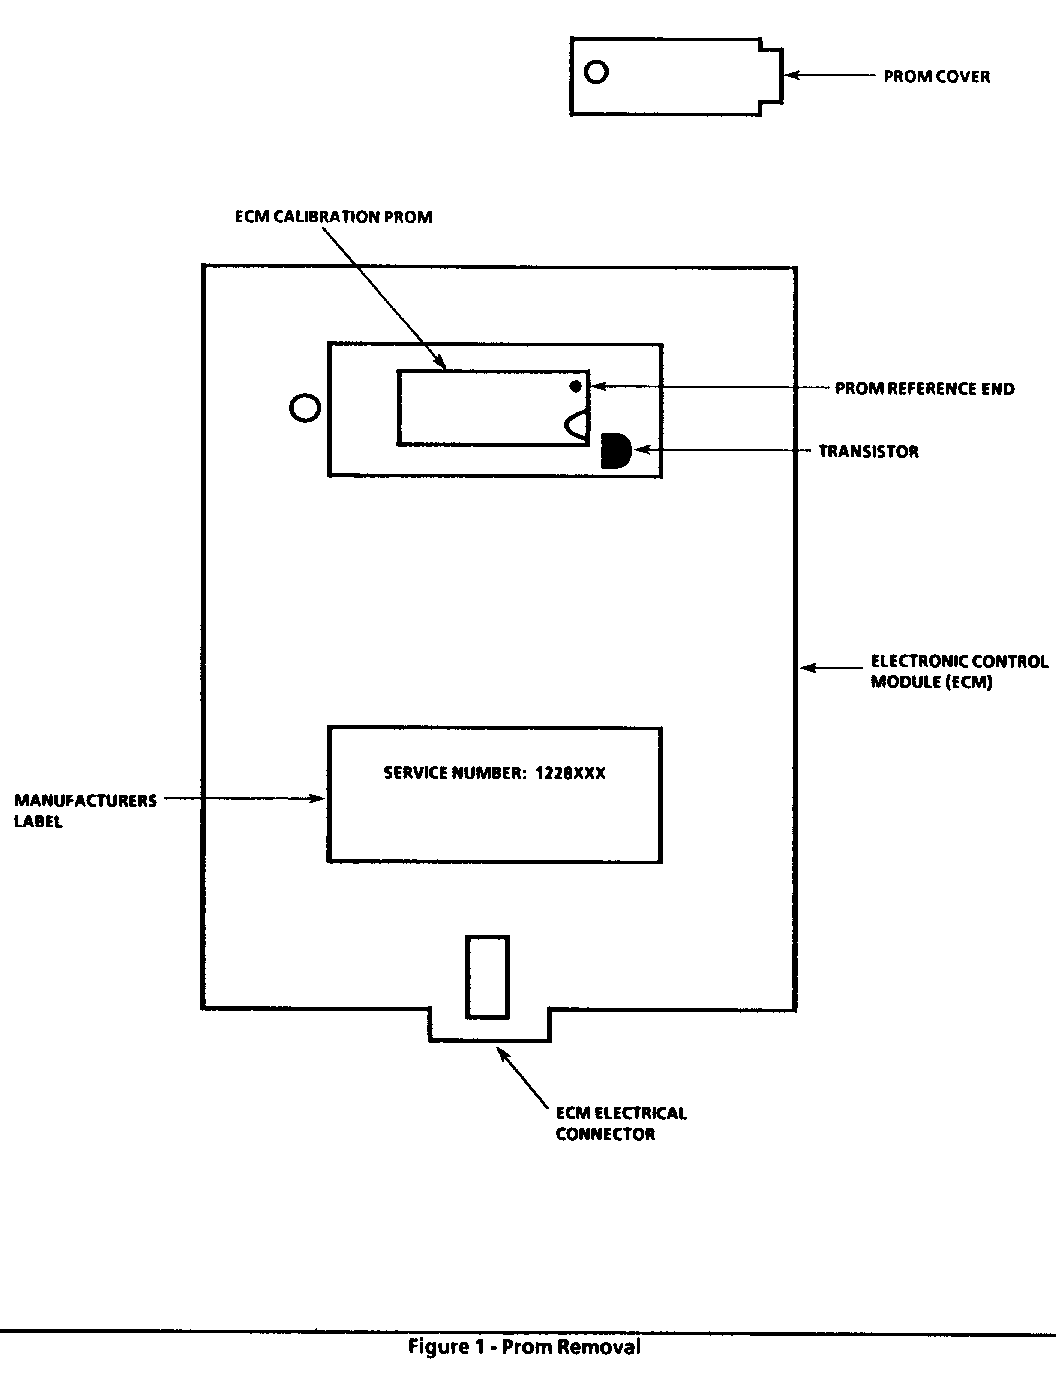
PROM Removal: REFER TO FIGURE 1
1. Disconnect negative battery cable. 2. Remove passenger side lower trim panel. 3. Remove ECM retainer strap. 4. Remove the ECM from its mounting bracket. 5. Disconnect the ECM's electrical connector. 6. Remove PROM cover to access the PROM. 7. Carefully remove the PROM from the ECM by pulling up on the PROM equally at both ends.
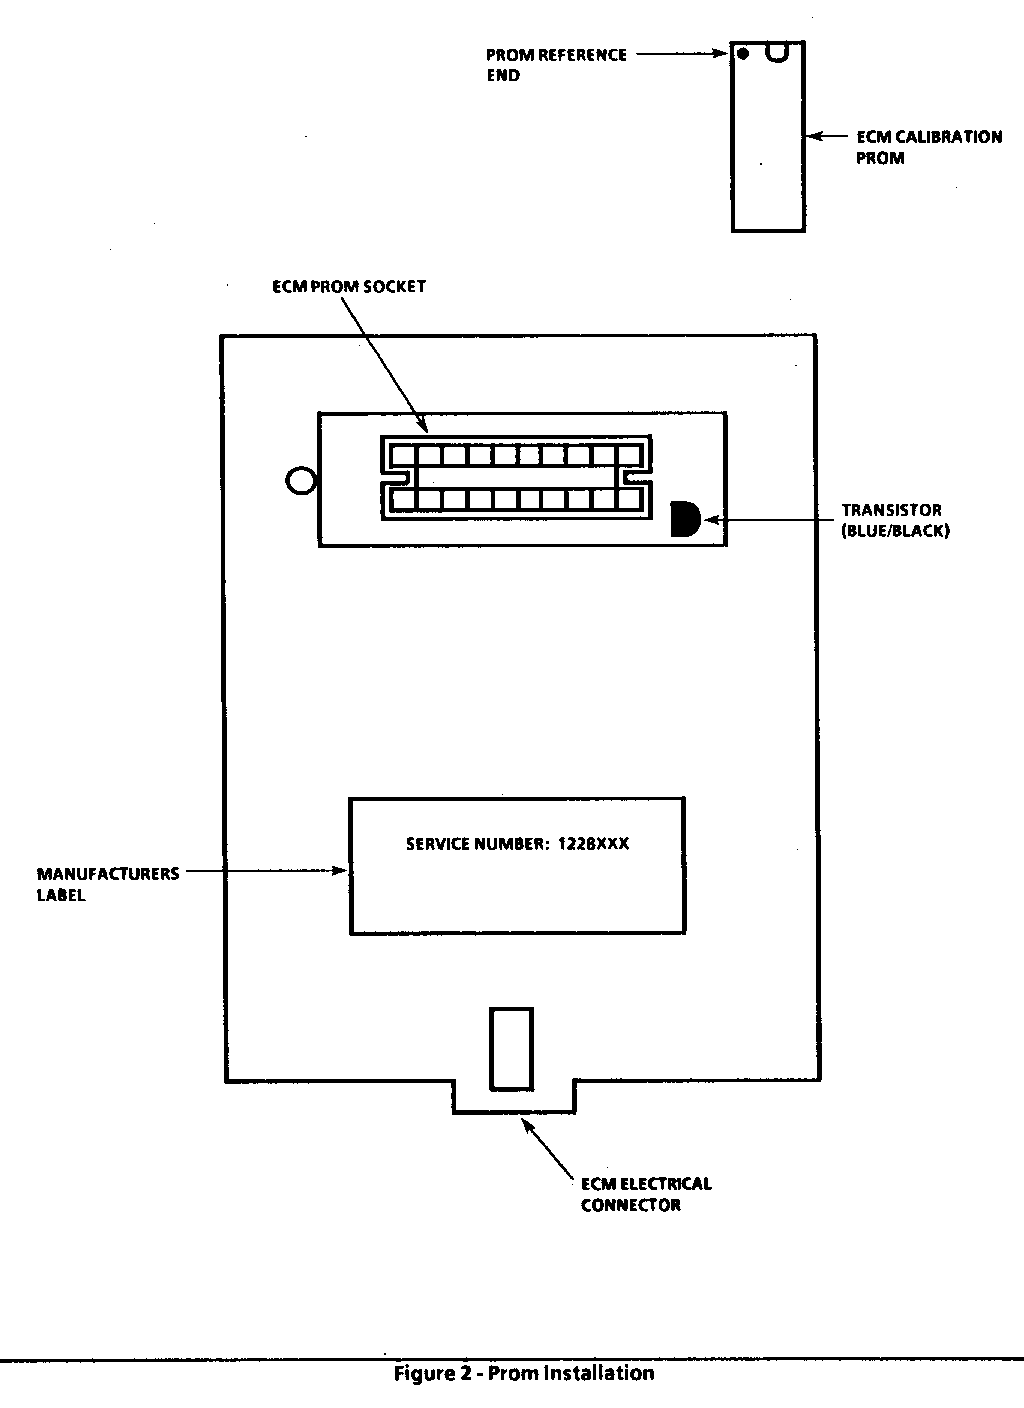
PROM Installation: REFER TO FIGURE 2
IMPORTANT
* When installing a service PROM, use due care not to force the PROM into its. mounting socket as you may damage the PROM and/or the ECM.
1. INSTALL PROM IN THE ECM WITH THE REFERENCE END OF THE PROM POINTED TOWARDS THE TRANSISTOR MOUNTED NEAR THE PROM SOCKET. 2. Install PROM cover. 3. Reconnect the ECM's electrical connector. 4. Install the ECM in its mounting bracket. 5. Install retainer strap. 6. Install lower trim panel. 7. Reconnect negative battery cable.
IMPORTANT
* Start and run vehicle, then perform the Diagnostic Circuit Check in the "Driveability And Emissions" Section of the Service Manual.


General Motors bulletins are intended for use by professional technicians, not a "do-it-yourselfer". They are written to inform those technicians of conditions that may occur on some vehicles, or to provide information that could assist in the proper service of a vehicle. Properly trained technicians have the equipment, tools, safety instructions and know-how to do a job properly and safely. If a condition is described, do not assume that the bulletin applies to your vehicle, or that your vehicle will have that condition. See a General Motors dealer servicing your brand of General Motors vehicle for information on whether your vehicle may benefit from the information.
