For 1990-2009 cars only
Removal Procedure
- Remove the liftgate trim panel. Refer to Liftgate Trim Panel Replacement .
- Disconnect the lock actuator electrical connection.
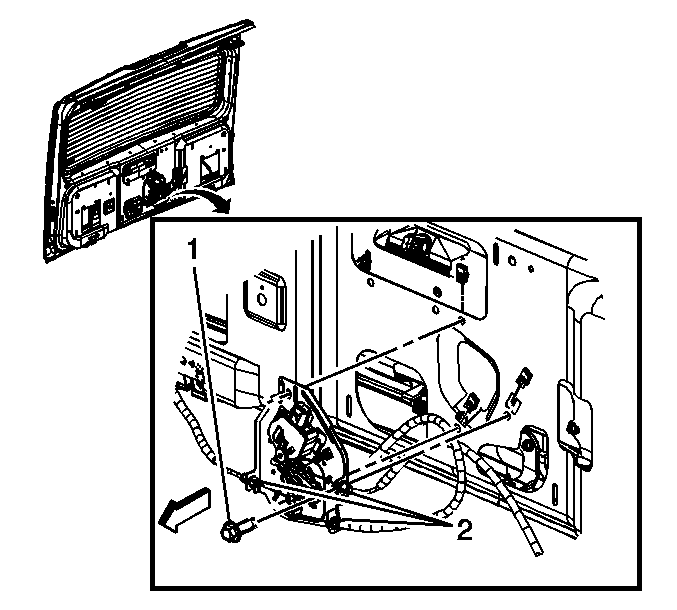
- Disconnect the latch control cables by releasing the retainers (2) and removing the cable ends from the cups. Note the routing.
- Remove the fasteners (1) retaining the control assembly to the liftgate.
- Remove the lock plate assembly from the liftgate.

Installation Procedures
- Position the lock plate assembly in place on the liftgate, and install the fasteners (1) retaining the control assembly to the liftgate.
- Connect the latch control cables (2) to the control assembly by placing the cable ends in their cups and securing the retainers. Note the proper routing.
- Connect the lock actuator electrical connector.
- Inspect for proper operation.
- Install the liftgate trim panel. Refer to Liftgate Trim Panel Replacement .
Notice: Refer to Fastener Notice in the Preface section.

Tighten
Tighten the fasteners to 9 N·m (7 lb ft).
