For 1990-2009 cars only
Catalytic Converter Replacement Right Hand
Removal Procedure
- Raise and suitably support the vehicle. Refer to Lifting and Jacking the Vehicle in General Information.
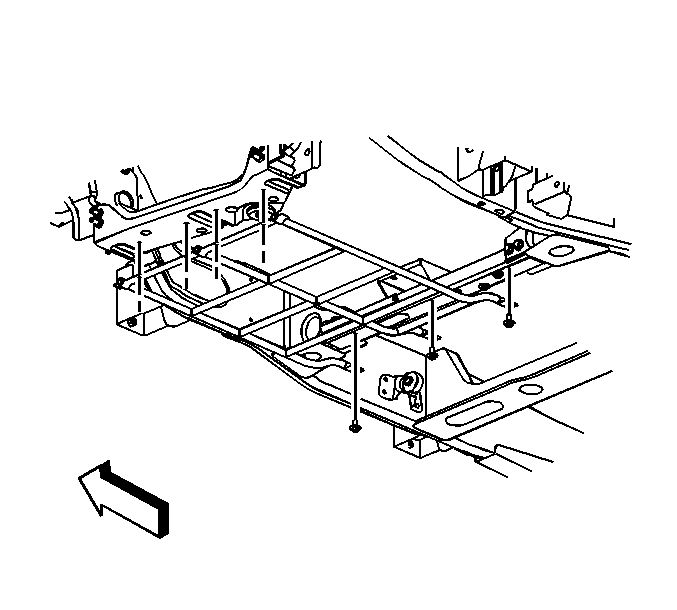
- Remove the catalytic converter guard. Refer to Catalytic Converter Guard Replacement in Frame and Underbody.
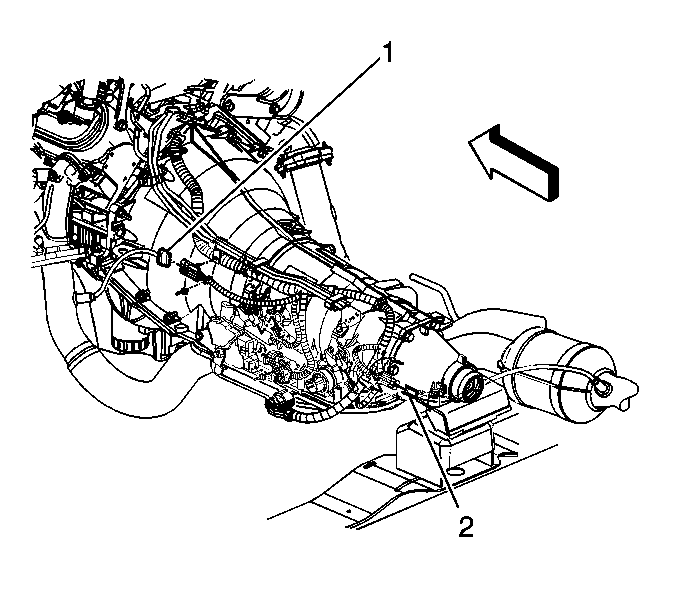
- Disconnect the connector position assurance (CPA) retainers.
- Disconnect the oxygen sensor electrical connectors (1, 2).
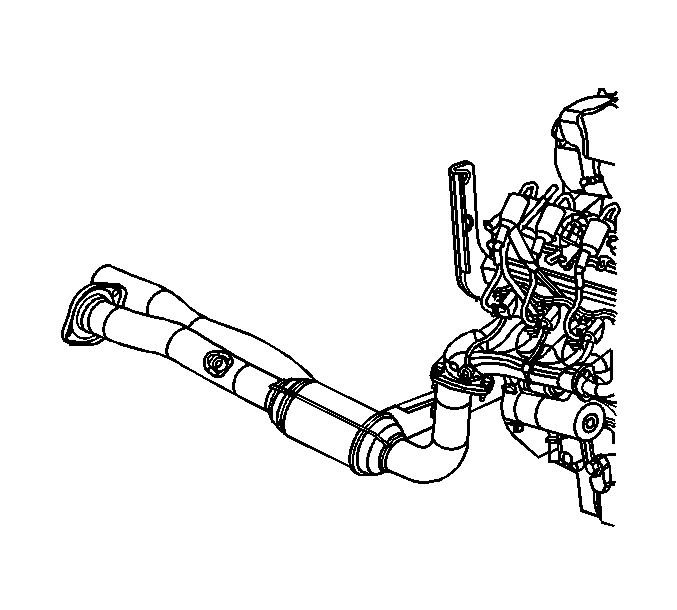
- Remove the catalytic converter to muffler flange nuts.
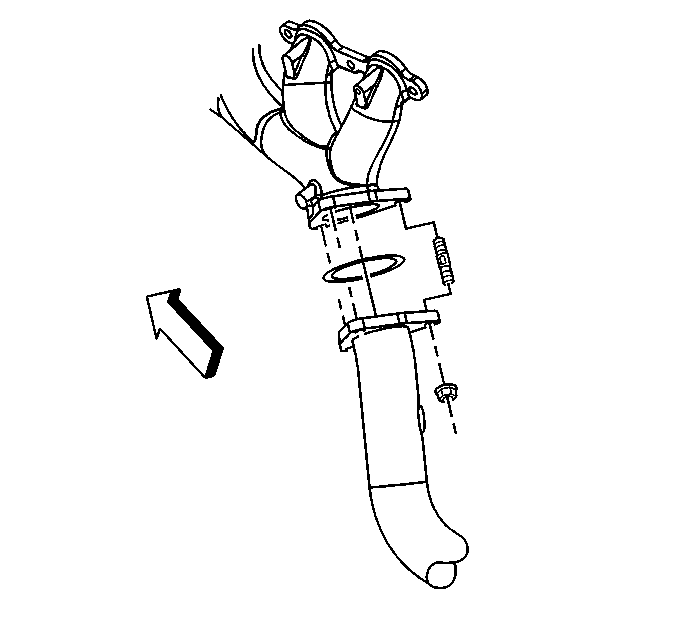
- Remove the left exhaust manifold pipe nuts.
- Remove the catalytic converter.
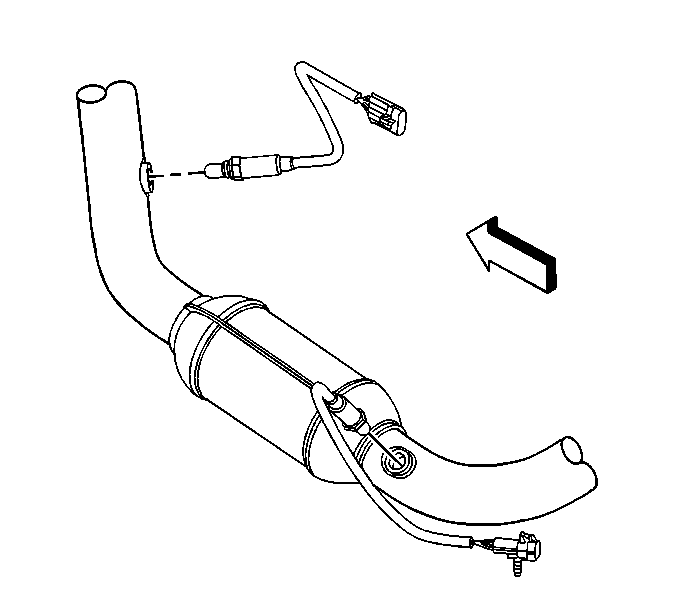
- Remove the oxygen sensors if the catalytic converter is to be replaced.
Installation Procedure
- If the catalytic converter was replaced, perform the following:
- Install a NEW exhaust seal to the exhaust manifold.
- Install the catalytic converter.
- Install the left exhaust manifold pipe nuts.
- Install the catalytic converter to muffler flange nuts.
- Connect the oxygen sensor electrical connectors (1, 2).
- Connect the CPA retainers.
- Install the catalytic converter guard. Refer to Catalytic Converter Guard Replacement in Frame and Underbody.
- Lower the vehicle.
Notice: Refer to Fastener Notice in the Preface section.

| 1.1. | Apply anti-seize compound GM P/N 12377953 or equivalent to the threads of the old oxygen sensors. |
| 1.2. | Install the oxygen sensors. |
Tighten
Tighten the oxygen sensors to 42 N·m (31 lb ft).


Tighten
Tighten the exhaust manifold pipe nuts to 50 N·m (39 lb ft).
Tighten
Tighten the nuts to 48 N·m (35 lb ft).

Catalytic Converter Replacement Left Hand
Removal Procedure
- Raise and suitably support the vehicle. Refer to Lifting and Jacking the Vehicle in General Information.
- Remove the catalytic converter guard. Refer to Catalytic Converter Guard Replacement in Frame and Underbody.
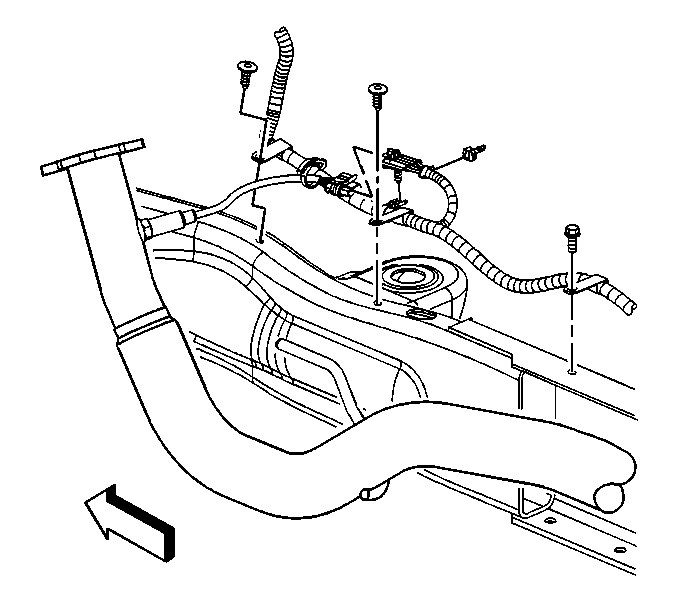
- Disconnect the connector position assurance (CPA) retainers.
- Disconnect the oxygen sensor electrical connectors.
- If replacing the exhaust manifold pipe, remove the oxygen sensors.
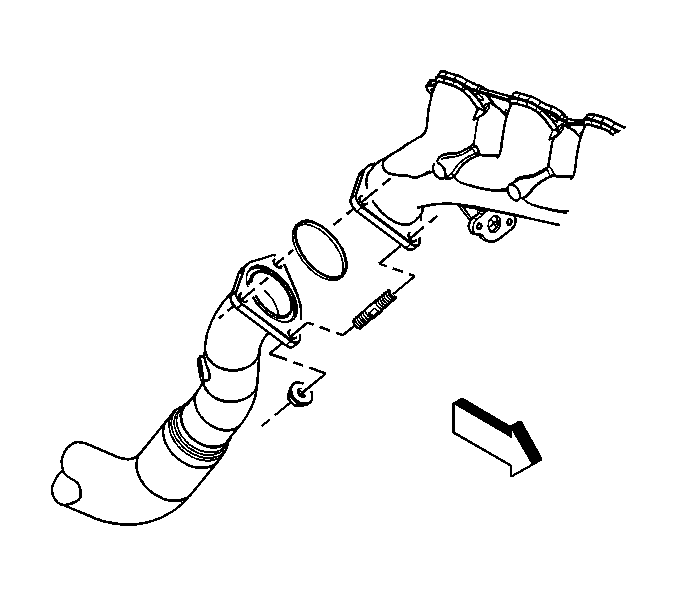
- Remove the exhaust manifold pipe nuts.
- Loosen the exhaust pipe clamp nut.
- Remove the exhaust manifold pipe.
- Discard the exhaust manifold pipe seal.

Installation Procedure
- Install a new exhaust manifold pipe seal to the exhaust manifold pipe.
- Install the exhaust manifold pipe.
- Replace exhaust pipe clamp if necessary.
- Install the exhaust manifold pipe nuts.
- Tighten the pipe clamp nut.
- If the exhaust manifold pipe was replaced perform the following:
- If the exhaust manifold pipe was not replaced perform the following:
- Install the catalytic converter guard. Refer to Catalytic Converter Guard Replacement in Frame and Underbody.
- Lower the vehicle.

Notice: Refer to Fastener Notice in the Preface section.

Tighten
Tighten the nuts to 50 N·m (39 lb ft).
Tighten
Tighten the pipe clamp nut to 40 N·m (29 lb ft).

| 6.1. | Apply anti-seize compound GM P/N 12377953 or equivalent to the threads of the old oxygen sensors. |
| 6.2. | Install the old oxygen sensors. |
Tighten
Tighten the oxygen sensors to 42 N·m (31 lb ft).
| 7.1. | Connect the oxygen sensor electrical connectors. |
| 7.2. | Connect the CPA retainers. |
