For 1990-2009 cars only
Removal Procedure
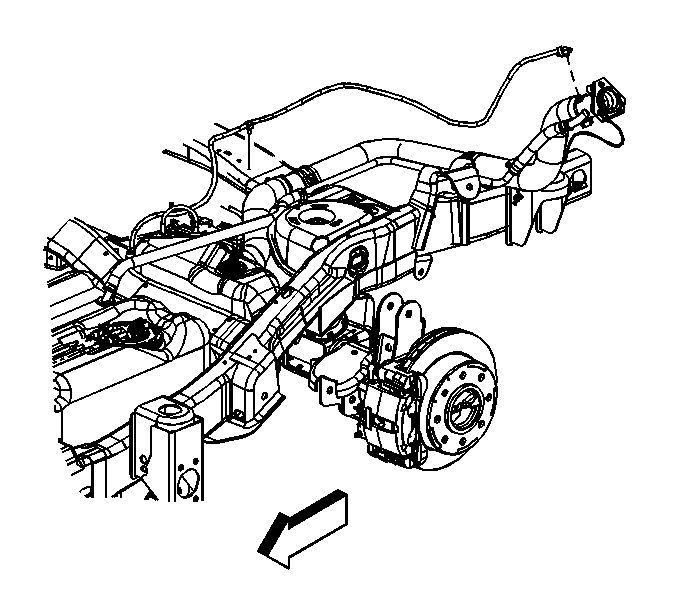
Important: Make note of the routing in order to aid in reassembly.
- Raise and support the vehicle.
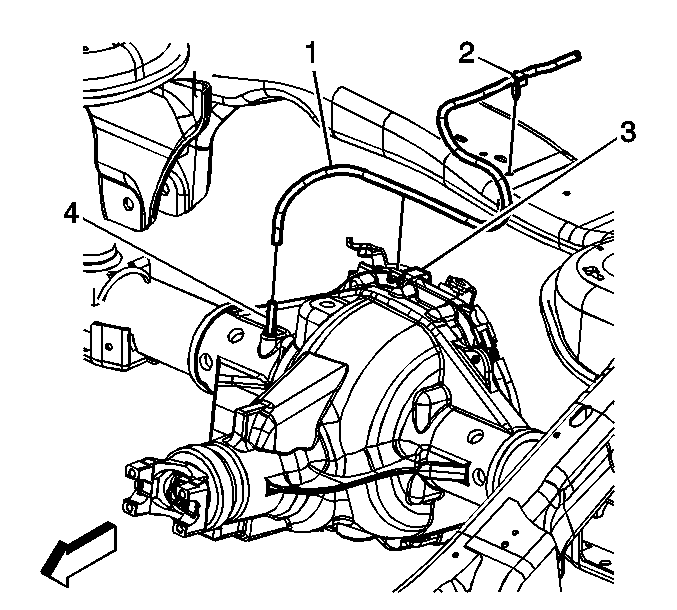
- Remove the vent hose (1) from the clip at the top of the rear axle (3).
- Remove the vent hose (1) from the vent tube (4).
- Remove the vent hose clip from the frame.
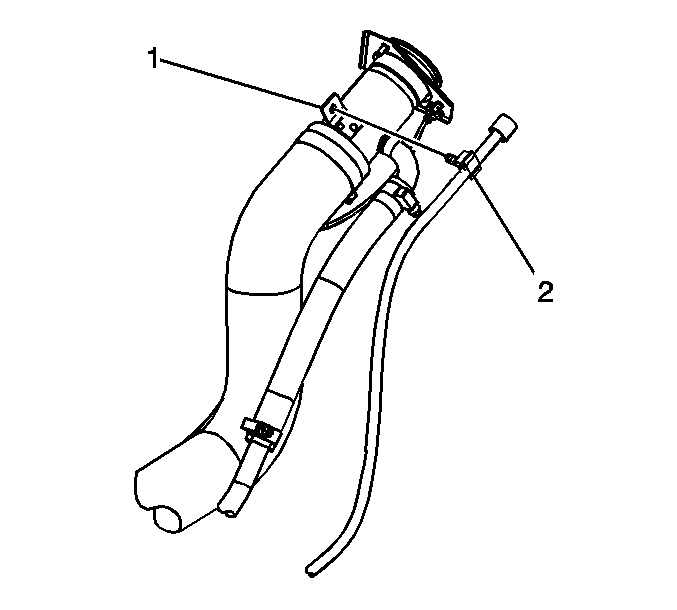
- Remove the vent hose clip (2) from the tab on the filler neck (1).
- Remove the vent hose from the vehicle.


Installation Procedure
- Install the vent hose to the vehicle.
- Install the vent hose clip (2) to the tab on the filler neck (1).
- Install the vent hose clip to the frame.
- Install the vent hose (1) to the vent tube (4).
- Install the vent hose (1) to the clip at the top of the rear axle (3).
- Remove the supports and lower the vehicle.

| • | Route the same way as when removed. |
| • | Ensure that the hose is free of kinks and is routed clear of sharp objects. |
| • | Ensure that the vent is not plugged. |


