Inside-Mounted Tire
Use the following art and text to help you store the spare or flat tire back into its proper spot when you are done.
Store the flat or spare tire back inside the vehicle on the spare tire mount.

Spare or Flat Tire
Receiver Extension (If Equipped)
Tire Retainer Plate
Nut
Wheel Blocks
To store the flat or spare tire on the spare tire mount, do the following:
- Slide the flat or spare tire onto the tire carrier.
- Slide the tire retainer plate into the wheel opening. Be sure that the stud attached to the tire carrier passes through the hole in the tire retainer plate.
- Tighten the nut by hand until the tire retainer plate is snug against the tire.
- Reattach the wheel blocks to the tire retainer plate and tighten the wing nut.
- Reinstall the tire cover onto the spare or flat tire.

Use the wheel wrench and spanner to tighten the nut firmly. Try to move the tire back and forth slightly to be sure it is secure.
Spare-Tire-Carrier-Mounted Tire
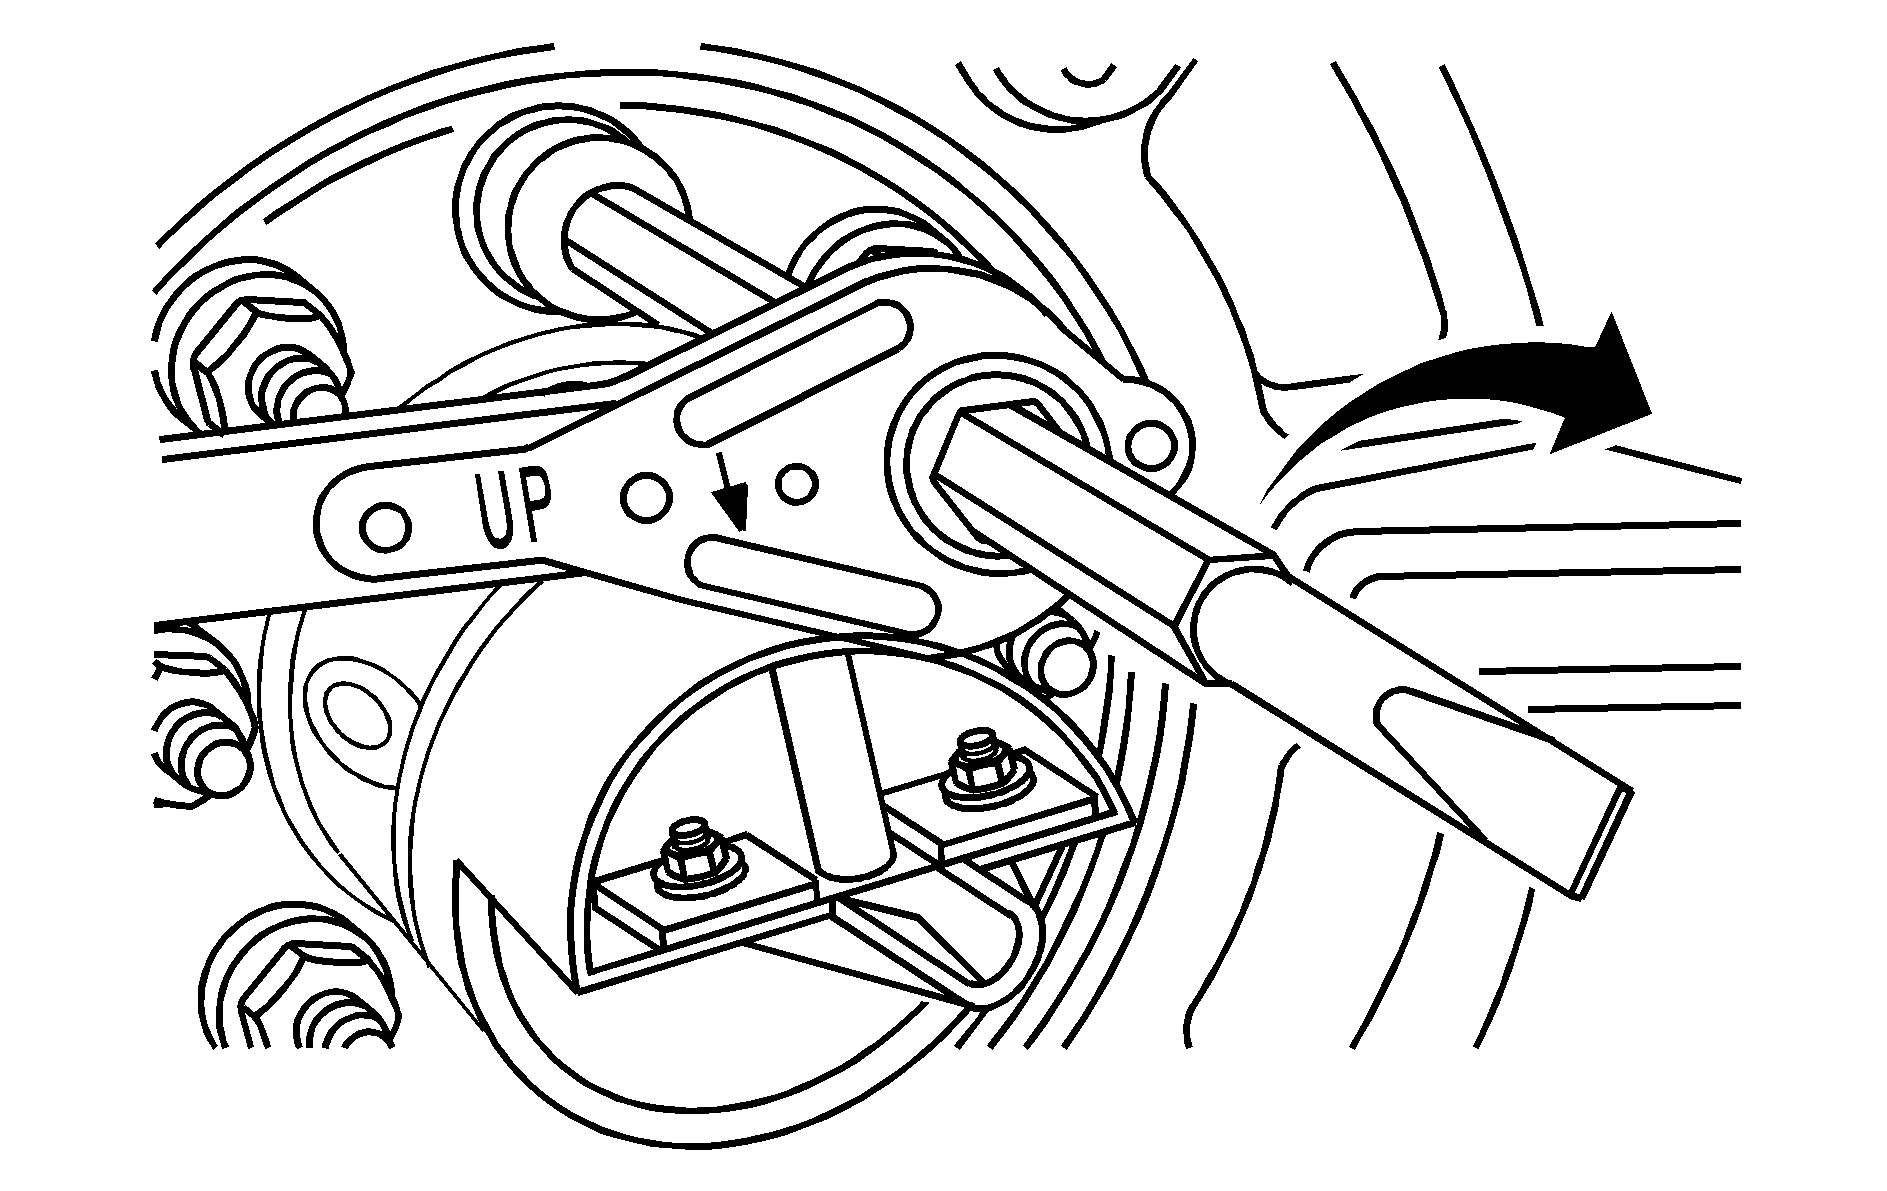
To store the flat or spare tire on the tire carrier, do the following:
- Close the tire carrier. See Tailgate for tire carrier operation.
- Place the flat or spare tire onto the tire carrier with the outside of the wheel facing you.
- Reinstall the three nuts holding spare or flat tire to the tire carrier. Tighten the nuts by hand.
- Use the ratchet and wheel wrench to tighten the nuts firmly. Try to move the tire back and forth slightly to be sure it is secure.
- Slide the license plate holder onto the spare or flat tire. Secure it from the back of the tire carrier with the wing nut.
Caution: Incorrect or improperly tightened wheel nuts can cause the wheel to come loose and even come off. This could lead to a crash. If you have to replace them, be sure to get new original equipment wheel nuts. Stop somewhere as soon as you can and have the nuts tightened with a torque wrench to the proper torque specification. See Capacities and Specifications for wheel nut torque specification.
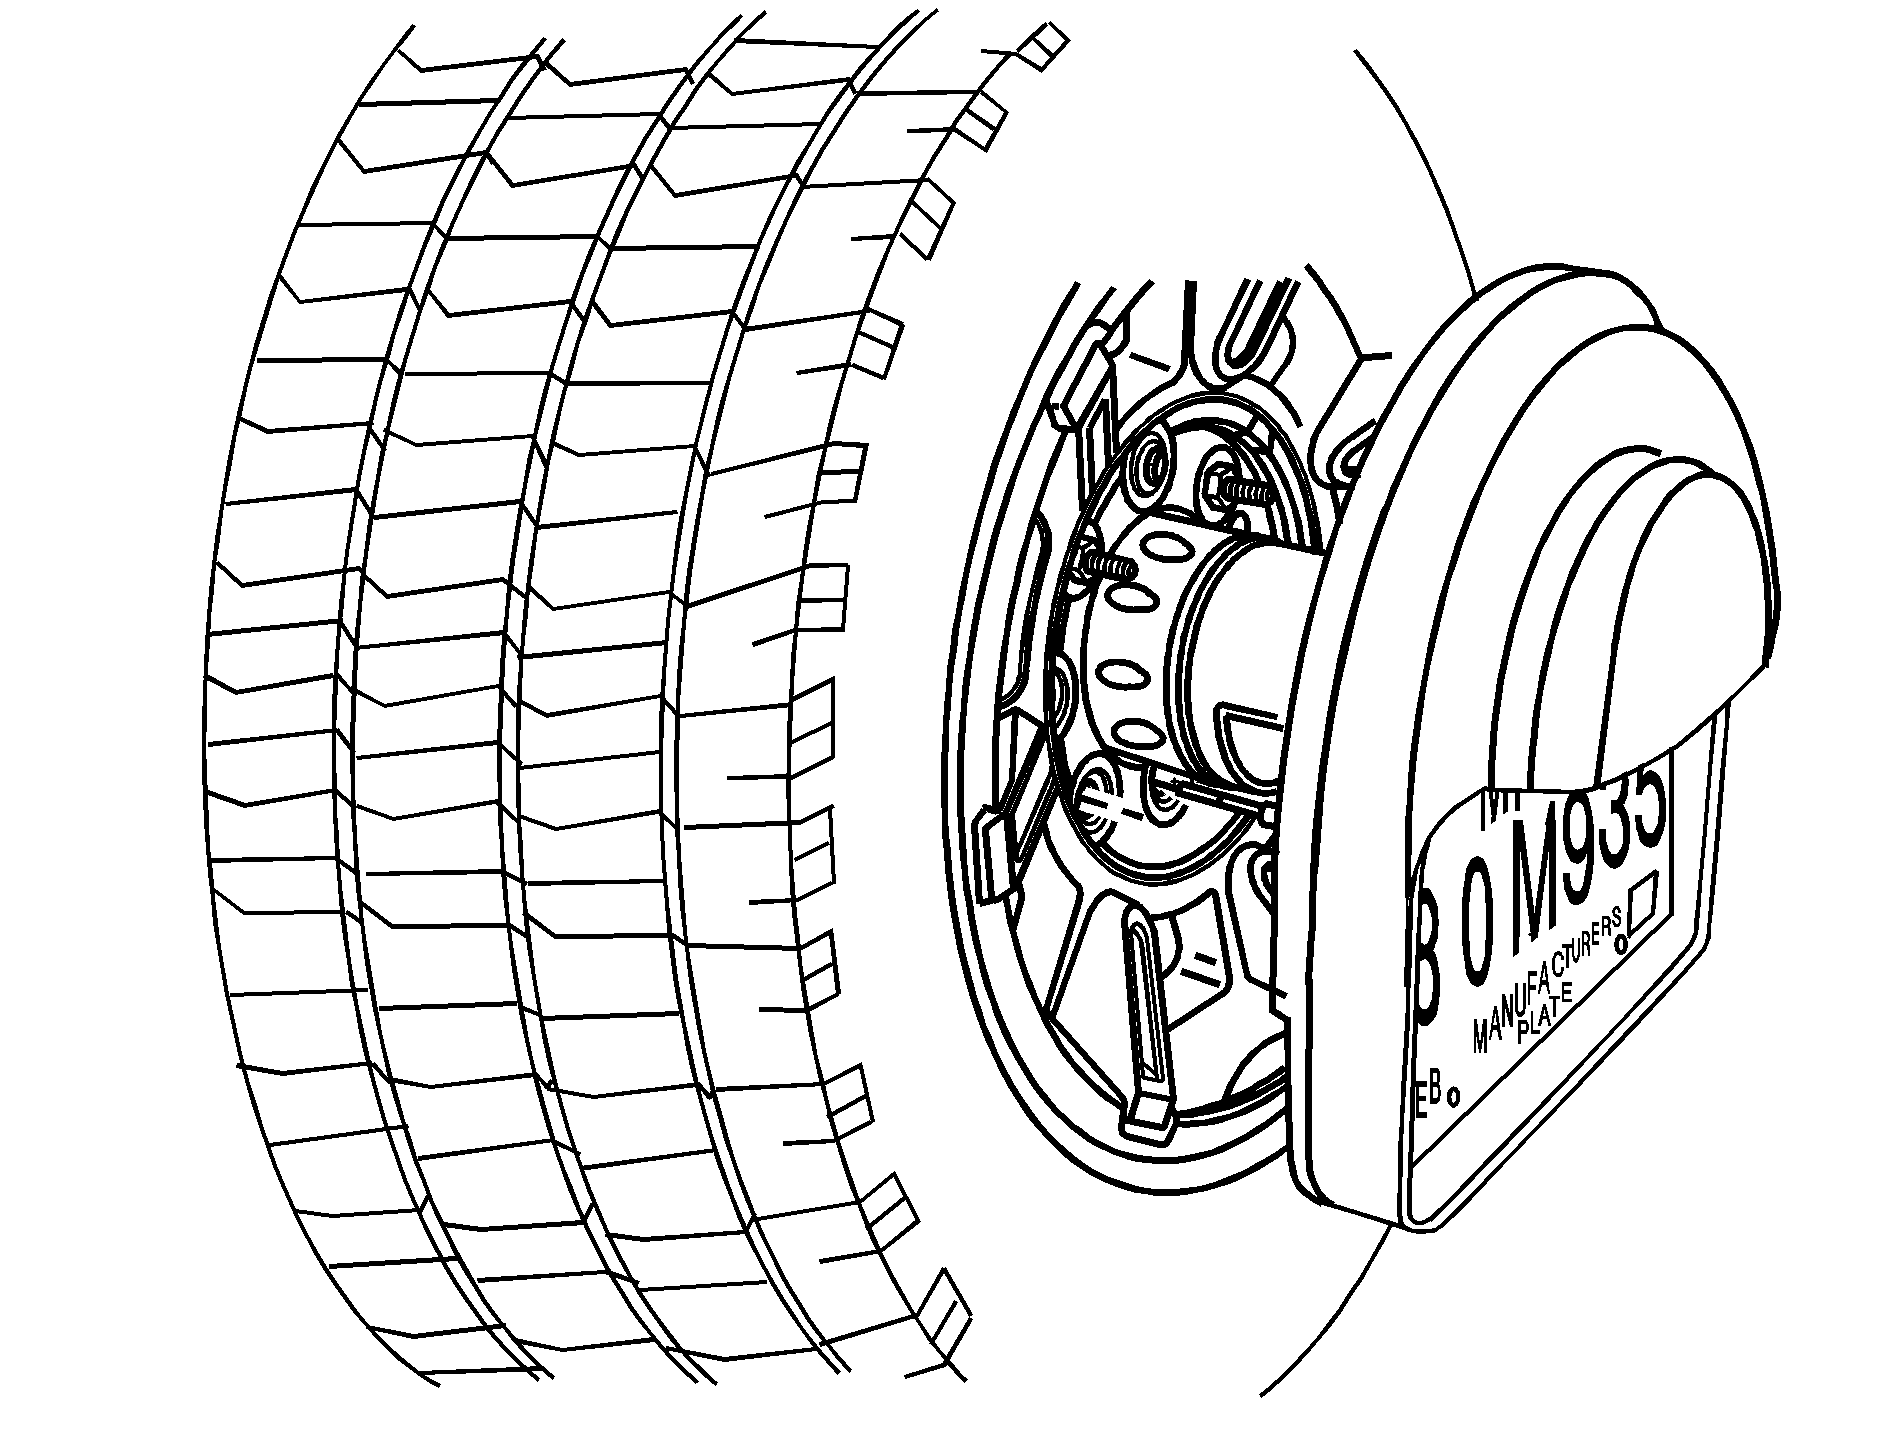
If you choose not to reinstall the spare or flat tire on the vehicle, you will still need to reinstall the license plate holder on the spare tire carrier.
Storing the Tools
SUV
Follow these instructions to store the jack and tools:
- Lower the jack completely.
- Place the jack in the mounting bracket.
- Place the tools in the bag.
- Slide the securing clip over the bag and secure the bag to the floor by tightening the wing nut (B) to the stud coming out of the floor.
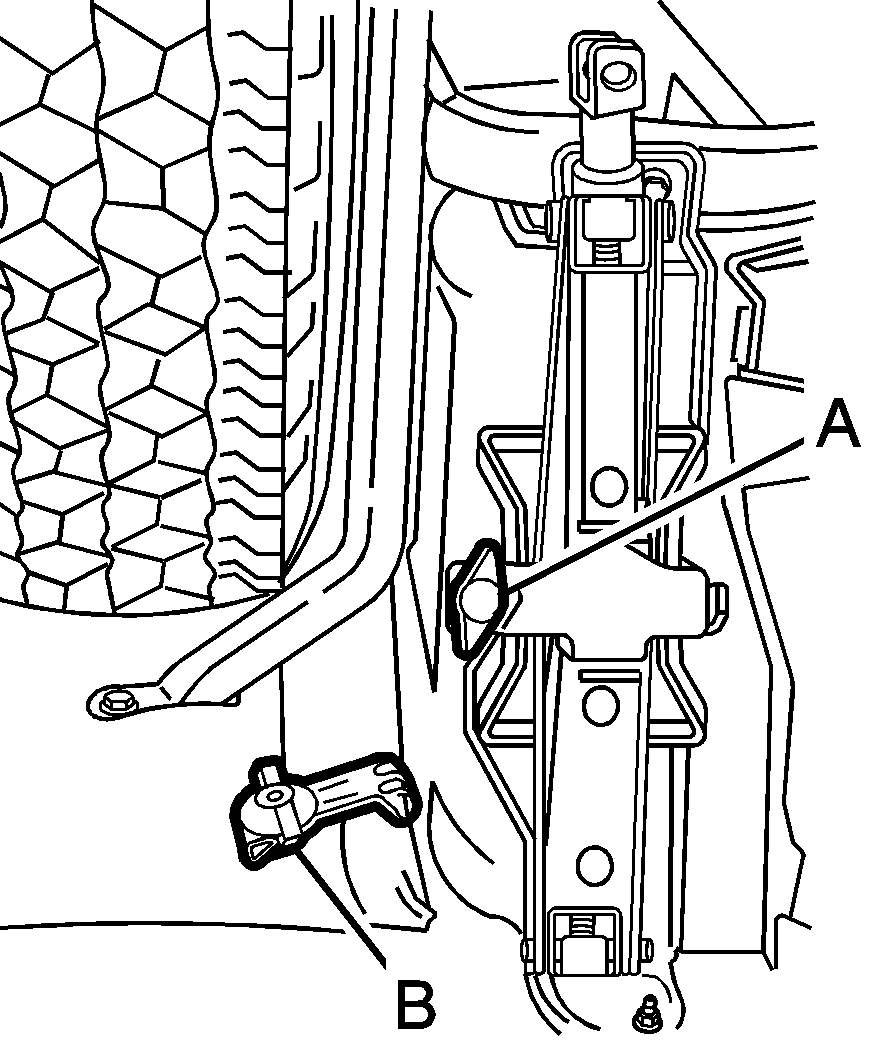
Tighten the wing nut (A) until the jack is securely fastened.
In order to reduce the potential of the jack squeaking or rattling, you will need to preload the jack so it fits tightly in the mounting bracket. To do this, turn the u-hook/clevis at the top of the jack clockwise until the jack is held tight in the mounting bracket.
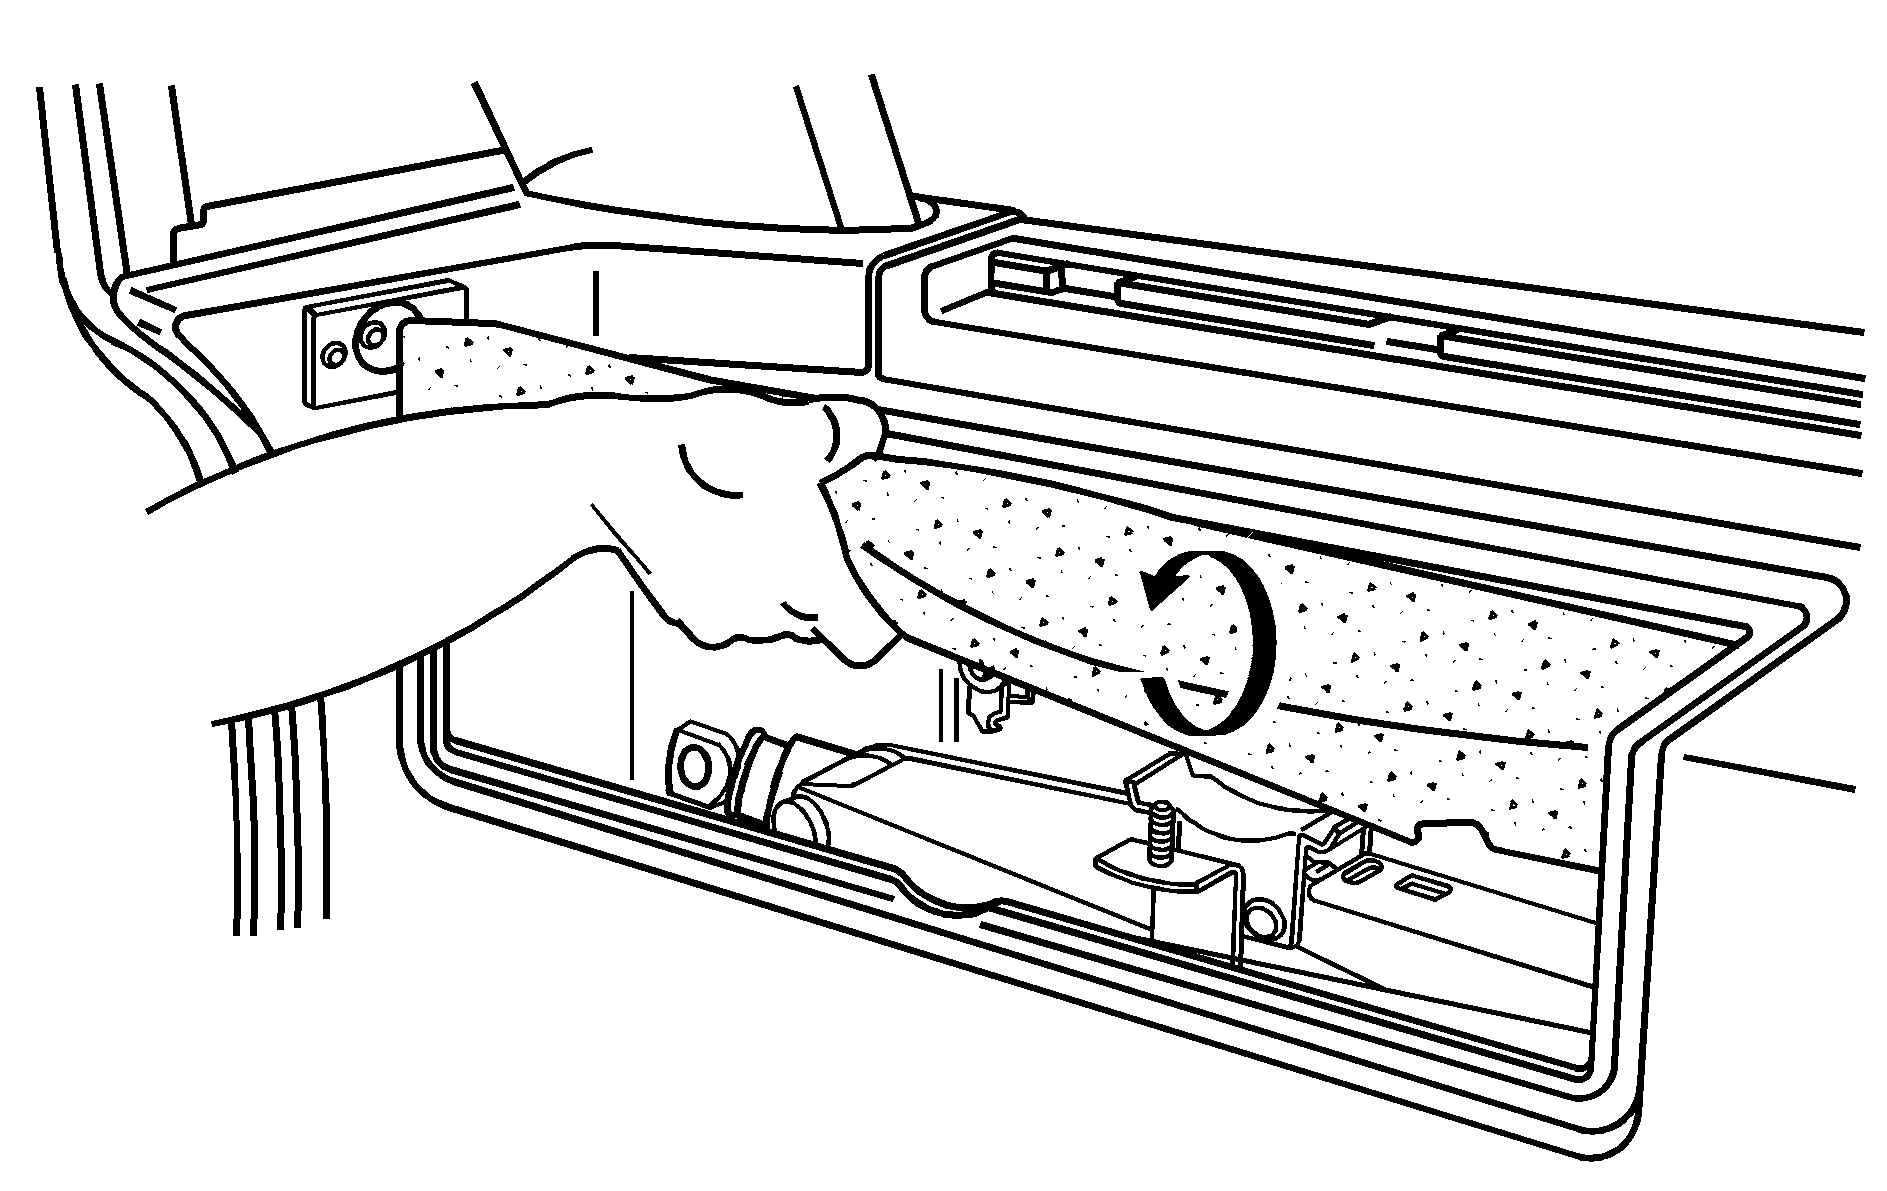
SUT
Follow these instructions to store the jack and tools:
- Lower the jack completely.
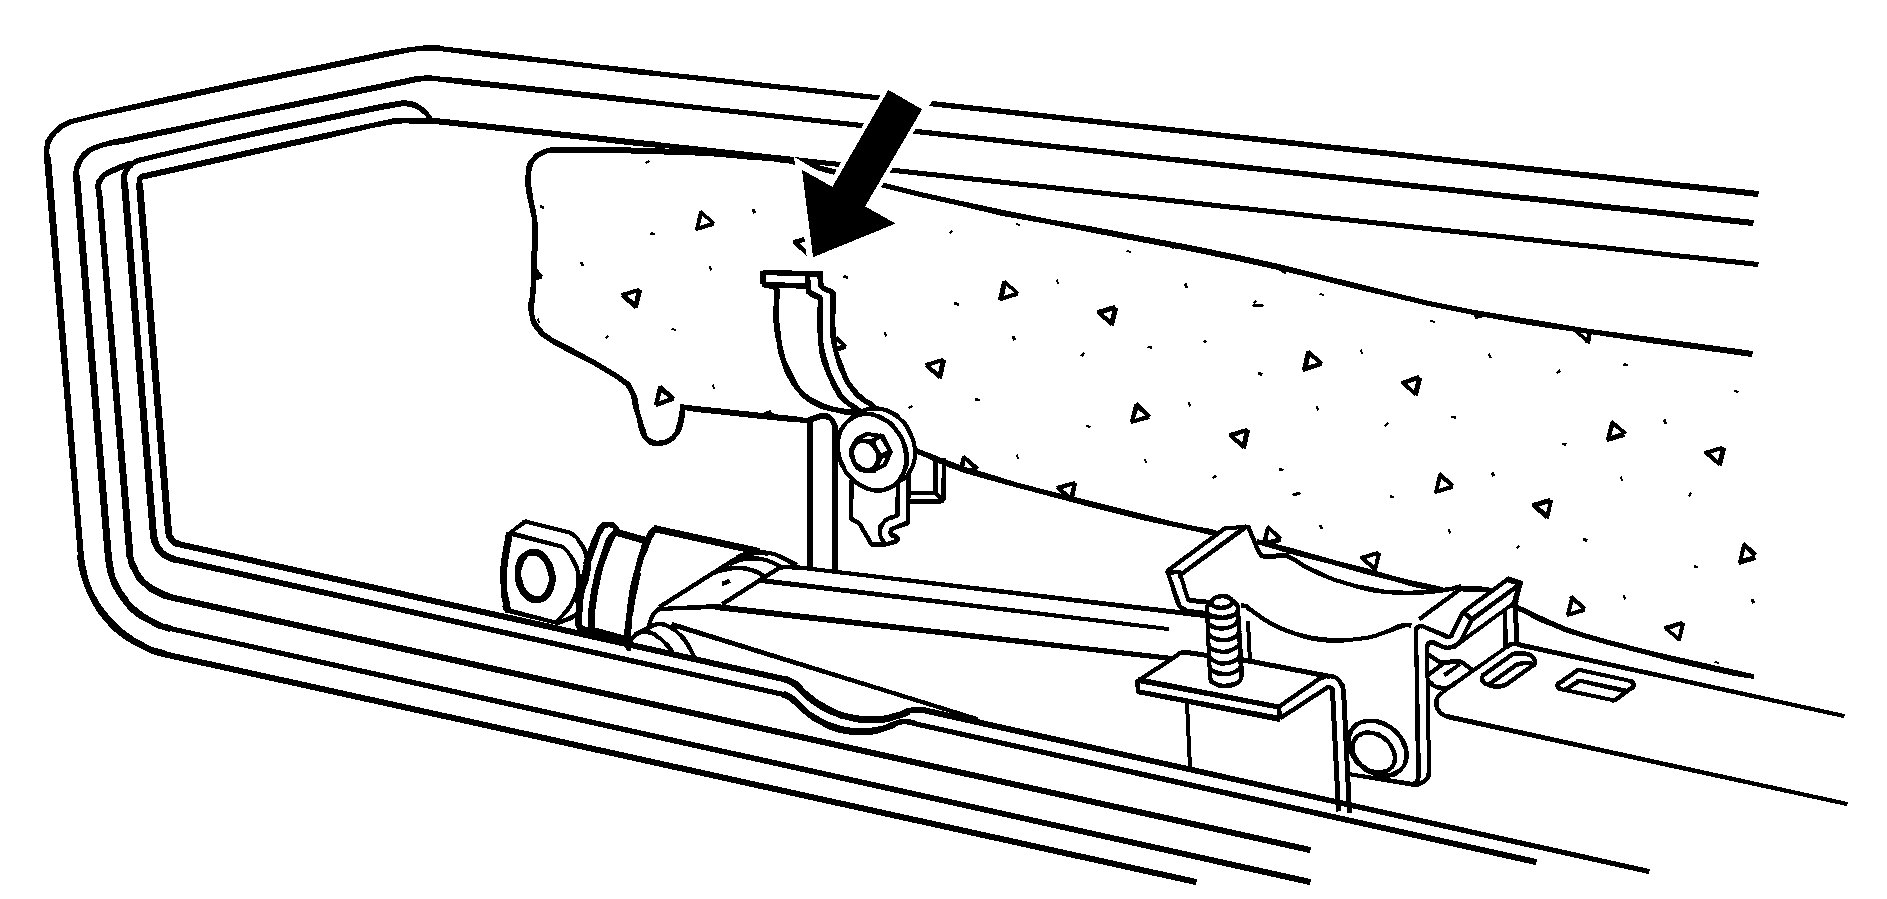
- Place the jack (B) in the mounting bracket in the rear cargo compartment.
- Tighten the wing nut (C) until the jack is securely fastened.
- Place the wheel blocks (E) onto the mounting stud and tighten the wing nut (D) to secure them.
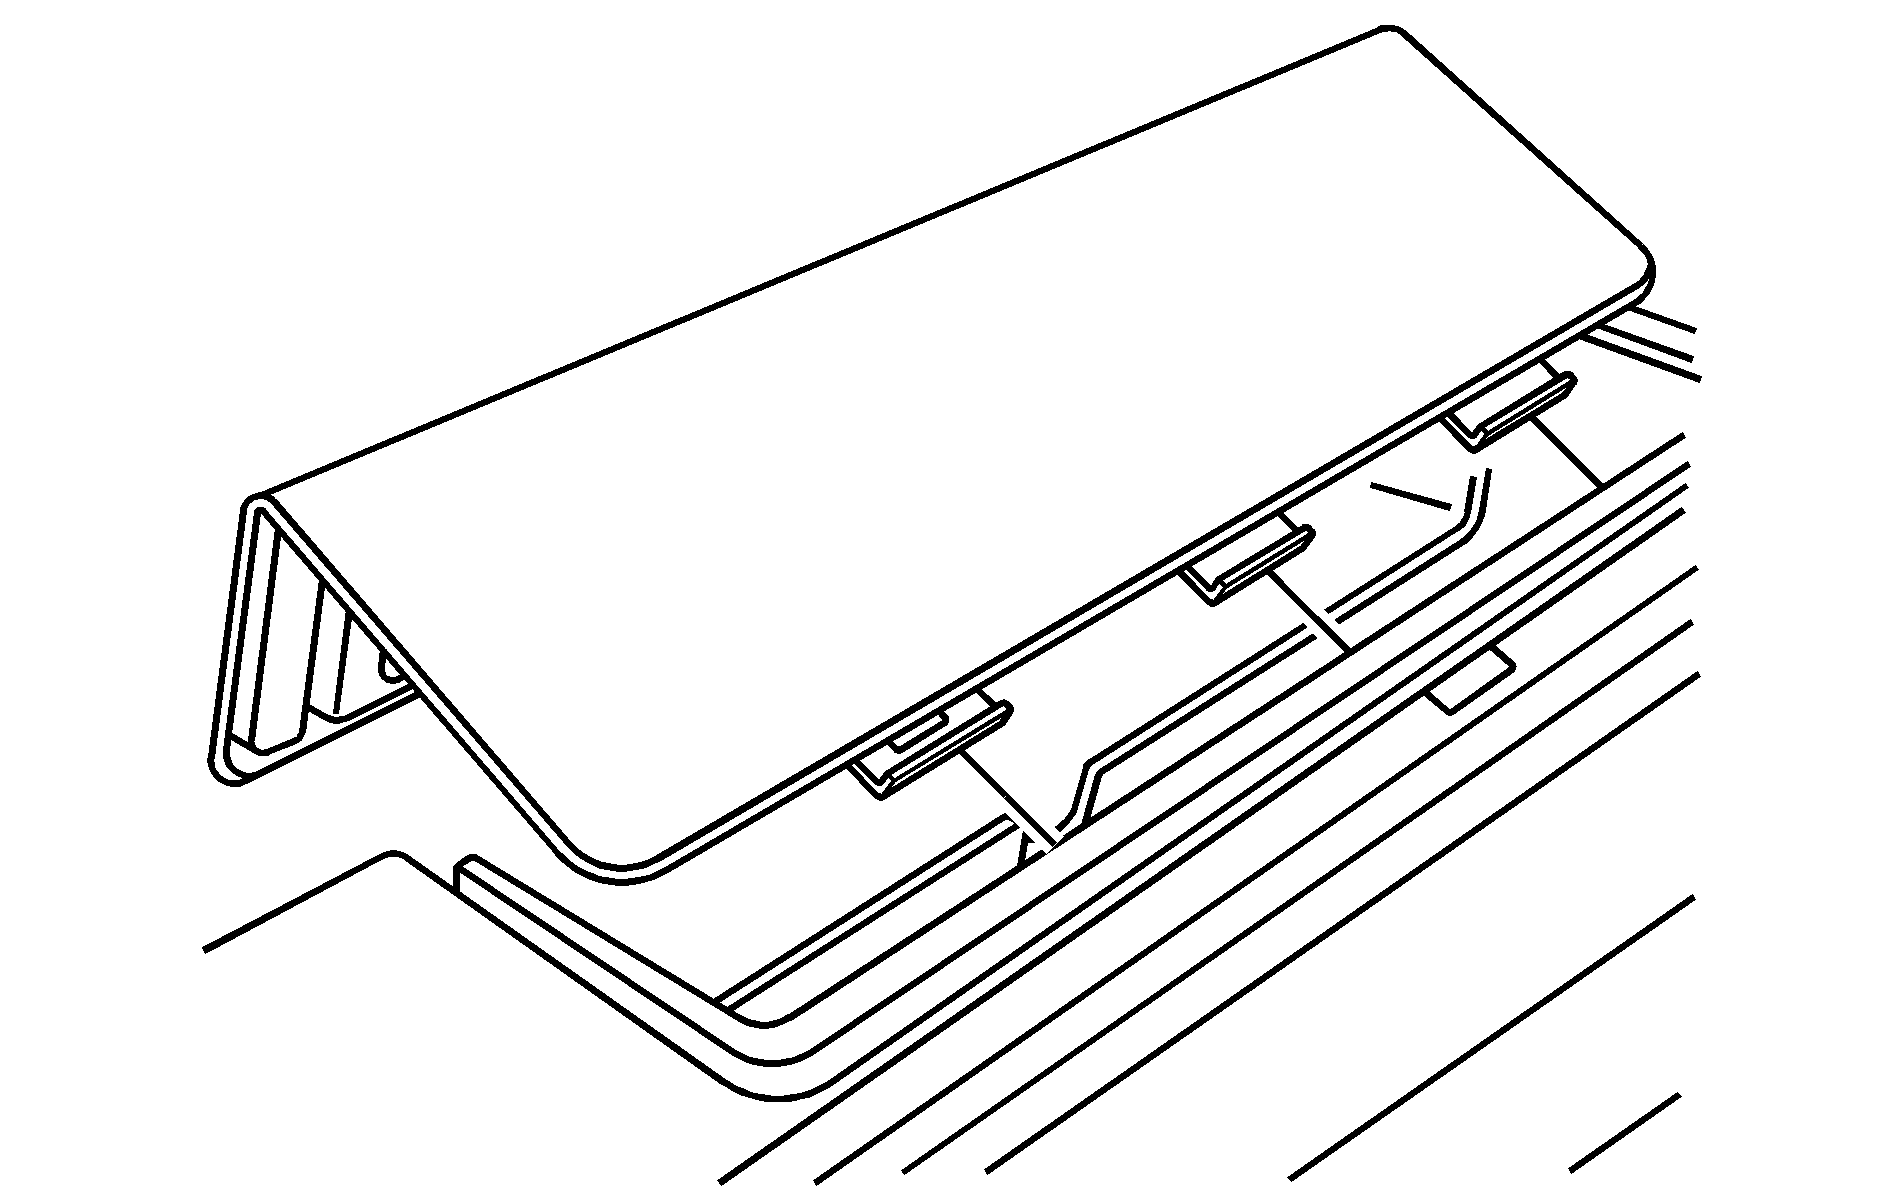
- Place the tools in the tool bag (A), roll the bag together tightly and neatly and then close it with the hook and loop fasteners.
- Slide the tool bag into the rear retention clip. It may help to twist the tool bag as you slide it into the rear retention clip.
- Push the front of the tool bag down into the front retention clip.
- Replace the jack cover. Be sure the tabs on the back of the jack cover fit into the slots on the cargo box before closing the jack cover.
- Close the spare tire carrier to ensure it securely latches. See Tailgate for tire carrier operation.
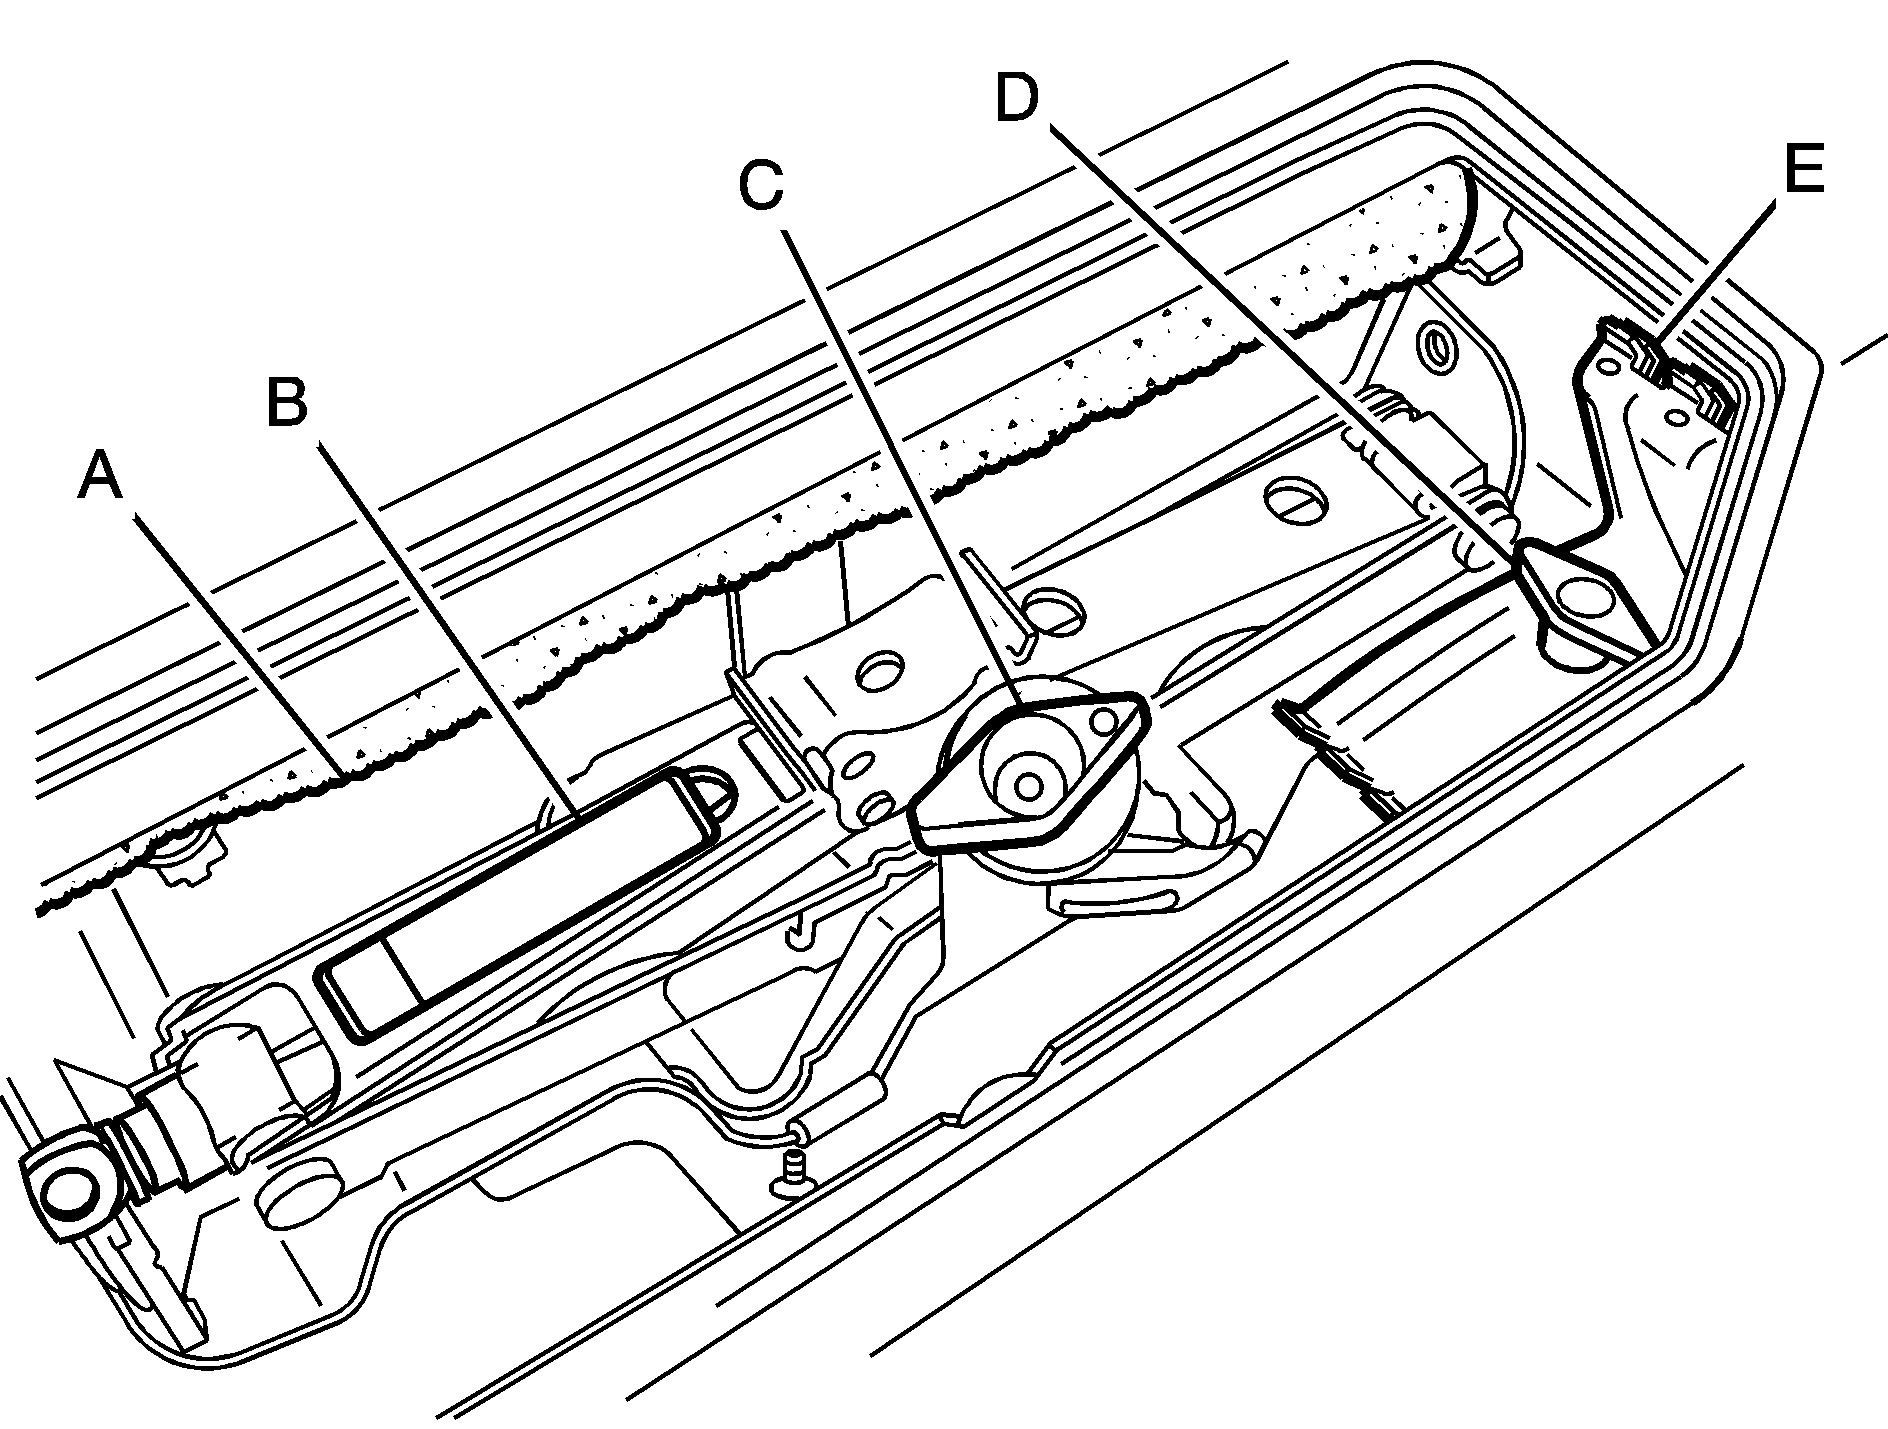
In order to reduce the potential of the jack squeaking or rattling, you will need to preload the jack so it fits tightly in the mounting bracket. To do this, turn the u-hook/clevis at the top of the jack clockwise until the jack is held tight in the mounting bracket.
If you do not roll the tool bag tightly and neatly, you will have trouble getting it back into the storage retention clips in the next step.