If your vehicle has removable side steps, remove the steps prior to off-roading to give your vehicle more ground clearance and to prevent damage to the vehicle from the side steps dragging and/or catching on obstacles.
Notice: Do not drive off-road with the side steps attached to your vehicle. You can damage the side steps and/or your vehicle's frame if they get caught or drag against an obstacle. This damage would not be covered by your vehicle's warranty. Always remove the side steps prior to any off-road driving.
U-Type Side Steps
The following instructions show how to install the optional U-type steps. If you want to remove them, just reverse the instructions:
- Start with the side step brackets pointing up and away from you, or just make sure the HUMMER logo faces up.
- For the front step, use the first and third brackets on the vehicle from the front tire. For the rear step, use the first and third brackets on the vehicle from the rear tire.
- Guide the pins on the side step brackets into the holes in the vehicle's rocker panel protector brackets. If you have difficulty doing this, it might help to have someone hold up the step while you guide the pins into the holes.
- Thread the knob through the remaining hole -- first into the rocker panel protector and then into the threaded hole in the side step bracket.
- Hand-tighten the knob by turning it clockwise until it is seated against the rocker panel protector bracket and then tighten it to 10 lb ft (13.5 N·m) with the tool as shown.
You will notice that the side steps have pins on both sides of the step brackets. This is because the steps are interchangeable between front/back and the driver/passenger sides of the vehicle. Use the pins as follows:
| • | Driver Side: Look at the side step with the HUMMER logo facing you. Use the pins which are on the right side of each side step bracket. This works for the front or rear of the vehicle. |
| • | Passenger Side: Look at the side step with the HUMMER logo facing you. Use the pins which are on the left side of each side step bracket. This works for the front or rear of the vehicle. |
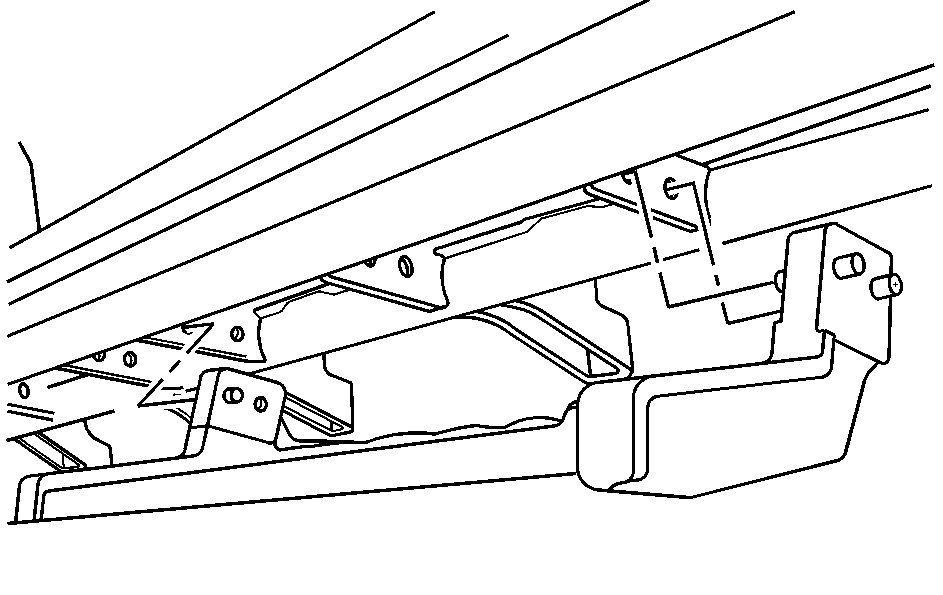
Guide three pins into the holes with the fourth hole in the vehicle's rocker panel protector brackets empty until the next step.
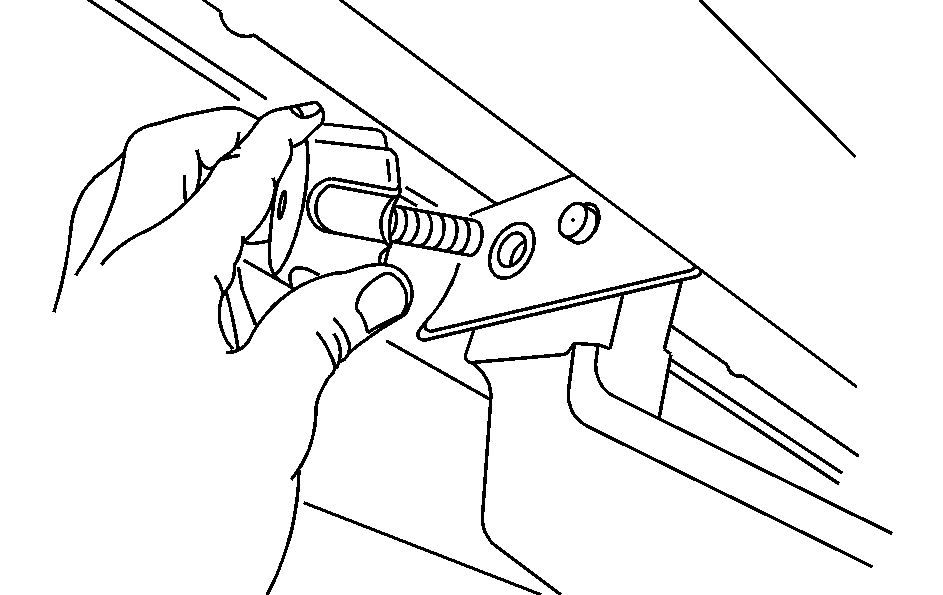
Notice: Threading the knob into the side step and then into the rocker panel will not secure the step. The step could fall off the vehicle and be damaged. Always thread the knob through the rocker panel first. After the knob is installed, try moving the step left and right to be sure the step is secure.
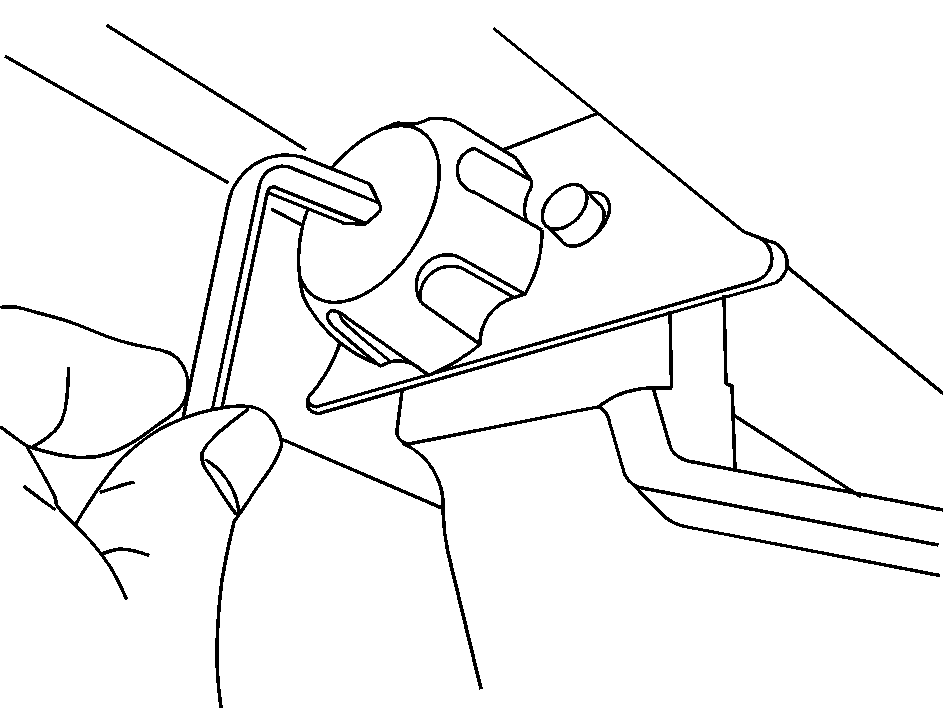
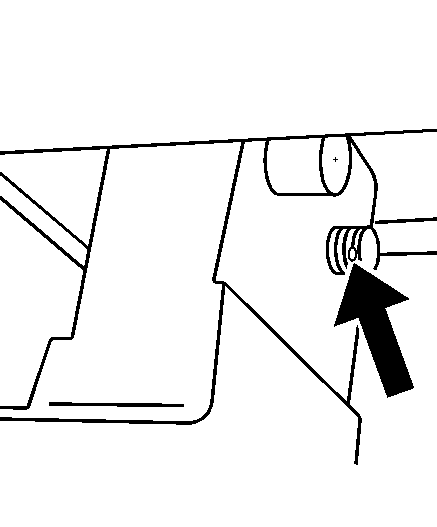
Once the knob is torqued, install the cotter pin through the hole in the end of the knob's threaded shaft.
This will help prevent the knob from coming completely loose and falling out.
Tubular Side Steps
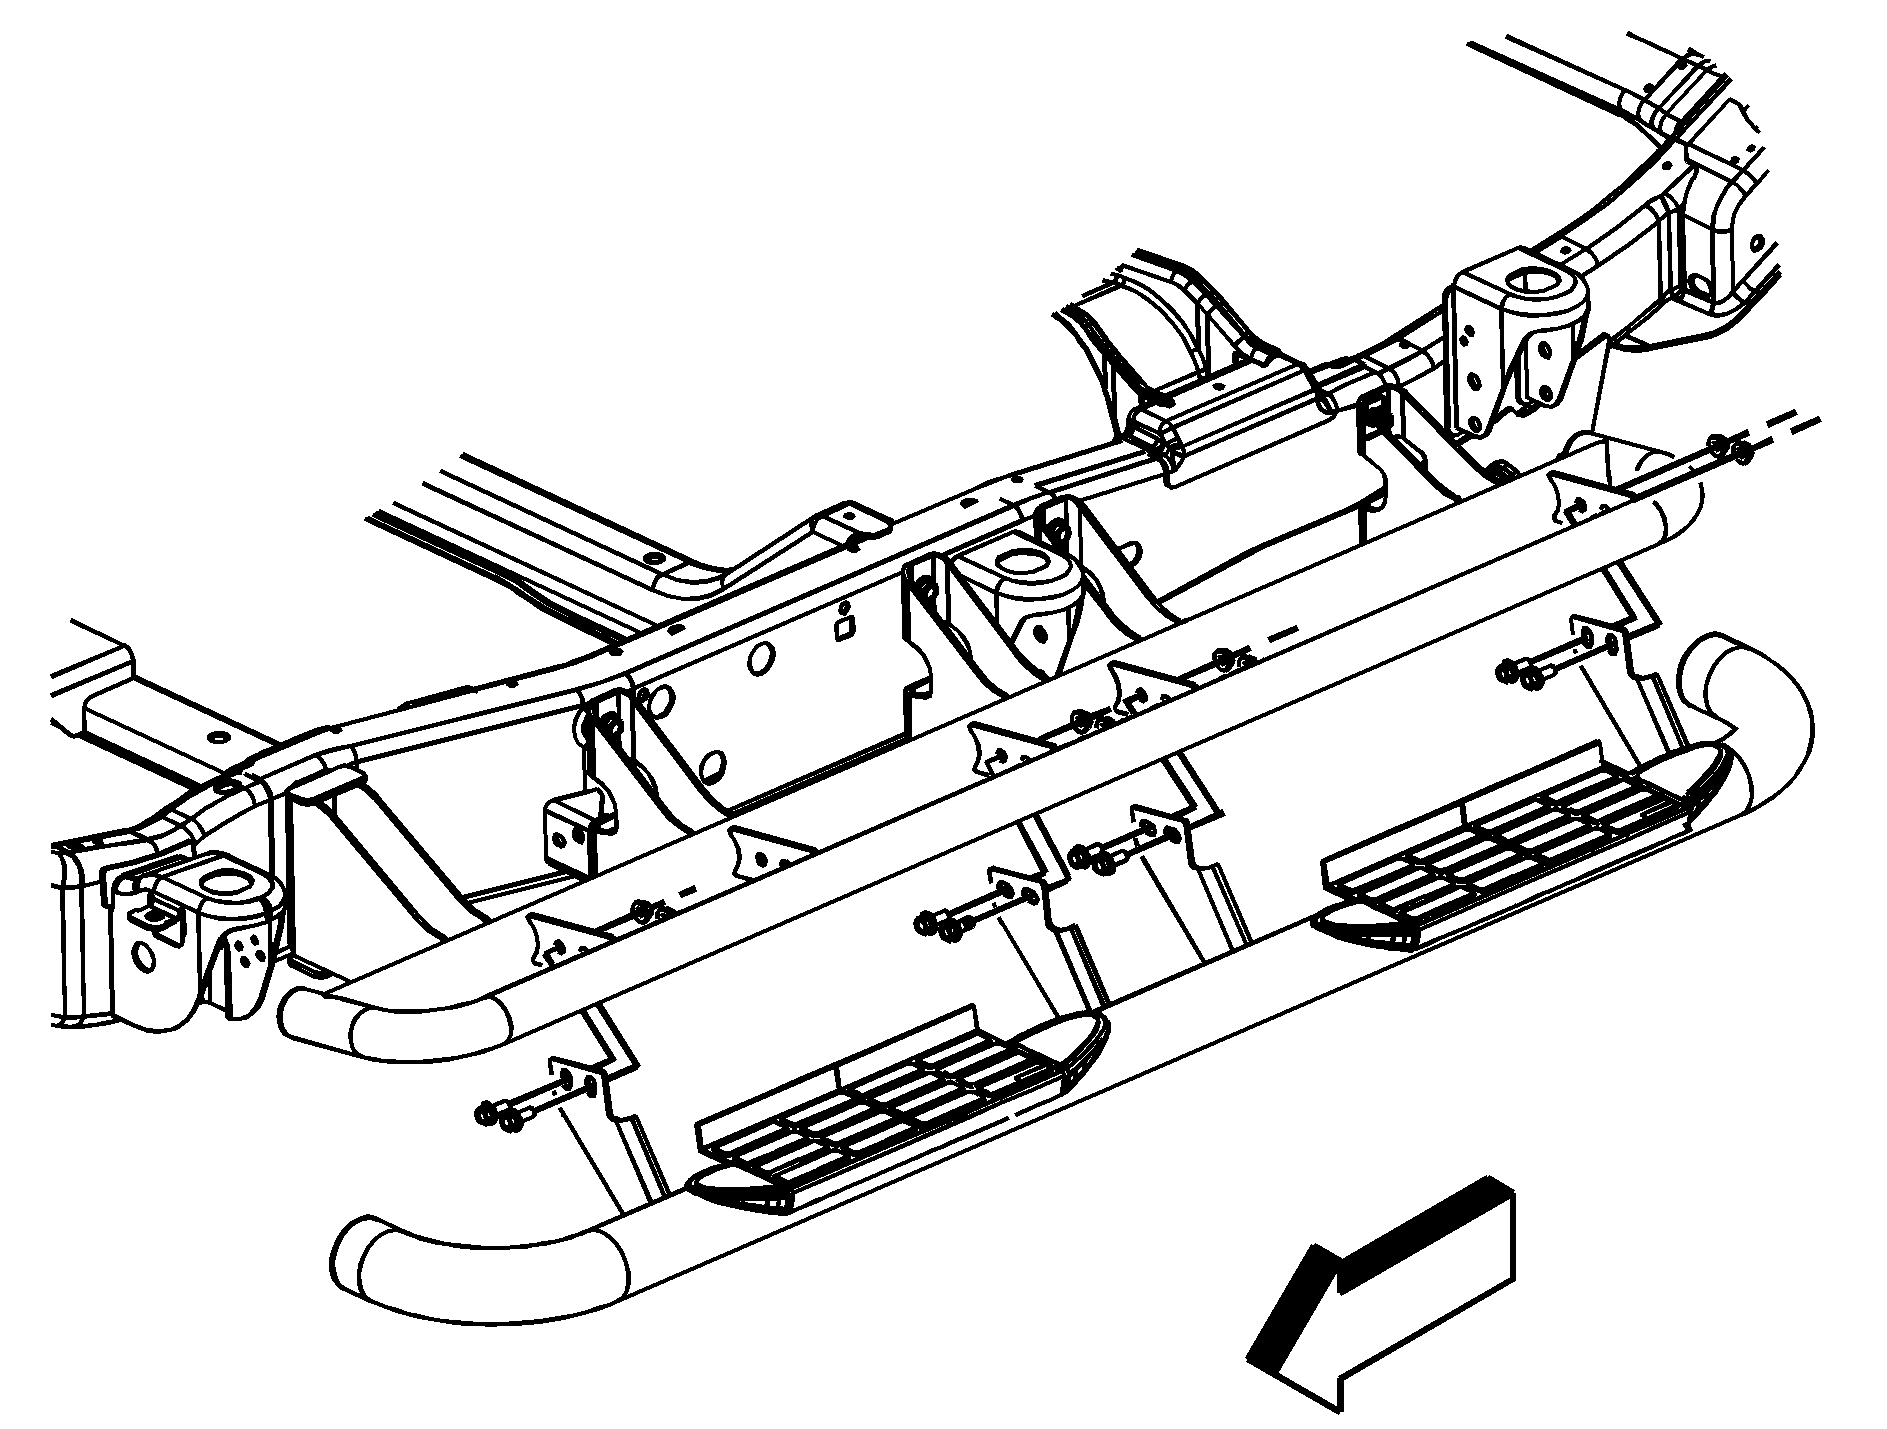
The driver's side of the vehicle is shown with the body removed for clarity. To remove a step:
- Remove the nuts and bolts attaching the step to the vehicle.
- Remove the step from the vehicle.
To install a step:
- Before installing the bolts:
- Install the side step to the vehicle. You might need someone to assist you in the installation.
- Install the nuts and bolts for the two inner brackets first, but do not tighten them.
- Using a level, make sure the step is level in relationship to the vehicle. Then, tighten the inner bracket nuts and bolts.
- Install the other nuts and bolts. Tighten all nuts and bolts to 39 lb ft (50 N·m).
| • | Remove all traces of the original adhesive patch. |
| • | Clean the threads of the bolts with denatured alcohol or equivalent and allow threads to dry. |
| • | Apply Threadlocker (GM Part No. 12345382, in Canada 10953489) or equivalent. |
