For 1990-2009 cars only
Off Road Lamp Replacement Low Profile
Removal Procedure
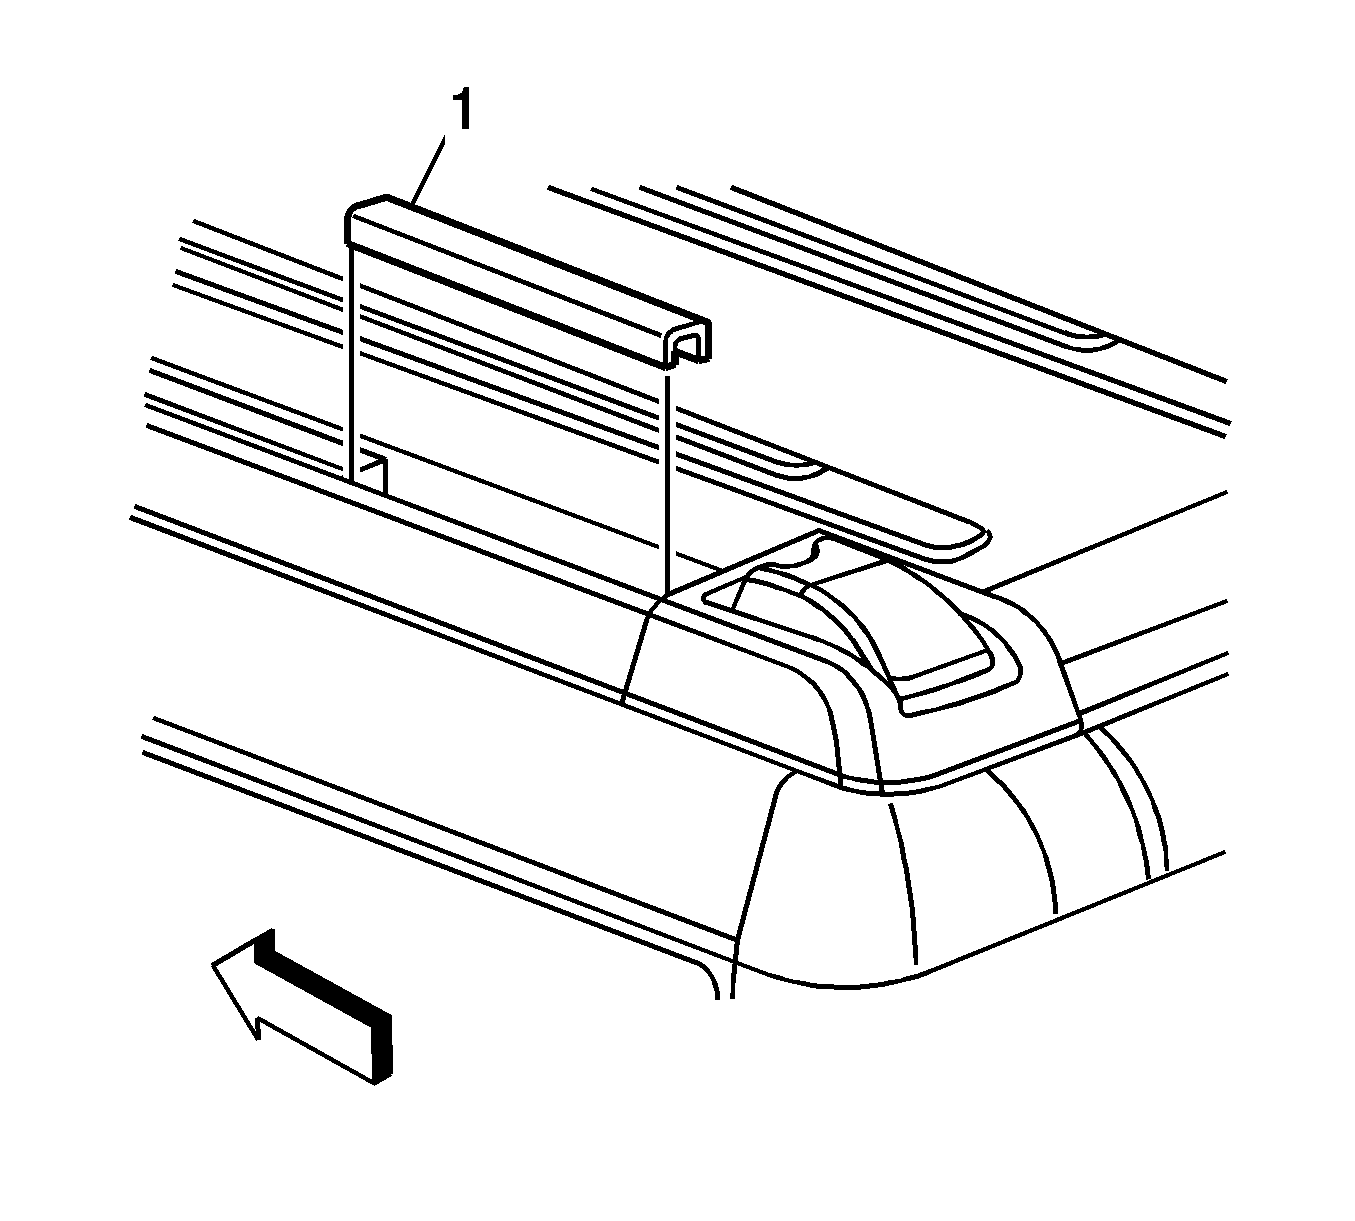
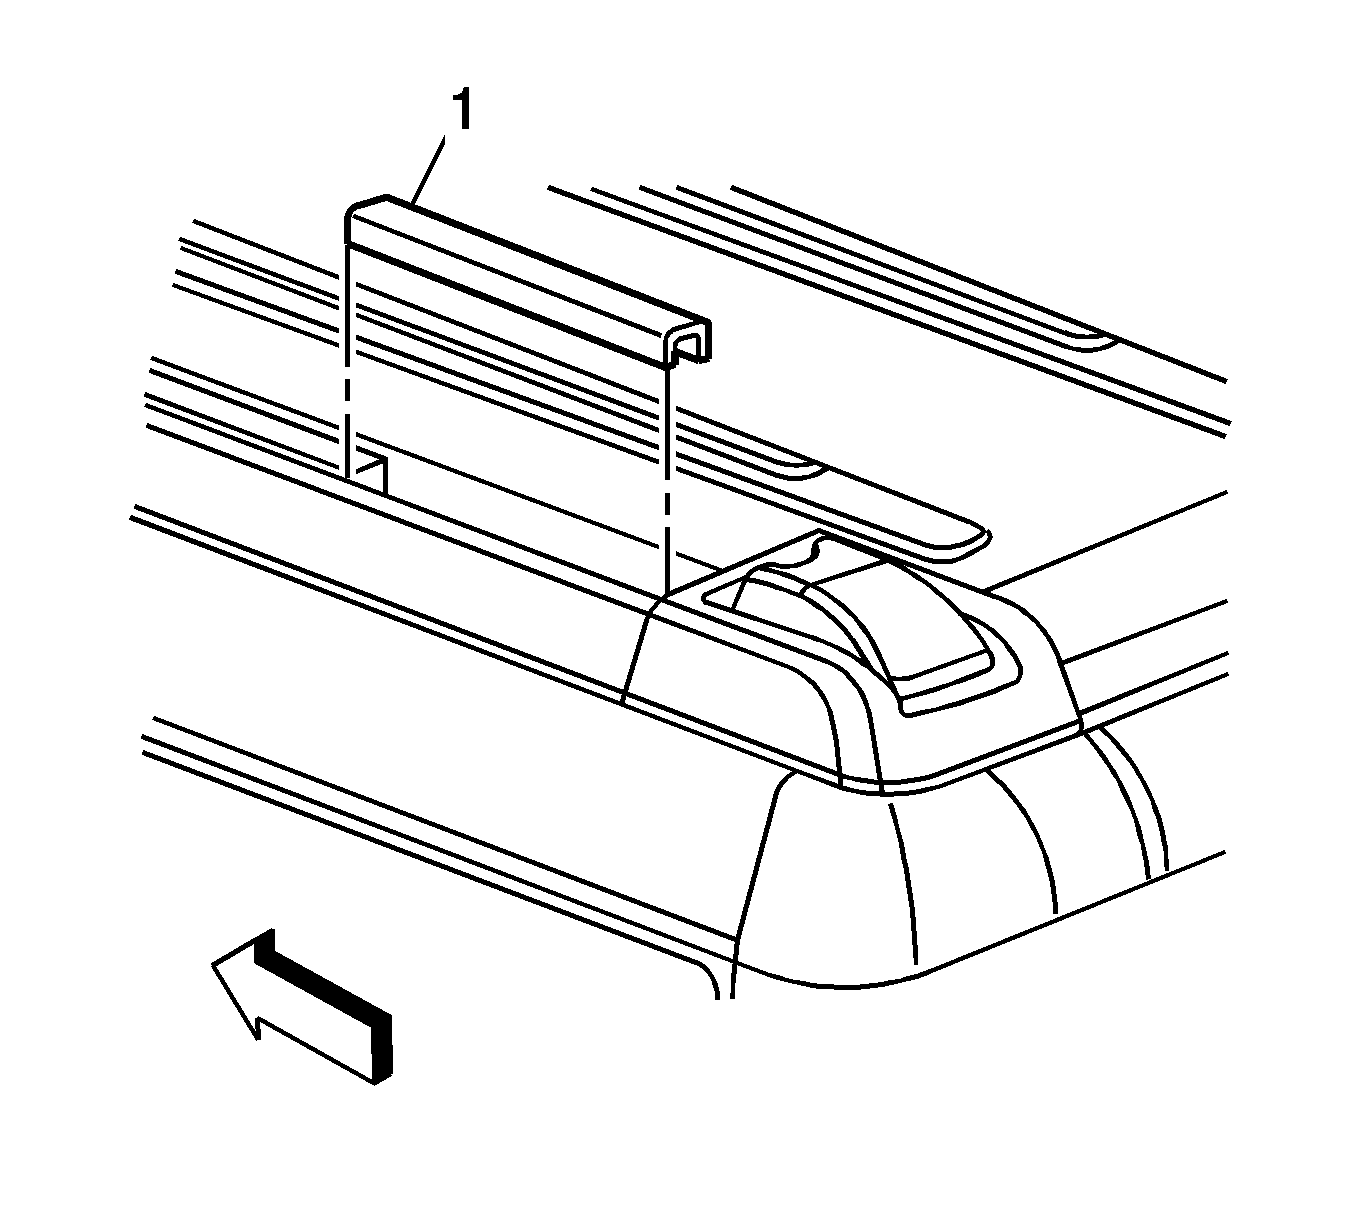
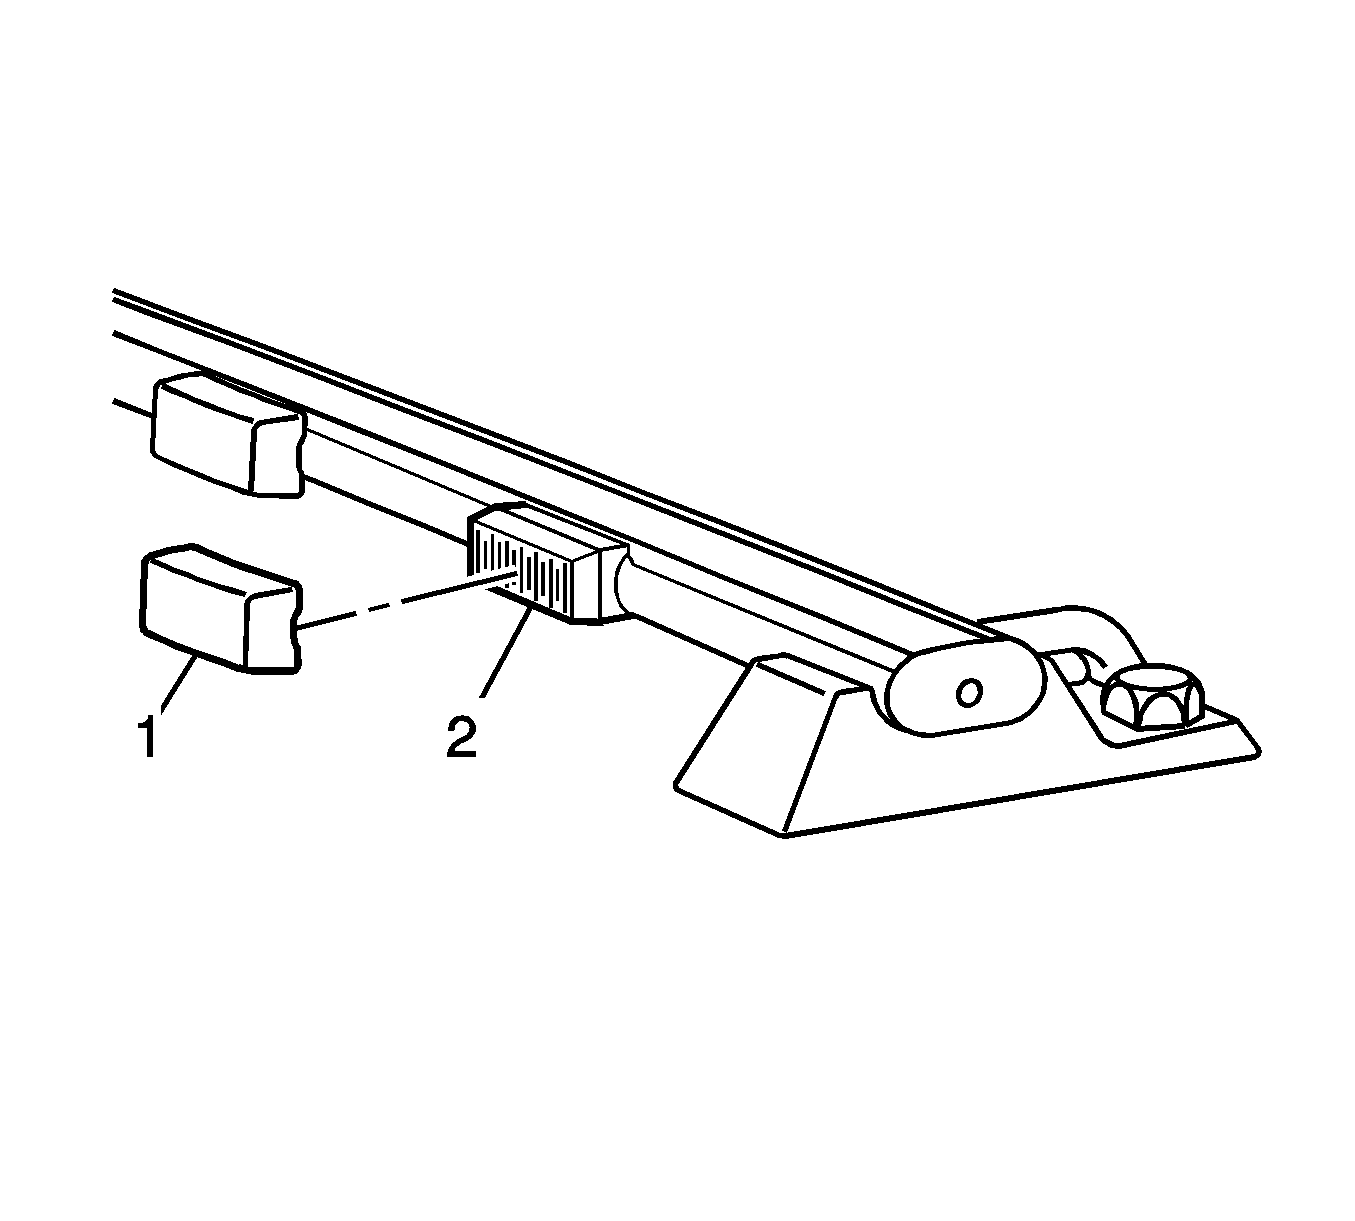
- On the sport utility vehicle (SUV), locate the plastic covers (1) toward the rear end of the roof rack side rails.
- Using a flat-bladed tool, remove the covers from both rear side roof rack side rails.
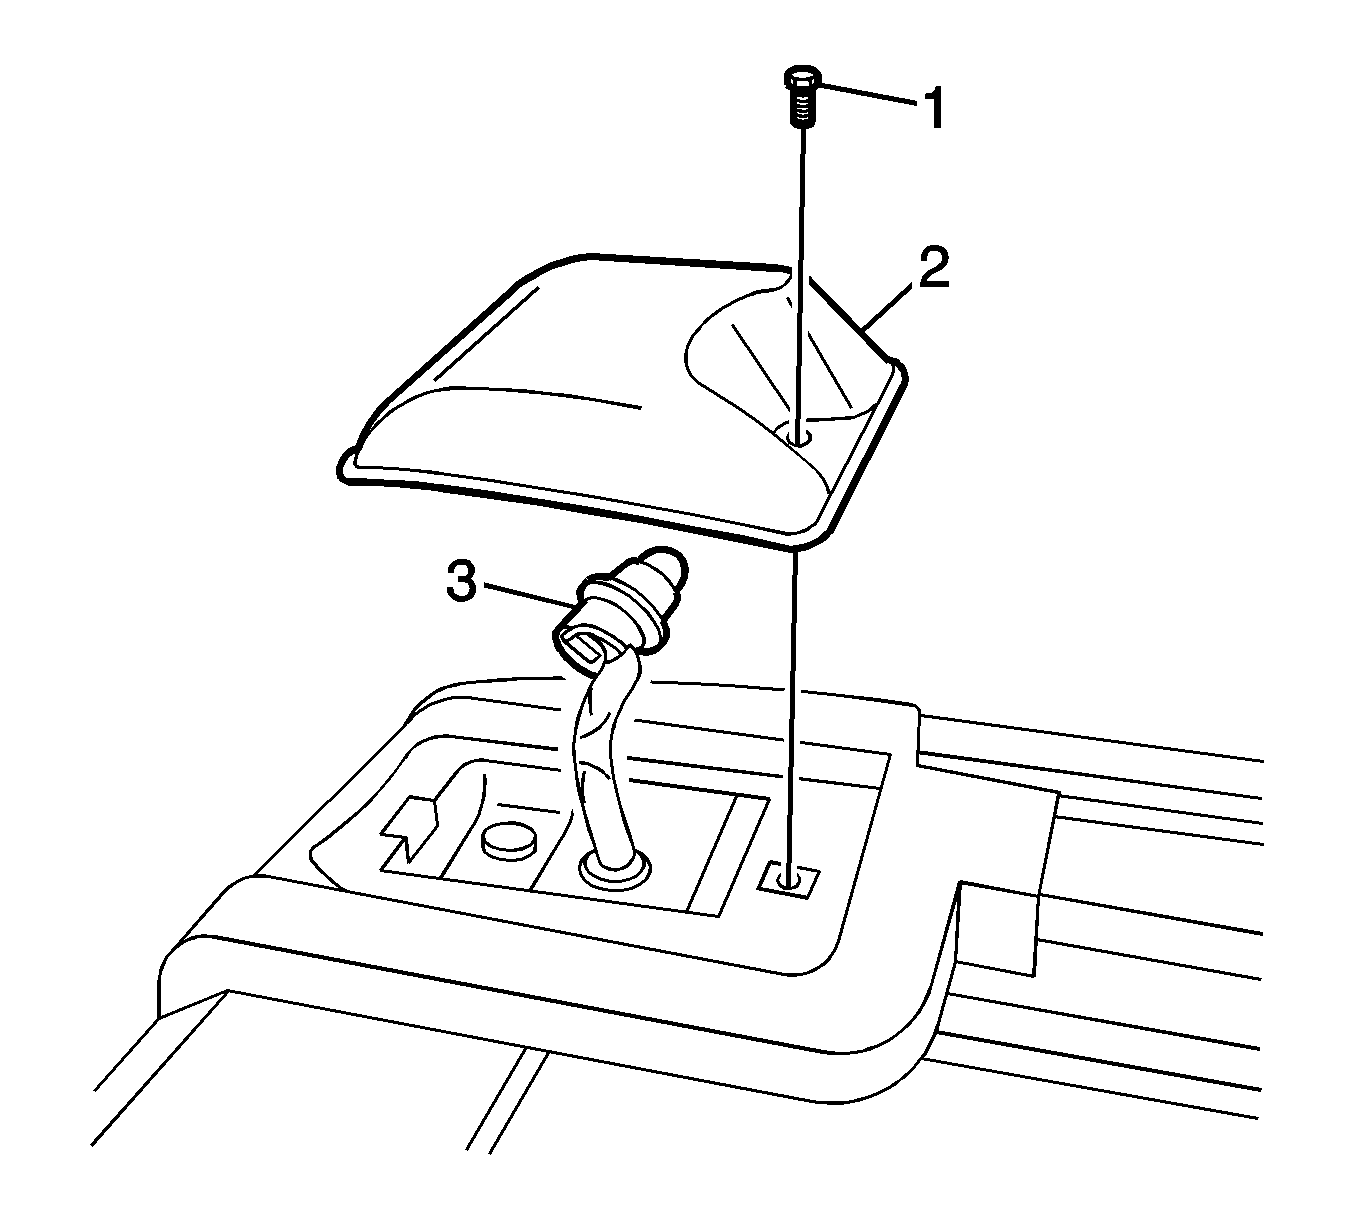
- On the sport utility truck (SUT) vehicle, locate the roof clearance lamps toward the rear end of the roof rack side rails.
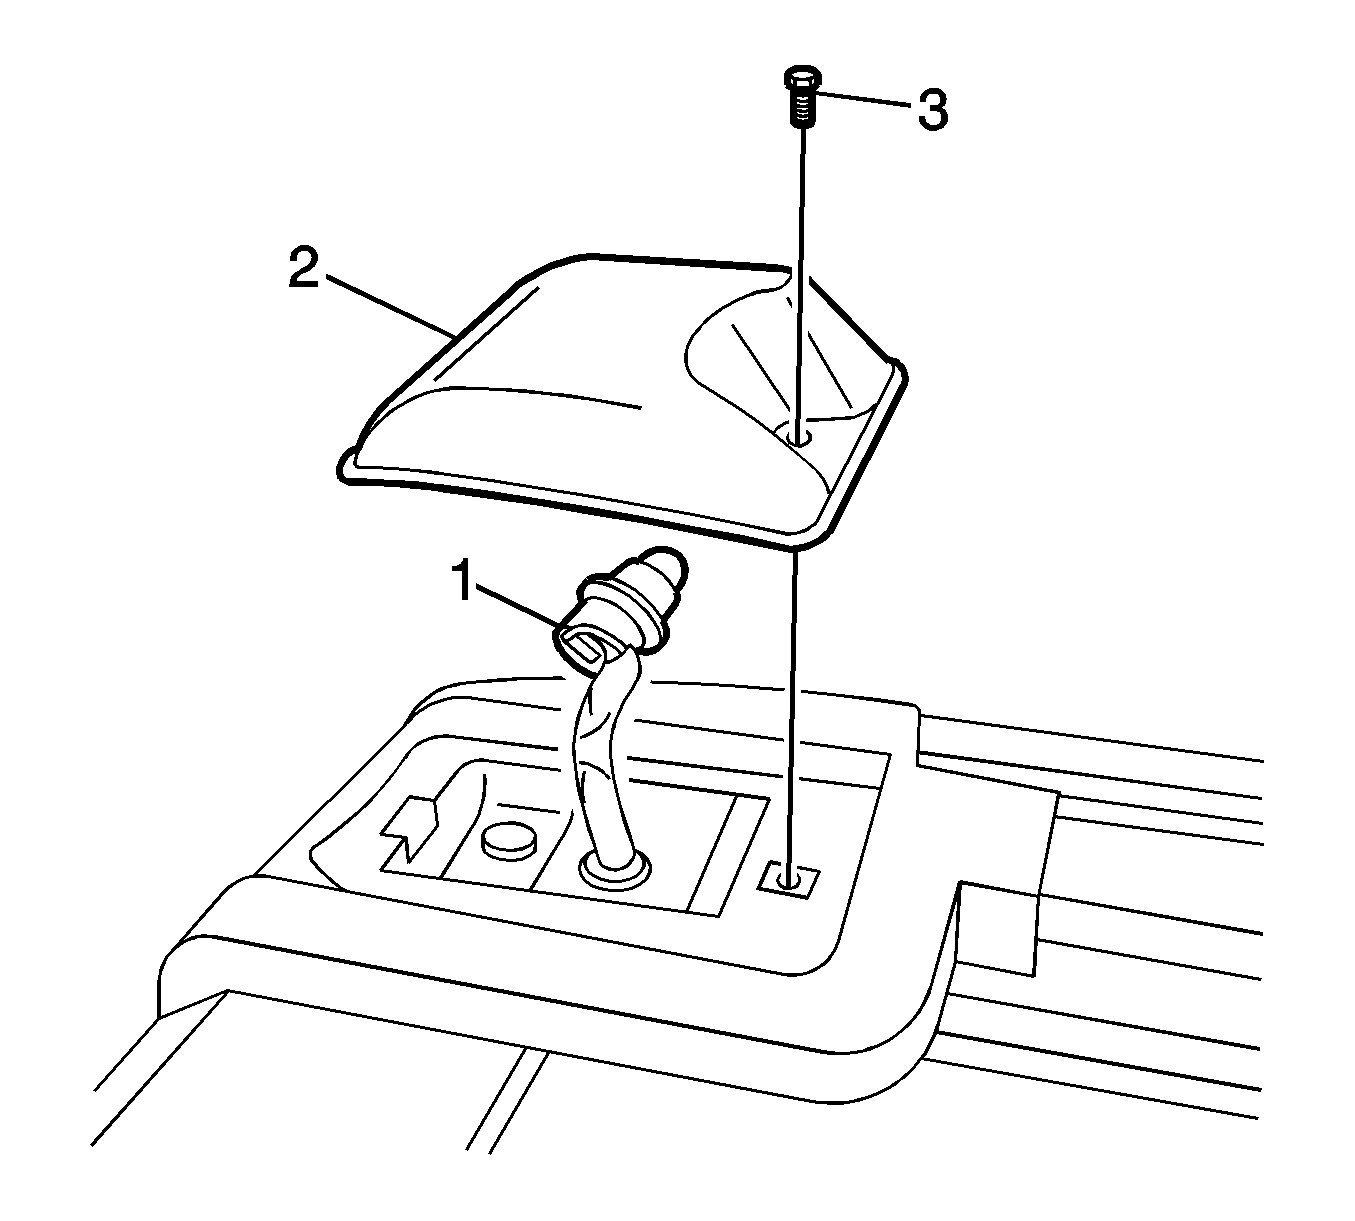
- Remove the screws (1).
- Using a flat-bladed tool, remove the clearance lamp lens covers (2) from both rear side roof rack side rails.
- Disconnect the lamp sockets (3) from the clearance lamp lens covers.
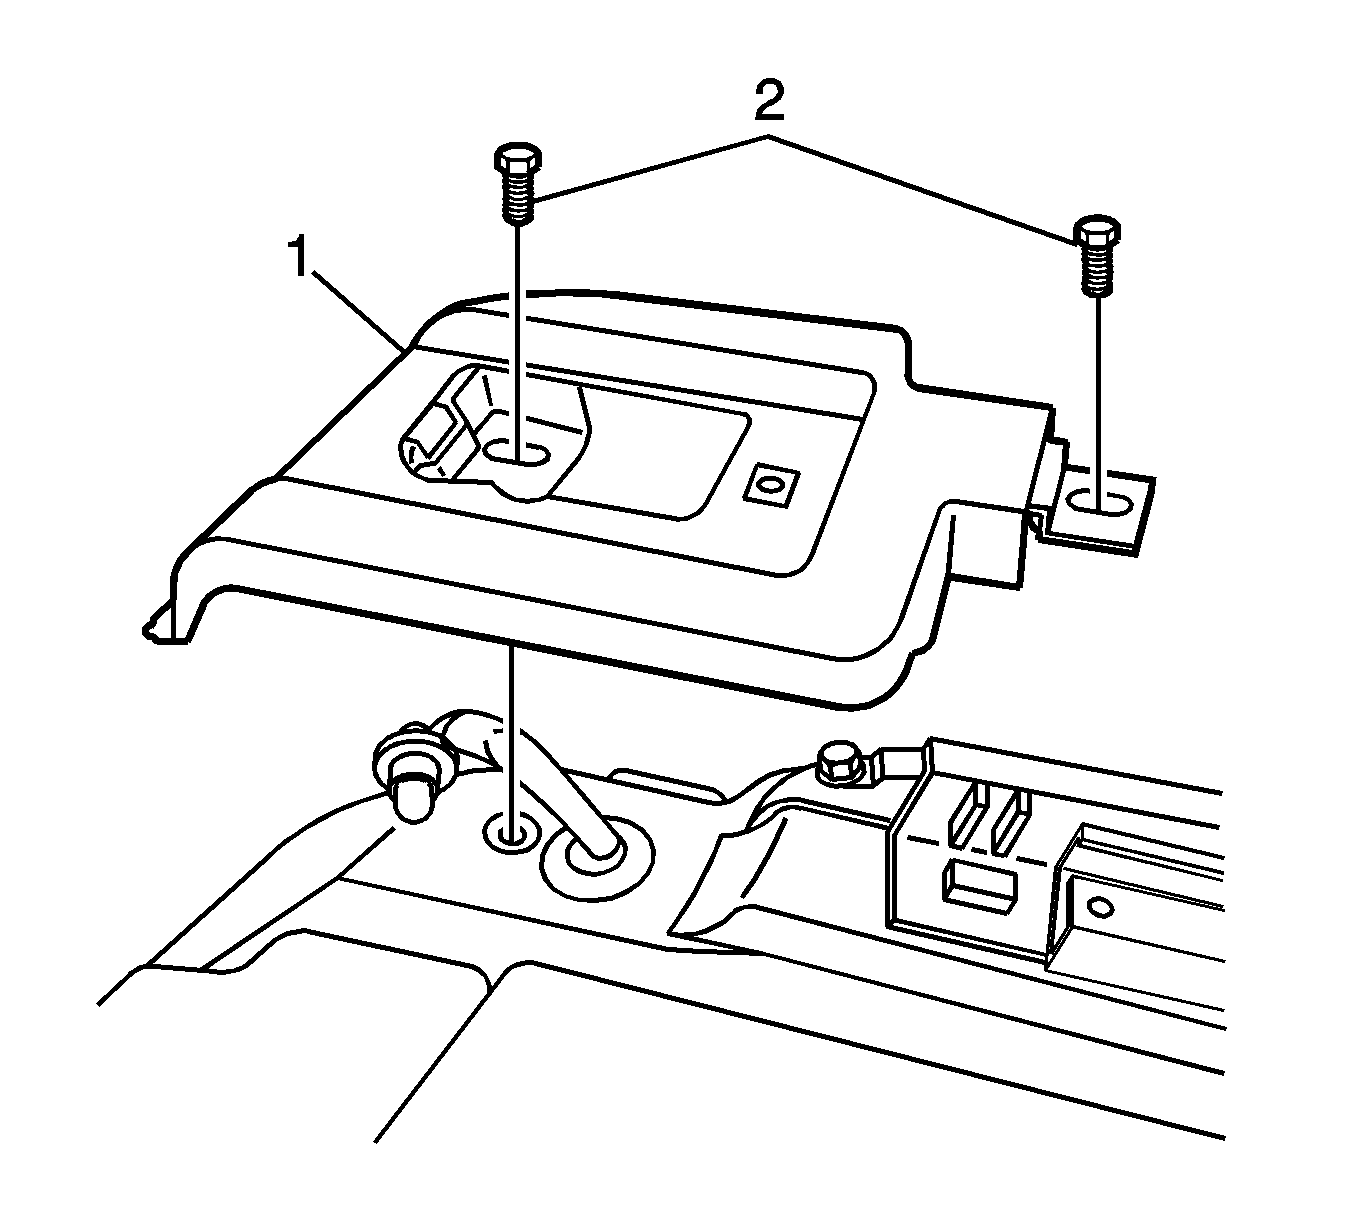
- Remove the screws (1) securing the stanchions to the roof side rails.
- Disengage the locating clips and remove the stanchions (2).
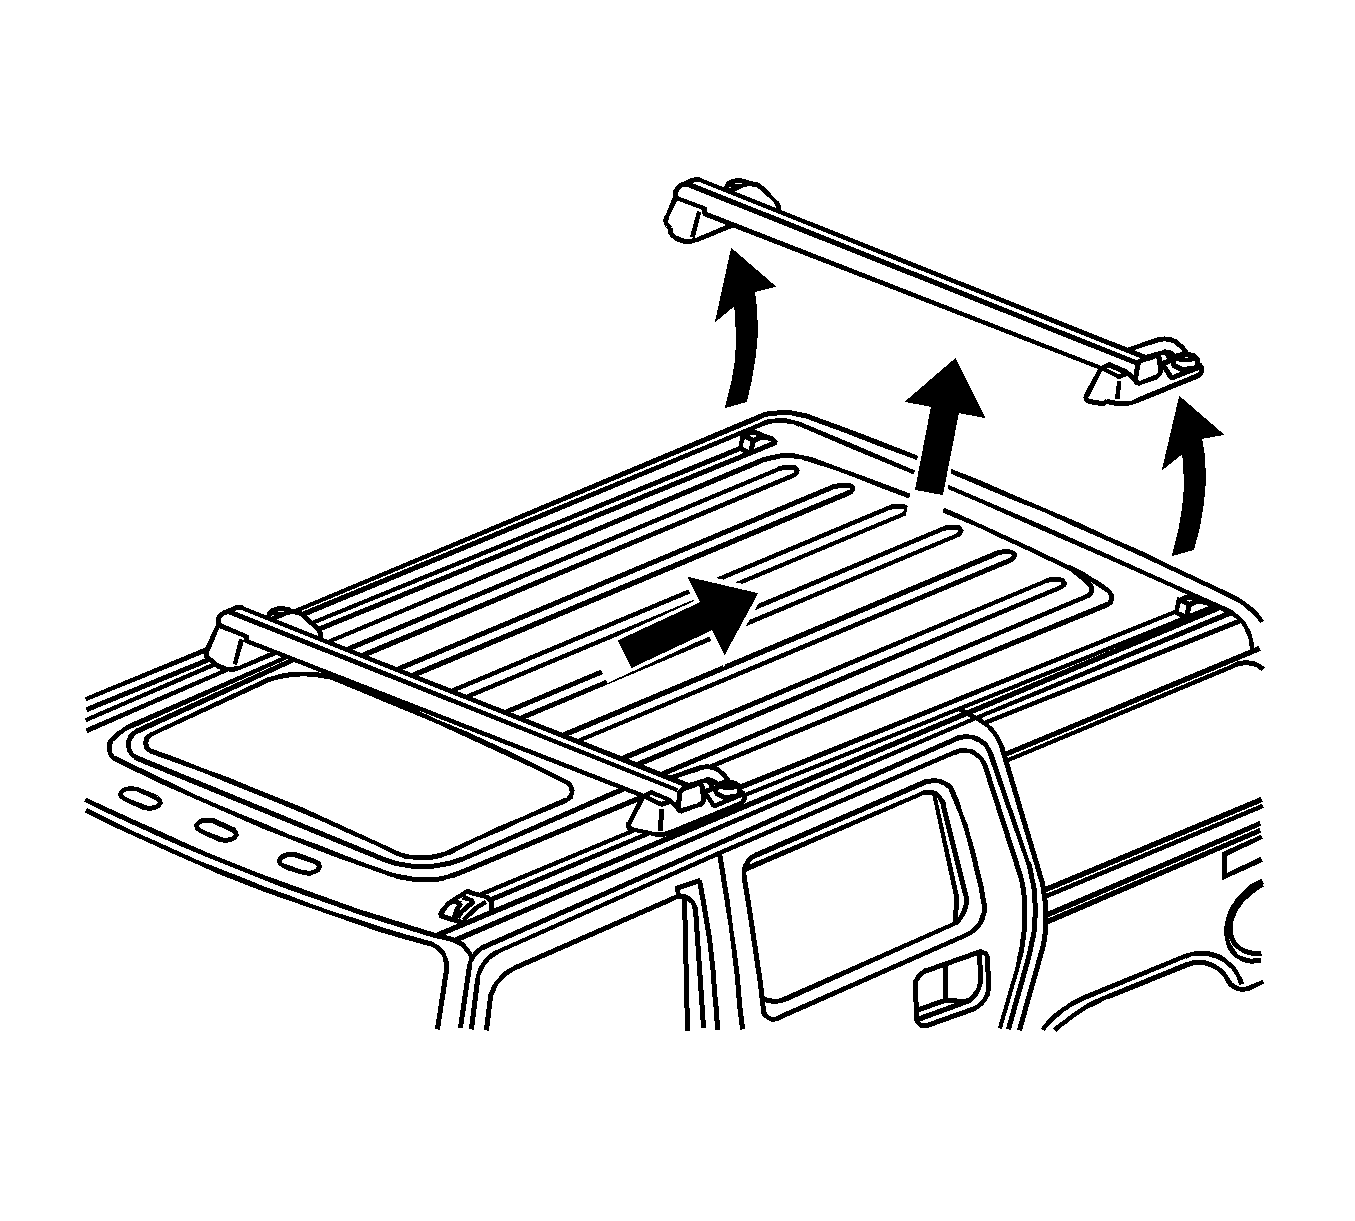
- On vehicles equipped with cross bars, loosen the lock knobs at each end of the cross bar in order to slide the cross bar and remove the cross bar from the roof rack side rails.
- Slide the cross bar towards the rear of the vehicle and remove where the roof clearance lamps were located.
- Repeat the removal process for vehicles equipped with more than one cross bar.
Installation Procedure
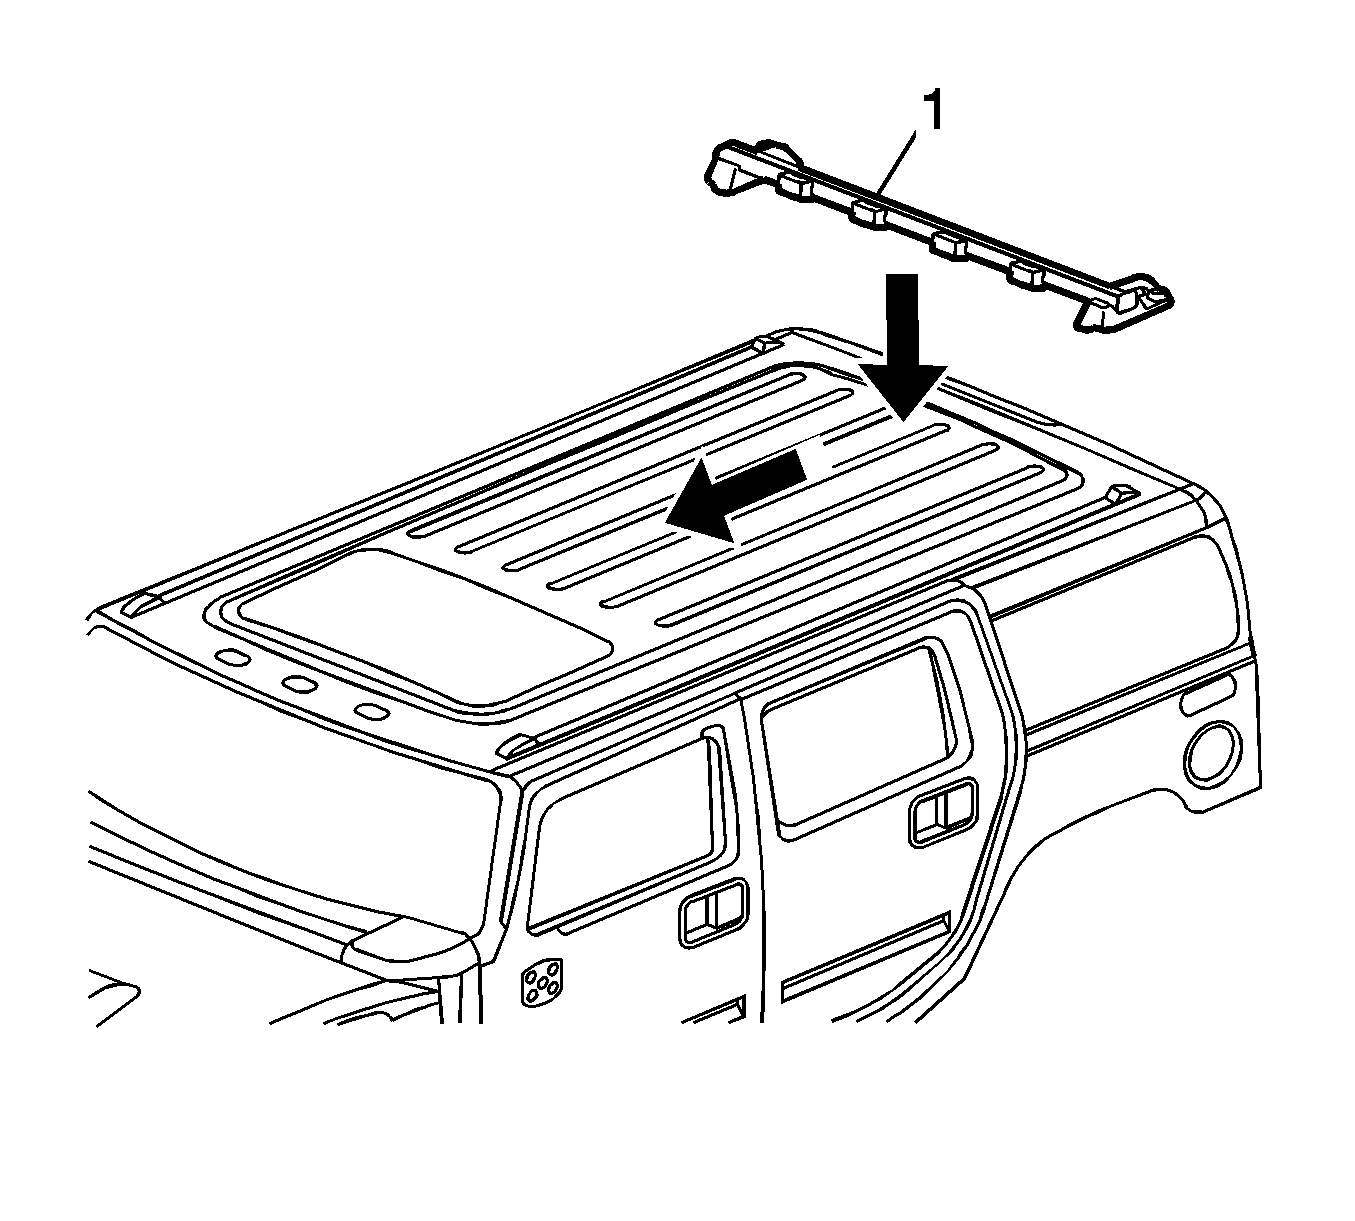
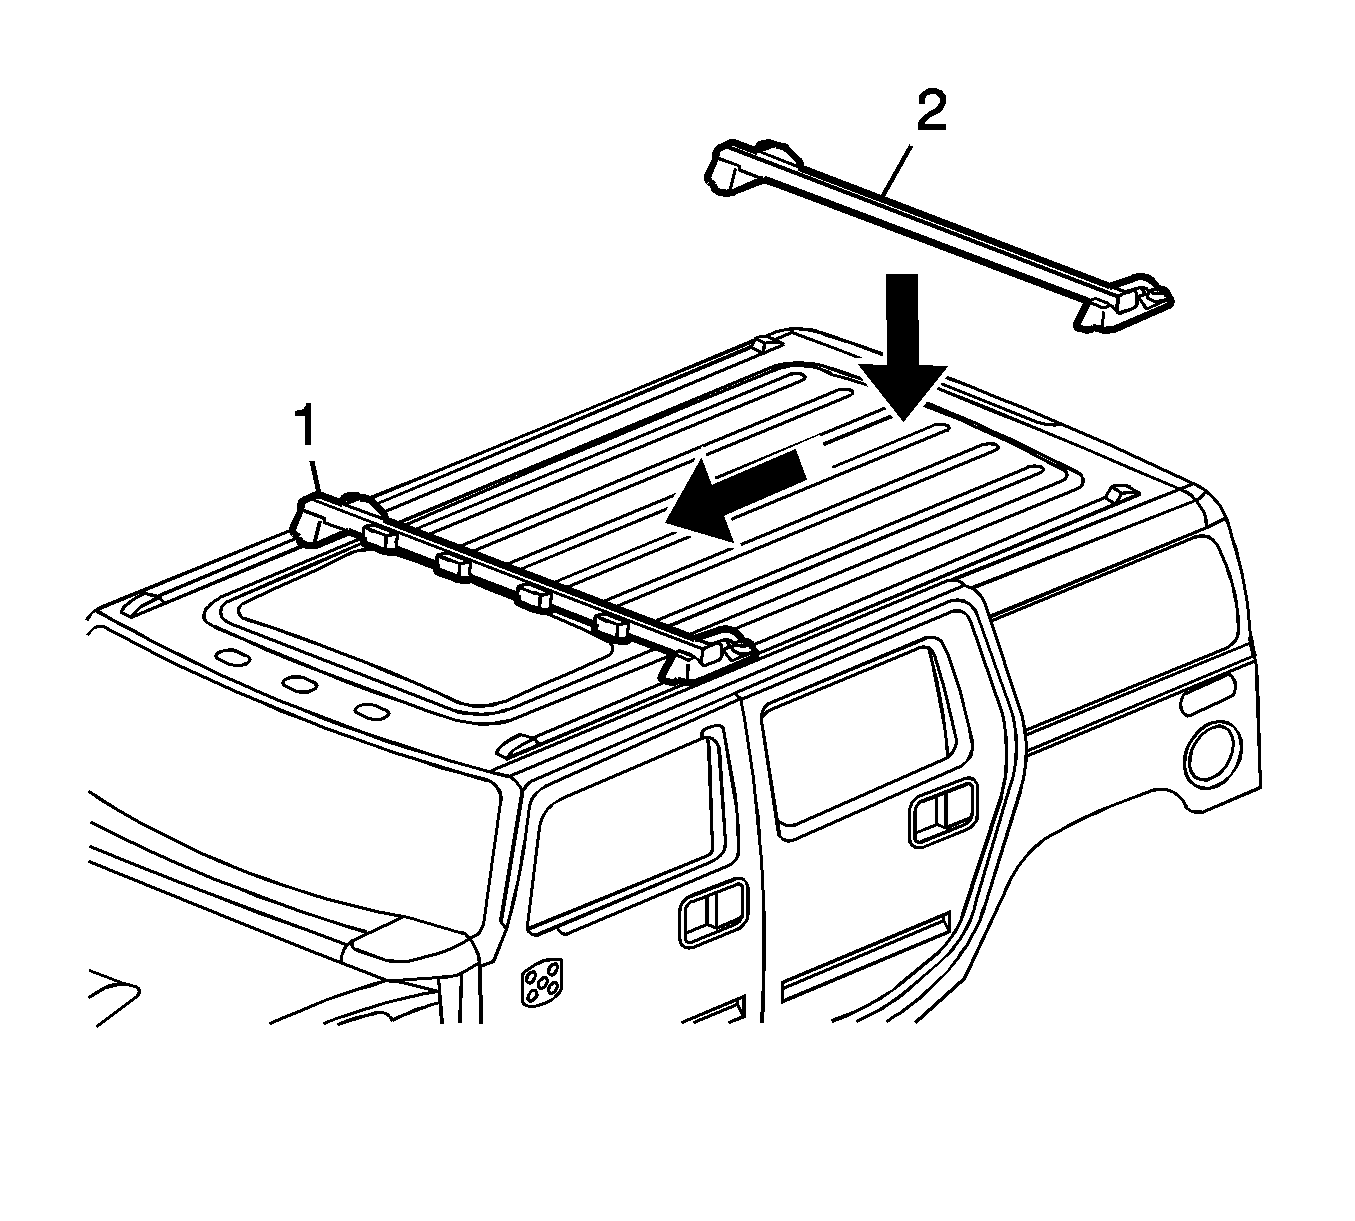
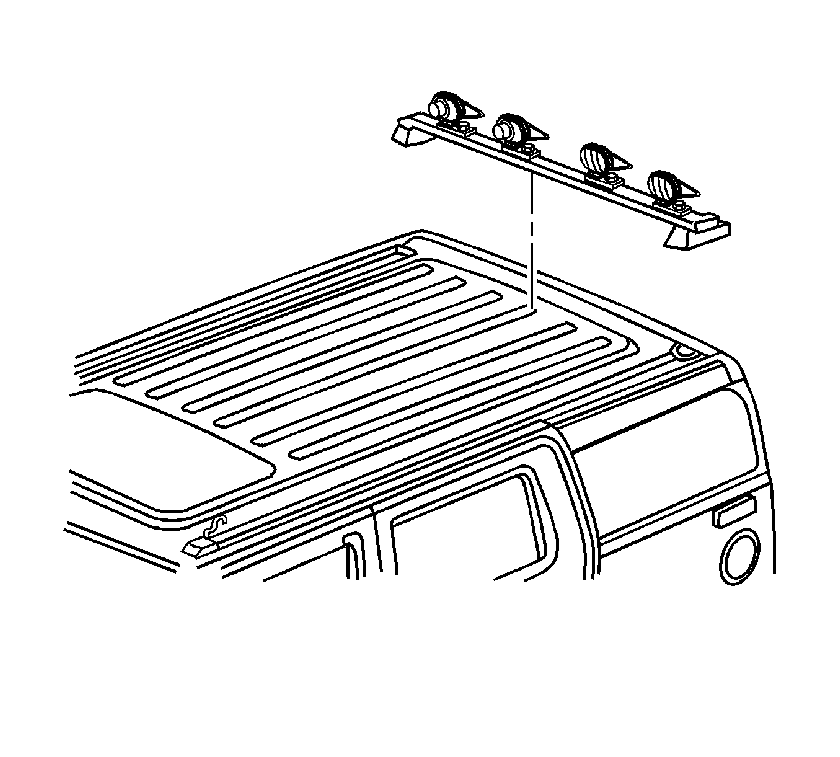
- Position the new roof mounted off road lamp bar assembly (1) to the openings where the roof clearance lamps were mounted.
- Slide the lamp bar assembly in the roof rack side rails all the way forward to the third detent position from the front of the rails.
- Tighten the lamp bar assembly lock knobs.
- Position the cross bar (2) into the roof rack side rails.
- Slide the cross bar to the lamp bar assembly (1).
- Tighten the cross bar assembly lock knobs.
- Install the plastic covers (1) inside the roof rack side rails.
- Position the roof marker lamp stanchion to the roof.
- Pull the electrical light harness through the opening in the stanchion.
- Secure the locking tab.
- Install the screws (2).
- Install the lamp socket (1) to the clearance lamp lens cover (2).
- Install the screws (3).
- Install the lens cover screws (3).
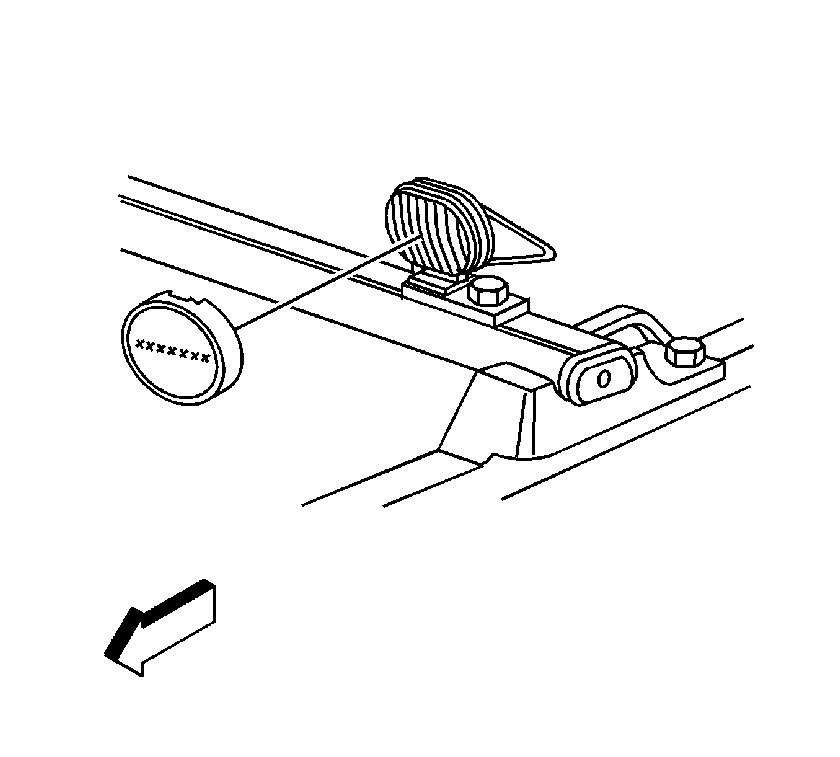
- Install the lamp lens covers (1) to the lamp bar assembly lights (2).
- Locate the roof lamp electrical harness located on the driver's side of the vehicle.
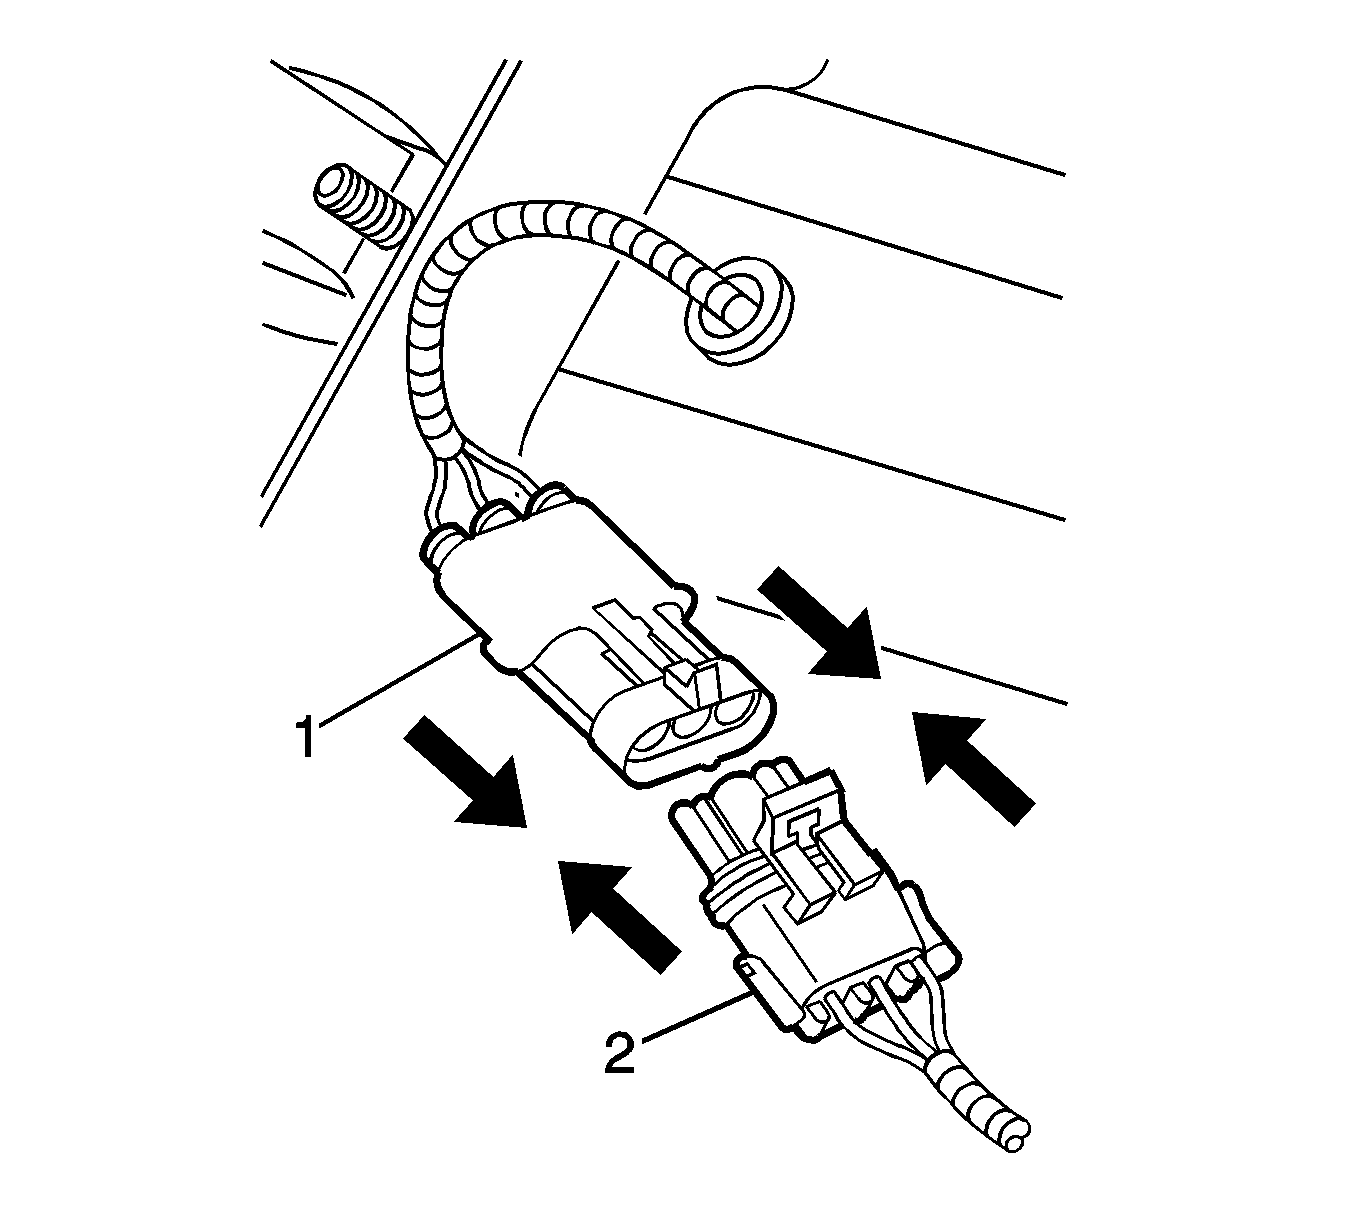
- Connect the lamp bar assembly electrical connector (1) to the body harness electrical connector (2).
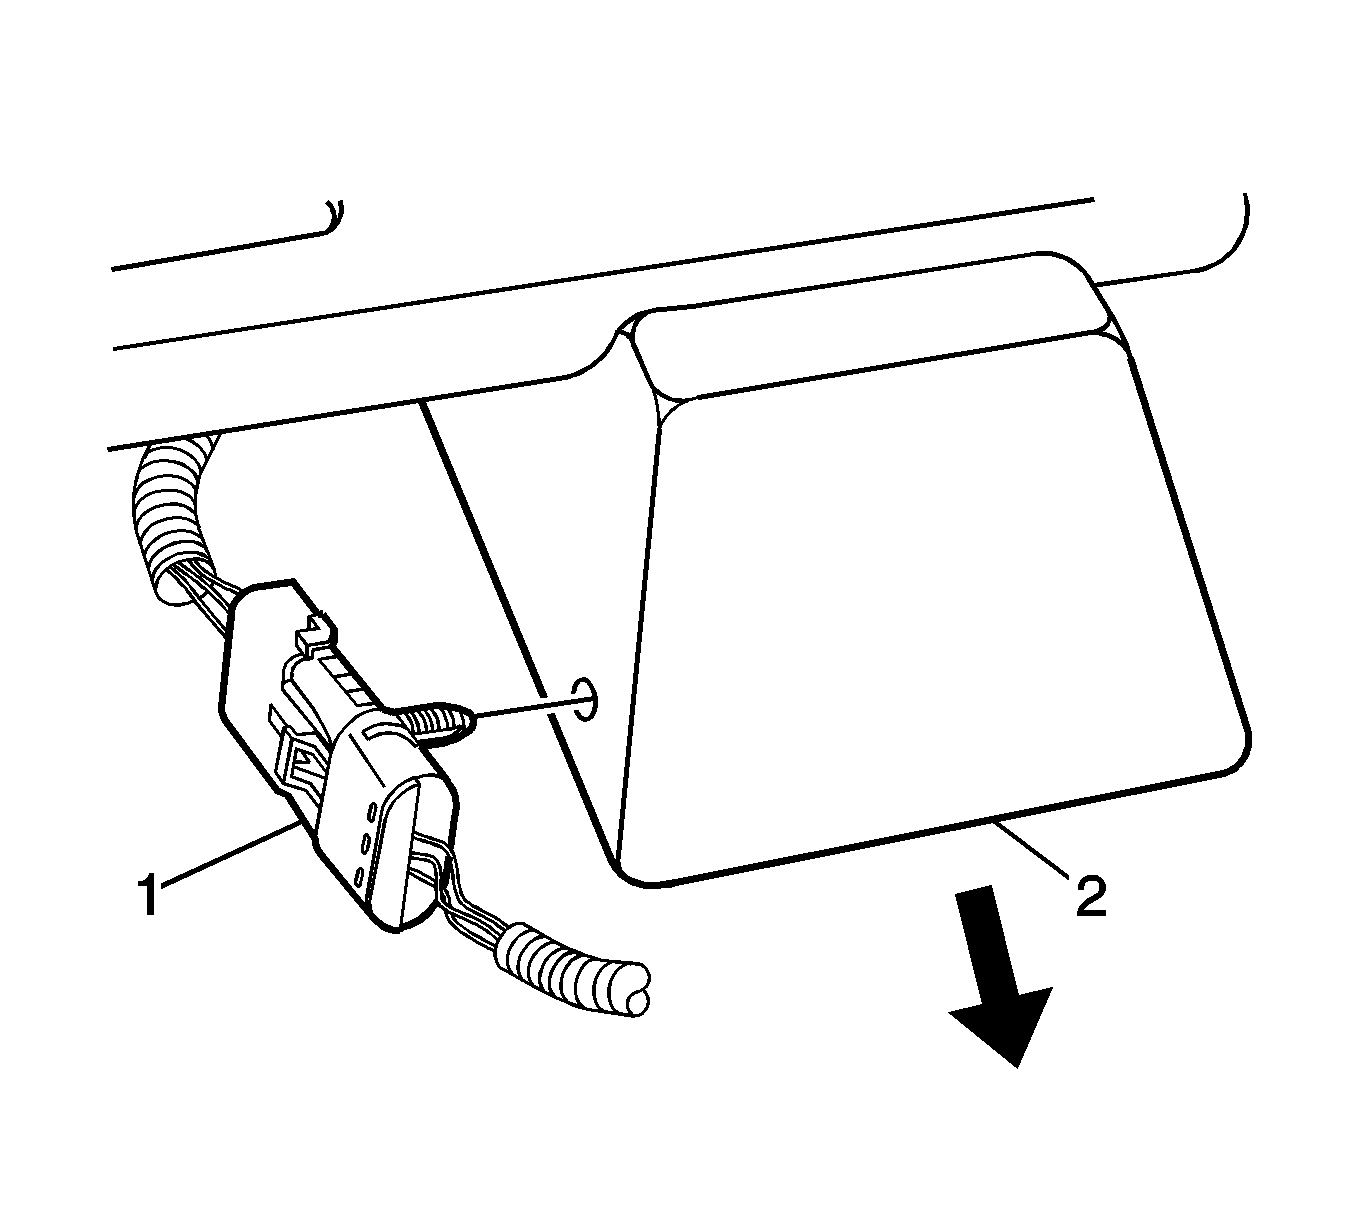
- Secure the electrical connection (1) to the lamp bar assembly frame (2).
- Inspect and verify the lamp bar operation.
Notice: Refer to Fastener Notice in the Preface section.
Tighten
Tighten the lamp bar assembly locking knobs to 7 N·m (62 lb in).
Tighten
Tighten the cross bar assembly locking knobs to 7 N·m (62 lb in).
Tighten
Tighten the screws to 5 N·m (44 lb in).
Tighten
Tighten the lens cover screws to 2.5 N·m (22 lb in).
Important: Remove the lamp lens covers prior to lamp operation.
Off Road Lamp Replacement Base
Removal Procedure
- Remove the sunshade.
- Remove the windshield pillar garnish molding. Refer to Windshield Pillar Garnish Molding Replacement .
- Disconnect the body harness roof lamp wire connectors.
- Remove the overhead console. Refer to Roof Console Replacement .
- Remove the power switch nut (1).
- Remove the power switch.
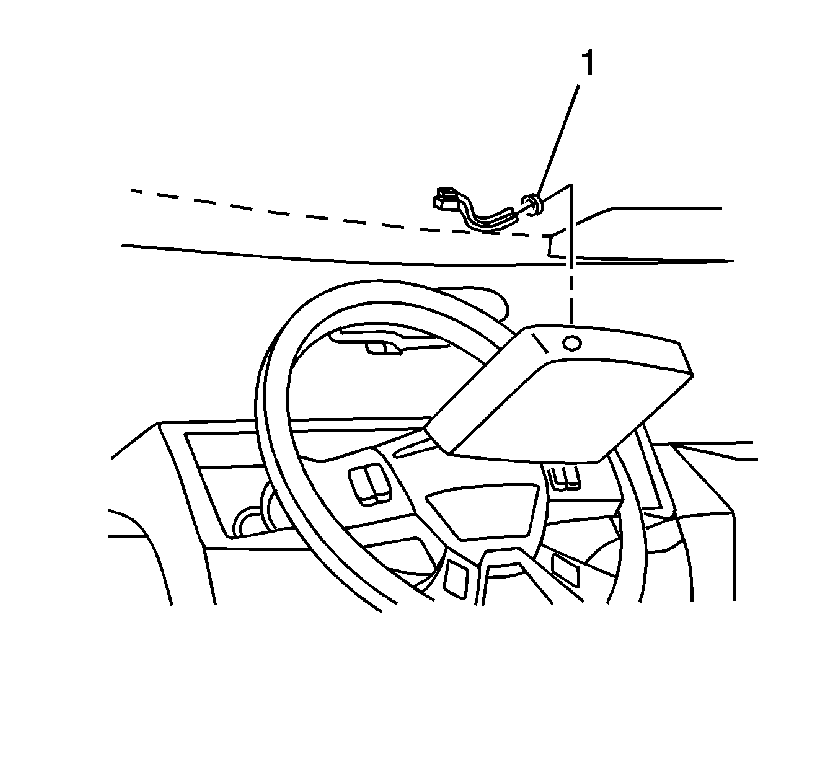
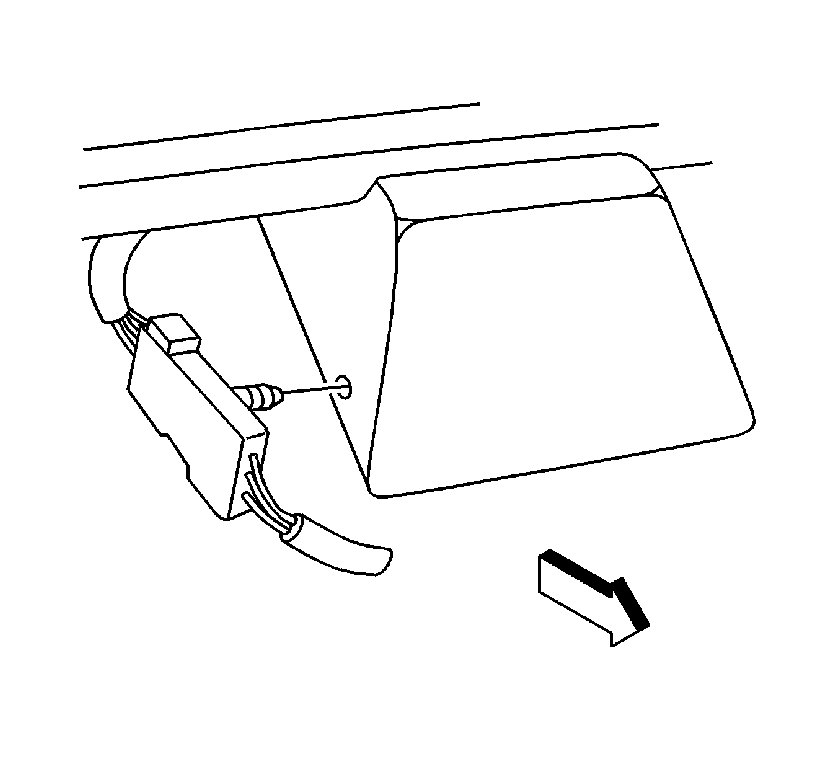
- Remove the connector retention clip from the hole in the driver's side lamp bar assembly stanchion.
- Remove the clearance lamp bulb and the clearance lamp. Refer to Clearance Lamp Replacement .
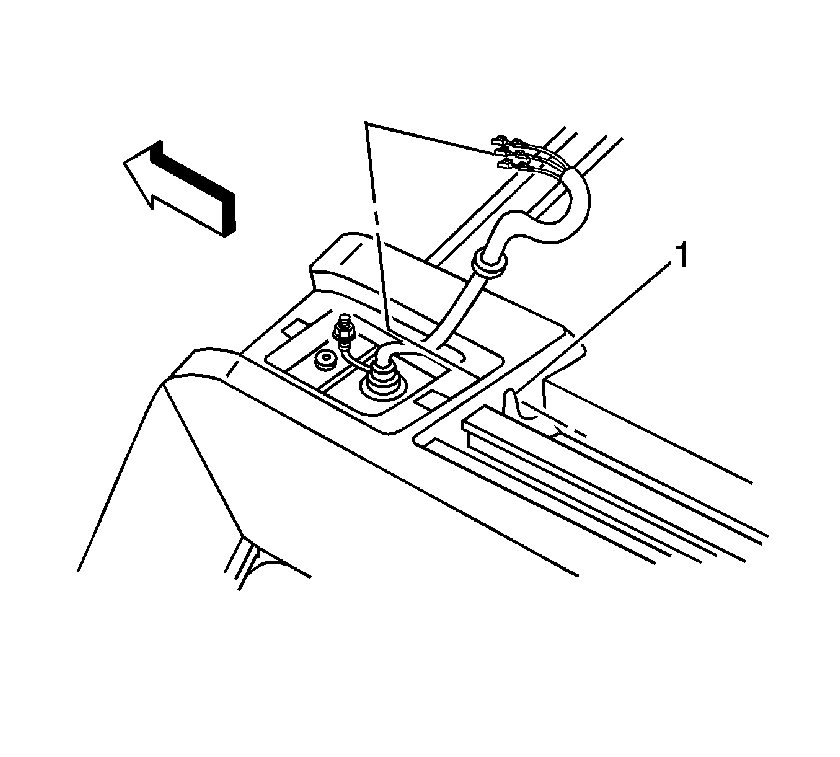
- Remove the wires through the opening (1) in the marker lamp pocket in the roof rail.
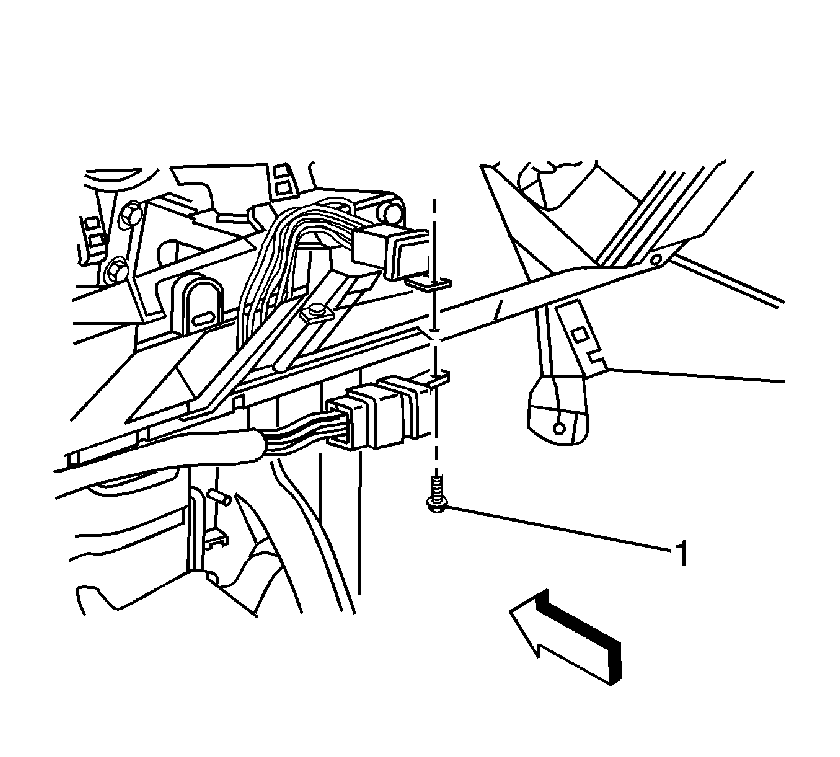
- Remove the bolt (1) in the opening in the dash rail from the J-nut on the upper relay flange, and remove the relays.
- Disconnect the section of harness connected to the Z82 location of the MidBec, trailer wiring connector, and remove.
- Remove the body harness containing the 3 wires through the overhead console opening through the headliner down the windshield pillar.
- If equipped, remove the luggage carrier roof rails. Refer to Luggage Carrier Replacement .
- Remove the lamp bar assembly with the lamps installed, out of the roof from the openings in the roof rails.
- Disconnect the lamp electrical connectors from the retainers on the back of the lamp stanchions.
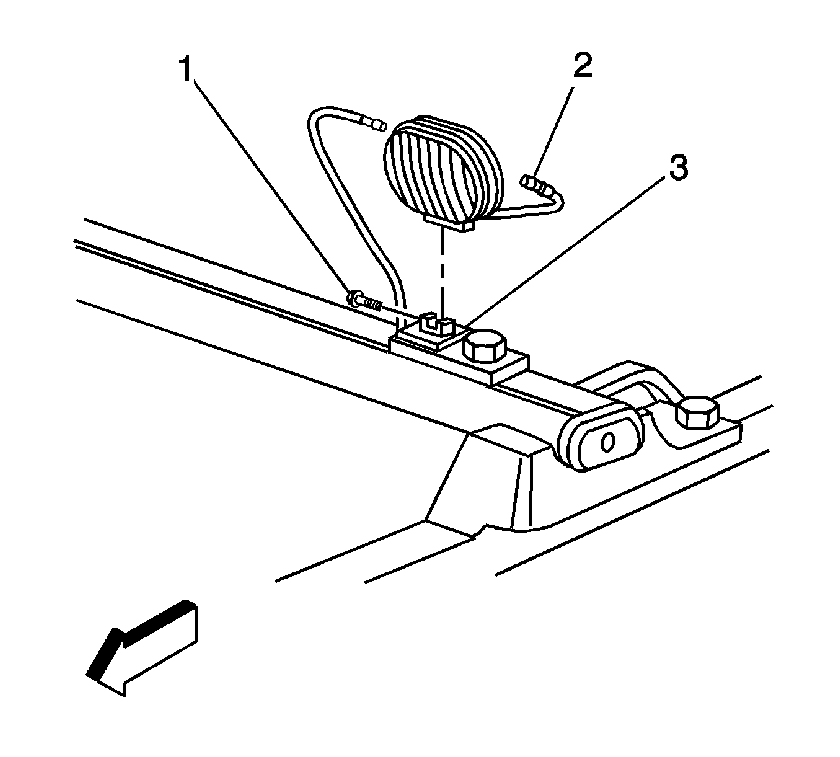
- Remove the lamps from the U-brackets of the lamp bar assembly.
Installation Procedure
- Install the lamps into the U-brackets of the lamp bar assembly.
- Install the bolts (1) through the U-brackets and the lamps.
- Connect the lamp electrical connectors (2), and snap the connectors into the retainers on the back of the lamp stanchions (3).
- Guide the lamp bar assembly, with the lamps installed, onto the roof through the openings in the roof rails.
- If equipped, replace the luggage carrier roof rails. Refer to Luggage Carrier Replacement .
- Install the lamp covers.
- Remove the overhead console. Refer Roof Console Replacement .
- Remove the windshield pillar garnish molding. Refer to Windshield Pillar Garnish Molding Replacement .
- Remove the sunshade. Refer to Sunshade Replacement .
- Route the section of the body harness containing the three individual wire connectors up the windshield pillar and through the headliner into the overhead console opening.
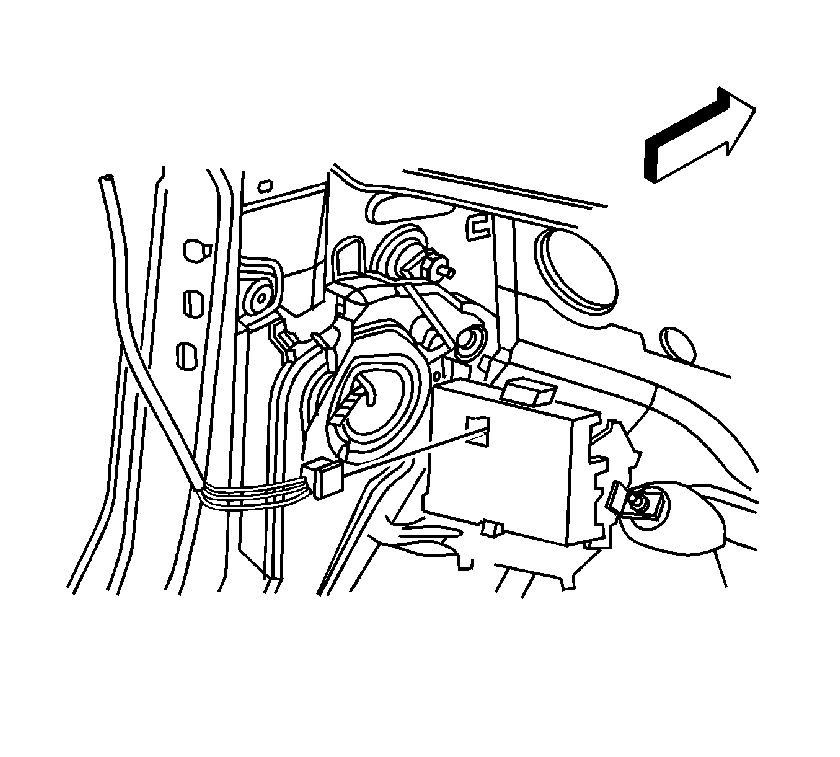
- Route the section of the harness with the connector under the dashboard, and connect into the Z82 location of the MidBec (trailer wiring connector), ensuring the connector is fully seated.
- Route the section of the body harness containing the relays along the dash panel rail. Install bolt (1) through the opening in the dash rail, through the relays and into the J-nut on the upper relay flange.
- Locate the harness for the overhead clearance lamp, which is located near the top of the A-pillar above the headliner, and disconnect.
- Remove the drivers side front overhead marker lamp and bulb. Refer to Clearance Lamp Replacement .
- Remove the clearance lamp harness through the hole in the roof, being careful not snag or force harness out.
- Guide the section of the harness containing the 3 individual wire connectors down through the hole where the original harness was removed in step 9, and into the vehicle along the A-pillar.
- Guide the remaining wires through the opening (1) the marker lamp pocket in the roof rail.
- Guide the wires into the connector. Once terminals are fully seated, close the retaining clip of the connector. Wires are to be placed in this order:
- Insert connector into the connector from the light bar assembly.
- Re-install the clearance lamp, making sure to re-install the lamp bulb. Refer to Clearance Lamp Replacement .
- Insert connector retention clip on the connector into the hole on the drivers' side lamp bar assembly stanchion.
- Inside the vehicle, guide the 3 individual wire connectors running out of the headliner through the power switch nut (1) and through the hole from the inside of the overhead center console.
- Insert the individual wire connectors into the terminals of the power switch, and insert the switch into the overhead center console. Hand tighten the power switch nut securely. Wires are to be placed in this order:
- Install the overhead center console. Refer to Roof Console Replacement .
- Locate the harness connector for the overhead clearance lamp that was disconnected in step 15, and connect to the new harness. Guide the remaining 2 connectors down to underneath the dash.
- Once the wires have been routed under the dash, locate the connectors on the body harness.
- Insert one wire and connector from roof lamp harness into one wire and connector in the body harness. Connect the remaining connectors. Tie wrap any loose wires securely to prevent squeaks, rattles, or wire damage.
- Replace the windshield pillar garnish molding. Refer to Windshield Pillar Garnish Molding Replacement .
- Replace the sunshade. Refer to Sunshade Replacement .
- Operate lights and inspect for proper operation.

Notice: Refer to Fastener Notice in the Preface section.
Tighten
Tighten the bolts to 15 N·m (11 lb ft).
If equipped, remove the luggage carrier roof rails. Refer to Luggage Carrier Replacement .


Tighten
Tighten bolt to 7 N·m (62 lb in).
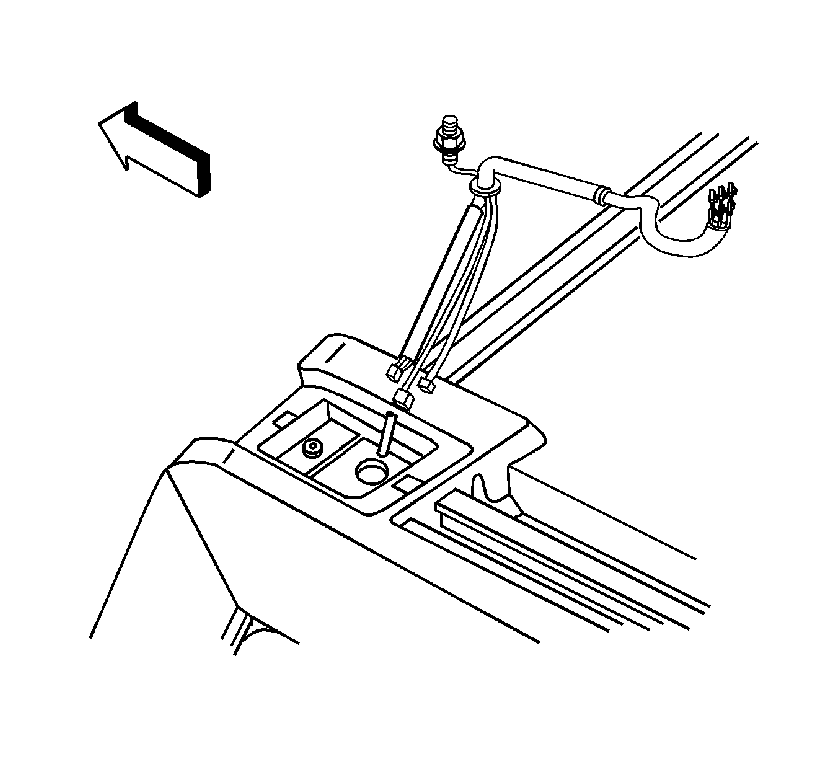
Important: Seat grommet properly in hole to insure a watertight seal. Failure to do so will cause water damage to the vehicle.

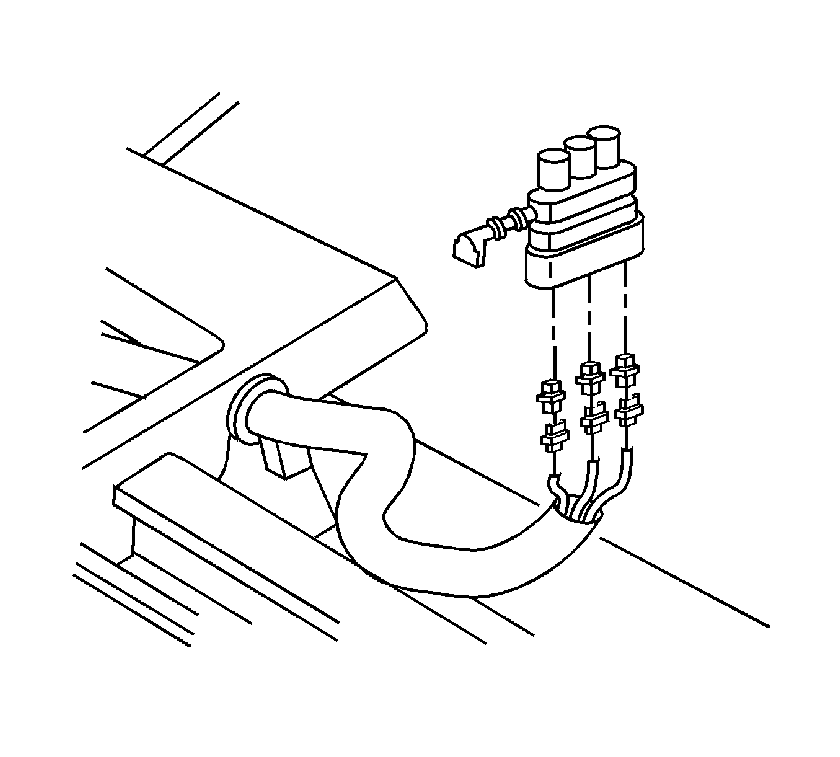
| • | Opening A = Purple wire |
| • | Opening B = Black wire |
| • | Opening C = Red wire |


| • | Terminal 1= Blue Wire |
| • | Terminal 2= Yellow Wire |
| • | Terminal 3= Black Wire |
