For 1990-2009 cars only
Special Tools
J 43181 Heater Line Quick Connect Release Tool
Removal Procedure
- Raise and suitably support the vehicle. Refer to Lifting and Jacking the Vehicle .
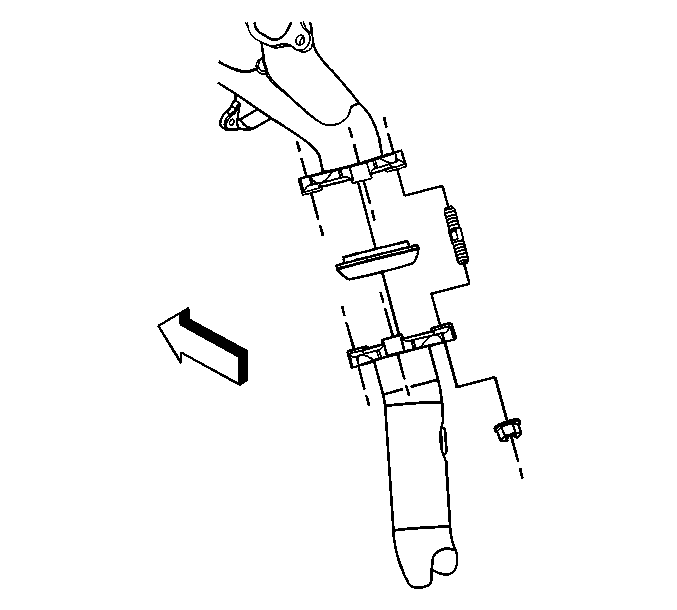
- Remove the exhaust manifold pipe nuts.
- Lower the vehicle.
- Remove the air cleaner assembly. Refer to Air Cleaner Assembly Replacement .
- Drain the coolant. Refer to Cooling System Draining and Filling .
- Using the J 43181 , remove the heater core hoses from the heater core. Position aside.
- Remove the spark plug wires. Refer to Spark Plug Wire Replacement .
- Remove the oil level indicator tube. Refer to Oil Level Indicator and Tube Replacement .
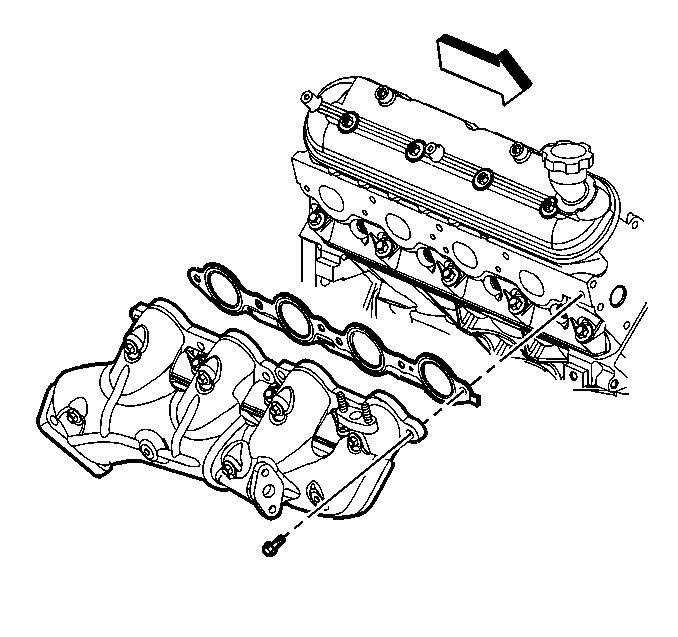
- Remove the exhaust manifold bolts, manifold, and manifold gasket.
- Discard the gasket.
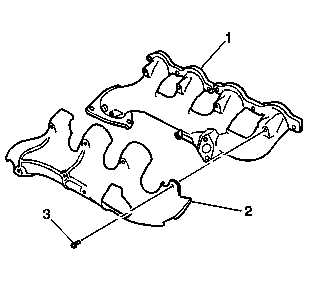
- Remove the heat shield bolts (3), and shield (2) from the exhaust manifold (1).


Installation Procedure
- Install the heat shield (2), and bolts (3) to the exhaust manifold (1), if necessary.
- Apply a 5 mm (0.2 in) wide band of threadlock GM P/N 12345493 (Canadian P/N 10953488) or equivalent to the threads of the exhaust manifold bolts.
- Install the NEW manifold gasket, exhaust manifold, and bolts.
- Tighten the exhaust manifold bolts a first pass to 15 N·m (11 lb ft). Tighten the exhaust manifold bolts beginning with the center two bolts. Alternate from side-to-side, and work toward the outside bolts.
- Tighten the exhaust manifold bolts a final pass to 25 N·m (18 lb ft). Tighten the exhaust manifold bolts beginning with the center two bolts. Alternate from side-to-side, and work toward the outside bolts.
- Using a flat punch, bend over the exposed edge of the exhaust manifold gasket at the front of the right cylinder head.
- Install the oil level indicator tube. Refer to Oil Level Indicator and Tube Replacement .
- Install the spark plug wires.
- Install the inlet heater hose. Refer to Heater Inlet Hose Replacement .
- Install the outlet heater hose. Refer to Heater Outlet Hose Replacement .
- Install the air cleaner assembly. Refer to Air Cleaner Assembly Replacement .
- Raise the vehicle.
- Install the exhaust manifold pipe nuts.
- Lower the vehicle.
- Fill the cooling system. Refer to Cooling System Draining and Filling .
Notice: Refer to Fastener Notice in the Preface section.

Tighten
Tighten the bolts to 9 N·m (80 lb in).

Important:
• Tighten the exhaust manifold bolts as specified in the service procedure. Improperly installed and/or leaking exhaust manifold gaskets may affect vehicle emissions and/or On-Board Diagnostics (OBD) II system performance. • The cylinder head exhaust manifold bolt hole threads must be clean and free of debris or threadlocking material. • Do not apply sealant to the first three threads of the bolt.
Tighten

Tighten
Tighten the nuts to 50 N·m (37 lb ft).
